A crochet bow bag can be much more than a basic pouch with a ribbon sewn to the front. The bow can become the entire silhouette, work as a closure detail, soften a structured handbag, decorate a compact shoulder bag, or turn a simple tote into a coquette-style accessory.

These 18 ideas cover noticeably different shapes, openings, straps, textures, and bow placements so you can compare the parts that affect actual use as well as appearance. Several linked tutorials already feature bows or ribbons. Others teach a useful bag construction—such as a granny-square tote, baguette bag, bucket bag, or crossbody—that can be adapted with a separately crocheted bow. For those adaptations, check the finished dimensions and attachment points before deciding how large or heavy the added bow should be.
Quick List
- Oversized Front-Bow Crochet Handbag
- Bow-Shaped Chunky Crochet Shoulder Bag
- Satin-Ribbon Crochet Bow Shoulder Bag
- Paper-Yarn Crochet Bow Tote
- Ribbed Crochet Handbag with Statement Bow
- Structured Crochet Bow Shoulder Bag
- Compact Valentine Crochet Bow Handbag
- Soft Crochet Purse with Centered Bow
- Coquette Bow-Shaped Crochet Purse
- Ruffled Crochet Shoulder Bag with Bow Accent
- Ribbon-Yarn Crochet Bow Clutch
- Crochet Ribbon Handbag with Bow Detail
- Granny-Square Crochet Bow Tote
- Baguette Crochet Bow Shoulder Bag
- Drawstring Crochet Bow Pouch
- Bucket Crochet Bow Bag
- One-Piece Crochet Bow Clutch
- Mini Crochet Bow Crossbody Bag
Choose the Bag Structure Before Choosing the Bow
Bow size should make sense in relation to the bag beneath it. A wide, dense handbag can visually support a large bow across the front, while the same bow may overwhelm a narrow baguette or mini crossbody. On softer bags, a heavy embellishment can also pull the fabric forward rather than sitting neatly against it.
Look at the opening and carrying method first. A bow placed directly over a flap, magnetic closure, drawstring channel, or frequently handled edge may interfere with access. For shoulder bags, consider where the bag naturally folds against the body. A flatter bow or ribbon treatment is often easier to position there than a highly dimensional one.
For an adaptation tutorial that does not include a bow, finish or at least plan the main bag dimensions before deciding the embellishment scale.
Yarn, Lining, and Strap Choices Change the Finished Shape
Dense crochet and relatively low-stretch yarn generally make a bow read more clearly because the loops and tails are less likely to collapse. Softer yarn can produce a relaxed, draping bow, which may suit a slouchy shoulder bag but look very different on a structured purse.
The bag body needs its own evaluation. If the fabric stretches noticeably when loaded, adding lining can help control deformation, but check whether the tutorial already addresses lining or closures before altering the construction. Strap stretch deserves separate attention because a decorative bow does not solve a weak carrying system.
Also consider bow attachment. A large embellishment puts repeated stress on a small area if it is secured at only one point. Plan enough attachment area to keep the bow oriented correctly without crushing its shape.
Oversized Front Bow Crochet Handbag
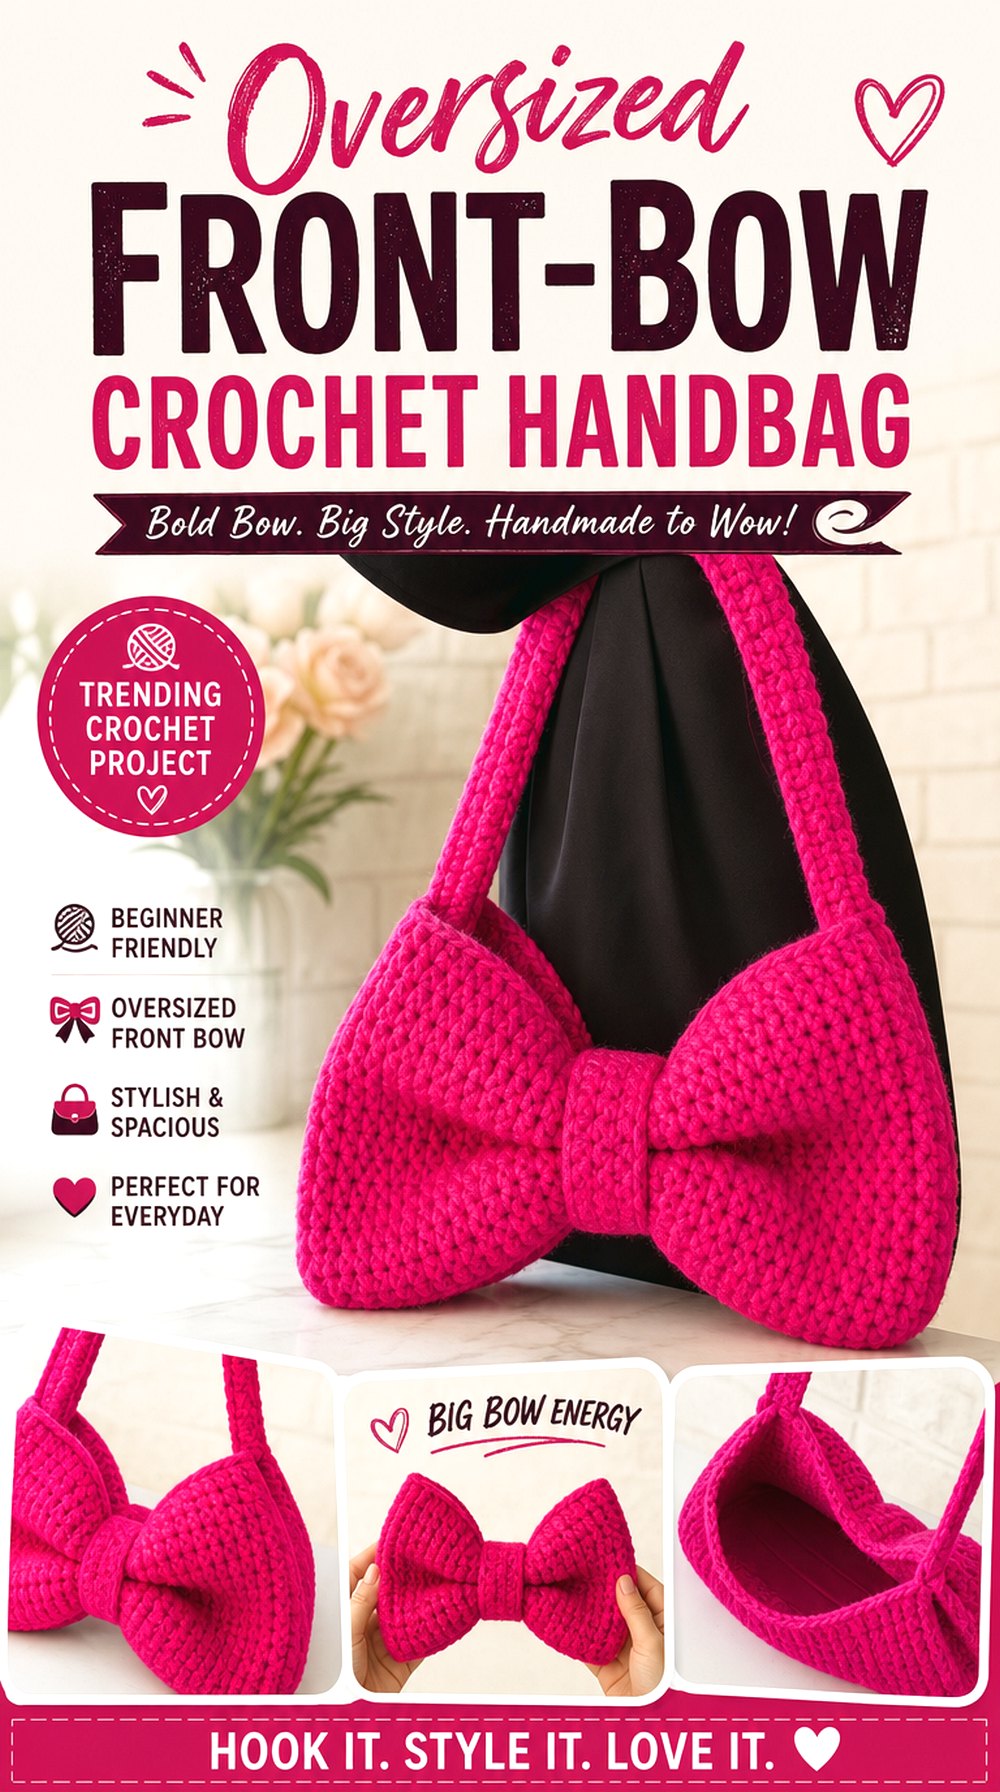
This design makes the bow the first thing you notice. A comparatively simple bag body creates a backdrop for an oversized crochet bow across the front, making the finished piece feel more like a statement handbag than a lightly decorated tote. Plakshi Jain’s tutorial specifically demonstrates a crochet bow bag and separates the bag base, bow, and final assembly in the project.
This approach works especially well when you want strong visual contrast between the clean body shape and the dimensional decoration. Before changing yarn or scaling the project, watch how much of the front panel the original bow occupies so a modified version still looks intentional.
Let the Bow Scale Follow the Front Panel
A large bow needs enough visual space around it. If you reduce the bag but leave the bow close to its original scale, the loops can extend beyond the sides or obscure the upper edge. If you enlarge the bag without reconsidering the bow, the decoration may suddenly look small. Compare the finished front-panel proportions rather than treating the bow and body as completely independent pieces.
Secure the Center Without Flattening the Loops
The bow should stay oriented while still retaining dimension. When adapting the attachment, focus reinforcement around the bow’s center and any additional areas needed to stop rotation. Avoid assuming that more stitches attaching every edge will automatically look better; excessive anchoring can make a soft bow appear pressed flat against the bag.
Bow Shaped Chunky Crochet Shoulder Bag
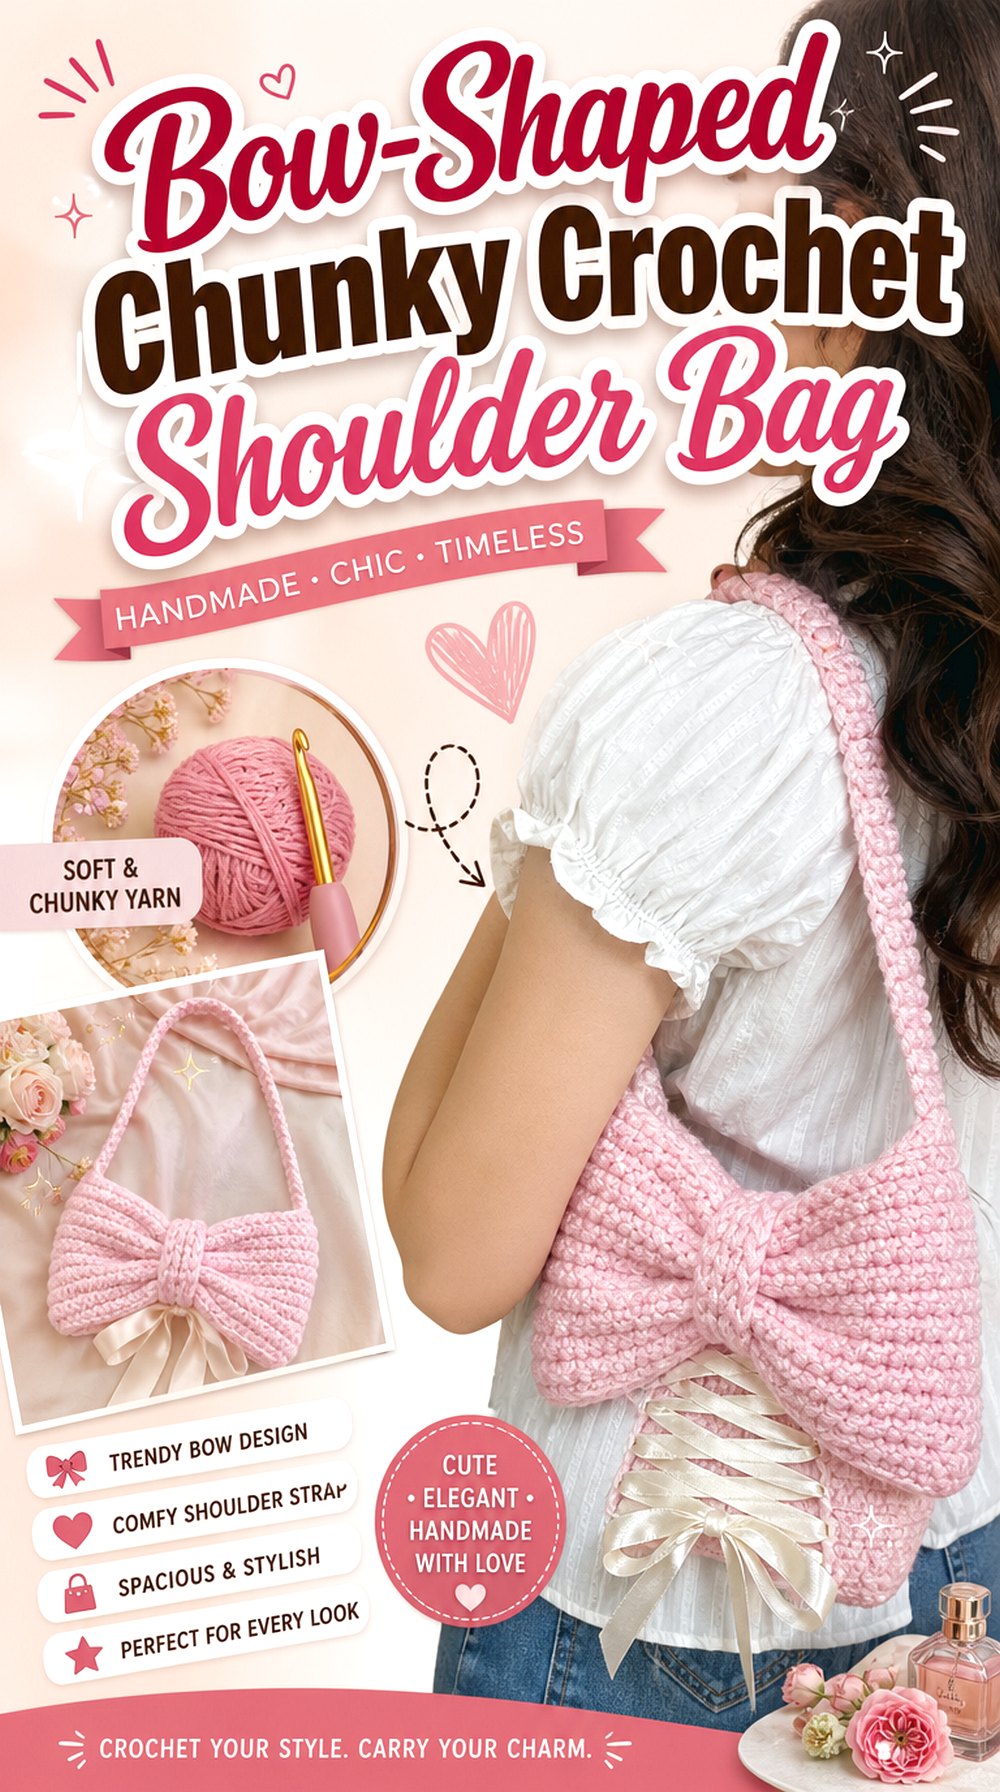
Instead of applying a bow to a conventional bag, this version turns the bow itself into the bag’s defining silhouette. Mahum’s tutorial includes a bow-shaped bag as well as a separate ribbon-bag variation, and the creator notes that the designs can be adjusted into different bag formats.
A bow-shaped construction creates a very different decision from an appliquéd bow: changing the loop width or center section can affect usable interior space, not merely decoration. It is a good option when you want the bow theme to remain obvious even in one color rather than depending on contrasting trim.
Shape and Storage Space Are Connected Here
On a conventional purse, enlarging a bow does not necessarily change capacity. On a bow-shaped bag, it can. Before altering the silhouette, distinguish between the decorative front shape and the actual compartment shown in the tutorial. A dramatic exterior is less useful if your changes narrow the opening or make the central storage area awkward to access.
A Chunkier Fabric Makes the Silhouette More Pronounced
A thicker fabric can help the bow loops remain visually recognizable, but it also adds bulk at joins, folds, and the center. If substituting a substantially different yarn, make a small fabric sample and compare flexibility before committing. The goal is enough body to maintain the bow shape without producing rigid, crowded seams.
Original Tutorial and Creator Credit
Creator: mahum 🎀
Satin Ribbon Crochet Bow Shoulder Bag
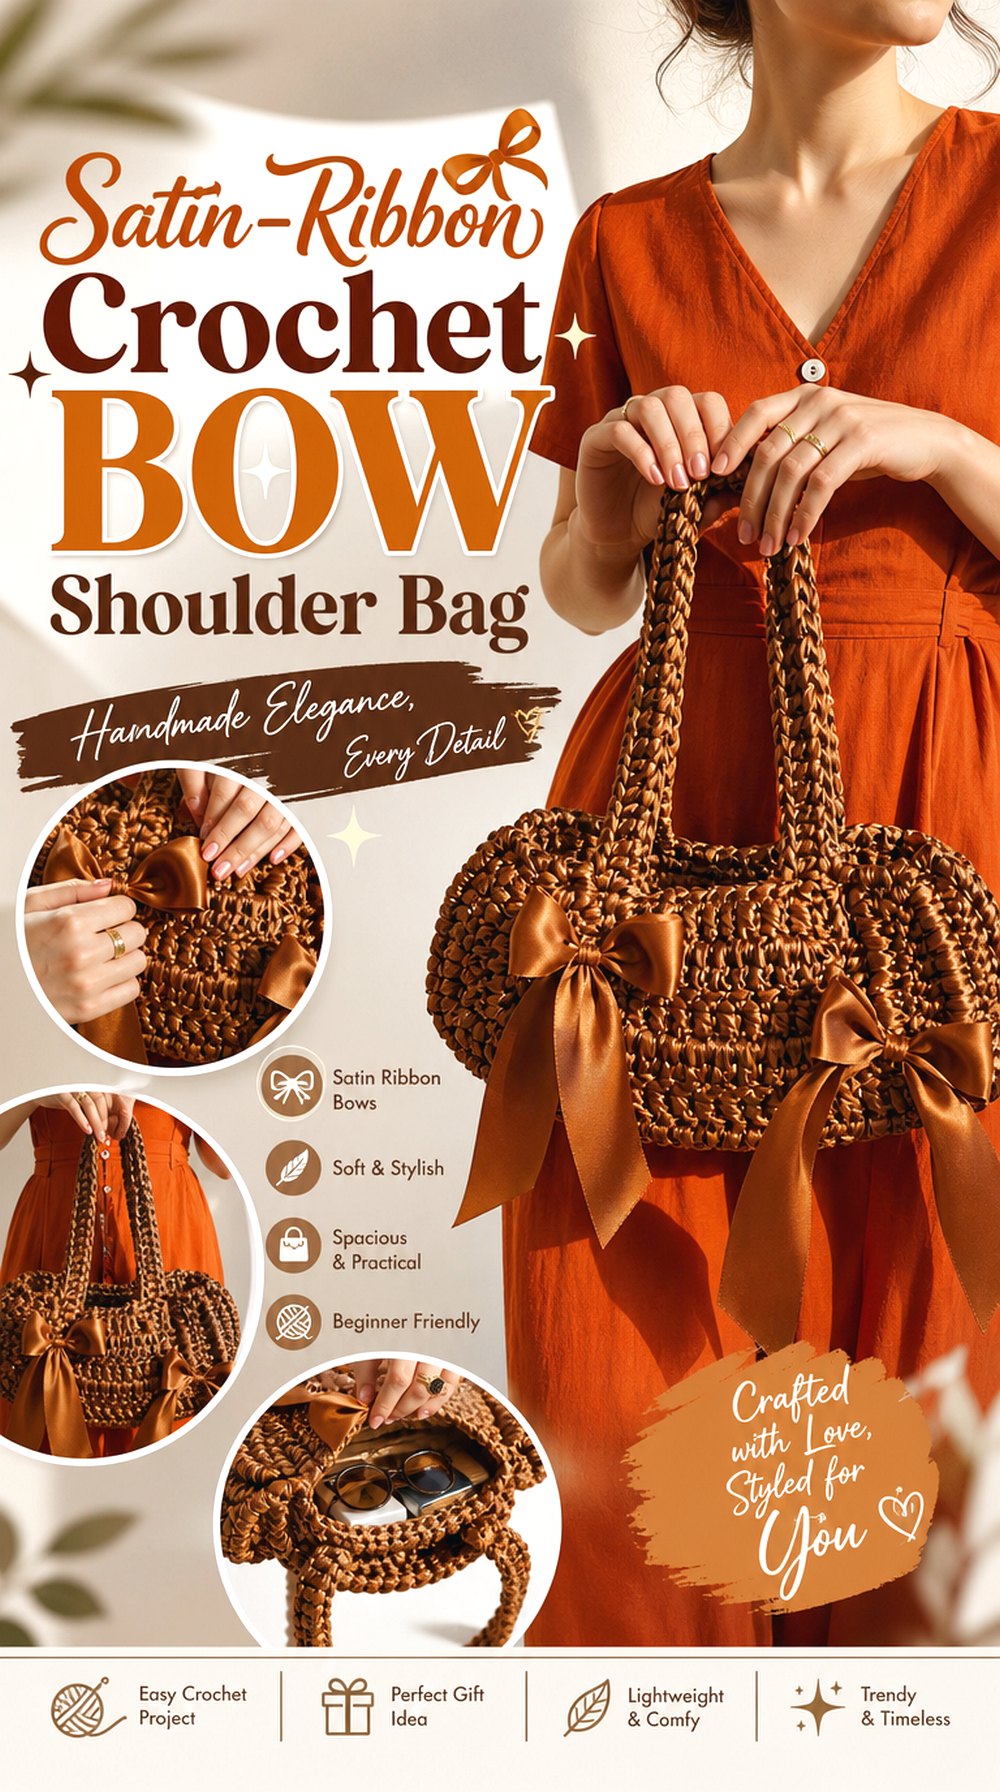
This shoulder-bag idea combines crochet fabric with satin ribbon, giving the bows a smoother surface than a fully crocheted embellishment. Day la hanh’s tutorial covers the handle, body construction, panel joining, buttons, and bows, making the ribbon treatment an integral part of the finished design rather than an afterthought.
The contrast between yarn texture and glossy ribbon can make small bows stand out without requiring an oversized motif. It is also a useful direction when you want several decorative bows distributed across a bag rather than one dominant center bow.
Ribbon Width Changes the Visual Weight Quickly
Ribbon can look disproportionately large even when it weighs very little. Before cutting several matching pieces, tie one sample bow and hold it against the completed or blocked bag panel. This gives you a better indication of scale than judging the loose ribbon on its spool. Narrower ribbon creates a lighter scattered detail, while a wider ribbon becomes a stronger focal element.
Keep Decorative Bows Away From High-Friction Areas
A shoulder bag repeatedly rubs against clothing and is handled near the strap and opening. Place ribbon details where they are visible without being constantly crushed under an arm or pulled while opening the bag. If you modify the original arrangement, test the bag on the shoulder before permanently fixing every bow.
Original Tutorial and Creator Credit
Creator: day la hanh
Paper Yarn Crochet Bow Tote
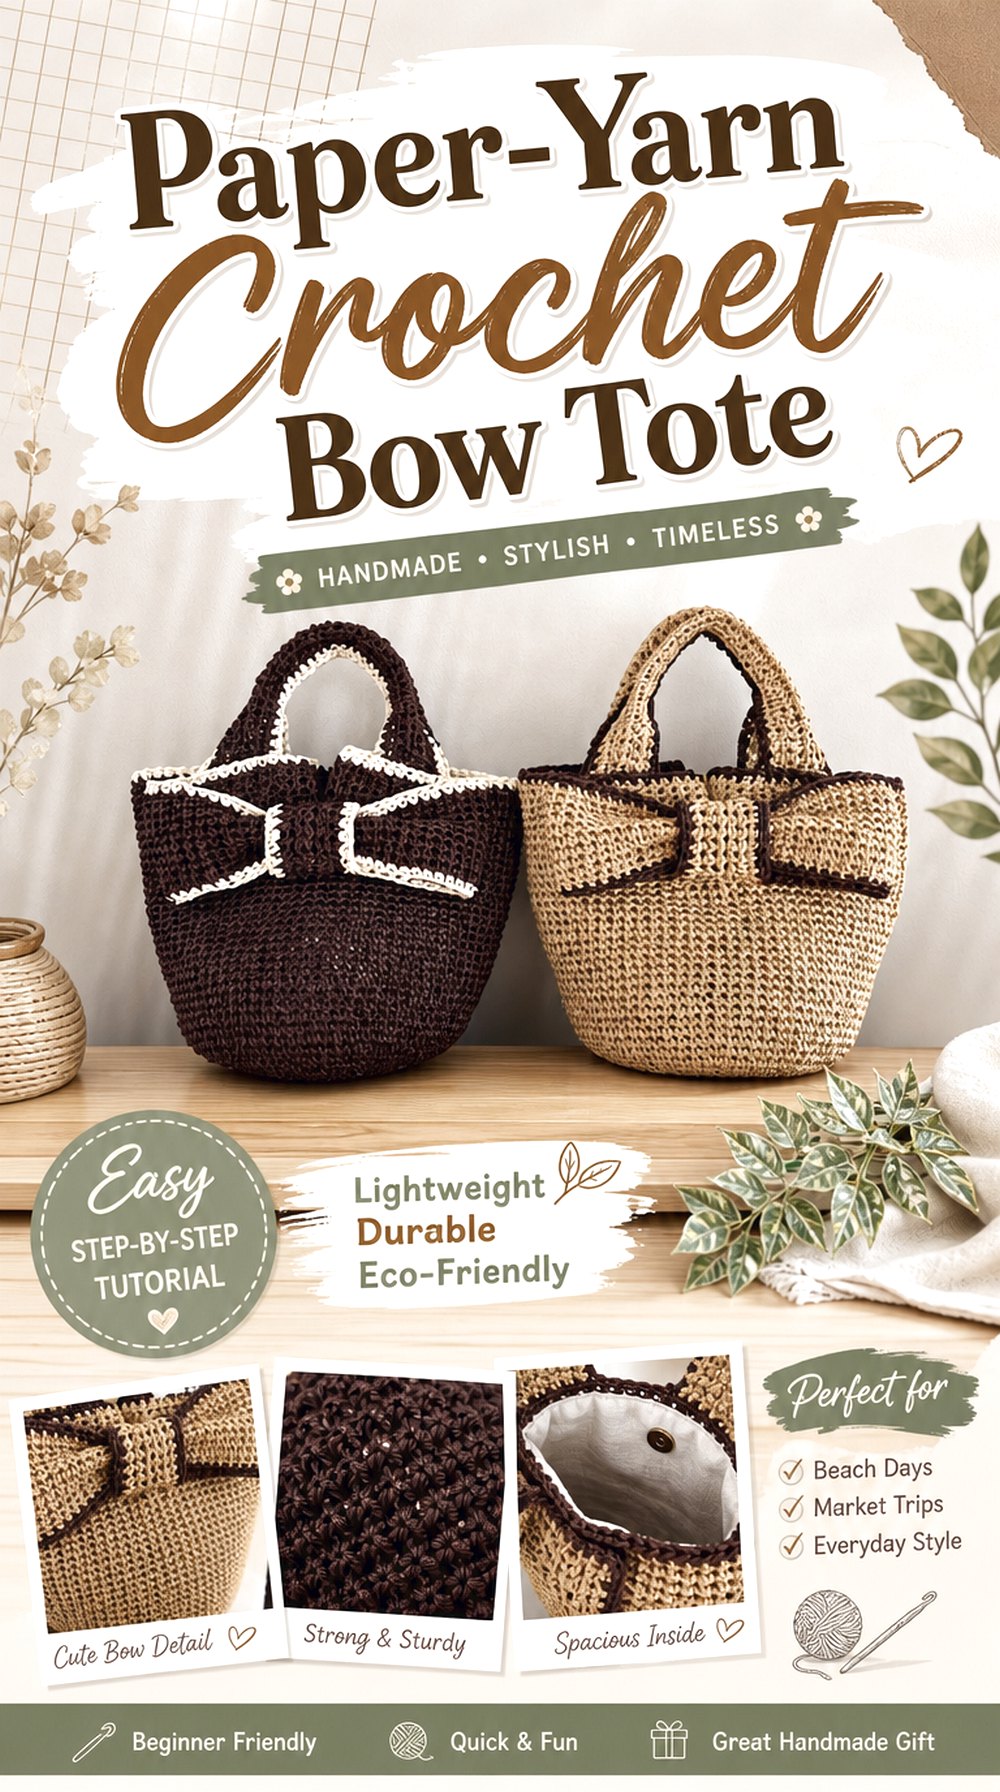
Fuwarico’s bag uses a large ribbon motif with a natural-looking paper-yarn body, creating a more structured interpretation of the bow-bag idea. The tutorial visibly separates the bottom, sides, ribbon area, ribbon pieces, handles, and finishing, so the bow becomes part of a carefully shaped handbag rather than a floppy add-on.
This direction suits readers who prefer a crisp seasonal bag silhouette over a soft plush purse. Because paper-style yarn behaves differently from ordinary soft yarn, substitution deserves more thought than simply matching color.
Stiffer Yarn Makes Small Tension Differences Visible
When the material holds its shape, uneven edges and changing tension can remain obvious instead of relaxing into the fabric. If you substitute yarn, compare the firmness of a small swatch with the material shown in the tutorial. A much softer fiber may produce a pleasant bag, but the bow and sides can drape rather than maintaining the same graphic shape.
The Bow Can Bridge Structured and Decorative Design
A large bow does not have to make a bag look soft. Here, the natural fiber appearance and defined body balance the romantic motif. If you want a less playful version, consider tonal color placement rather than reducing the bow until it loses its role in the composition.
Original Tutorial and Creator Credit
Creator: fuwaricoの happy handmade
Ribbed Crochet Handbag with Statement Bow
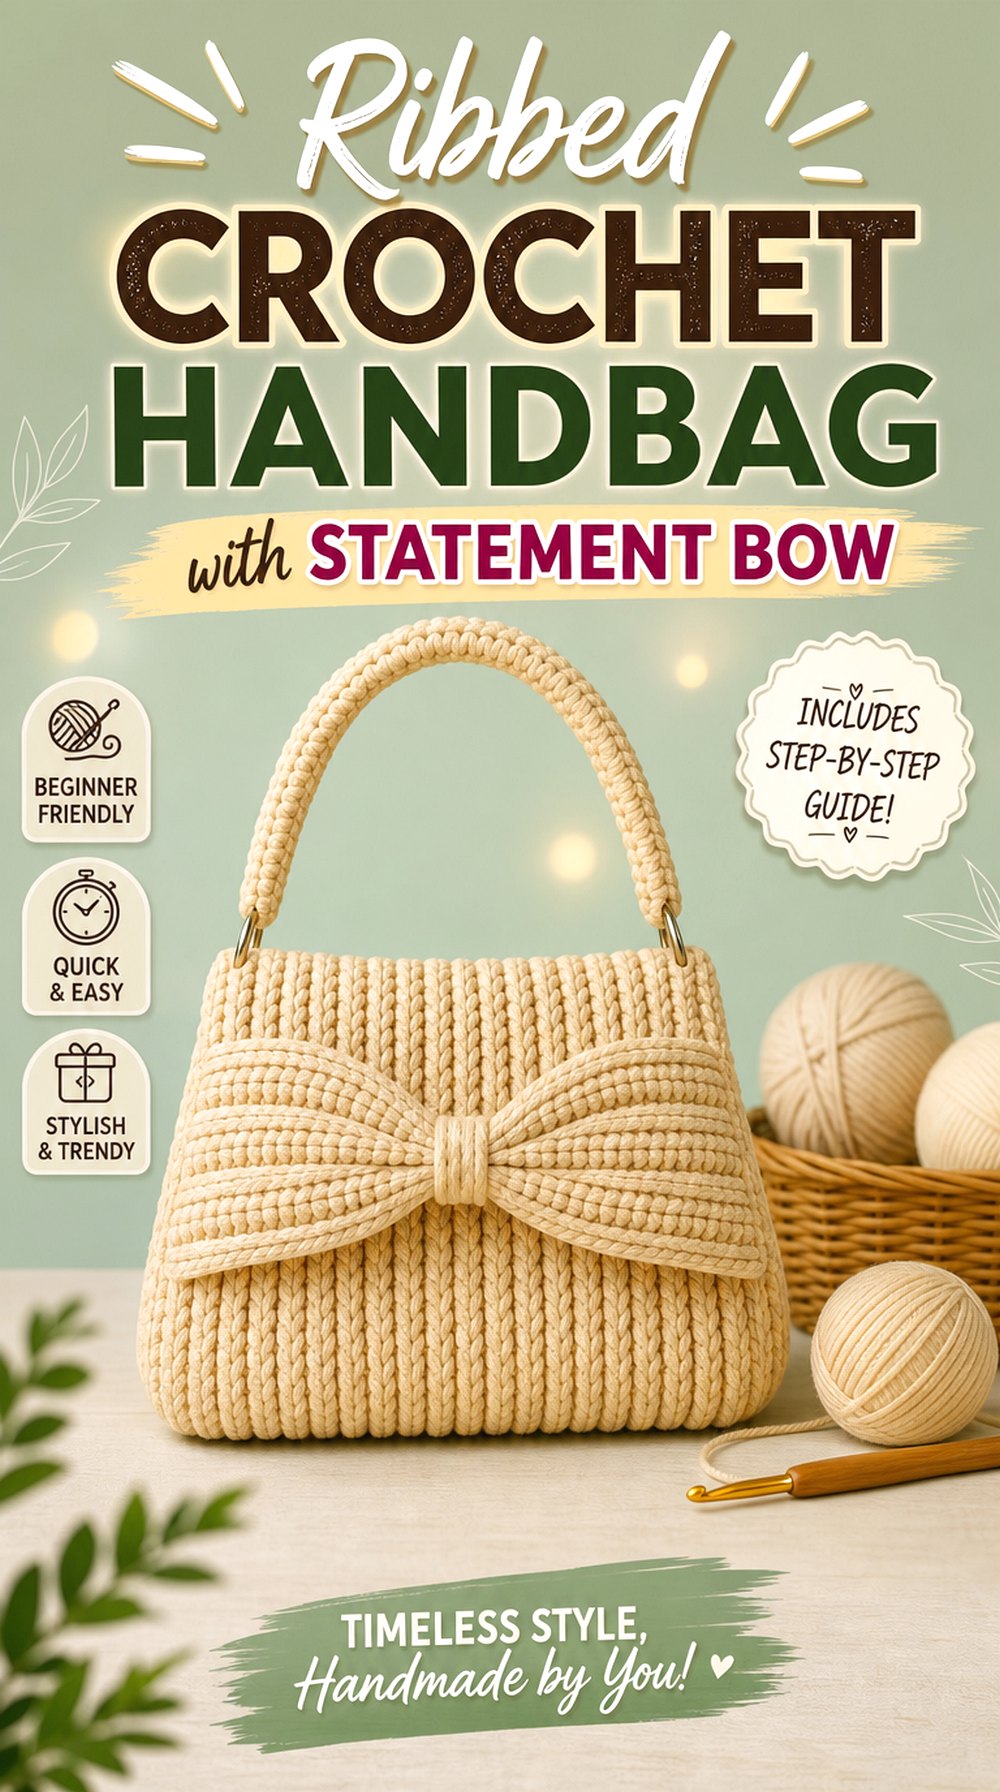
A ribbed surface gives this bow handbag texture without competing with the main decoration. The Crochet Bag channel’s tutorial describes a ribbed handbag with a large front bow and a thick rounded handle, producing a compact, strongly shaped accessory rather than a soft tote.
The combination is useful because texture appears across the body while the bow remains visually separate. If you prefer a monochrome bag, ribbing can create enough shadow and definition to stop the bow from disappearing into the same-color background.
Ribbing Direction Can Emphasize the Bow
Texture creates visual lines. If those lines run behind a broad horizontal bow, they can frame its outline; if you modify the body construction or orientation, the relationship may change. Before adapting the panel, consider whether the ribbing is simply decorative or helping the finished bag look taller, wider, or more structured.
A Rounded Handle Changes Where the Bag Carries Its Weight
A thick hand-held handle creates different stresses from a long shoulder strap. If you replace it with a longer strap, do not assume the same attachment areas will behave identically. Check how the original handle connects to the bag and reinforce any adaptation appropriately, particularly if the new strap introduces more leverage or stretch.
Lining May Help Preserve a Crisp Interior
The video description identifies lining as optional rather than mandatory. If you plan to carry small objects that could poke through the fabric or you want the ribbed body to distort less, lining is worth evaluating. Choose it for function, however, not simply because a structured-looking crochet bag must automatically have one.
Original Tutorial and Creator Credit
Creator: Crochet Bag
Structured Crochet Bow Shoulder Bag
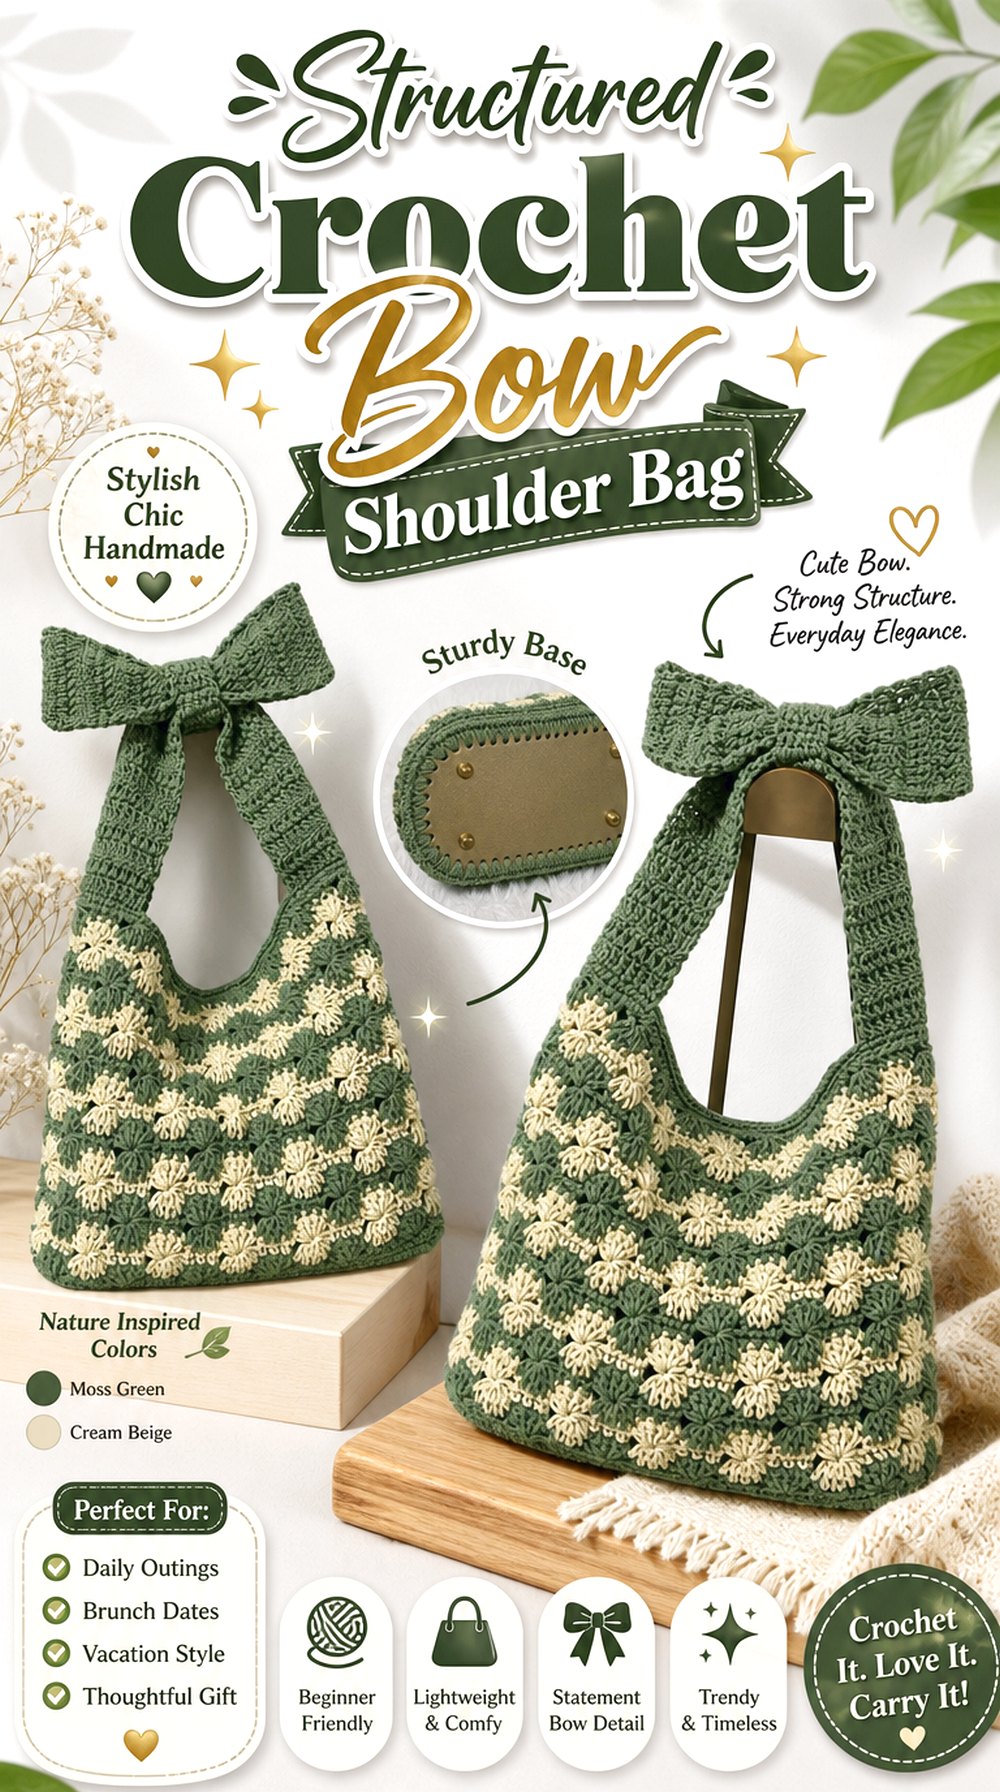
Kane Crochet’s tutorial pairs a defined bag body with a magnetic closure, shaped base, shoulder strap, and bow accent. The published tutorial also provides finished dimensions and materials, making it one of the easier options to evaluate before deciding whether its scale suits your intended use.
Compared with softer bow bags, this version places more emphasis on construction and hardware. The bow remains decorative, but the base and closure help determine how the handbag functions. That makes it a strong reference if you want a bow aesthetic without sacrificing a clearly structured purse shape.
Hardware Placement Should Be Planned Before Decorating
A magnetic closure occupies the same upper-front region where a bow might otherwise be attached. When changing bow size, make sure the embellishment does not make the closure hard to locate or put unnecessary pulling force around it. Functional hardware should continue to work naturally after decorative changes are made.
A Firm Base Changes the Bag’s Profile
The tutorial uses a separate bag bottom, giving the lower section more definition than an entirely soft crochet base. If you omit or substitute that component, expect the silhouette to change. A softer base may sag differently when the bag is filled, which can also change how the front bow appears when the bag is carried.
Check the Strap Against Your Preferred Carrying Position
Before permanently attaching or modifying a strap, hold the bag at the height where you actually want it to sit. Strap length affects more than comfort: a bag worn higher against the torso can compress a dimensional bow, while a lower position may leave it more visible.
Original Tutorial and Creator Credit
Creator: Kane Crochet
Compact Valentine Crochet Bow Handbag
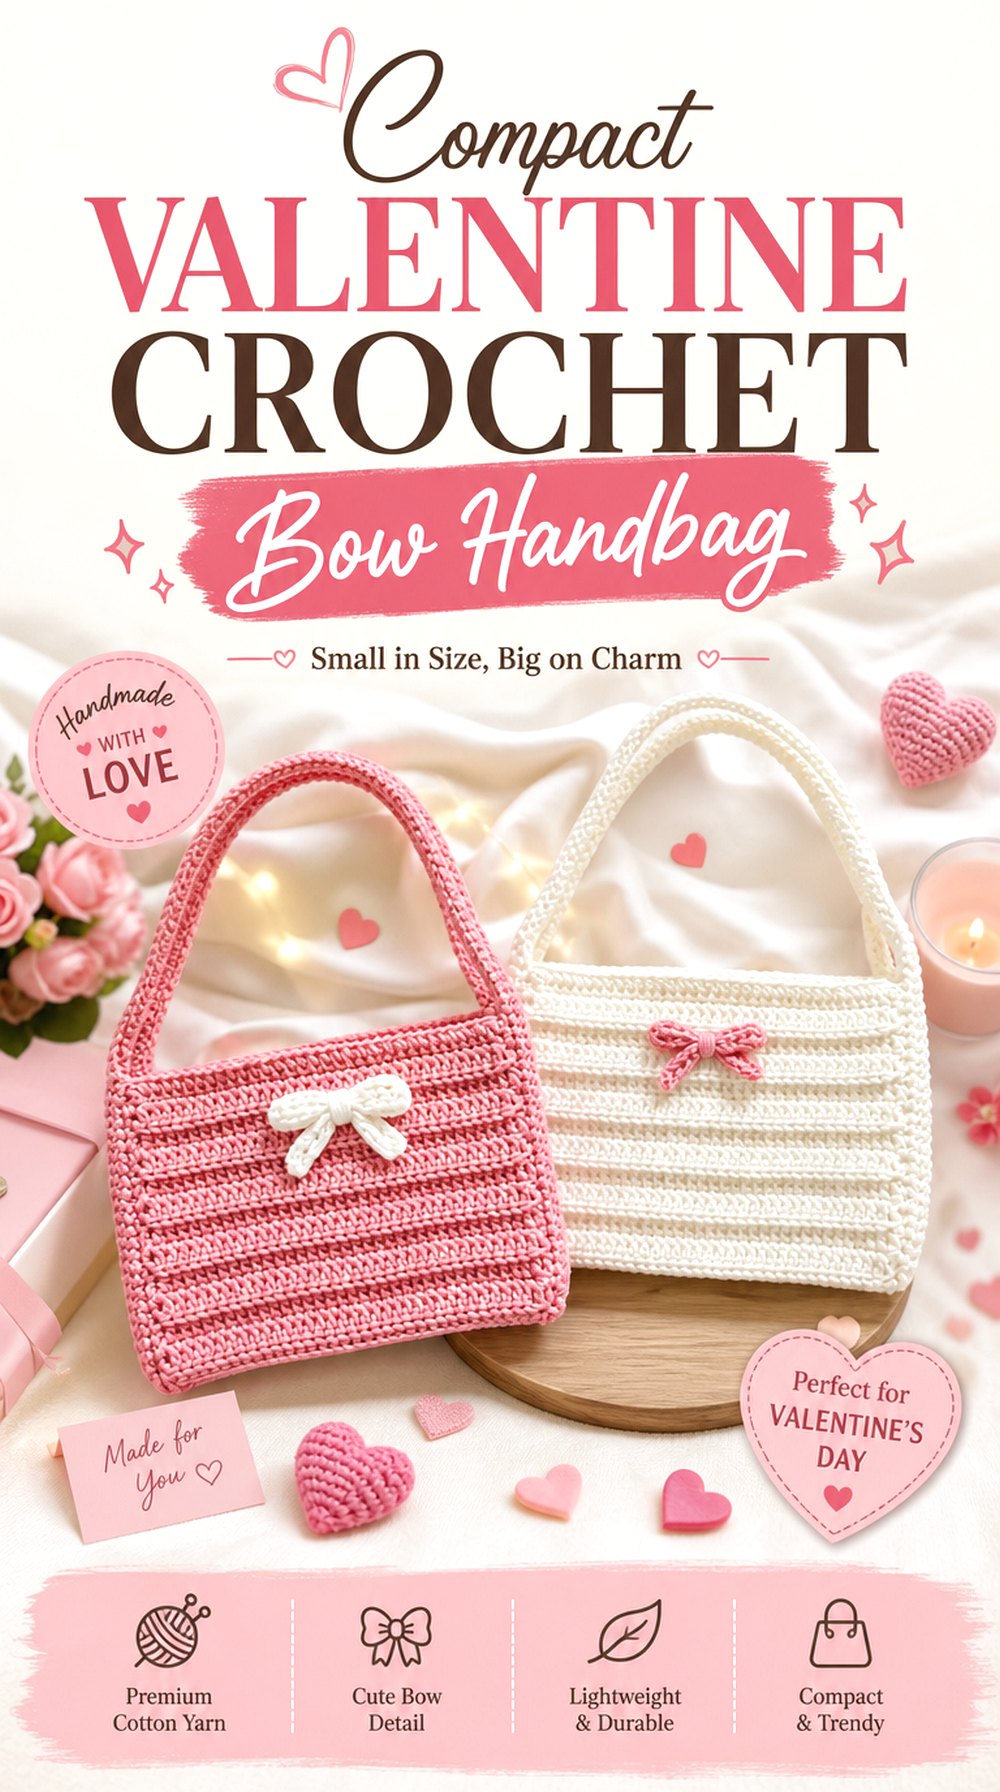
Vyva ‘s Crochet demonstrates a compact handbag with a contrasting attached bow and magnetic closure. The tutorial separates the body, handle and side area, bow, and final attachment, giving the finished piece a tidy, compact shape rather than an oversized tote profile.
Although the creator presents it as a Valentine-themed project, the basic visual idea is not restricted to that occasion. A neutral body with a contrasting bow, tonal yarn choices, or seasonal color pairings can change the mood while retaining the same bow-focused construction.
Contrast Can Replace Extra Embellishment
A bow does not need additional beads, charms, or multiple colors to stand out. One clear contrast between the body and bow can provide enough emphasis. If you want a quieter version, reverse that logic and keep both elements tonal so the bow is defined mainly by its raised shape and shadows.
Keep the Bow Clear of the Opening
On a compact handbag, the decorative area and opening sit relatively close together. Before enlarging the bow, check that fingers can still reach the closure comfortably and that the upper loops do not fold into the opening whenever the bag is used.
Original Tutorial and Creator Credit
Creator: Vyva ‘s Crochet
Soft Crochet Purse with Centered Bow
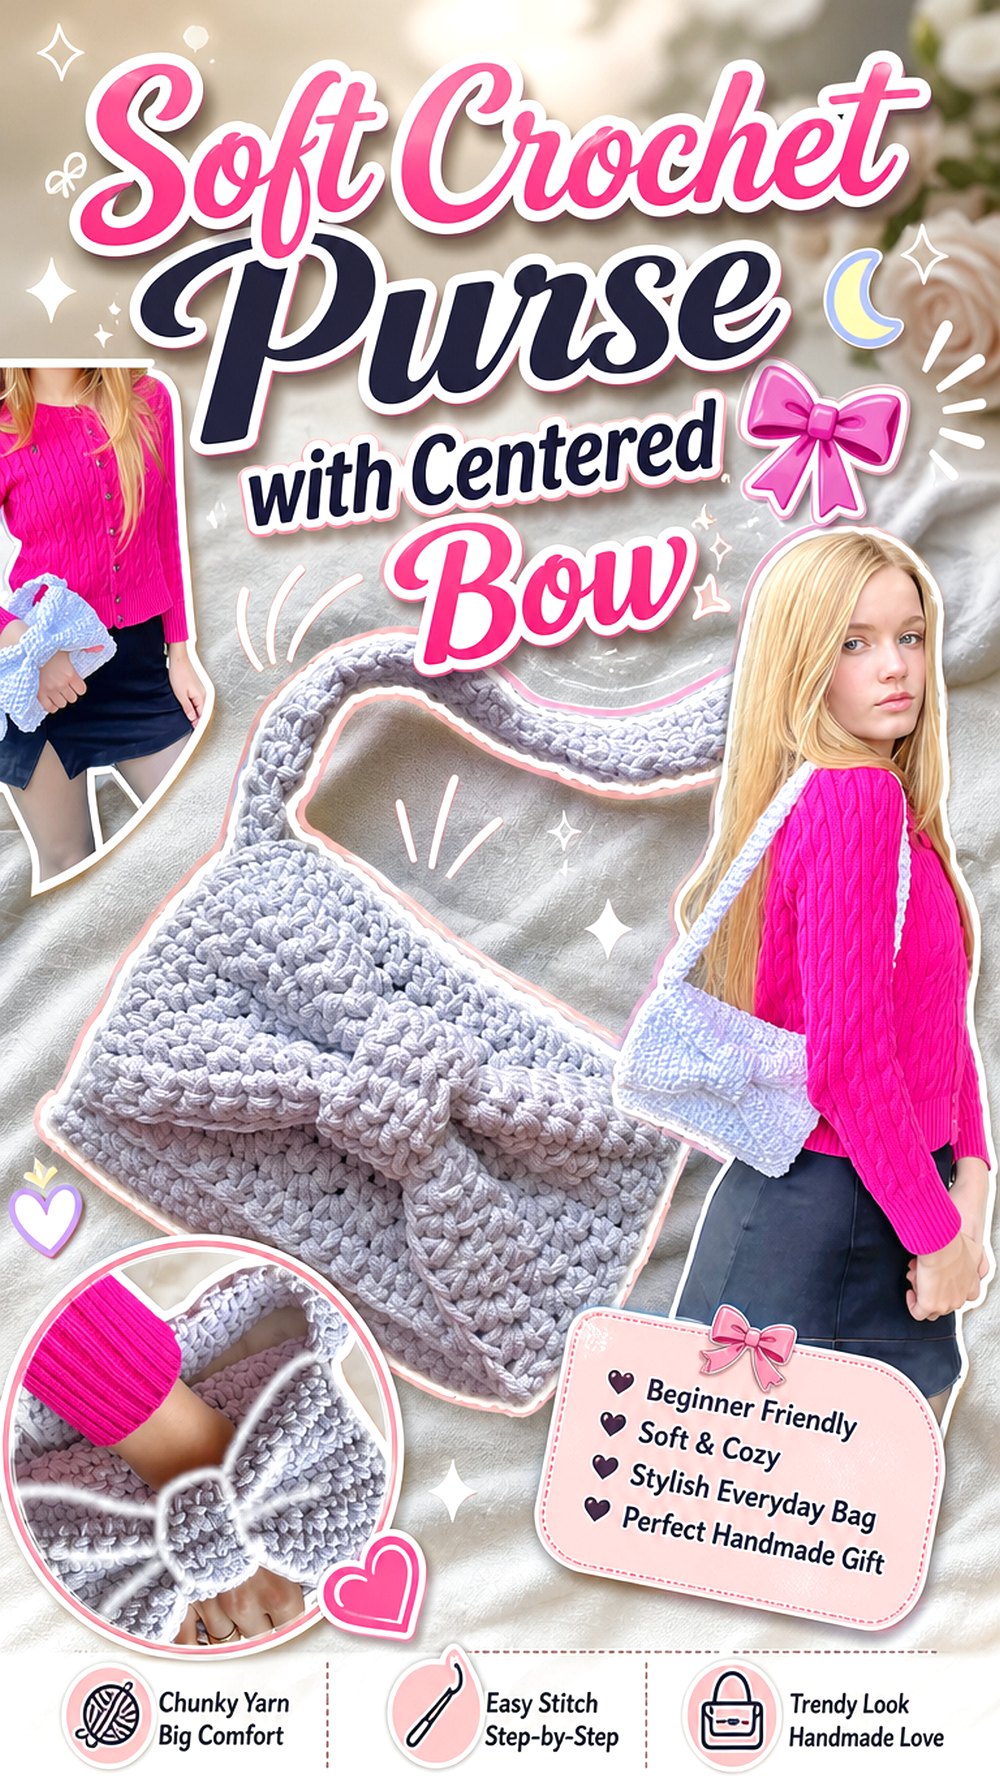
WONDER NETTING’s version uses a simple bag shape paired with a prominent bow, resulting in a softer and less hardware-heavy alternative to the structured handbag ideas above. The creator’s tutorial specifically demonstrates a crochet bag with a bow.
This type of project lets yarn texture do much of the work. Instead of a firm base or elaborate closure defining the finished object, the balance between the soft body and centered bow creates the style. It is therefore a useful option when you want a casual handmade appearance rather than a rigid purse silhouette.
Soft Fabric Needs a Bow That Moves With It
A very stiff bow on a highly flexible bag can look disconnected from the body and may pull at its attachment points. When substituting yarn, compare the flexibility of both components. They do not need to match perfectly, but they should behave well together when the bag bends, hangs, and is carried.
Center Placement Makes Small Errors Noticeable
A single central bow creates a strong visual axis. Before sewing it down, lay the bag flat, mark the center of the front panel, and check the placement again with the bag hanging naturally. A bow that looks centered on an empty flat bag can shift visually once the body stretches under its own weight.
Original Tutorial and Creator Credit
Creator: WONDER NETTING
Coquette Bow Shaped Crochet Purse
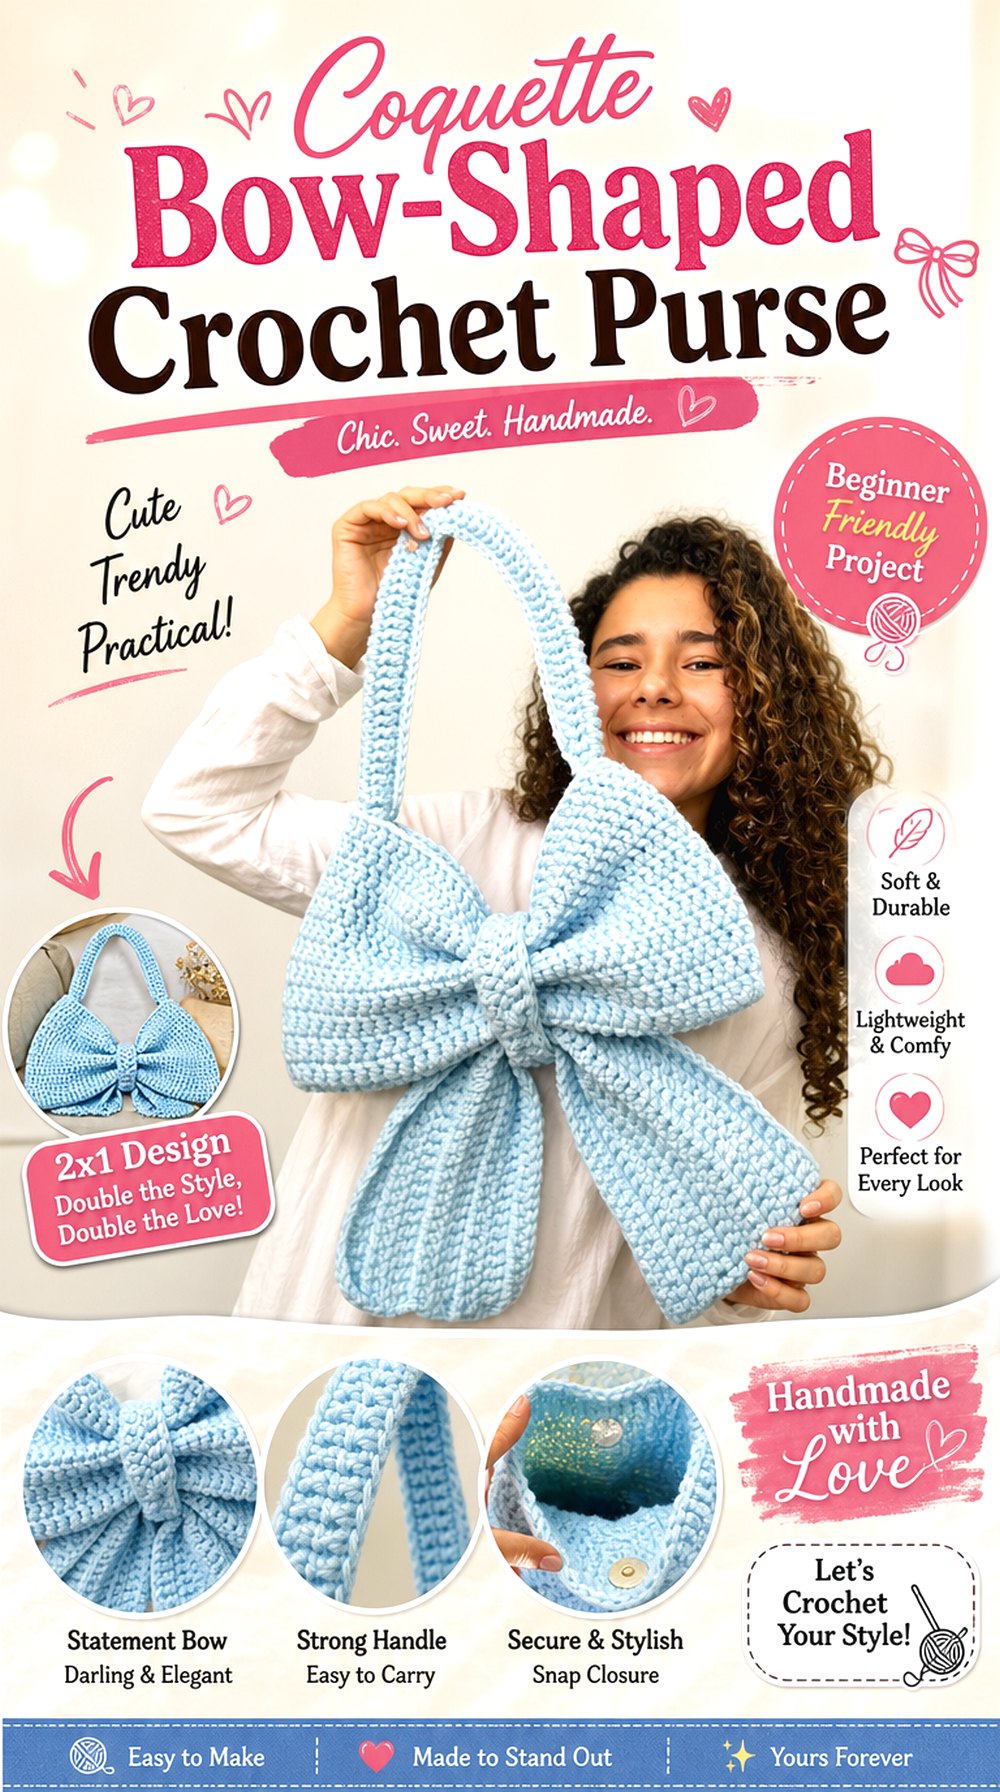
Tangled Between Threads takes the coquette theme beyond a small ribbon accent by shaping the bag itself around a bow-inspired form. The tutorial is specifically described as a coquette-aesthetic crochet bag in the shape of a bow.
That makes this project distinct from front-bow handbags: the bow cannot simply be removed without changing the identity of the finished purse. It is a useful choice for readers who want a highly themed accessory rather than a conventional bag that happens to include a bow.
Symmetry Matters More When the Bow Is the Bag
When two loops define the complete silhouette, differences in size or shaping can be much more noticeable than they would be on a separate appliqué. Compare corresponding sections as you work and correct obvious differences before final assembly rather than hoping attachment will hide them.
Decide How Much Novelty You Want
A literal bow-shaped purse makes a stronger styling statement than a small ribbon on a standard tote. If you expect to use the bag with many outfits, think about color and strap simplicity so the silhouette remains the main feature. For a more theatrical version, contrasting trim can push the novelty further.
Original Tutorial and Creator Credit
Creator: Tangled Between Threads
Ruffled Crochet Shoulder Bag with Bow Accent
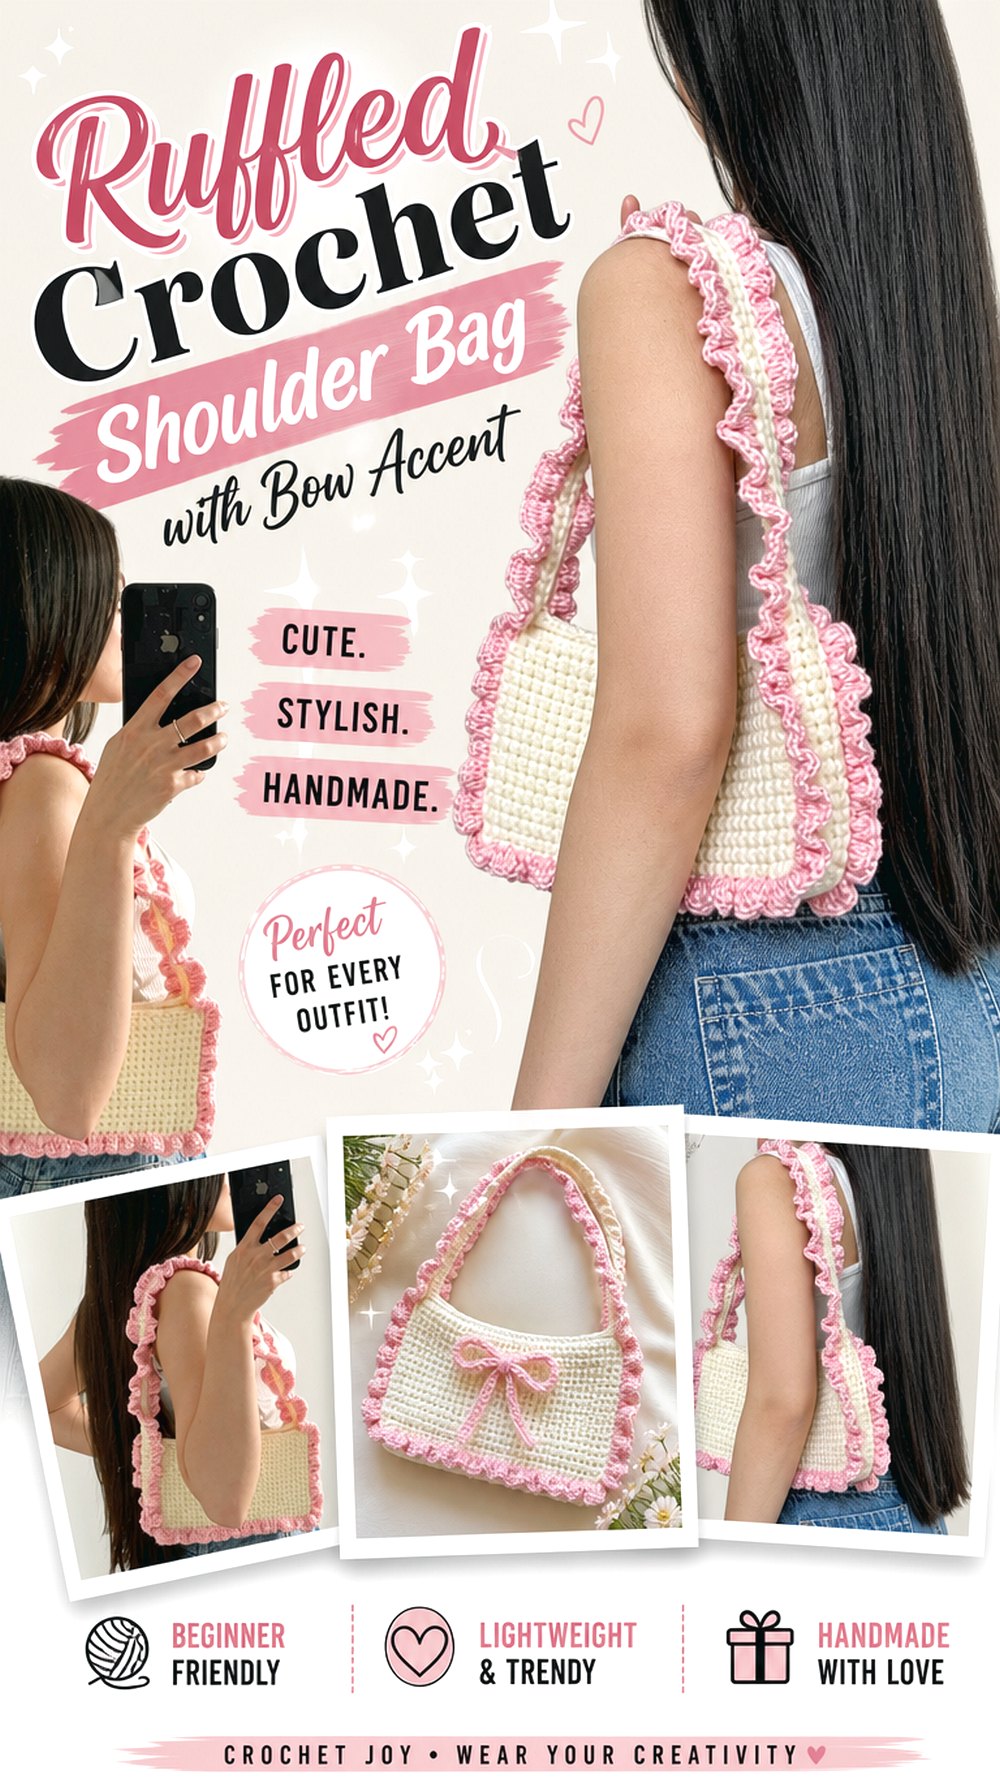
Crochet daniela’s tutorial demonstrates a mini ruffled coquette shoulder bag rather than an exact bow bag. That makes it a useful adaptation base when you want the softness of ruffles plus a small bow without copying the same oversized-front-bow structure used elsewhere in this collection.
Because ruffles already create movement around the bag, the bow should generally support that visual texture rather than compete with it. A small centered ribbon, strap-base bow, or removable tie can add the bow theme while allowing the ruffled edging to remain visible.
Ruffles Already Add Significant Visual Volume
Hold a sample bow against the finished ruffled edge before choosing its final size. A large bow plus a full ruffle can create a crowded focal area, especially on a mini bag. If the trim is already prominent, a narrower or flatter bow may give the design better separation.
Use the Existing Bag Construction as the Reference
The linked tutorial teaches the ruffled shoulder bag itself, not a bow modification. Follow the creator for the actual bag construction, then treat the bow as a separate embellishment decision. Do not change panel proportions simply to imitate a different bow-bag tutorial unless you have checked how those changes affect the ruffle placement and opening.
A Removable Bow Keeps the Bag More Flexible
For an adaptation, a detachable ribbon or securely tied removable bow can let the ruffled bag work in both decorated and simpler forms. If using any removable component, make sure the fastening method is appropriate for the intended user and does not leave a loose piece likely to fall off during ordinary wear.
Original Tutorial and Creator Credit
Creator: crochet daniela
Ribbon Yarn Crochet Bow Clutch
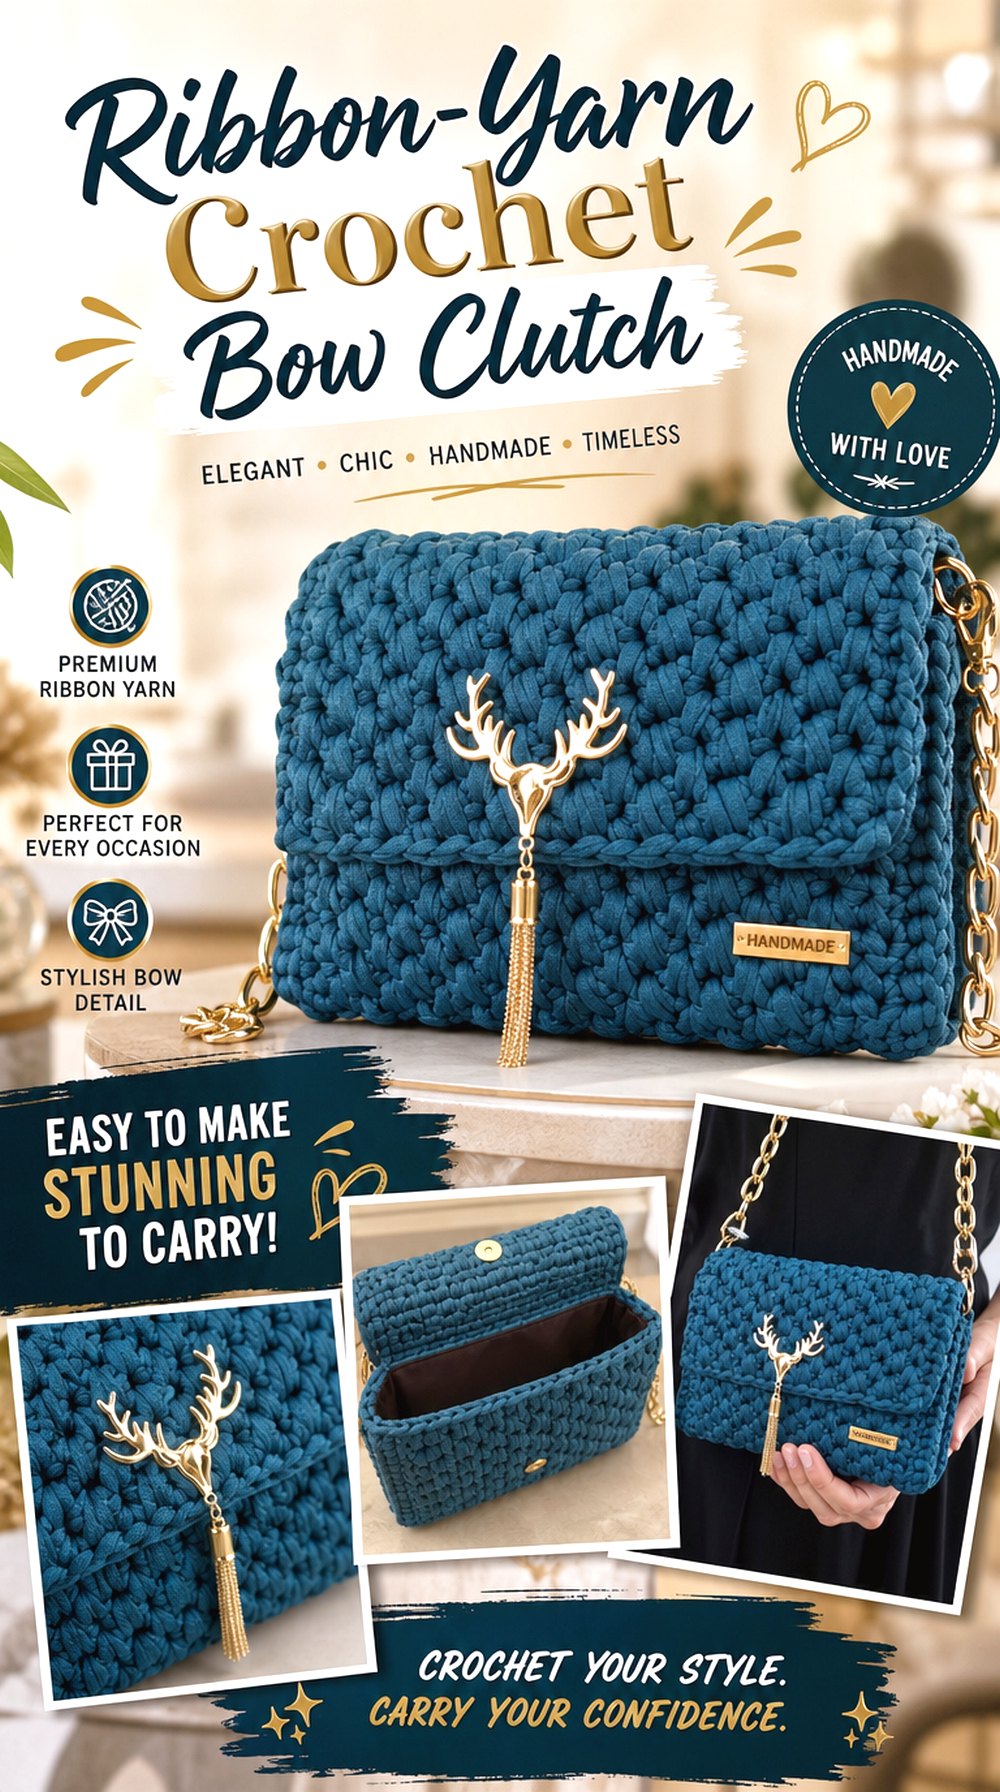
L’uncinetto di Silvana’s tutorial demonstrates a compact crochet ribbon clutch with a magnetic button and chain. Here, “ribbon” refers to the material used in the bag rather than an existing bow decoration, so the bow is an editorial adaptation rather than part of the original tutorial.
The clutch shape offers a useful contrast to shoulder and tote bags. A relatively flat bow can sit near one side of the flap or front panel without adding the bulk that an oversized three-dimensional bow might create on a bag intended to remain compact.
Keep Added Decoration Compatible With the Closure
The tutorial uses a magnetic button. If you place a bow around the closure area, confirm that the bag still opens naturally and that the embellishment does not hide the spot your hand reaches for repeatedly. Decorative stitching should also avoid interfering with hardware already installed inside the flap.
Match the Bow to the Clutch’s Low Profile
A clutch is usually viewed as one compact shape. A thick bow can make the front project outward substantially, changing how the bag feels when held under the arm or placed flat. A flatter crocheted ribbon or a bow concentrated near the center knot can preserve the clutch profile more successfully.
Original Tutorial and Creator Credit
Creator: L’uncinetto di Silvana
Crochet Ribbon Handbag with Bow Detail
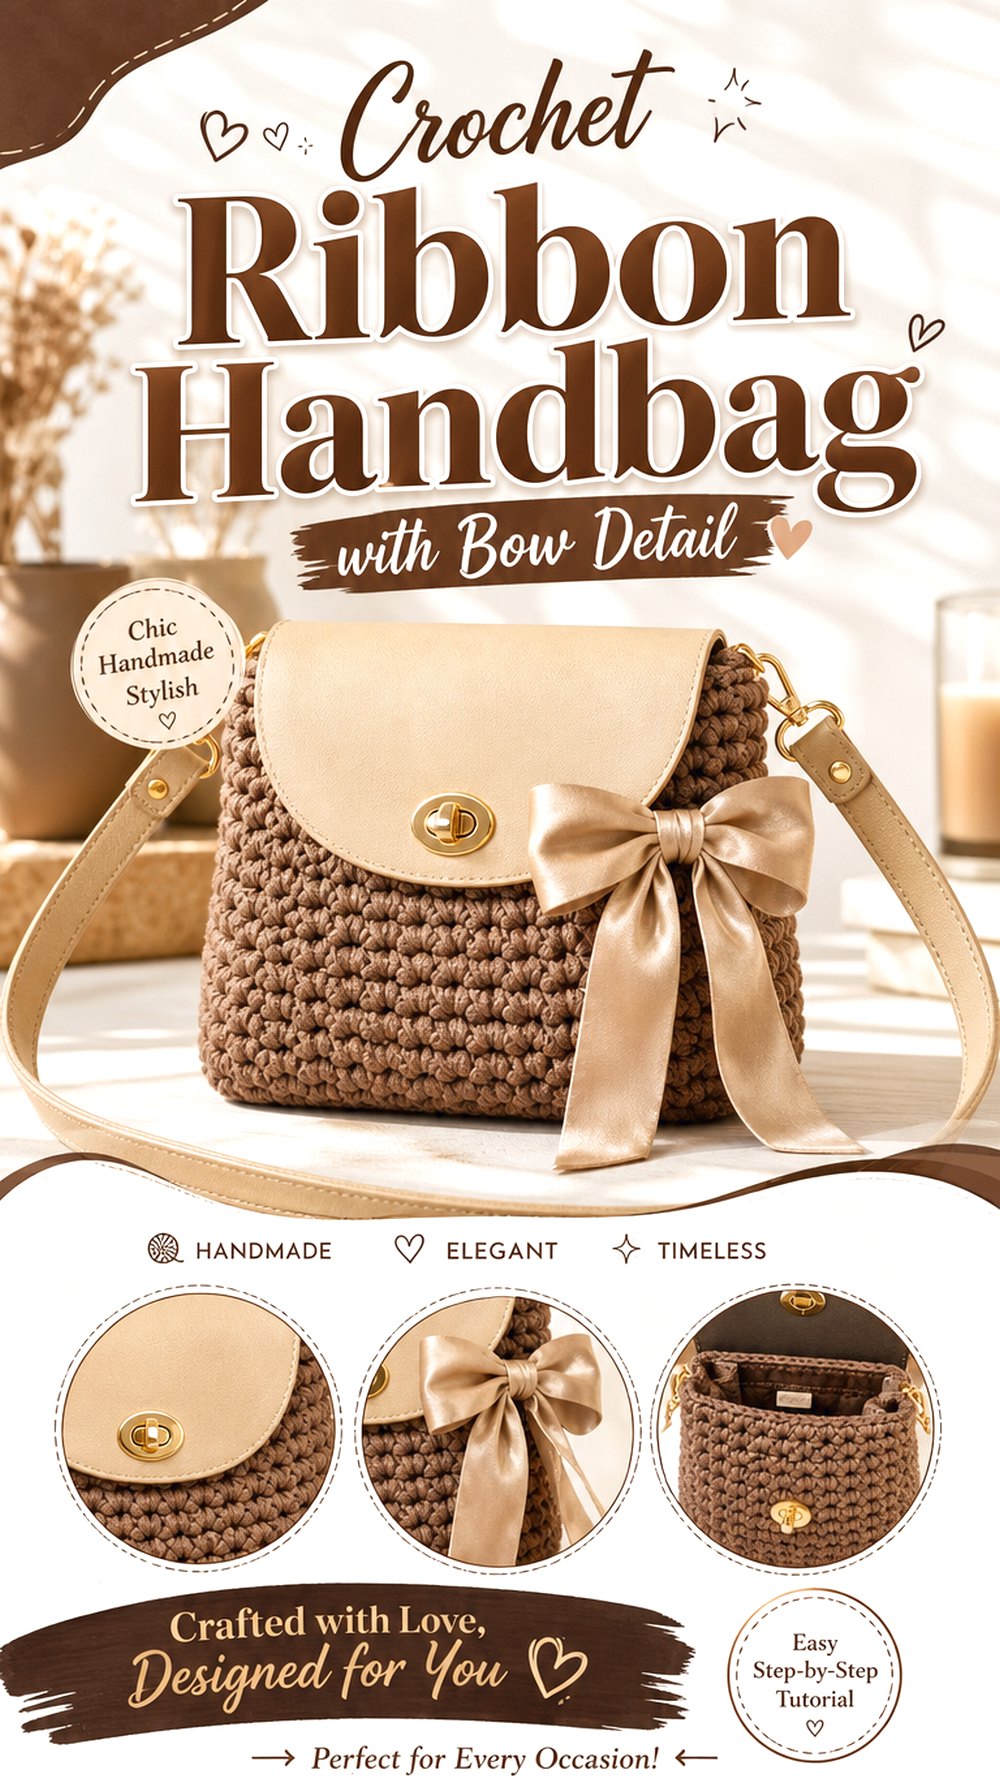
Cucito e creatività demonstrates a crochet ribbon bag with a straightforward handbag form. As with the previous project, the source is valuable for the bag construction, while a bow can be added independently if you want to push the design toward the bow-bag theme.
This approach is useful for readers who prefer a relatively restrained bag. Instead of covering the front with a dramatic motif, a single small bow near a handle attachment or upper corner can add the theme without changing the overall silhouette.
A Small Bow Can Work Better on a Clean Handbag
When the base has a simple shape and strong texture, an oversized embellishment is not the only option. Test a smaller bow at the upper edge, beside a handle, or centered just below the opening. Photographing two or three temporary placements can make the visual balance easier to compare before sewing anything permanently.
Confirm the Material Before Copying the Look
Ribbon-style yarn, cord, and ordinary spun yarn can produce very different stiffness and stitch definition. If you substitute materials, judge the new fabric rather than expecting it to duplicate the source bag automatically. A bow made from the same material may also become much thicker than one made with a finer coordinating yarn.
Original Tutorial and Creator Credit
Creator: Cucito e creatività
Granny Square Crochet Bow Tote
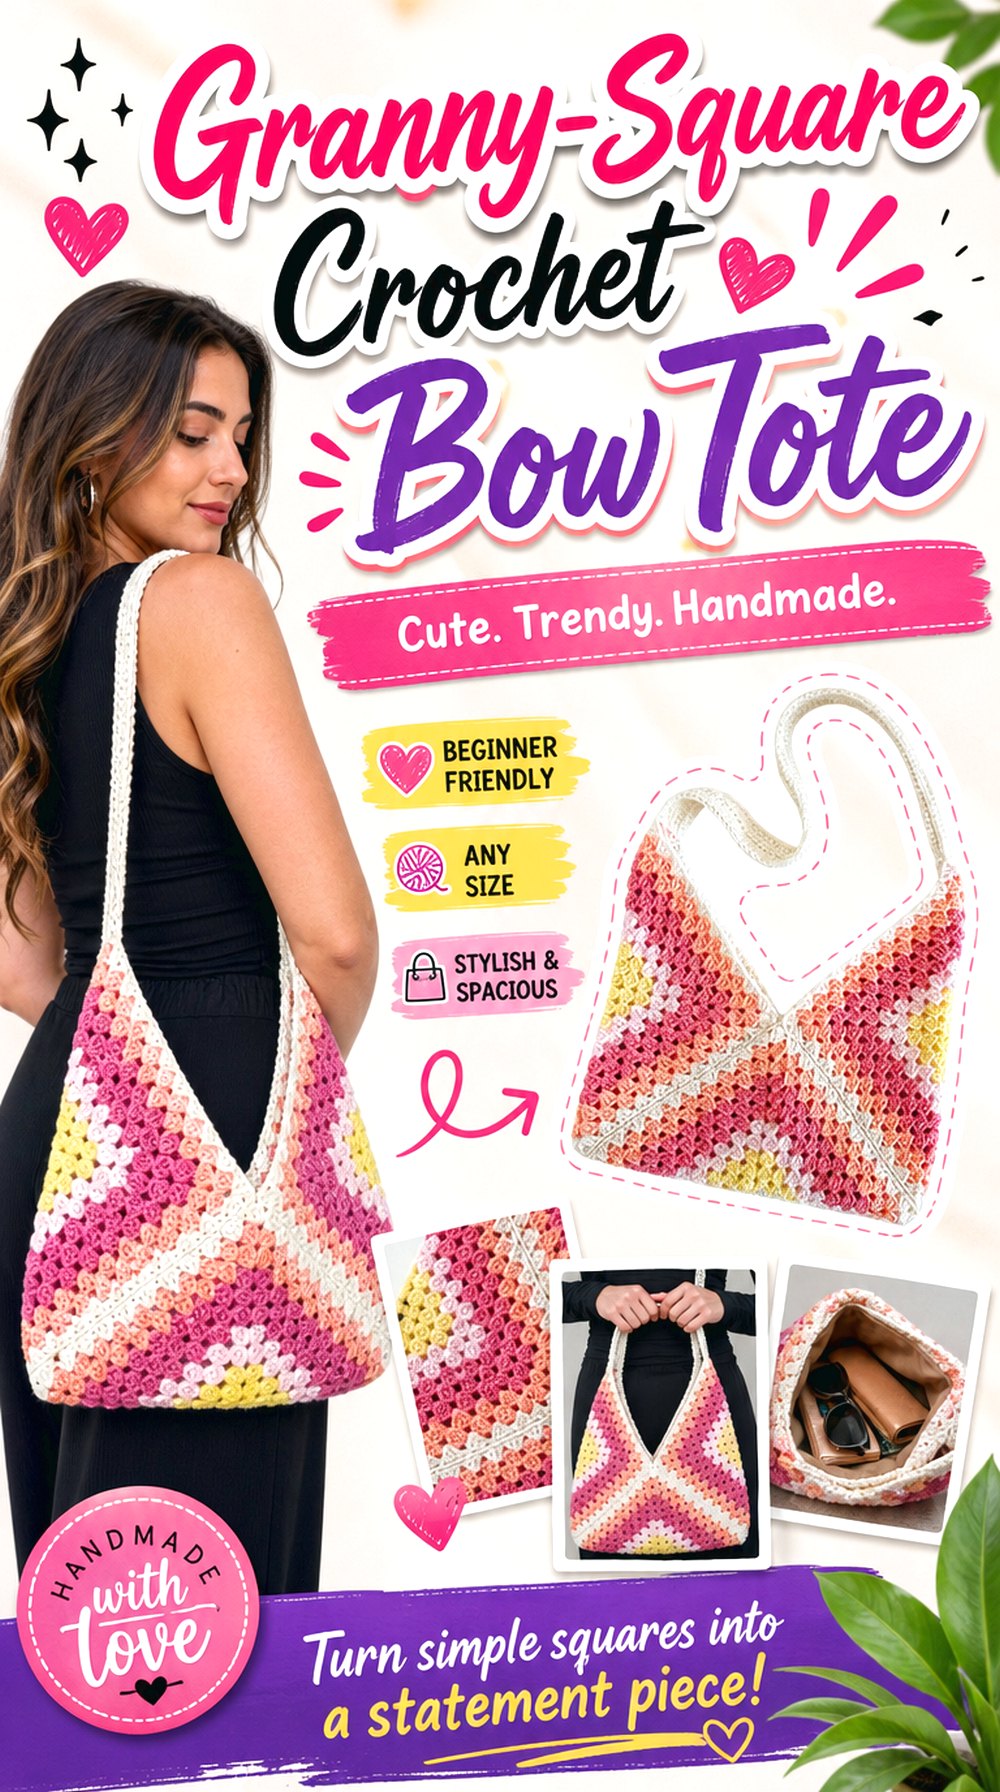
A granny-square tote introduces pattern and color before the bow is even added. ElyseCrochets demonstrates a granny-square bag construction that can be adjusted in size; the source itself is not an exact bow-bag tutorial.
For a bow adaptation, the challenge is deciding whether the bow should dominate the motifs or behave as a small finishing detail. A solid-color bow over a multicolor square layout can create a clear focal point, while a heavily patterned bow may compete with the square arrangement. Finish planning the motif layout before committing to embellishment placement.
Do Not Hide the Strongest Granny-Square Motif
If the front contains a particularly attractive square or color arrangement, placing a large bow directly over it wastes some of the tote’s visual interest. Consider positioning a bow closer to the upper joining line, at a handle base, or on a simpler square so the motif and embellishment can both remain readable.
Block and Join Before Finalizing Bow Size
Individual squares can change slightly after blocking and joining. A bow sized against one loose square may look very different once the tote has become a larger panel. Complete the bag body to the point where its front proportions are stable, then assess the bow against the assembled surface.
Keep Strap and Bow Details From Competing
A granny-square bag already has visible joins and handles framing the body. If you add ties, tassels, charms, and a bow at the same time, the upper section can become visually crowded. Decide which detail should be the focal point and simplify nearby finishing accordingly.
Original Tutorial and Creator Credit
Creator: ElyseCrochets
Baguette Crochet Bow Shoulder Bag
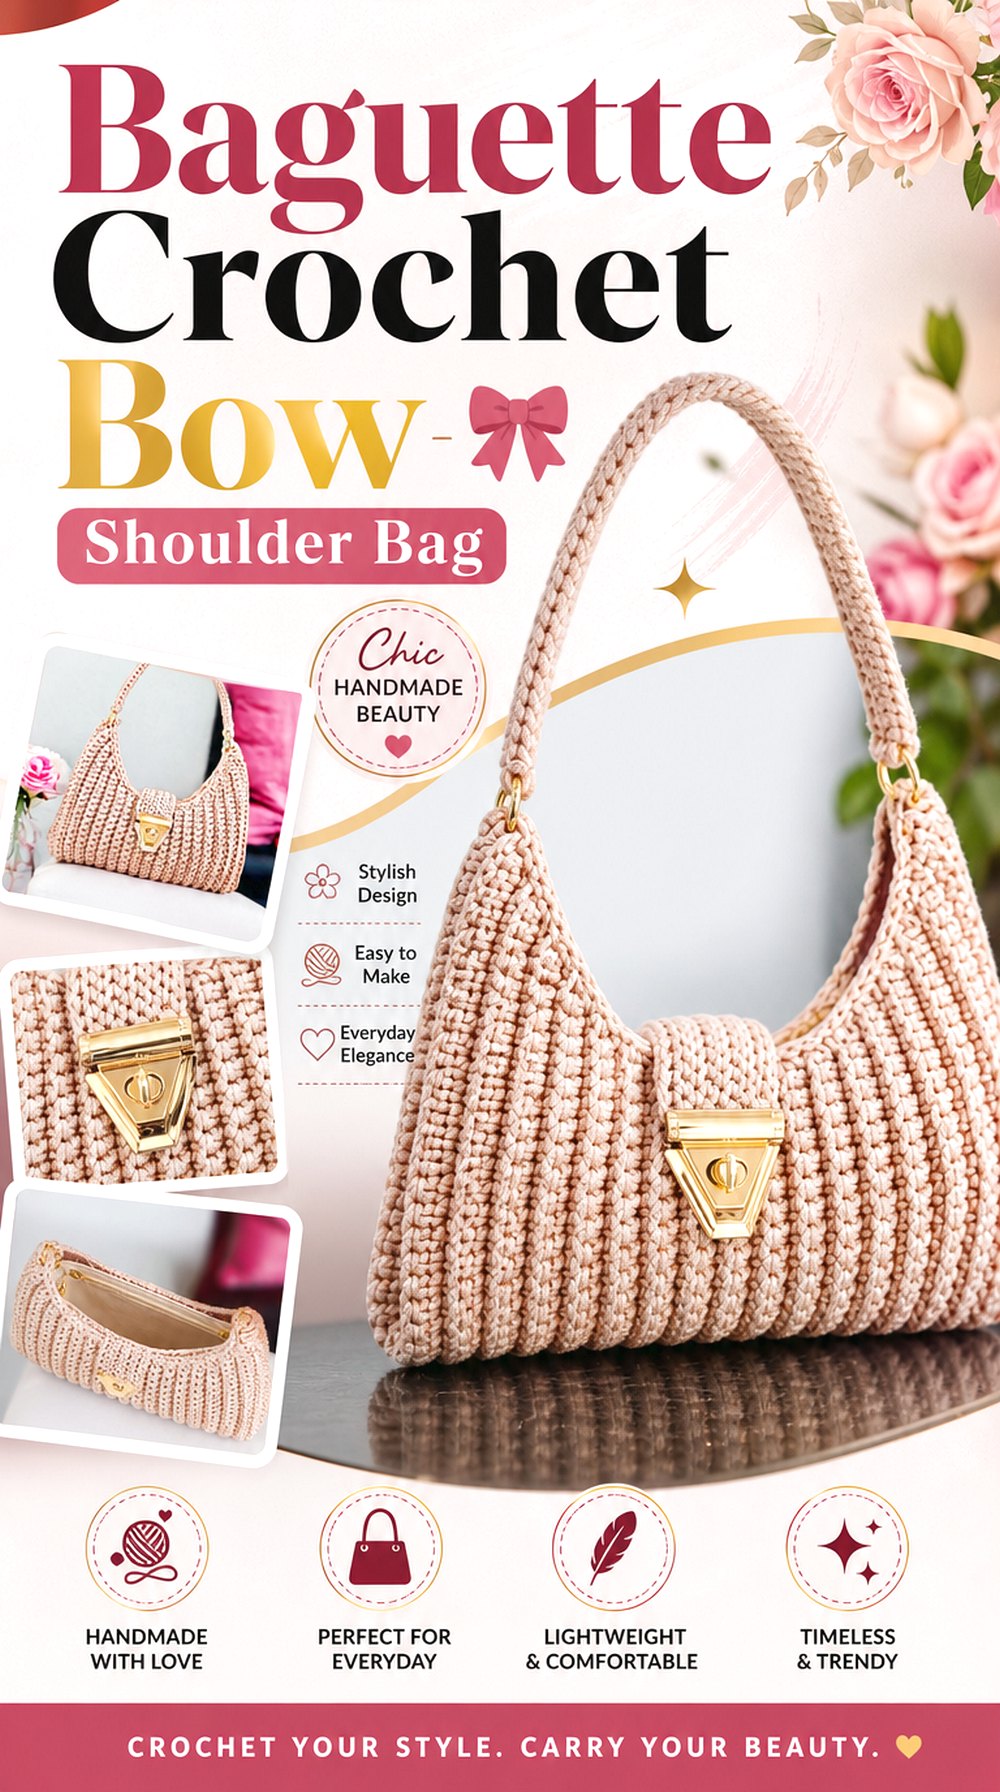
The long, narrow proportions of a baguette bag create an ideal canvas for a horizontal bow, but scale becomes important. Faz Crochê’s tutorial demonstrates the baguette construction rather than an exact bow variation.
A centered bow can echo the horizontal silhouette, while two small bows near the strap attachments create a less dominant adaptation. Because a baguette bag sits close under the arm, excessive front projection may be less comfortable than it would be on a hand-carried purse.
Use the Horizontal Shape to Guide Placement
A wide bow follows the same visual direction as the bag, which can make the finished design feel cohesive. Still, leave enough exposed body on either side so the bag does not look like a bow with a narrow strip of fabric behind it. Temporary pinning helps establish the right proportion before permanent attachment.
Check Underarm Clearance With the Bag Worn
Baguette bags often sit relatively high. Put the finished base bag on before deciding where a dimensional bow should go. If the top loop is directly beneath the arm, it may fold repeatedly or feel bulky. Moving the embellishment slightly lower can preserve the bow shape while keeping the carrying position comfortable.
Keep the Opening Visually Separate
A decorative bow should not make it difficult to identify or reach the bag opening. When adding one to a tutorial that was not designed around an embellishment, leave enough space around zippers, flaps, buttons, or upper edges so the original function remains clear.
Original Tutorial and Creator Credit
Creator: Faz Crochê
Drawstring Crochet Bow Pouch
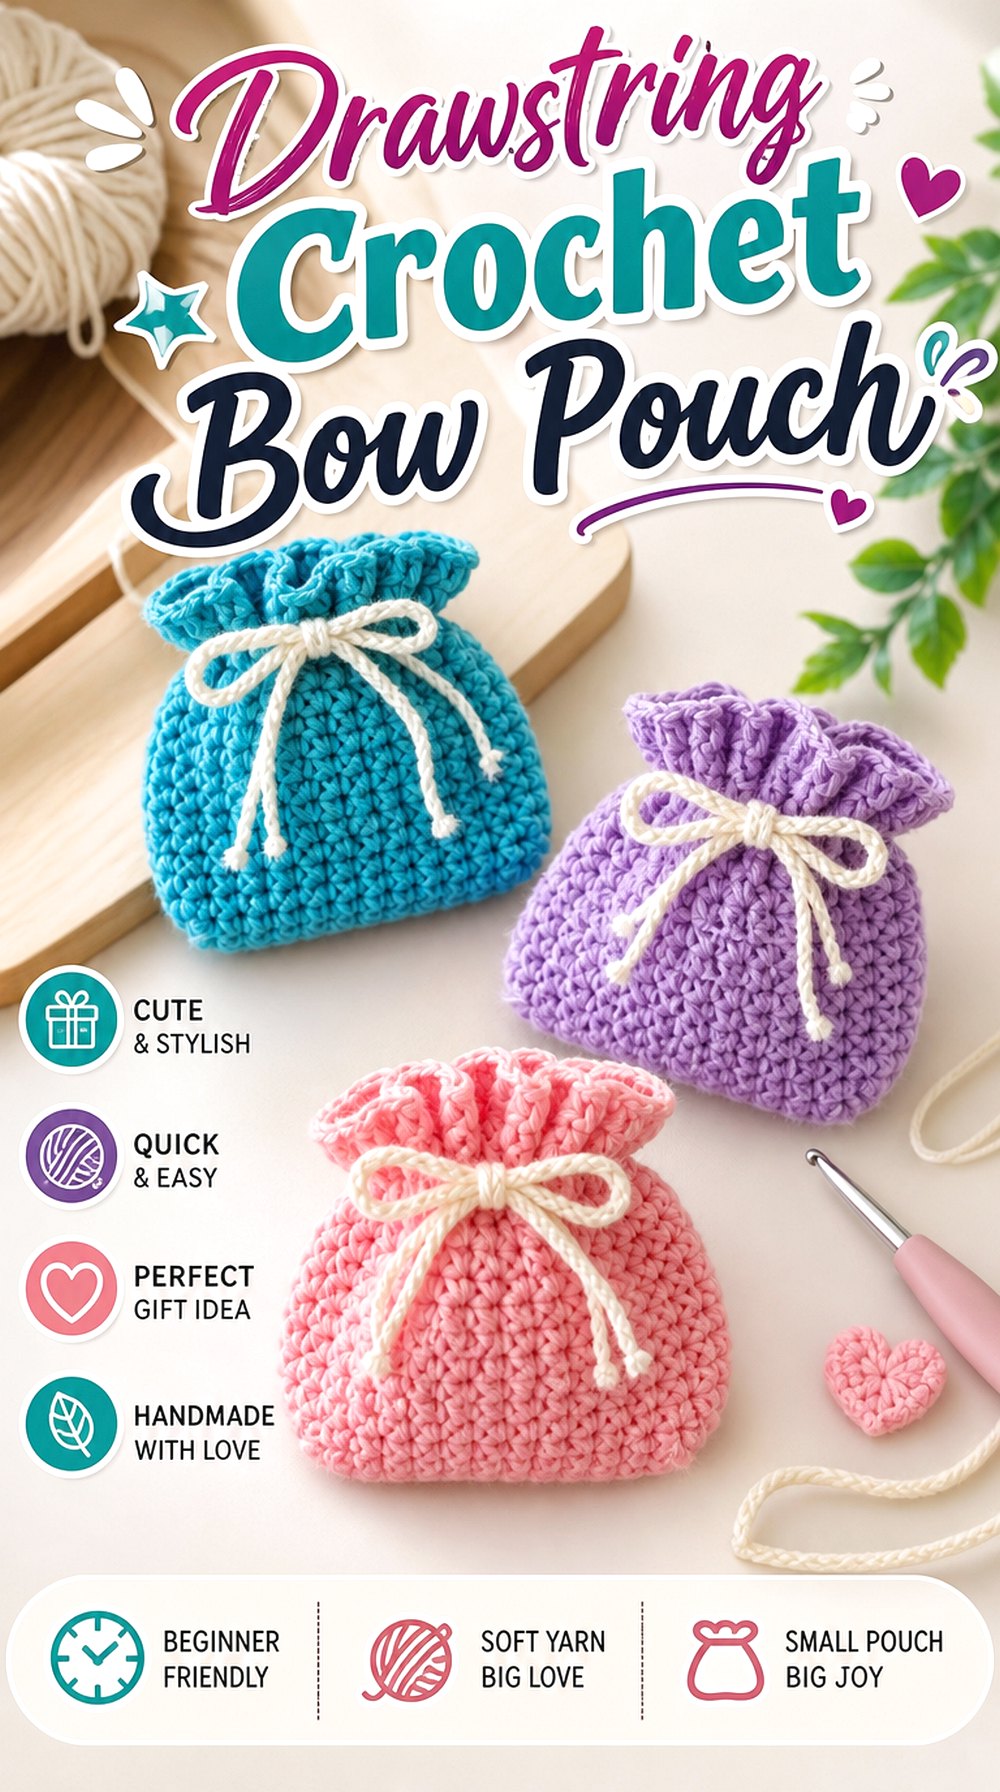
A drawstring pouch offers a natural way to introduce bow shapes because the closure already involves ties. Aakuju Crochet’s tutorial demonstrates the pouch construction; it is not presented as a dedicated bow bag.
Instead of adding a large separate appliqué, you can use the drawstring area as the visual starting point. Decorative ends, a small centered crochet bow, or a separate bow below the channel can give the pouch a softer look while preserving the cinching function.
Do Not Turn the Bow Into a Stuck Drawstring
If you tie the functional cords into a decorative bow, make sure the pouch can still be opened without frustrating knots or excessive friction. A permanent embellishment placed below the drawstring channel can be more practical when the bag will be opened frequently.
Small Pouches Magnify Bulky Finishing
On a compact pouch, several thick knots and tails can occupy a surprising amount of space. Keep attachment ends tidy and compare the bow thickness with the pouch depth. A flatter bow often looks more proportional than a deeply layered one.
Check the Cinched and Fully Open Shapes
The upper edge changes significantly between open and closed positions. Test temporary bow placement in both states. An embellishment that looks centered on a closed pouch may shift, fold, or interfere with the channel when the opening is expanded.
Original Tutorial and Creator Credit
Creator: Aakuju Crochet
Bucket Crochet Bow Bag
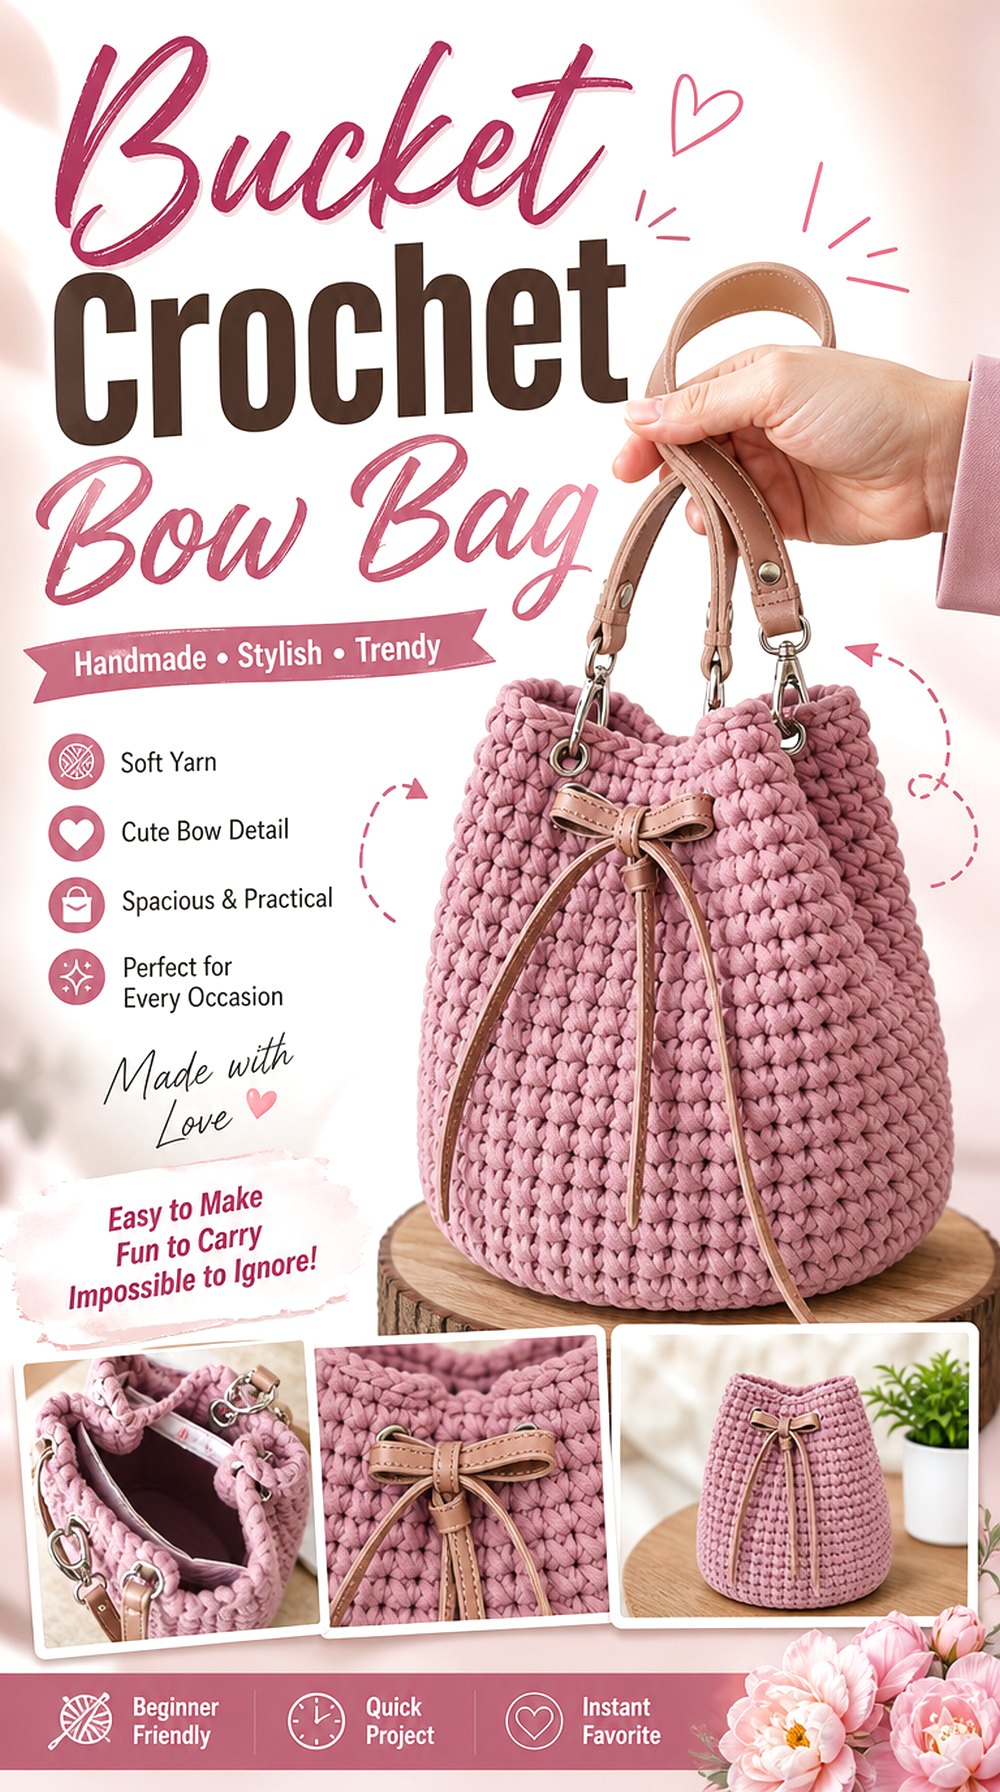
A bucket bag gives the bow theme a taller, rounded silhouette. Crochet with Julia’s tutorial demonstrates a crochet bucket bag rather than a bow-specific version. The shape makes a useful adaptation because a bow can be positioned on the front, at the drawstring area, or near a strap attachment without copying a flat rectangular handbag.
The curved body also changes how the decoration sits. A very wide bow may not lie as evenly against a rounded surface as it would against a flat panel.
Let the Bow Follow the Curved Surface
Before sewing, hold the filled or lightly shaped bag upright and place the bow against the actual curve. A decoration that appears correct while the bag is flattened may lift at the edges once the bucket regains its rounded profile. Smaller attachment zones can sometimes allow the loops to follow the surface more naturally.
Protect the Drawstring or Top Opening
The upper section of a bucket bag often does significant functional work. Avoid locating a large bow where it catches the drawstring, folds into the opening, or blocks access. If the upper edge is already busy, the front center of the body may provide a cleaner location.
Weight Distribution Matters on Taller Bags
A bucket bag can stretch vertically as contents settle toward the base. If your yarn produces a flexible fabric, check the bag under realistic light loading before finalizing bow position. The decoration may appear lower once the body elongates, particularly if it was positioned using only the empty bag as a reference.
Original Tutorial and Creator Credit
Creator: Crochet with Julia
One Piece Crochet Bow Clutch
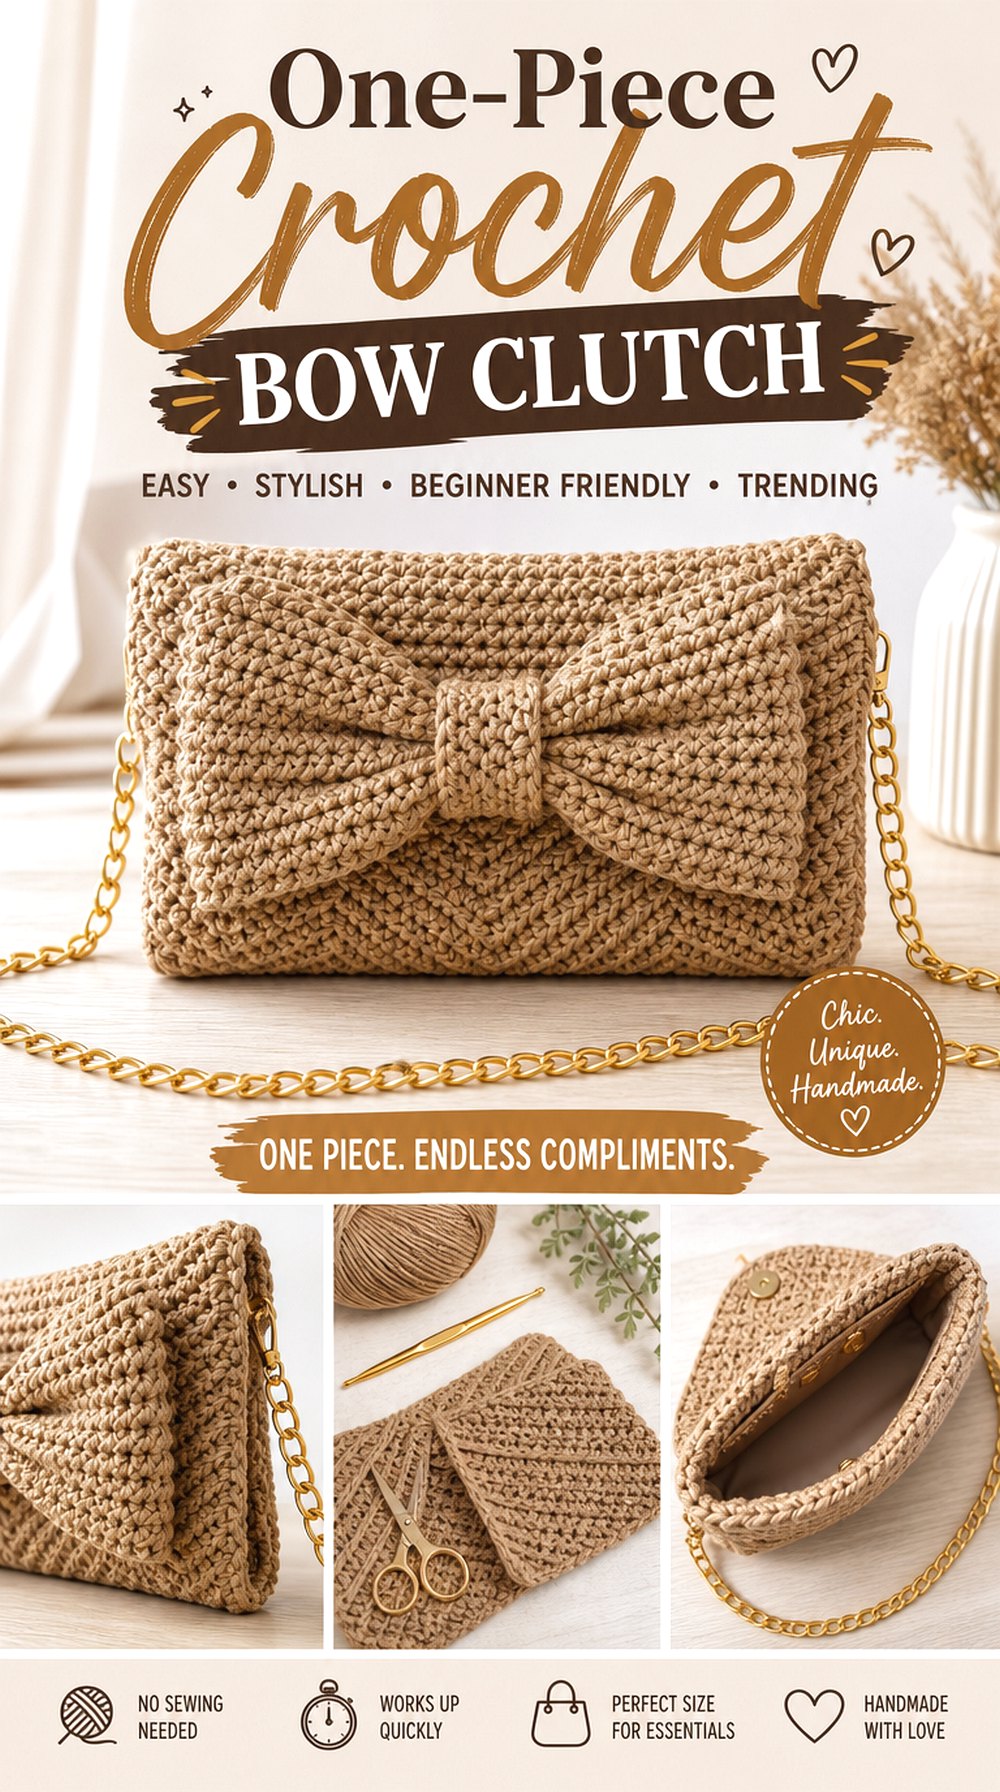
Zhav in crochet’s tutorial uses a one-piece approach for a clutch body and flap rather than creating a bow bag specifically. That makes it useful for a clean adaptation where one compact bow becomes the main decoration.
A bow placed near the flap edge can make the clutch feel gift-like, while one centered on the lower body gives a more conventional purse appearance. Because the base construction is intentionally simple, the embellishment can become prominent without competing with many seams or motifs.
Decide Whether the Bow Belongs to the Flap or Body
A bow attached across both areas may restrict the flap’s movement. Choose one structural section as the attachment surface so the bag can still open fully. If you favor a flap bow, check its position both when the clutch is closed and when the flap is lifted.
A Flat Clutch Benefits From Controlled Thickness
A thick knot or deeply layered bow can cause the clutch to rock when placed on a table and may be awkward when held close to the body. Consider using a flatter center wrap or less bulky yarn for the embellishment while maintaining enough stitch definition for the loops to remain recognizable.
Finish the Base Before Committing to Embellishment
Because the source tutorial is for the clutch itself, complete the construction and closure first. That prevents the bow from forcing changes to functional areas halfway through the project. Once the bag works properly, you can compare several bow sizes without risking the integrity of the base design.
Original Tutorial and Creator Credit
Creator: zhavin crochet
Mini Crochet Bow Crossbody Bag
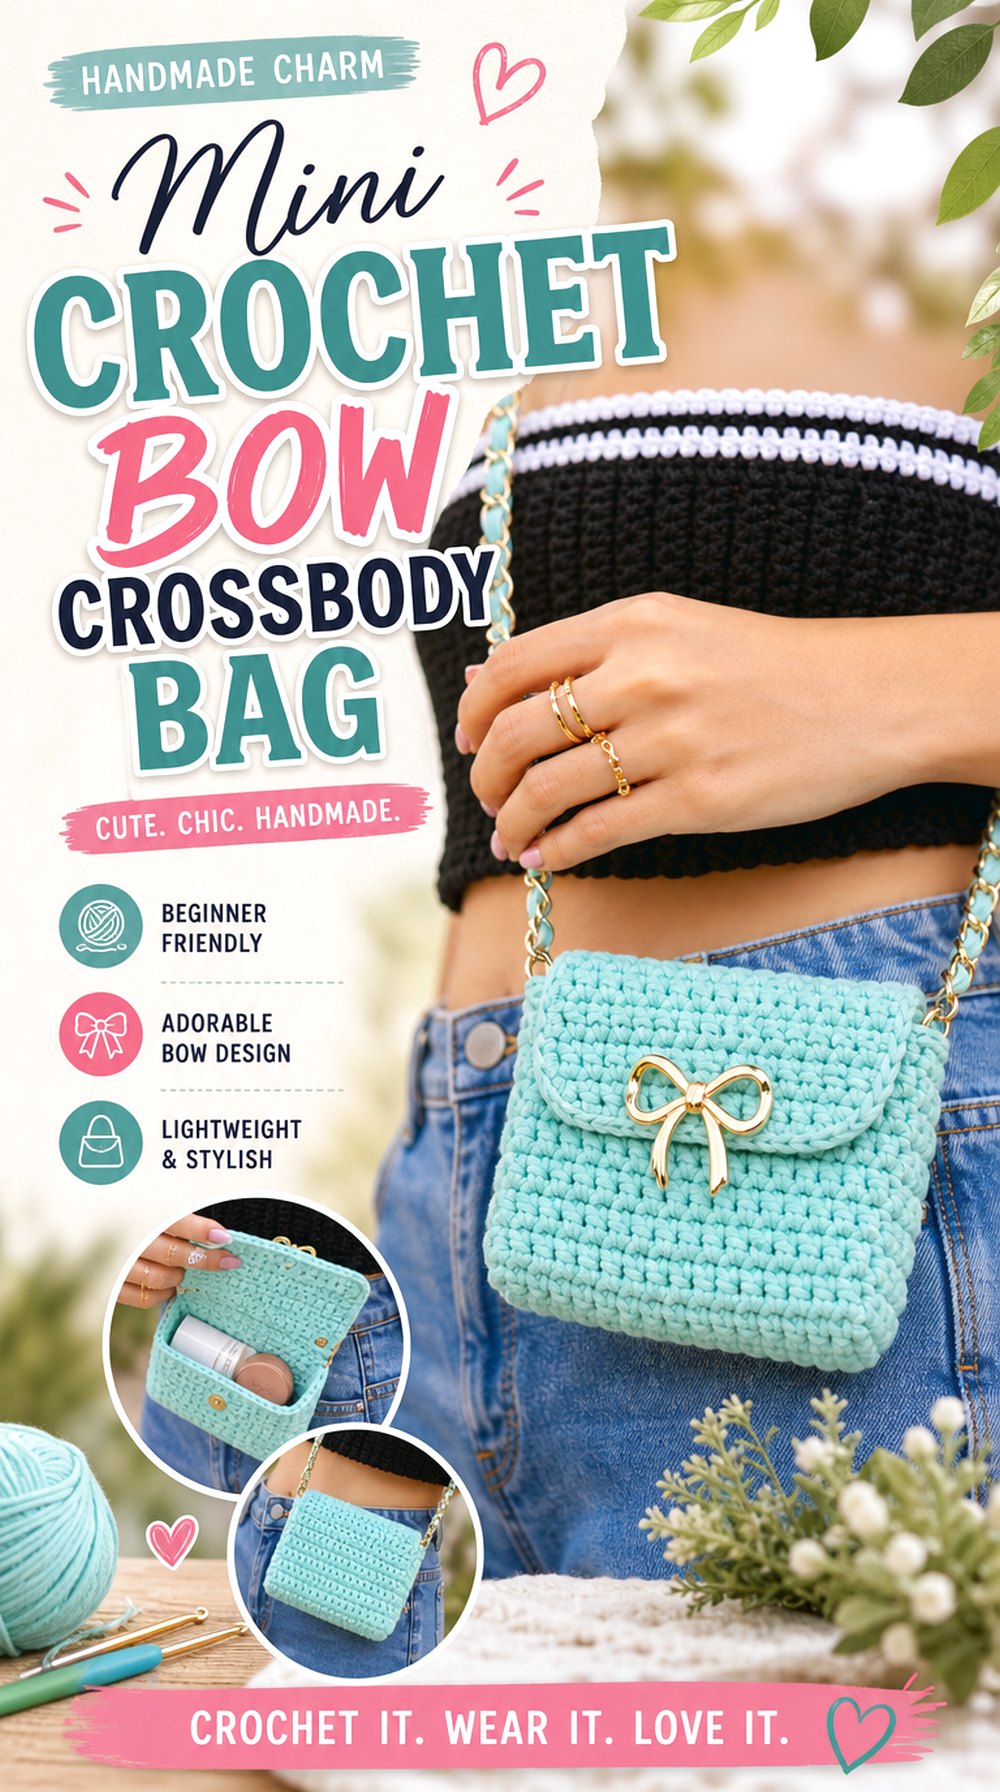
A mini crossbody keeps the bow-bag idea practical for carrying only smaller essentials. Chenda DIY’s tutorial demonstrates a mini crochet crossbody bag; the linked project does not depend on a bow motif, so this idea uses it as a construction base for an added embellishment.
Unlike a hand-held bow purse, a crossbody moves against the torso and hip as you walk. That makes embellishment profile, strap placement, and abrasion more important. A small flatter bow can communicate the theme without turning the front of the mini bag into a bulky projection.
Keep the Bow Below the Strap Hardware
The upper corners already carry load from the strap. Avoid crowding those attachment areas with decorative stitching unless you have checked the construction carefully. Centering a bow on the body usually separates the decorative function from the parts responsible for carrying the bag.
Test the Decoration While Wearing the Bag
A crossbody bag should be evaluated on the body, not only on a table. Temporarily position the bow, put the bag on, and move around. Check whether the bow rubs under an arm, folds against clothing, or faces sideways because of the way the bag naturally hangs.
Scale Down the Details With the Bag
Mini bags can be overwhelmed by embellishments copied directly from larger totes. Use the completed front panel as the reference and leave visible space around the bow. The goal is for the viewer to read both “mini crossbody” and “bow,” rather than seeing the decoration first and only later discovering a bag behind it.
Comparing the 18 Crochet Bow Bag Directions
The most useful choice depends on whether the bow or the bag shape should lead the design.
| If you want… | Strong directions to consider | Main planning issue |
|---|---|---|
| The bow to define the whole silhouette | Bow-Shaped Chunky Bag, Coquette Bow-Shaped Purse | Interior space and symmetry |
| One dramatic front focal point | Oversized Front-Bow Handbag, Ribbed Statement-Bow Bag | Bow scale and attachment |
| A firmer handbag | Paper-Yarn Bow Tote, Structured Bow Shoulder Bag | Material stiffness and hardware |
| A softer coquette effect | Satin-Ribbon Shoulder Bag, Ruffled Shoulder Bag | Preventing too much visual volume |
| A compact purse | Valentine Handbag, Ribbon-Yarn Clutch, One-Piece Clutch | Keeping the opening accessible |
| A bow adaptation on a different silhouette | Granny Tote, Baguette, Drawstring, Bucket, Mini Crossbody | Adding decoration without disrupting the original construction |
If the bow itself is the priority, start with one of the tutorials that already incorporates it into the design. If you mainly want a particular bag shape, an adaptation tutorial gives you more freedom—but finish the functional construction before deciding exactly how the bow should attach.
Conclusion
The most distinctive crochet bow bags are not simply the same tote with different ribbon colors. A bow-shaped shoulder bag creates a completely different result from a structured handbag, a ruffled coquette purse, a narrow baguette, or a compact crossbody.
Choose the base according to how you want to carry and use the bag first. Then decide whether the bow should define the silhouette, dominate the front panel, or remain a smaller finishing detail. Structured materials can sharpen the motif, while softer fabrics create more relaxed bows and bag shapes. For the adaptation ideas, treat the linked videos as construction references rather than exact bow-bag patterns. Use the original tutorials for their precise construction details before making independent changes to embellishment, lining, straps, or closures.
Frequently Asked Questions
What yarn qualities help a crochet bow keep its shape?
A bow usually reads most clearly when the fabric has enough body to keep its loops and tails recognizable. Dense stitches and lower-stretch yarn can help, while very soft yarn creates a more relaxed look. There is no single required fiber or yarn weight for every bow bag. If substituting yarn from a tutorial, make a small sample and compare firmness, thickness, and flexibility before deciding whether it suits both the bag and bow.
Should a crochet bow bag be lined?
Not every crochet bag needs lining, and the linked tutorials differ in construction. Lining is worth considering when you want to reduce stretch, keep small objects from working through the fabric, or give the interior a cleaner finish. However, lining can change how the bag flexes and how its opening behaves. Check the original tutorial first so you do not accidentally interfere with a closure, drawstring channel, or intentional stretch.
Why does a large bow droop on the front of a crochet bag?
Possible causes include very soft yarn, loose fabric, insufficient attachment area, or a bow that is too heavy for the front panel. First determine whether the bow itself is collapsing or whether the bag fabric is being pulled forward. Those are different problems. Increasing attachment over appropriate areas may stop rotation, while a firmer bow fabric may improve the loops. Avoid simply sewing every edge flat, because that can remove the bow’s dimensional appearance.
Can I add a crochet bow to any bag tutorial?
Many bag constructions can accept an embellishment, but not every location is suitable. Check closures, zippers, drawstrings, flap movement, handle attachments, and high-friction areas before adding anything. A bow that works on a flat tote may interfere with the opening of a clutch or get crushed under the arm on a baguette bag. When the original tutorial does not include a bow, complete and evaluate the functional bag first.
How large should the bow be compared with the bag?
There is no universal percentage that works across all bag styles. A statement handbag can support a bow covering much of its front, while a mini crossbody usually needs substantially less visual volume. Temporarily pin or hold a sample bow against the finished bag and view it both flat and while carried. Leave enough visible bag around the decoration for the underlying silhouette, opening, and handles to remain easy to read.
Where is the strongest place to attach a bow to a crochet bag?
The best position depends on the construction. A stable front panel away from closures and strap hardware is often easier to work with than an opening edge that moves constantly. Large bows may need enough attachment area to prevent twisting, while smaller bows can use more localized anchoring. Inspect the inside of the bag as well so attachment stitches do not interfere with lining, pockets, hardware, or the normal movement of the fabric.