A crochet tarot card holder can be a close-fitting sleeve, a soft drawstring bag, a buttoned wallet, or a zippered pouch. The most useful difference is not the color scheme but how the opening works, how much room the deck has at the sides, and whether seams or textured stitches sit against the card edges.

The first projects below include tutorials made specifically for tarot or card storage. The remaining ideas use complete pouch, wallet, eyeglass-case, and dice-bag tutorials as construction bases that could be resized for a tarot or oracle deck. Measure your actual stack before adapting a general-purpose case because card decks vary substantially in width, height, and thickness.
The exact tutorials and adaptable bases are separated deliberately, and dimensions, materials, or construction details are only stated when the available source supports them.
Quick List
- Crochet Straight-Sided Tarot Card Pouch
- Crochet Drawstring Tarot Deck Bag
- Crochet Textured Card Holder Bag
- Crochet Compact Card Bag
- Crochet Flat Card Holder Wallet
- Crochet Slanted-Flap Button Pouch
- Crochet Love-Letter Envelope Sleeve
- Crochet Wild-Rose Granny Square Pouch
- Crochet Granny Square Drawstring Pouch
- Crochet Basic Round Drawstring Pouch
- Crochet Honeycomb Dice Pouch for Tarot Cards
- Crochet Button-Loop Eyeglass Pouch
- Crochet Heart Pouch With Two Closure Options
- Crochet Zipper Pouch for Tarot Cards
Measure the Full Deck Before Choosing a Holder
Measure the complete deck rather than a single card. Width and height establish the basic outline, but deck thickness determines how much extra fabric has to travel around the sides. A flat wallet designed for bank cards, for example, may look wide enough from the front while still lacking the depth required for a full tarot stack.
Closure space matters too. A flap must reach over the filled pouch, a drawstring needs room to gather above the cards, and a zipper needs a usable opening wide enough for card corners to pass without scraping. When adapting a tutorial, compare the developing fabric with the real deck before finishing seams or installing a closure. Changing the yarn or hook alone is not a reliable sizing method because several dimensions may change together.
Choose the Closure With the Interior in Mind
Drawstrings offer an adjustable opening and suit soft bag-shaped holders, although extra fabric gathers above the deck. Flaps keep the profile flatter and can be secured with buttons or ties. Zippers make the opening more completely enclosed but introduce hardware that should not rub directly against card edges.
Also inspect the inside of the finished crochet. Dense fabric can provide a relatively continuous surface, while granny squares and decorative textures may leave openings, joins, or raised areas. A lining can be considered when you want a smoother interior, but it adds another construction step and has to match the final pouch dimensions. Whichever style you choose, woven-in ends, bulky seams, buttons, and zipper components should be positioned so the deck slides in and out without catching.
1. Crochet Straight-Sided Tarot Card Pouch
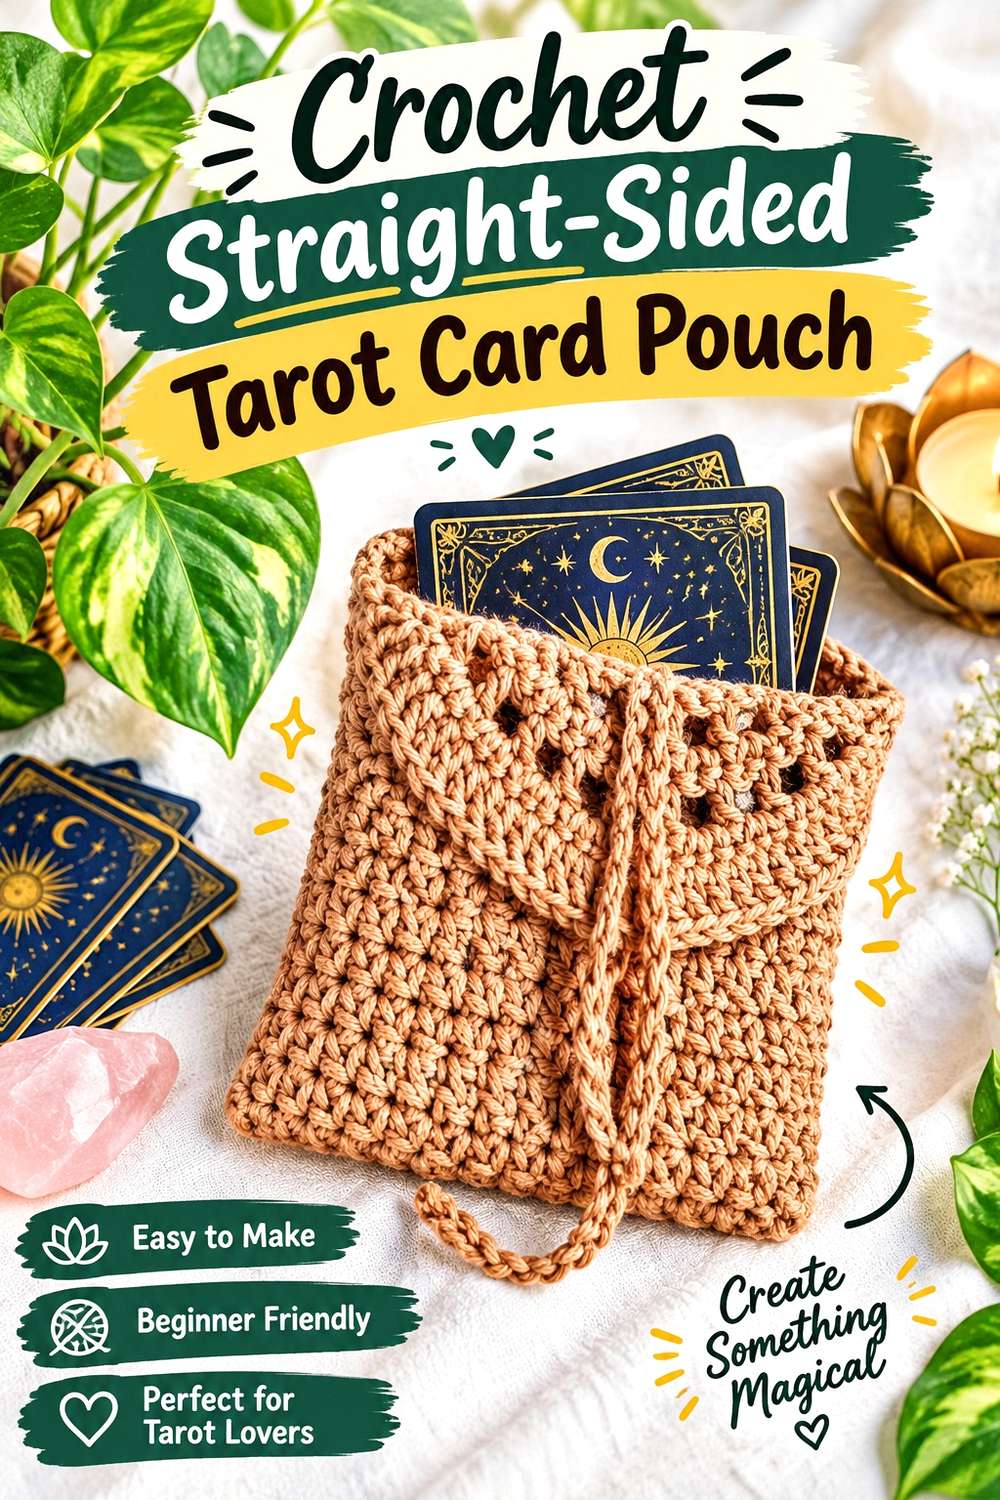
This is the most direct starting point in the collection because the source tutorial from Ashten Stitches is specifically presented as a crochet tarot card pouch. The creator describes a construction using single and double crochet, so there is no need to reinterpret a completely different object before deciding whether the project suits a deck.
A simple rectangular pouch also makes fit easier to judge than a rounded bag. The deck can remain stacked in its normal shape while you compare the width of the opening, the height of the body, and the amount of room available around the thicker side edges. That straightforward profile leaves plenty of room for personal color choices without turning decoration into the main structural decision.
This is the option to examine first if you want the holder to behave primarily like a sleeve rather than a miniature handbag.
Check Thickness Before Finishing the Sides
Front width alone does not establish fit. Hold the complete stack against the developing pouch and account for the distance the crochet must travel around both side edges.
If the pouch requires substantial stretching just to insert the deck, the card corners may continually push against the fabric. A little usable ease is more practical than a case that looks exceptionally neat while empty but becomes difficult to load.
Keep the Interior Corners Simple
Straight sides make the lower corners natural resting points for the deck. That means bulky knots, poorly secured yarn tails, or unusually thick seams are especially noticeable there.
Inspect those areas before regular use. If you add decorative surface work later, keep it primarily on the exterior rather than creating additional lumps exactly where the card edges sit.
Creator: Ashten Stitches
2. Crochet Drawstring Tarot Deck Bag
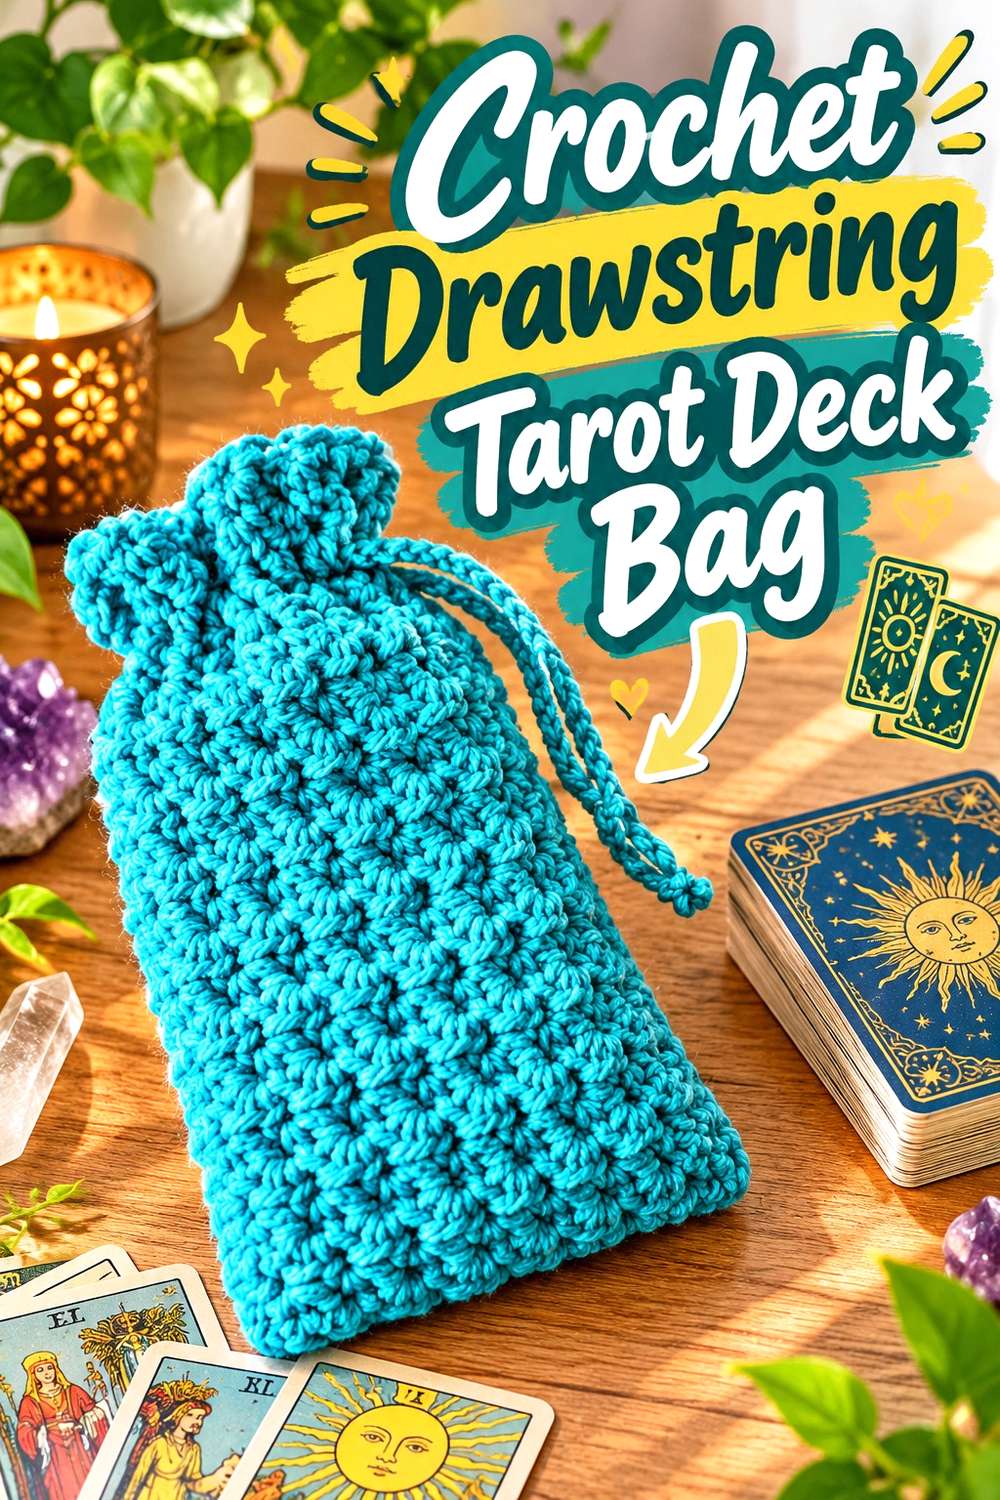
Tarot with Ruby teaches a bag specifically for tarot cards, but its behavior is quite different from a fitted sleeve. The tutorial identifies it as a basic drawstring tarot bag and includes construction of the sides, the drawstring, a finished fit check, and variations on the basic design.
A drawstring gives the top of the holder flexibility. Rather than aligning a flap with one fixed button position, you open the mouth, insert the deck, and gather the fabric above it. That can be convenient when the same deck sometimes includes a few extra reference cards, provided the body itself already has adequate room.
The visual trade-off is a softer silhouette. A gathered top will not remain as flat as an envelope pouch, so this design makes more sense when you like a small bag format rather than a close rectangular case.
Leave Space Above the Cards for Gathering
The cord channel needs somewhere to collapse when it closes. If the deck fills the pouch all the way to the drawstring, the gathered fabric may press into the upper card edges instead of closing freely above them.
Check the holder with the full deck inside before deciding its final height. The useful measurement includes both card coverage and the portion needed for the closure to work comfortably.
Decide What Happens to the Cord Ends
Long ties, tassels, charms, and beads can change how the pouch stores in a drawer or larger bag. They are decorative choices, but they also create extra pieces that can tangle with neighboring objects.
If you add hard embellishments, keep them on the outside and consider where they rest when the pouch is closed. The cord itself should move through its channel without needing excessive force.
Creator: Tarot with Ruby
3. Crochet Textured Card Holder Bag
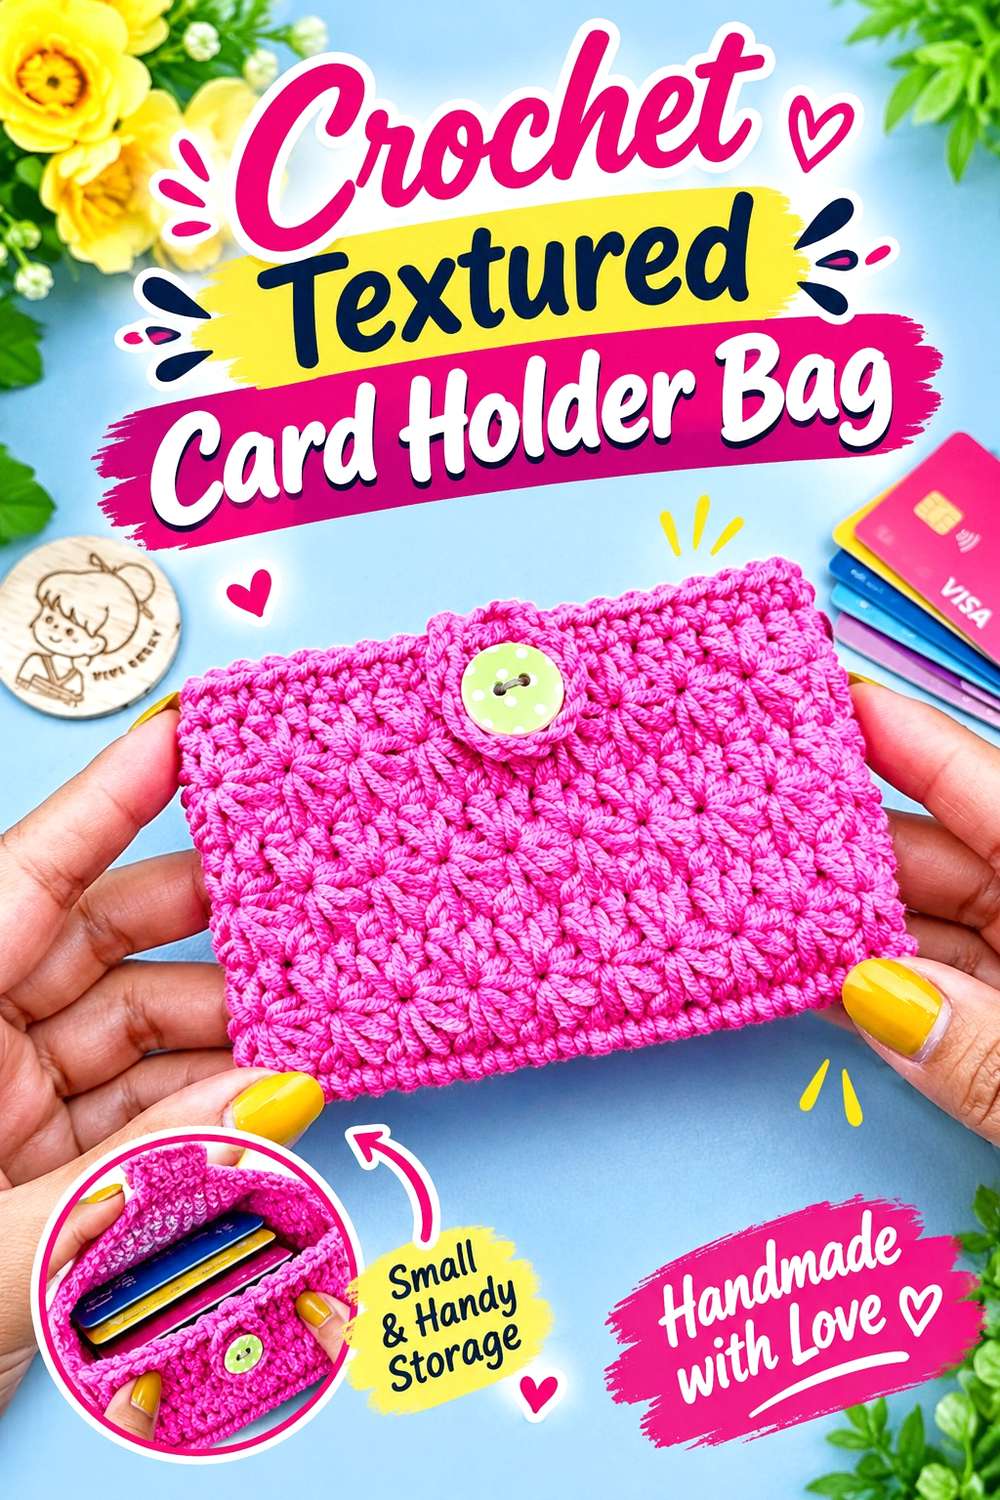
ViVi Berry DIY provides a step-by-step tutorial for a crochet card holder bag, making this a useful bridge between a tarot-specific pouch and a general accessory case. The source is explicitly card-oriented and presents a small crocheted holder rather than a large handbag.
For tarot use, the main adaptation is scale. A holder intended for everyday cards may have a pleasing compact proportion while still being too short, narrow, or shallow for a complete divination deck. Rather than copying the original size automatically, treat its overall construction as the reference and compare every major dimension with your own stack.
The textured surface gives this idea more visual detail than the plain sleeve above. That makes it a good choice when you want the crochet itself to supply the decoration instead of attaching appliqués or charms afterward.
Scale the Body, Not Just the Opening
Making only the top edge wider will not solve a body that is too shallow for the thickness of a tarot deck. Width, height, and depth need to work together.
When adapting a small card holder, compare the developing fabric around the entire stack. If the sides bow outward sharply, increase the body capacity rather than expecting the opening or closure to absorb the difference.
Let Texture Stay Decorative
Raised or clustered-looking stitch patterns can make a small pouch distinctive without extra trim. For a card case, however, exterior texture is more useful than a bulky interior surface.
After finishing, feel the inside with your fingers. If prominent joins or yarn ends project inward, secure or reposition them before using the pouch for cards with delicate edges.
Creator: ViVi Berry DIY
4. Crochet Compact Card Bag
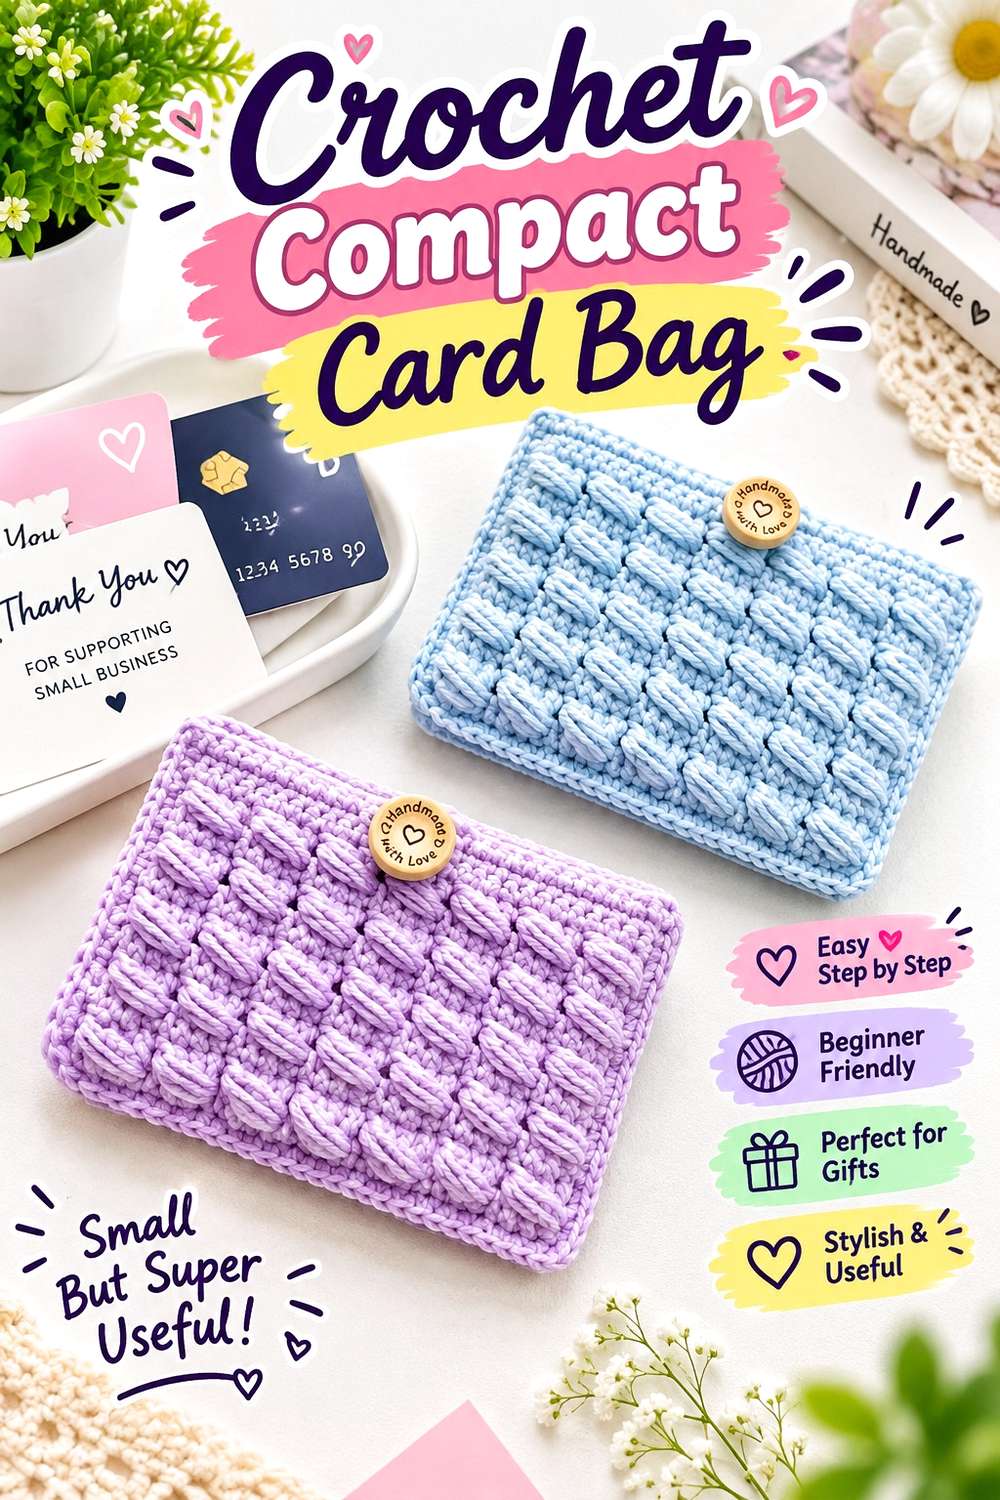
Ada’s Handmade teaches a small crochet card bag and gives a finished sample size of 10 × 7.5 cm. That stated size makes this tutorial particularly useful as an adaptation exercise: you can compare the source dimensions directly with your own deck before deciding whether the original proportions will work.
Many tarot and oracle decks will require a different size, so the attraction here is the compact card-bag concept rather than an assumption that every deck fits the source sample. A close rectangular outline can keep storage bulk low and avoids the unused space that comes with a very rounded drawstring pouch.
This approach suits someone who wants the holder to remain visually small and deck-shaped. It also encourages deliberate planning because there is less spare room to disguise a sizing error once the case is assembled.
Use the Published Size as a Comparison Point
Measure your stacked deck and compare it with the source’s 10 × 7.5 cm sample before starting. Do not look at face dimensions alone; the stack’s thickness requires additional usable space.
If your cards are clearly larger, plan the adaptation from the beginning. Relying on crochet stretch at the end can distort the case and make repeated insertion unnecessarily awkward.
Preserve the Compact Proportion When Enlarging
A tarot adaptation does not have to become a loose bag. If you like the small-case look, enlarge only as much as your deck and chosen closure require.
Check progress against the real cards rather than multiplying every measurement mechanically. The aim is to preserve the compact character while giving the stack enough room to enter and leave without forced stretching.
Creator: Ada’s Handmade
5. Crochet Flat Card Holder Wallet
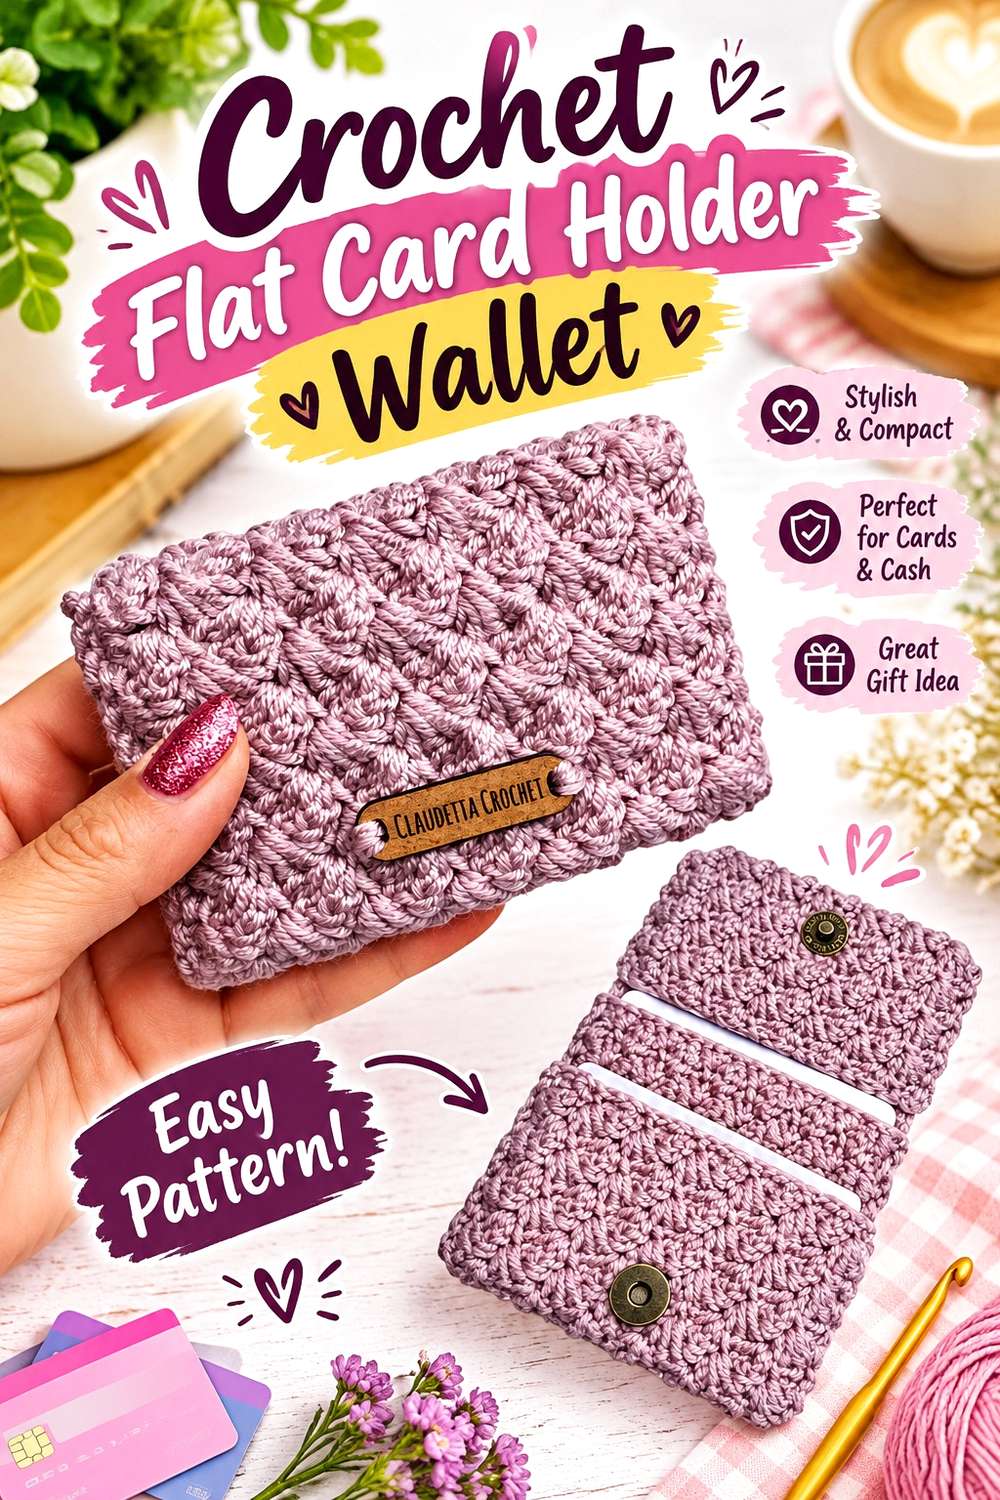
Claudetta Crochet’s tutorial is specifically for a crochet card holder or card wallet. Its original purpose is not presented as tarot storage, so it is best treated as a flat wallet construction to resize rather than a ready-made tarot pattern.
The wallet format is useful when you prefer a holder that sits flat on a table or shelf. Compared with a rounded bag, it keeps the outline closer to the shape of the cards and can make the front panel a natural place for subtle surface decoration.
The challenge is depth. A wallet intended for a few conventional cards does not automatically have the capacity for a thick tarot stack. The adaptation should therefore begin with the complete deck and its side profile, not simply with a longer foundation or a larger hook.
Give a Thick Deck Real Depth
Think of the stack as a small rectangular block rather than a single flat card. The side edges need fabric around them, and a wallet that is only enlarged in height and width can remain too tight.
Before completing the seams, wrap the developing piece around the full stack. This physical check shows immediately whether the project has enough capacity without requiring aggressive stretch.
Keep the Pocket Easy to Open
A shallow pocket can look clean but become frustrating if fingers cannot grip the upper edge of the deck. When changing the proportions, consider how much of the cards will remain accessible when the case is open.
The holder should cover the deck sufficiently for storage while still allowing the stack to be removed as one unit instead of prying out individual cards.
Creator: Claudetta Crochet
6. Crochet Slanted-Flap Button Pouch
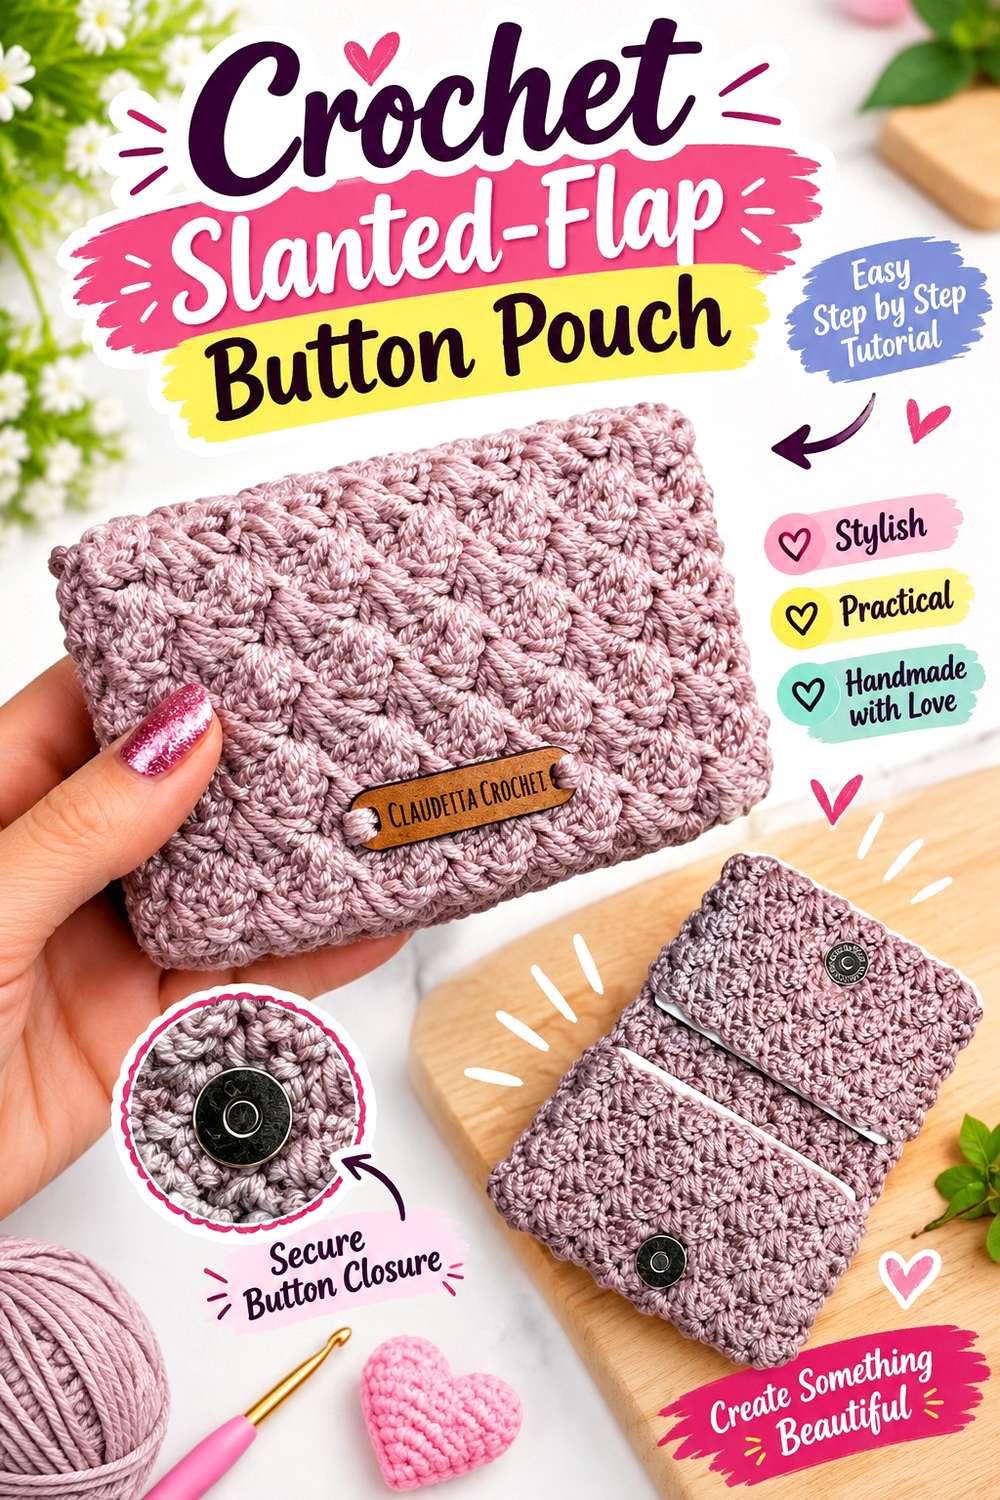
Andrea’s Loops demonstrates a rectangular pouch worked with a textured Griddle Stitch, then shapes a slanted flap and finishes the project with buttonholes and buttons. The source project is a multipurpose pouch rather than a tarot case, so its dimensions should be adapted around the chosen deck.
The flap makes this construction visually different from the simpler sleeves. Instead of gathering extra fabric or adding zipper hardware, the top folds across the front and creates a defined closing line. The angle also gives the pouch character even in one color.
This version is worth considering when you want the closure itself to become part of the design. Its main planning point is the filled pouch: once a deck adds thickness, the flap has farther to travel than it does when the crochet lies empty and flat.
Position Buttons With the Deck Inside
A button placed according to an empty pouch can become too low once the deck fills out the body. Before permanently attaching closure hardware in an adaptation, insert the complete stack and let the flap settle naturally.
The correct position is one that closes without pulling the upper edge into a tight curve. A little movement is preferable to forcing the flap over the cards every time.
Keep the Angled Edge Free to Bend
The slanted flap supplies enough visual interest that it does not need heavy decoration along the fold. Bulky appliqués or stiff additions near that bending point can change how the closure sits.
If you want embellishment, the lower front panel offers a less structurally sensitive location. That leaves the flap free to move while keeping the holder recognizably decorative.
Creator: Andrea’s Loops
7. Crochet Love-Letter Envelope Sleeve
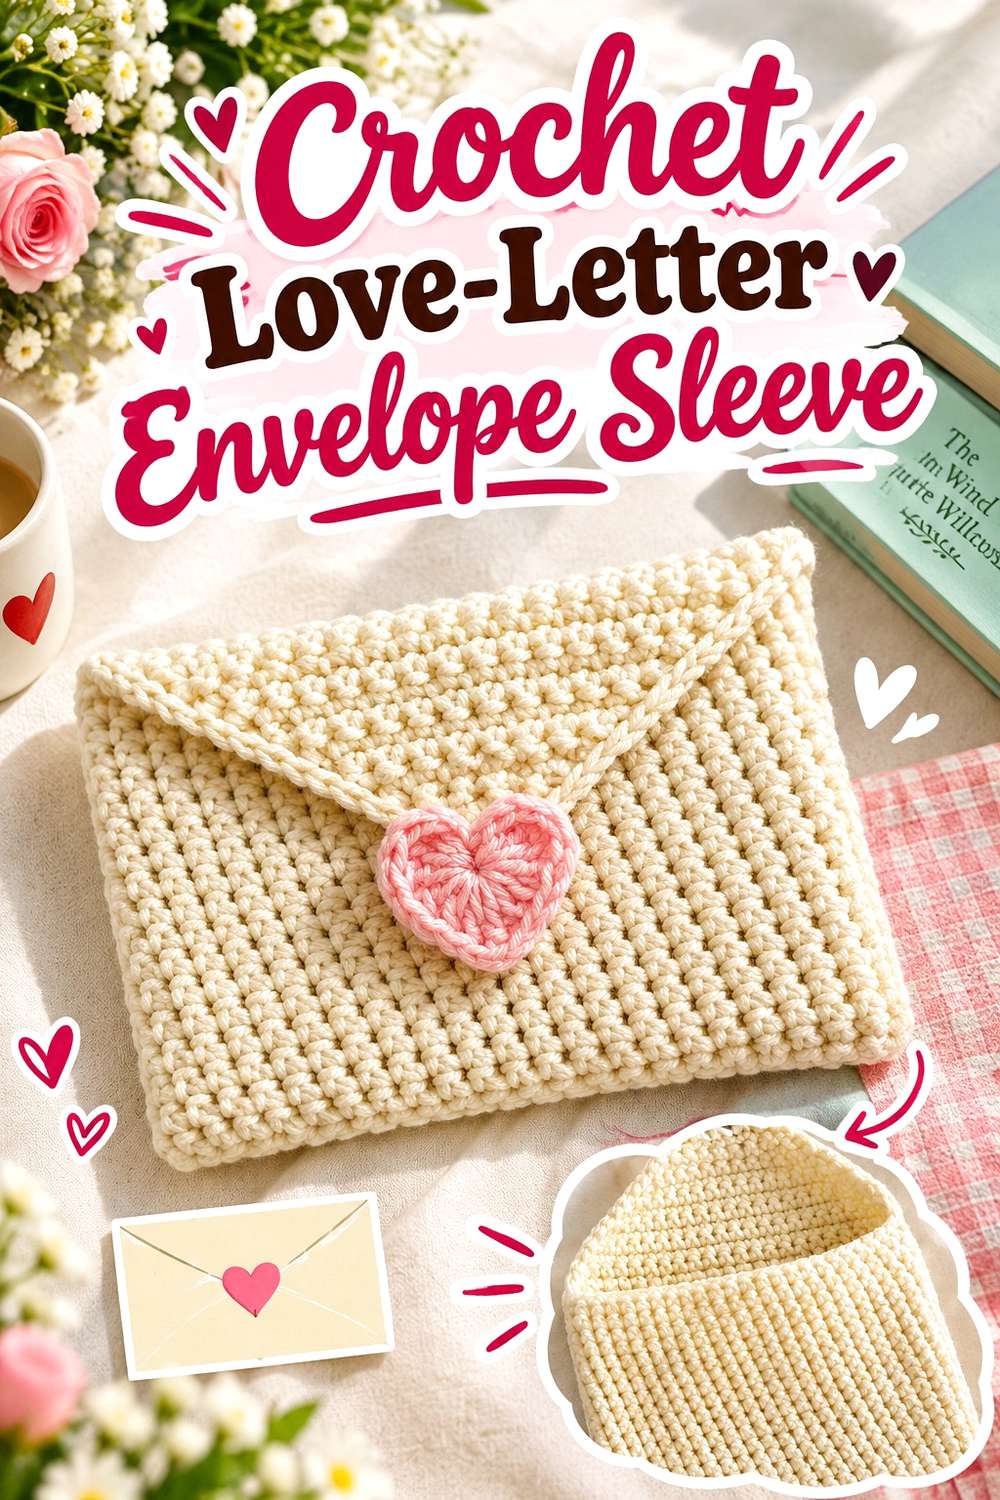
The mahum 🎀 tutorial can be made as a book sleeve or a smaller wallet/pouch and uses an envelope-style flap with a heart detail. That made-to-measure idea transfers naturally to tarot storage, although the source object should still be understood as the construction base rather than a dedicated tarot pattern.
The envelope silhouette is especially suited to cards because both objects share a flat rectangular shape. Visually, the broad triangular-style closing area gives you more front-surface interest than a plain open sleeve without requiring the rounded bulk of a drawstring.
For a tarot version, reduce the concept around the actual deck rather than simply shrinking every dimension from a book. Deck thickness is proportionally much greater than the thickness of a single envelope, so the folded front and flap still need enough travel to close comfortably.
Allow the Flap to Travel Over the Stack
The flap must cover not only the front face but also the added depth at the top of the deck. A thicker stack can make a flap that looked generous while flat seem surprisingly short.
Test its reach with the actual cards inside before finishing the closure. This is particularly important if you switch from the book-sleeve proportions shown by the source to a much smaller holder.
Treat the Heart as Optional Surface Detail
A heart charm reinforces the love-letter look, but the envelope construction remains recognizable without it. Omitting or replacing that decoration lets the same base move toward celestial, botanical, minimalist, or other tarot-inspired styling.
If you attach a firm charm or button, check its position against the cards beneath it. Decorative pressure points are better kept away from the center of the stored stack.
Creator: mahum 🎀
8. Crochet Wild-Rose Granny Square Pouch
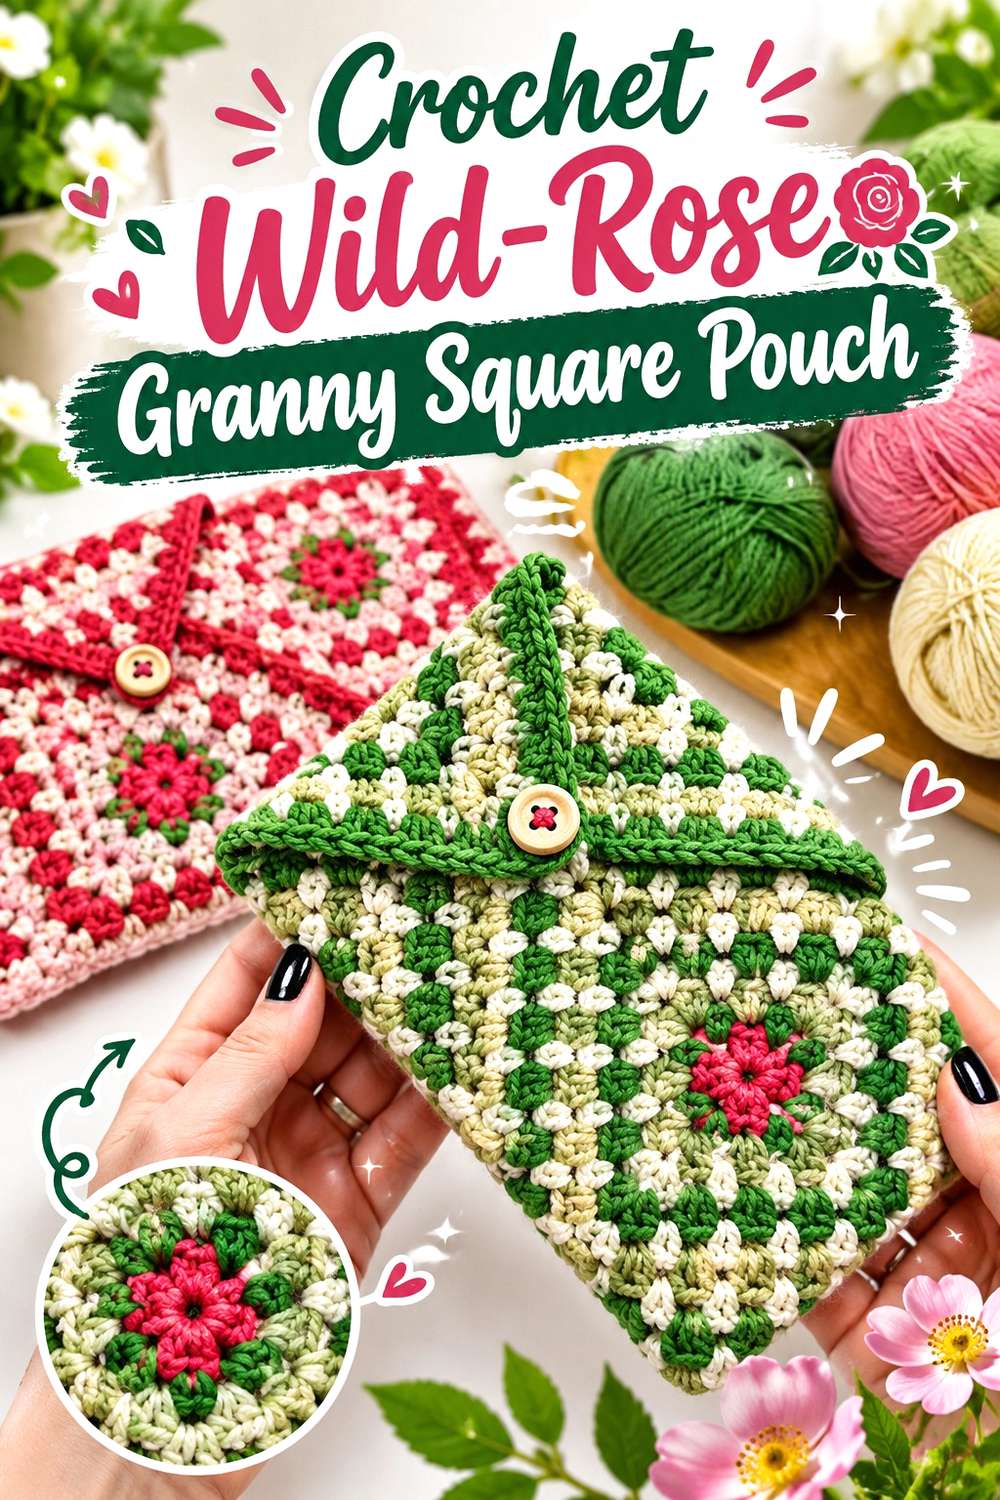
Ophelia Talks Crochet teaches a pouch built around the Wild Rose Granny Square. The tutorial covers connecting the squares, turning the pouch, and attaching its button, so this is a complete pouch construction rather than a floral motif tutorial standing in for a bag.
For tarot storage, the appeal is obvious: the floral square becomes the entire visible face of the holder. That can make a deck case feel decorative enough for shelf display without needing separate surface embroidery or appliqués.
The important adaptation issue is motif size. A square controls both the look and much of the finished pouch dimension, so swapping yarn or changing the motif scale affects more than decoration. Compare the completed square with the deck before joining pieces and remember to account for the stack’s thickness, not just the face of one card.
Finish the Motifs Before Judging Fit
Granny squares can change shape as the fabric settles and the ends are finished. Use the completed motif dimensions for planning rather than estimating from an early round.
Place the deck over the square and check how much fabric remains around the edges. If there is barely enough face coverage, there may not be sufficient allowance for the side depth after assembly.
Consider What the Open Spaces Expose
Granny-square fabric generally has more visible spaces than a densely crocheted sleeve. That may be completely acceptable for a deck kept on a shelf, but it is a different interior environment from a solid pouch.
A fabric lining is one possible adaptation when you want a continuous barrier between card corners and motif openings. Adding one, however, introduces sewing and must follow the finished crochet dimensions.
Creator: Ophelia Talks Crochet
9. Crochet Granny Square Drawstring Pouch
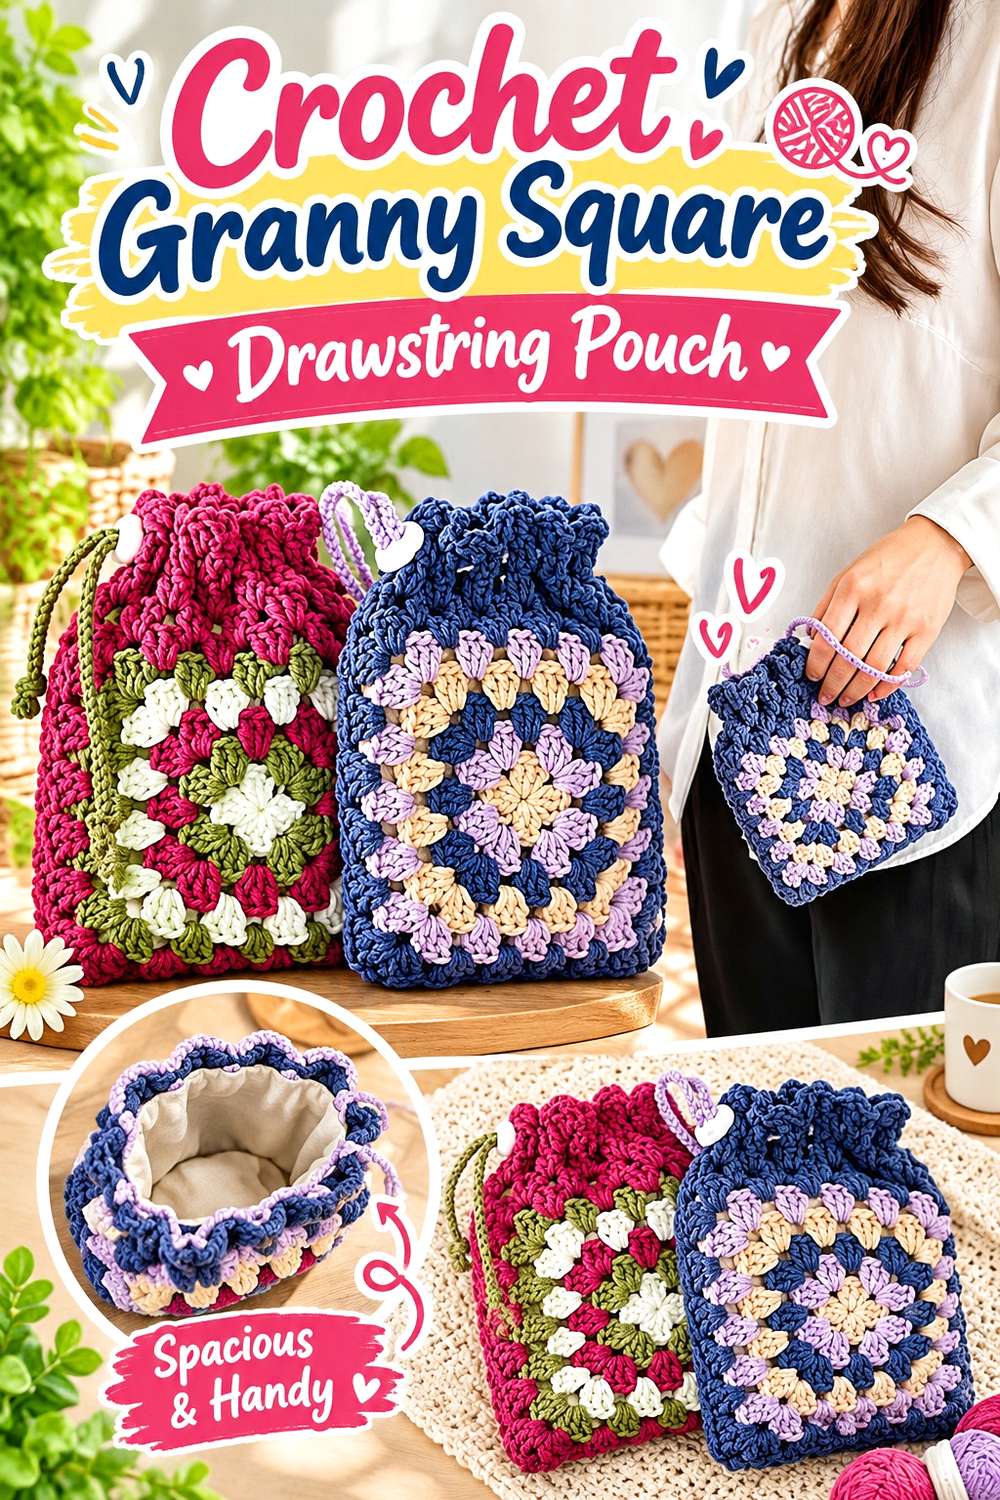
The 하우스 오브 지원 house of Jiwon tutorial takes the granny-square idea in another direction. Its indexed steps include making and joining motifs, working the opening, creating a strap-insertion area, adding optional scalloped edging, and making the straps.
That construction offers a useful compromise between decorative motifs and an adjustable gathered top. Unlike the buttoned Wild-Rose pouch, the closure is integrated into an upper section designed for the cords. For a tarot adaptation, this makes sense when you want the visual rhythm of granny squares but prefer a softer bag closure.
The motif layout still sets important dimensions, so this is not a project to resize casually by choosing a larger hook. First decide how the complete deck sits relative to the finished motifs, then consider how much additional height is required for the opening and drawstring area.
Plan the Motif Layout Around the Deck Face
A centered square or repeating motif arrangement looks strongest when the seams fall predictably around the holder. Before joining, place the deck over the pieces and decide where the card edges will sit.
If resizing changes the number or scale of motifs, check the whole layout rather than solving one side at a time. The visual balance and the usable interior are connected here.
Keep Decorative Edging Out of the Opening
Scalloped edging can make the top more ornamental, but an adapted tarot holder still needs a clear route for the full deck.
After adding any decorative top treatment, check the opening at its narrowest point. The corners of the cards should pass through without catching on scallops or forcing the drawstring area outward.
Creator: 하우스 오브 지원 house of Jiwon
10. Crochet Basic Round Drawstring Pouch
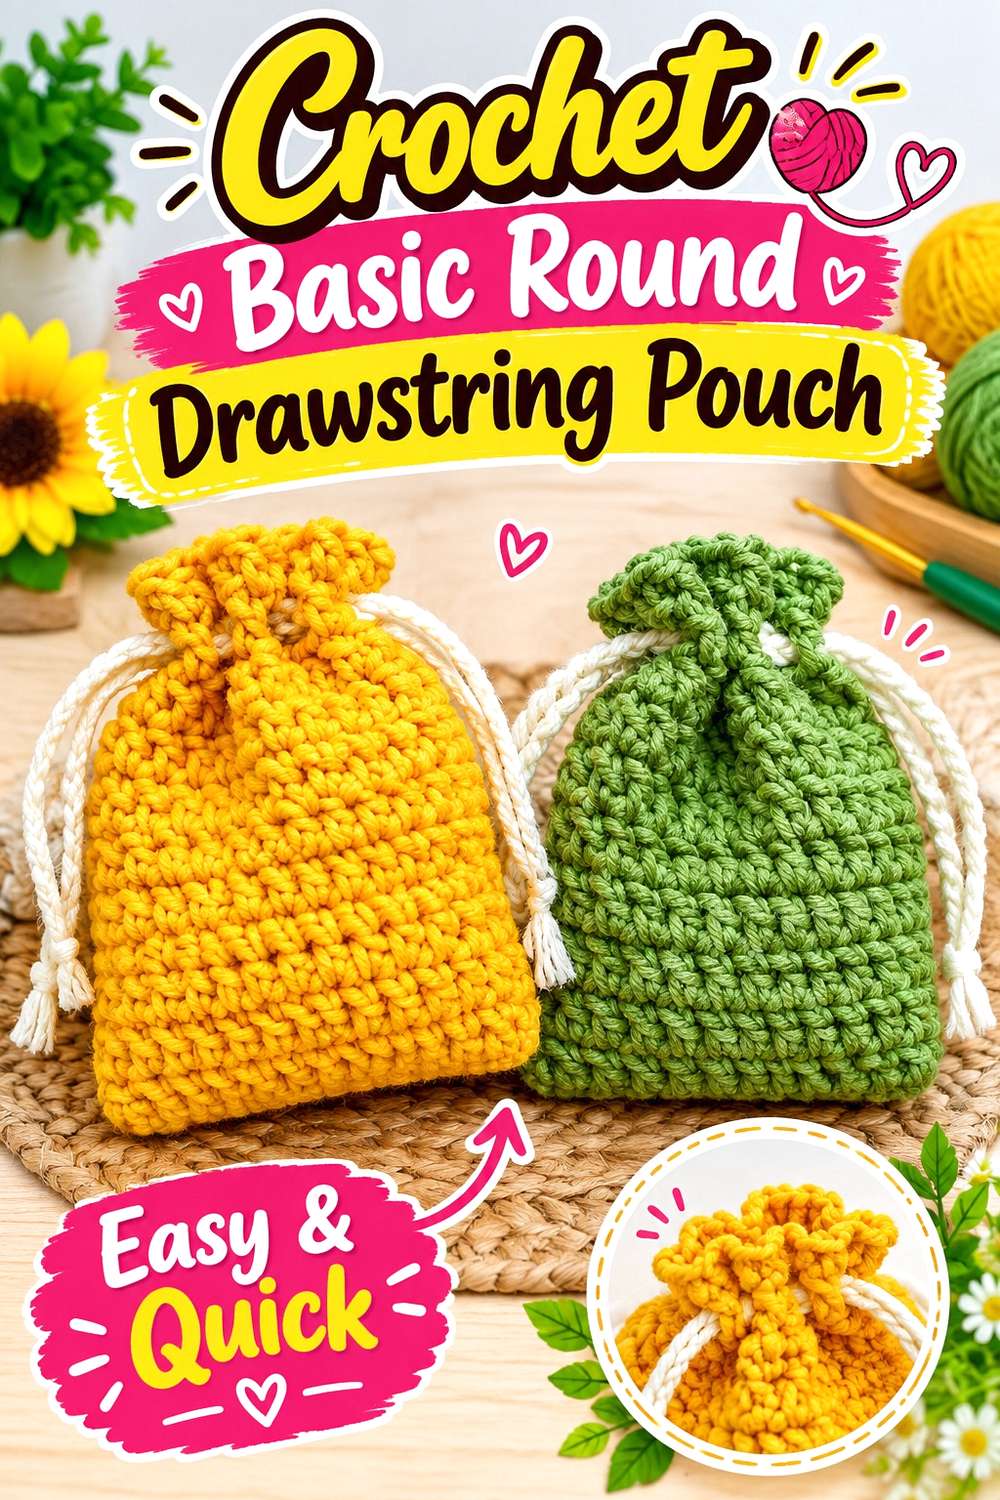
VivCrochets teaches a small basic drawstring pouch worked in rounds and finishes it with two drawstrings. It is a general-purpose pouch rather than a tarot case, so converting it for cards means changing more than the color or simply making a few extra rounds.
The rounded bag shape is the distinguishing feature. A tarot deck is rectangular, so the pouch will naturally have more unused space around portions of the stack than a fitted sleeve does. That is not necessarily a problem: some readers prefer a loose bag that opens widely and has a relaxed handmade appearance.
The decision is therefore about volume. Make it roomy enough that the deck does not force its corners against the rounded base, but not so large that the cards move around excessively and the gathered top becomes bulky.
Check the Base With the Deck Laid Flat
Before building substantial height, compare the base footprint with the complete deck. The corners need somewhere to sit without pushing the circular or rounded shape into a strained rectangle.
If you enlarge the base, remember that extra diameter also creates more loose fabric around the sides. Increase only as much as the intended contents require.
Use Extra Volume Intentionally
A slightly roomy bag can leave space for a thin soft wrap or another lightweight flat item kept with the deck. Excess space is less useful when the pouch is intended only for cards.
Decide what will actually live inside before sizing. That keeps the drawstring from gathering a large amount of unnecessary fabric above a relatively small deck.
Creator: VivCrochets
11. Crochet Honeycomb Dice Pouch for Tarot Cards
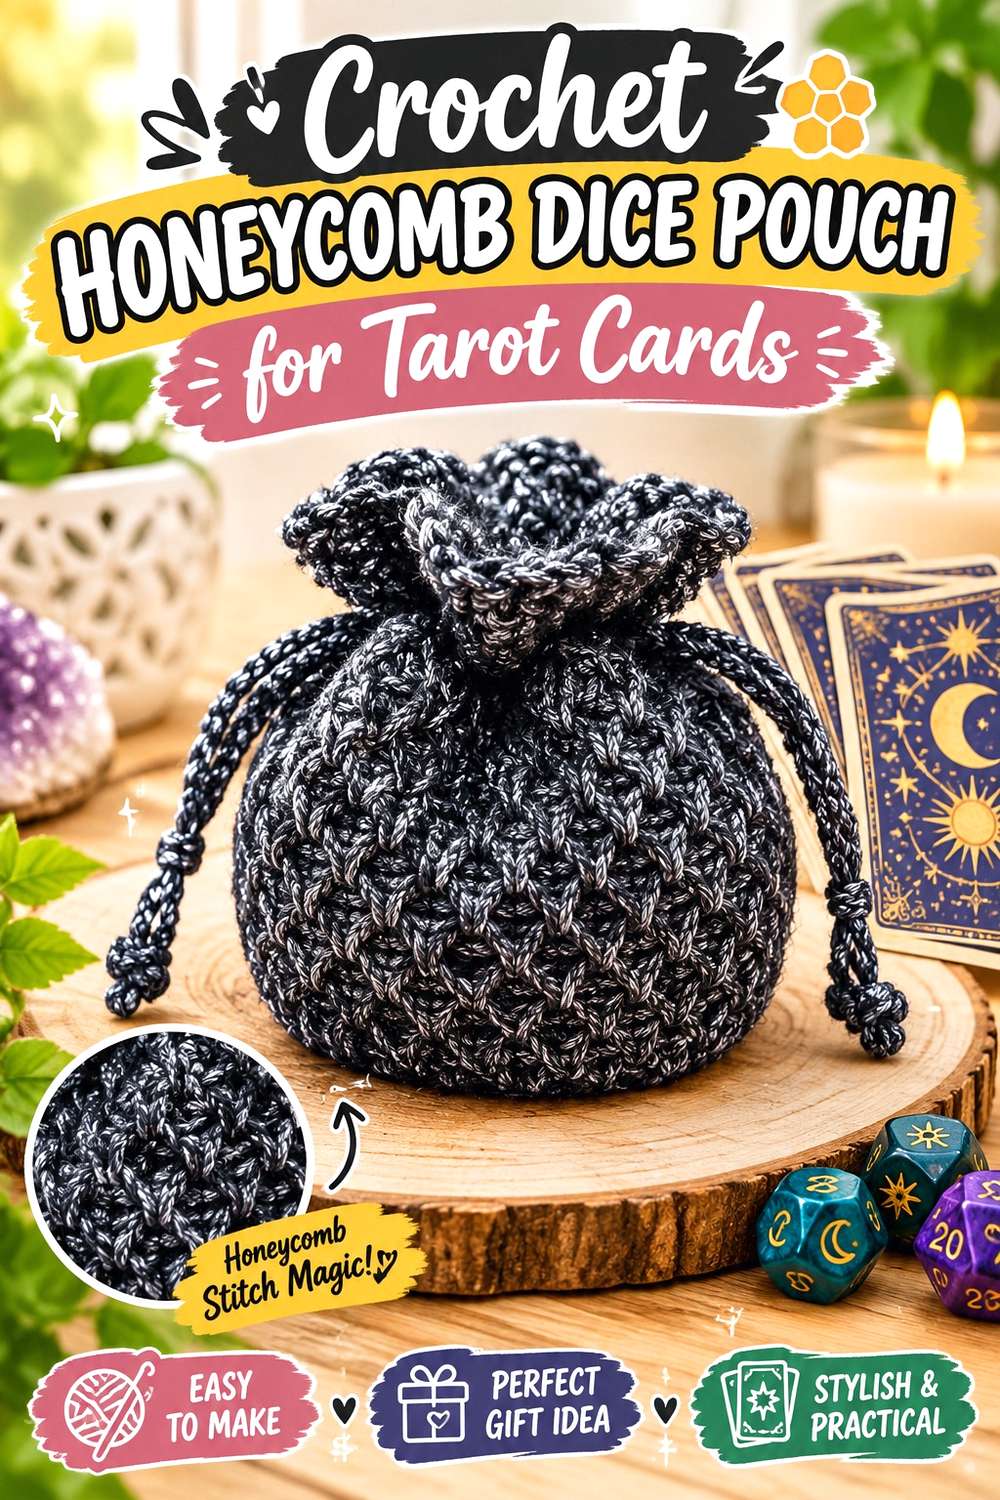
Artsy Maki’s tutorial teaches a honeycomb-stitch pouch intended as a dice bag, project bag, or—at its largest size—a bucket bag. Tarot storage is therefore a proposed adaptation, but the complete pouch construction and drawstring-style bag concept provide a useful base.
The honeycomb texture separates this idea from the plain round drawstring holder. Instead of relying on embellishments, the stitch structure itself supplies the visible pattern. That makes it a good option when you want an ornate-looking deck bag without attaching motifs afterward.
Because the source accommodates different pouch uses, choose size according to the actual tarot stack rather than assuming the dice-bag proportions translate directly. A rectangular deck also occupies a rounded or flexible pouch differently from loose dice, so test the base and side width before finishing the upper closure.
Account for a Rectangular Object in a Soft Bag
Loose dice can settle into available space, while a tarot deck remains a rigid rectangular stack. Its corners determine the minimum usable footprint.
Place the full deck into the developing pouch whenever the construction permits. If the corners push hard into the sides, add capacity rather than relying on the stitch texture to stretch indefinitely.
Let the Honeycomb Texture Do the Decorating
A strongly textured surface already gives the holder a distinctive identity. Adding several raised appliqués on top may make the bag unnecessarily bulky, particularly if it will be stored beside other decks.
If you want a themed finish, color placement or a small cord-end detail can change the mood without competing with the honeycomb surface.
Creator: Artsy Maki
12. Crochet Button-Loop Eyeglass Pouch
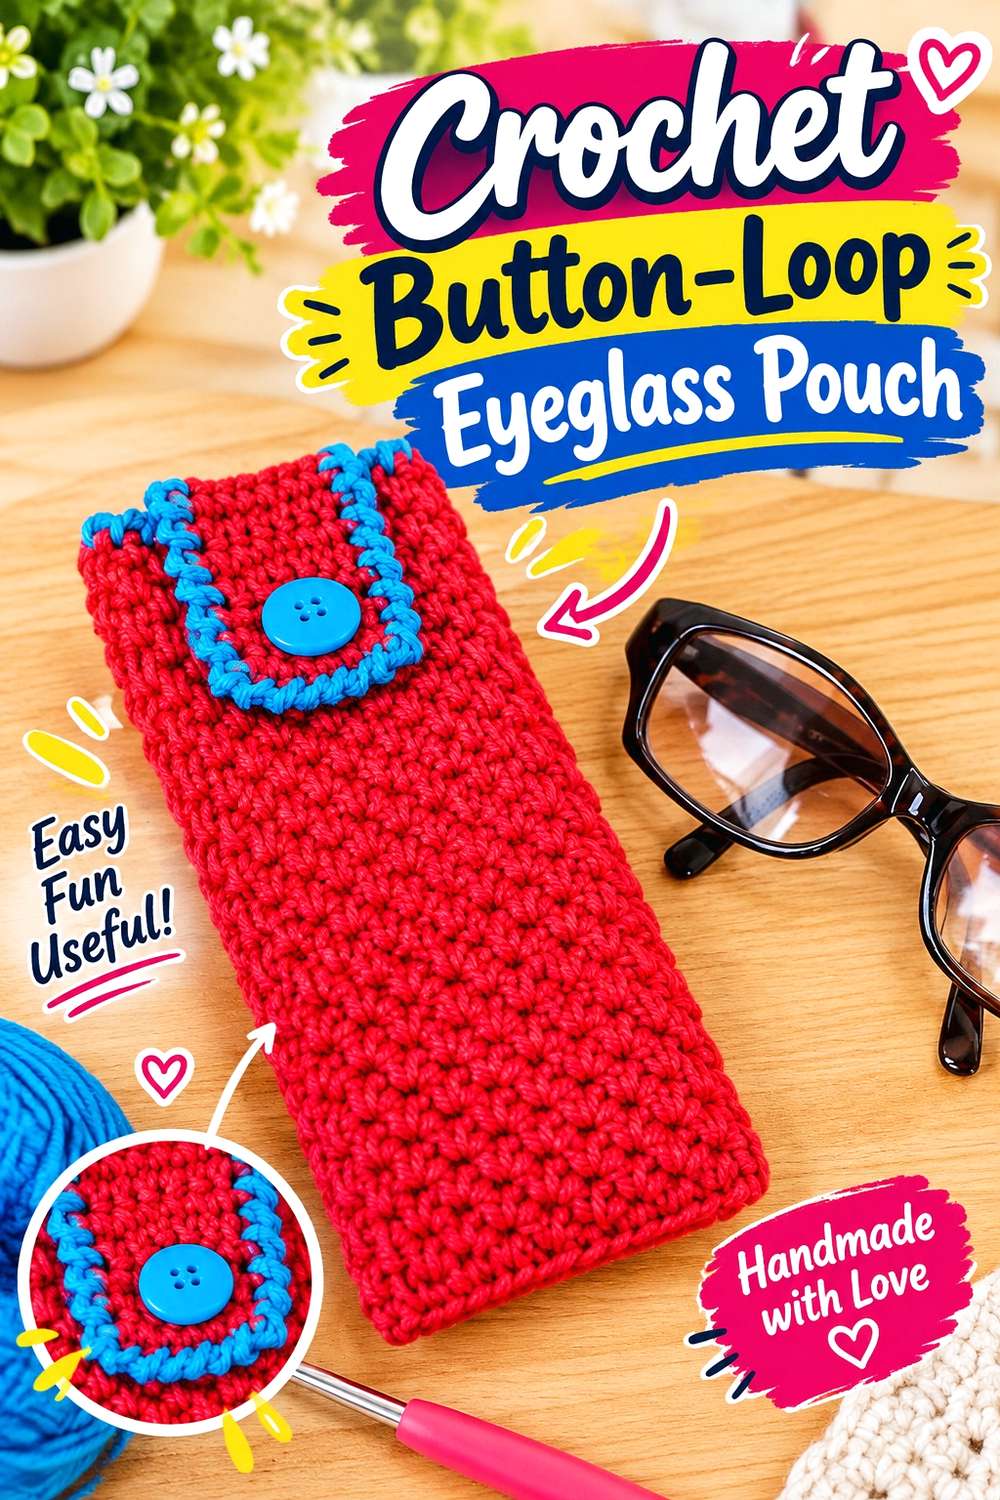
Fial Barbantes teaches a pouch-style crocheted eyeglass case and explicitly includes construction of the body, a buttonhole, contrasting finishing, and sewing on the button. The narrow eyeglass proportions make it an adaptation base rather than an immediately interchangeable tarot holder.
What makes this source useful is its closure concept. The button loop occupies relatively little space and avoids the gathered fabric of drawstrings or the hardware track of a zipper. For a tarot version, widen and deepen the body according to the deck while preserving the simple top closure if that is the feature you prefer.
The eyeglass-case origin also encourages a clean, elongated silhouette. With adjusted proportions, it can become a straightforward deck sleeve whose main visual detail is the contrasting edge or button rather than a heavily decorated front.
Solve the Width Before the Button Position
The original object is long and narrow, while tarot decks generally need a different width-to-height relationship. Establish the body dimensions first and treat the closure as a finishing decision.
Once the complete deck sits comfortably inside, fold or position the top as intended and then determine where the loop and button should meet. Doing it in the opposite order can leave the closure under unnecessary tension.
A Small Closure Keeps the Front Uncluttered
A button loop uses only a localized portion of the front panel. That leaves room for restrained embroidery or a simple color change if you want to add a tarot theme later.
Keep any embellishment clear of the button’s working path. The loop should slide on and off without needing to catch around decorative crochet each time the deck is opened.
Creator: Fial Barbantes
13. Crochet Heart Pouch With Two Closure Options
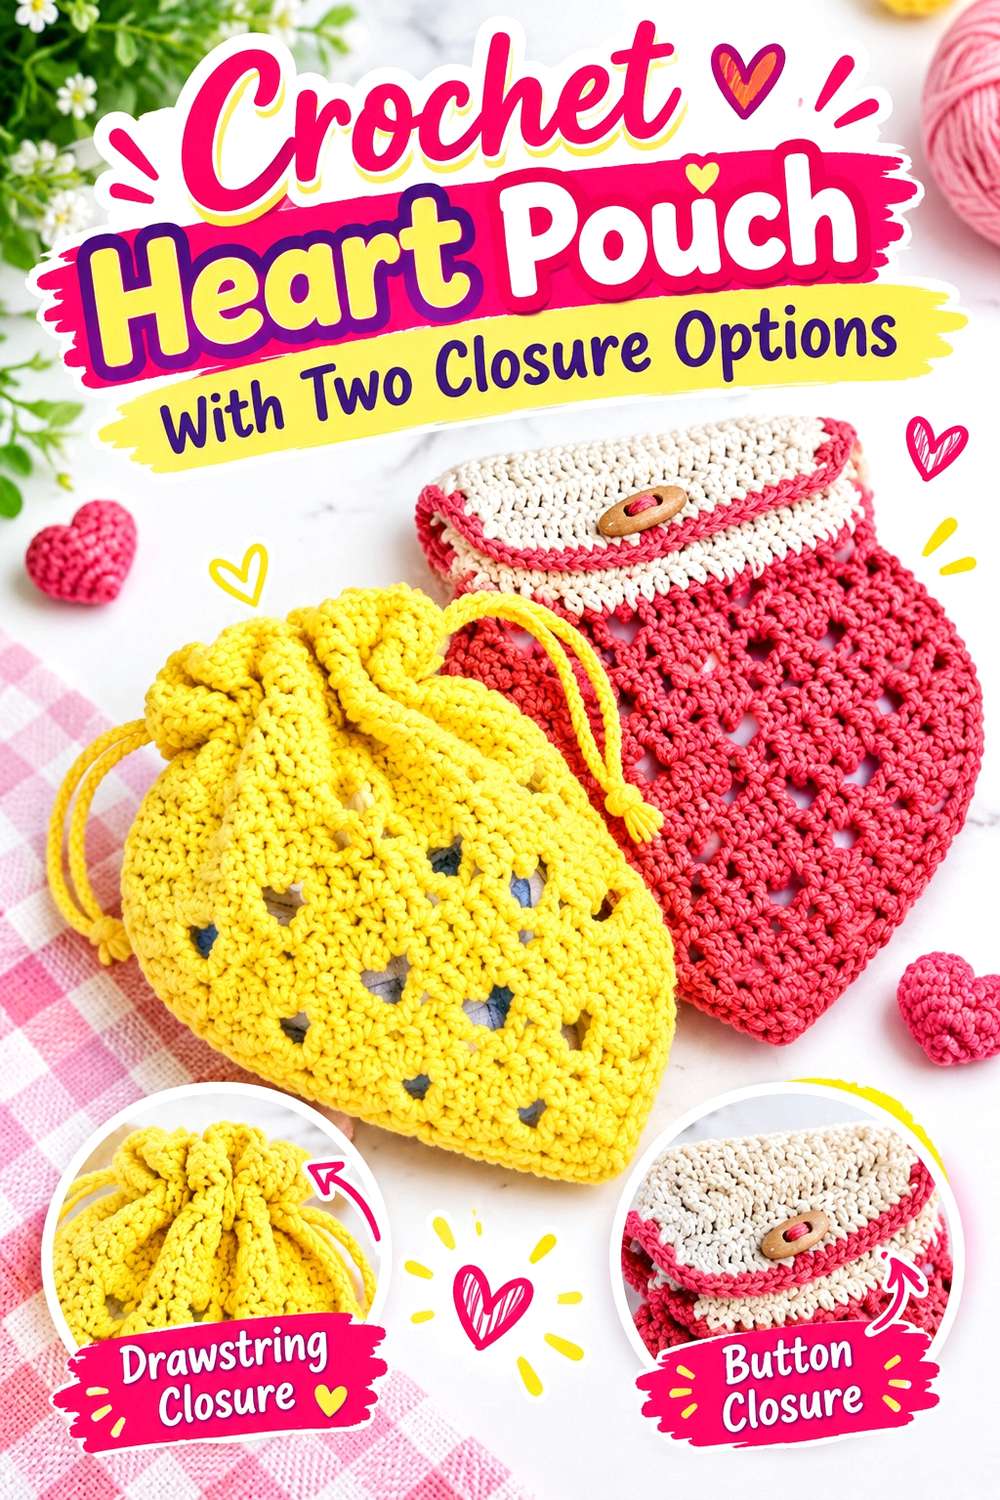
옐로우위브스 Yelloweaves teaches a heart-patterned pouch with adjustable sizing and demonstrates both drawstring and button versions. The tutorial is not tarot-specific, but having two closures applied to the same overall pouch concept makes it especially useful for comparing how you want an adapted deck holder to behave.
The heart pattern supplies repeated surface decoration across the body, so this version feels more graphic than a plain sleeve even before color changes are considered. For tarot storage, the useful decision is not merely which finish looks better. A button keeps the upper edge comparatively flat, while a drawstring deliberately gathers it.
Because the creator discusses adjustable sizing, this is a plausible adaptation base, but fit should still be established with the complete deck rather than assuming an adjustment intended for cosmetics or another object will automatically suit cards.
Choose the Closure Before Finalizing Height
A drawstring needs additional upper fabric for its channel and gathering, while a button closure depends on where the fastening points meet.
Decide between those two versions early enough that the body can accommodate the chosen finish. Trying to convert one into the other after completing the pouch may alter how much of the deck remains covered.
Use the Heart Texture as the Main Theme
A repeated heart surface is already visually busy compared with plain single-color fabric. If you want a mystical or celestial interpretation instead, color can shift the mood without requiring extra raised pieces.
For any attached charms, keep hard components away from the area directly over the deck. The patterned crochet itself can remain the principal decorative element.
Creator: 옐로우위브스 Yelloweaves
14. Crochet Zipper Pouch for Tarot Cards
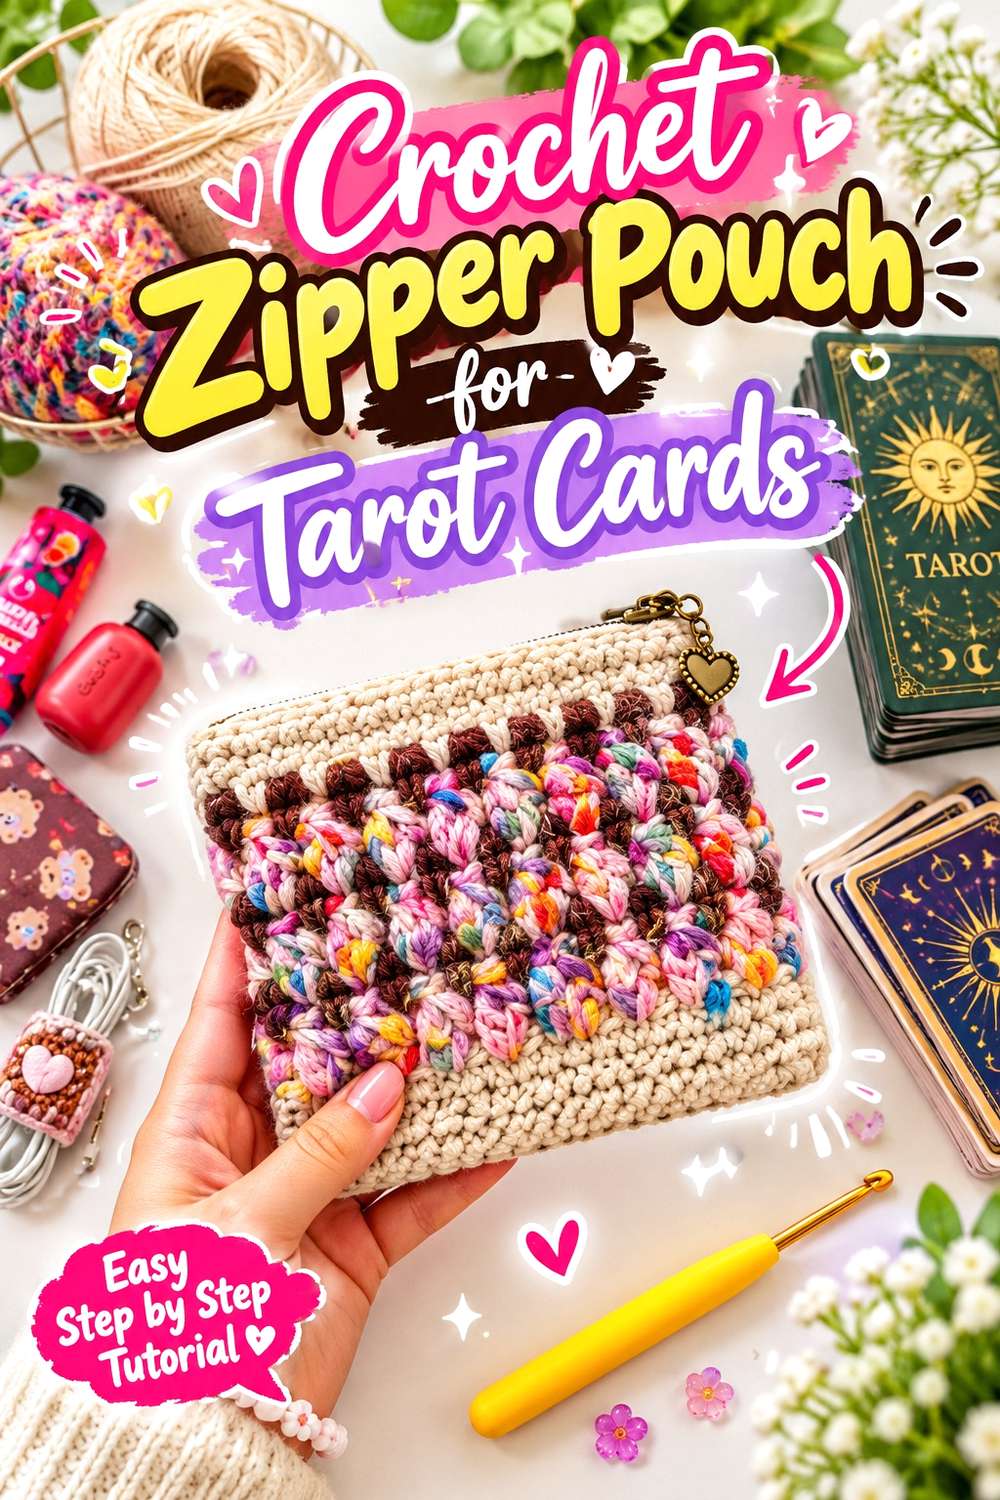
Châu Đan’s tutorial teaches a crochet zipper pouch with an approximately 11 × 9.5 cm finished sample. Its indexed sections cover the pouch base, a textured body pattern, top border, zipper sewing, and finishing, making it a complete pouch source to adapt rather than a zipper-only technique.
A zipper creates the most defined enclosed opening in this collection. For a tarot version, however, the clear opening matters as much as the overall pouch width. A deck may technically fit inside the body yet remain awkward to insert if zipper stops or side seams reduce the usable entrance.
This format makes sense when you want a case that resembles an everyday accessory rather than a traditional drawstring tarot bag. The zipper also becomes the main structural detail, so there is little need for an additional flap or tie competing at the top.
Measure the Usable Zipper Opening
Do not select a zipper solely because its nominal length resembles the deck width. The slider, stops, and finished side seams can reduce the clear opening available to card corners.
Before permanently finishing an adapted version, confirm that the complete stack enters and leaves without being angled sharply or dragged along the teeth. Comfortable access matters more than an exceptionally close fit.
Inspect the Zipper Area From the Inside
The upper interior combines crochet, sewing, and hardware, so this is the place most likely to contain small edges that can catch a card.
After assembly, run your fingers around the inside and operate the zipper several times while the pouch is empty. Correct loose thread, protruding yarn, or uneven tape before introducing the deck.
Creator: Châu Đan
Conclusion
Choose the holder by the way you want to access and store the deck. The Ashten Stitches sleeve keeps the outline simple, while Tarot with Ruby provides a tarot-specific drawstring option. The Andrea’s Loops flap and Fial Barbantes button-loop case suit flatter closures, and the Châu Đan zipper pouch offers a more enclosed accessory-style approach. For stronger visual texture, compare the Wild-Rose granny squares, the house of Jiwon motif pouch, Artsy Maki’s honeycomb surface, and the Yelloweaves heart design.
Whichever base you adapt, size it around the complete deck and check the interior before regular use. Follow the original tutorials for their exact construction details rather than treating these planning notes as replacement patterns.
Frequently Asked Questions
How should I measure a tarot deck for a crochet holder?
Measure the complete stack in three directions: face width, card height, and total deck thickness. Those measurements describe a rectangular block rather than a flat card. Your pouch needs enough usable interior room for all three dimensions plus whatever space its closure requires.
Instead of adding a universal amount of ease, compare the developing crochet directly with the deck. Stitch structure, yarn, tension, seams, and lining can all change the final internal space.
Can I really adapt a regular card holder for tarot cards?
Yes, when the underlying construction is still appropriate after resizing. Flat card wallets, button pouches, eyeglass cases, and zipper pouches can all provide useful bases, but their original dimensions should not be assumed to fit a tarot deck.
The biggest change is often thickness. A wallet designed for a handful of cards may need much more depth for a complete tarot stack. Keep the source construction clear and treat all tarot-specific resizing as your adaptation.
Which closure is best for a thick tarot deck?
Different closures solve different problems. Drawstrings tolerate some variation in the upper opening but create gathered bulk. Flaps keep the profile flatter, although they need enough length to travel over the deck’s thickness. Buttons create a fixed fastening point, while zippers provide a clearly enclosed opening but require enough clearance for the card corners.
Rather than choosing by appearance alone, place the full deck inside and check how the closure behaves under real thickness.
Should a crochet tarot pouch have a lining?
A lining is optional rather than universally necessary. It may be useful with open granny-square fabric, pronounced interior joins, or when you simply prefer a continuous fabric surface between the cards and crochet. Dense, smoothly finished crochet may already meet your needs without one.
Adding lining changes the project, however. It reduces some interior space, requires separate fitting and sewing, and should follow the actual finished dimensions of the crocheted shell.
Can I substitute a different yarn in these pouch tutorials?
You can choose another yarn for an adaptation, but do not assume the finished dimensions will stay the same. Yarn thickness, construction, fiber behavior, hook choice, stitch pattern, and your own tension all affect the resulting fabric.
When deck fit matters, compare the work with the real cards as you go. That is more dependable than expecting a particular yarn label or larger hook to produce a predictable amount of extra room.
How can I keep card corners from snagging inside the holder?
Inspect the empty pouch before inserting the deck. Pay particular attention to side seams, lower corners, motif joins, woven-in tails, button attachments, and the inside of a zipper opening. Anything raised or loose there can become a contact point.
If the crochet has deliberately open spaces, consider whether a lining suits your project. Whatever construction you choose, the goal is a clear path from the opening to the bottom so the full stack can slide in and out without catching.