A crochet fawn hooded capelet can range from a close-fitting shoulder layer with tiny deer ears to a roomy hooded poncho that feels more like woodland outerwear. The biggest differences are not just decorative. Cape depth, hood weight, neckline shape, closure, yarn drape, and the placement of ears or spots all affect how the finished piece sits and moves.
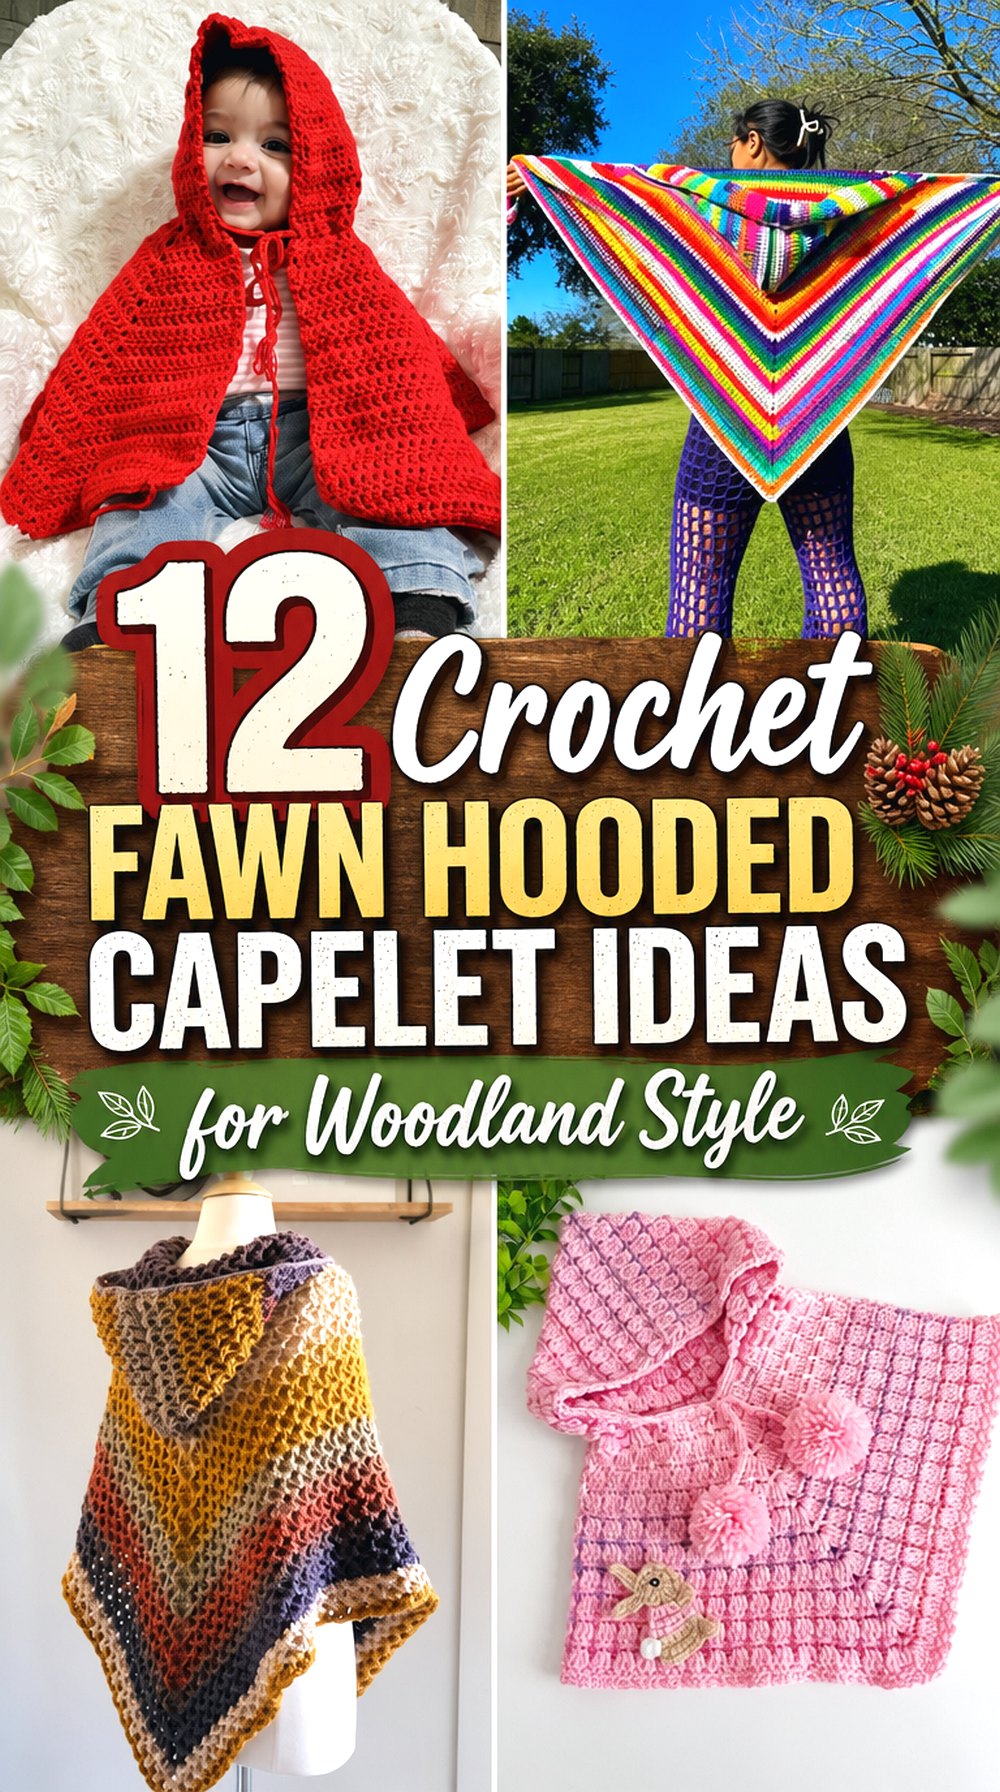
Exact fawn-specific capelet videos are limited, so the projects below use verified hooded capelet, cape, wrap, and poncho tutorials as construction references. The fawn coloring, ears, spots, and optional antlers are adaptation ideas unless the original tutorial specifically includes animal features. That distinction lets you choose a solid garment shape first, then add only the deer details that suit the wearer and intended use.
Quick List
- Crochet Woodland Fawn Moss-Stitch Hooded Capelet
- Crochet Velvet Fawn Occasion Hooded Capelet
- Crochet Soft-Drape Fawn Hooded Wrap Capelet
- Crochet Everyday Fawn Hooded Poncho Capelet
- Crochet Cuffed Fawn Hooded Poncho
- Crochet Scallop-Edge Fawn Hooded Poncho
- Crochet Pointed Woodland Fawn Hooded Capelet
- Crochet Toddler Fawn Storybook Hooded Cape
- Crochet Seamless Round-Yoke Fawn Hooded Capelet
- Crochet Baby Fawn Panel Hooded Poncho
- Crochet Textured V-Point Fawn Hooded Poncho
- Crochet Relaxed Adult Fawn Hooded Capelet
Plan the Fawn Details Around the Hood
The hood carries most of the animal character, so decide on ears, facial accents, and optional antlers before treating them as last-minute decorations. Small rounded ears need enough structure to stay visible, but heavy embellishments can pull a soft hood backward. If you want antlers, compare their weight with the hood fabric before permanently attaching them.
Placement matters too. Pin or temporarily position both ears while the hood is being worn rather than judging them only on a flat table. A slightly wider hood may need ears placed farther apart than a close-fitting one. For a subtle everyday version, ears plus a cream inner-ear accent may be enough. A costume-focused capelet can carry stronger facial details, spots, or antlers without every version needing all of them.
Choose Capelet Coverage by How It Will Be Worn
A shoulder-length capelet behaves differently from a full poncho. Shorter versions are easier to layer over a fitted top or dress because the arms remain relatively free, while deeper ponchos provide more torso coverage and can feel more substantial. Triangle wraps create another effect: they may appear short at the sides while dropping much farther at the front or back.
Before adding fawn details, try the undecorated garment over the kind of clothing it will actually cover. Check whether the neckline stays in place when the wearer reaches forward, whether the hood pulls the body upward, and whether the hem interferes with the hands. For children, also consider how easily the cape can be removed and whether decorative cords or small detachable pieces are appropriate.
Yarn, Drape, and Spot Placement Change the Final Look
The same fawn color palette can look completely different in dense, textured fabric and in a softer shawl-style fabric. A structured hood helps ears remain distinct, while a drapier body can keep a larger capelet from feeling rigid. If you change the yarn used by a tutorial, make a swatch and compare the resulting fabric before assuming the original dimensions or fit will carry over.
White or cream fawn spots are easiest to control when they are planned as accents rather than scattered everywhere. Concentrating them across the upper back, outer shoulders, or lower cape can create the deer reference without crowding the hood. If spots are added as appliqués, remember that numerous small pieces also add seams, ends, and a little extra weight.
Crochet Woodland Fawn Moss Stitch Hooded Capelet
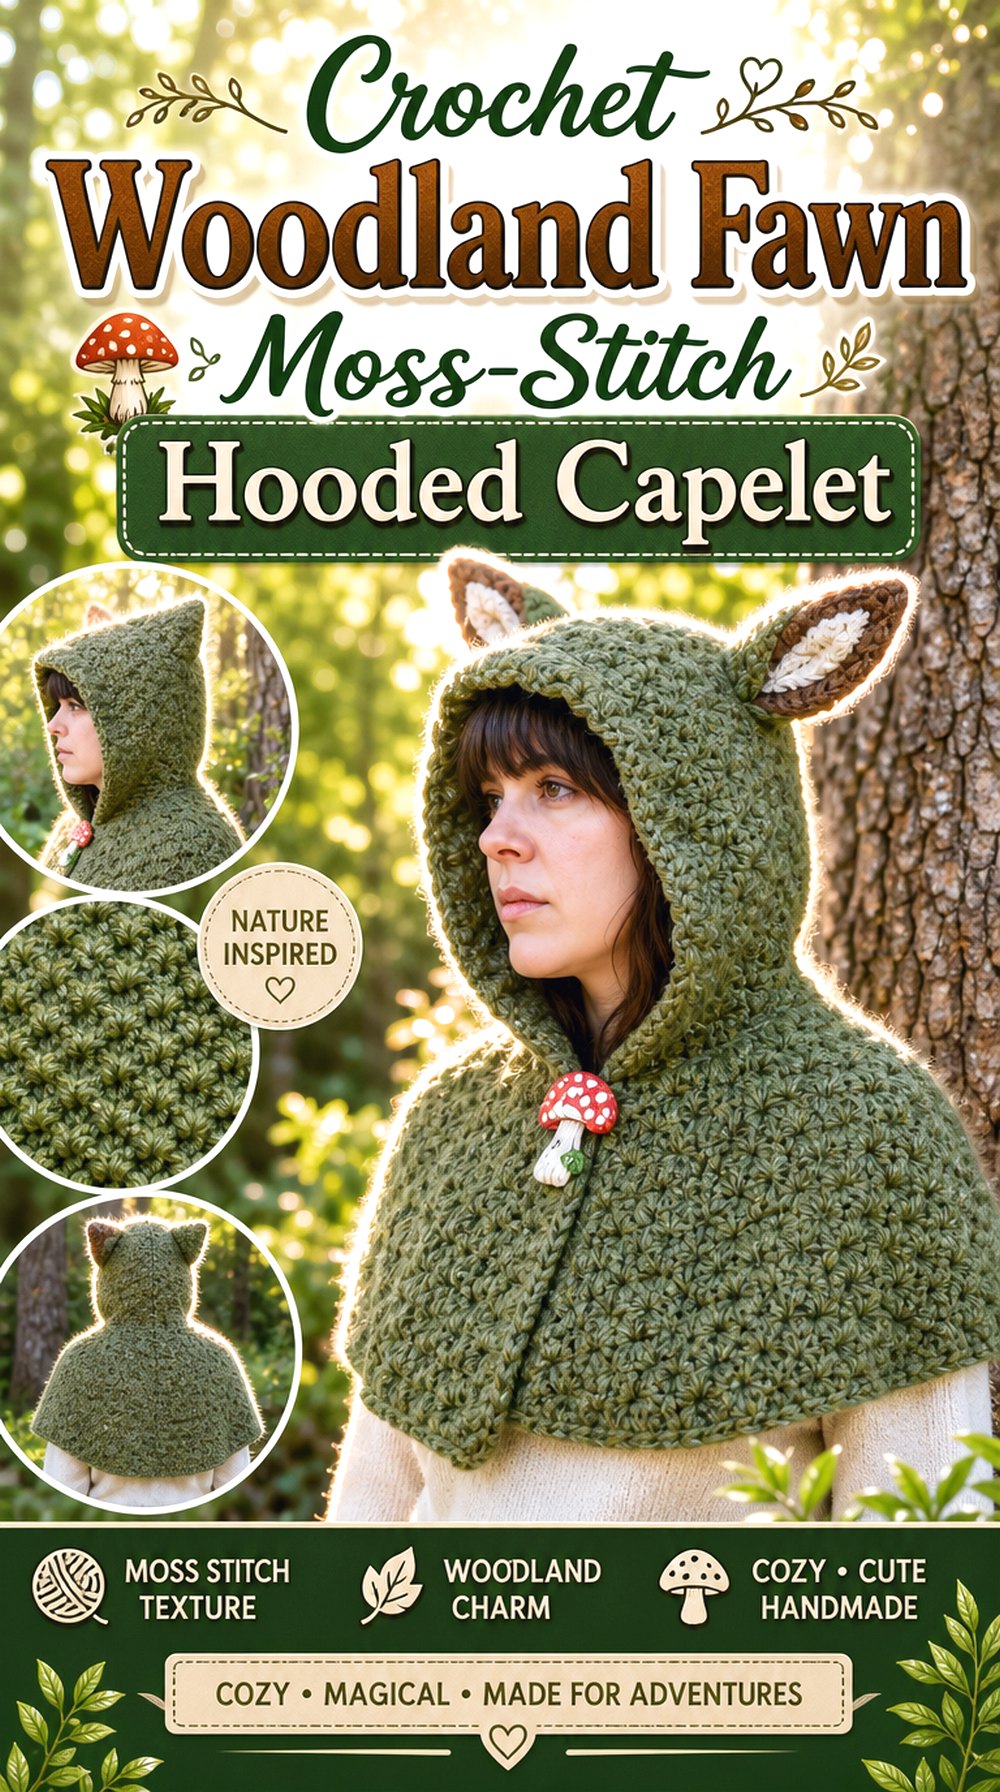
A short moss-textured capelet is a natural match for a woodland fawn theme because the surface already has a quiet, rustic character. This version would keep the body compact around the shoulders, use a warm brown or taupe base, and let rounded deer ears provide the strongest animal cue. Small cream spots can be limited to the back rather than covering the entire piece.
Lizfaerie Crafts’ tutorial shows an actual hooded capelet made with extended moss stitch, making it one of the closest structural matches in this collection. Its true capelet proportions are especially useful if you want the fawn idea without the extra length of a poncho.
Keep the Fawn Ears Light on a Textured Hood
Moss-style texture gives the hood visual substance, so oversized ears are unnecessary. Start by comparing ear width with the hood while it is worn and pin both ears temporarily before sewing them down. If they flop forward, the problem may be weight rather than placement. A smaller ear made from a slightly firmer fabric can be more effective than adding internal bulk that makes the whole hood heavier.
Short Shoulder Coverage Works With Simple Layers
Because a genuine capelet ends closer to the shoulder area, it can sit neatly over a dress, fitted sweater, or long-sleeved top without becoming a second full outer garment. Check the wearer’s arm movement before adding a deep decorative border. An edging that looks balanced while standing still may become distracting if it falls directly where the upper arms repeatedly brush against it.
Scatter Spots Where the Capelet Can Still Drape
For a small capelet, a few well-spaced spots usually read more clearly than dozens of tiny appliqués. Test their placement while the cape hangs naturally so motifs do not bunch along a curved section of the shoulder. If appliqués noticeably stiffen the fabric, move some of the visual interest to the hood or use color changes that do not add another layer of crochet.
Crochet Velvet Fawn Occasion Hooded Capelet
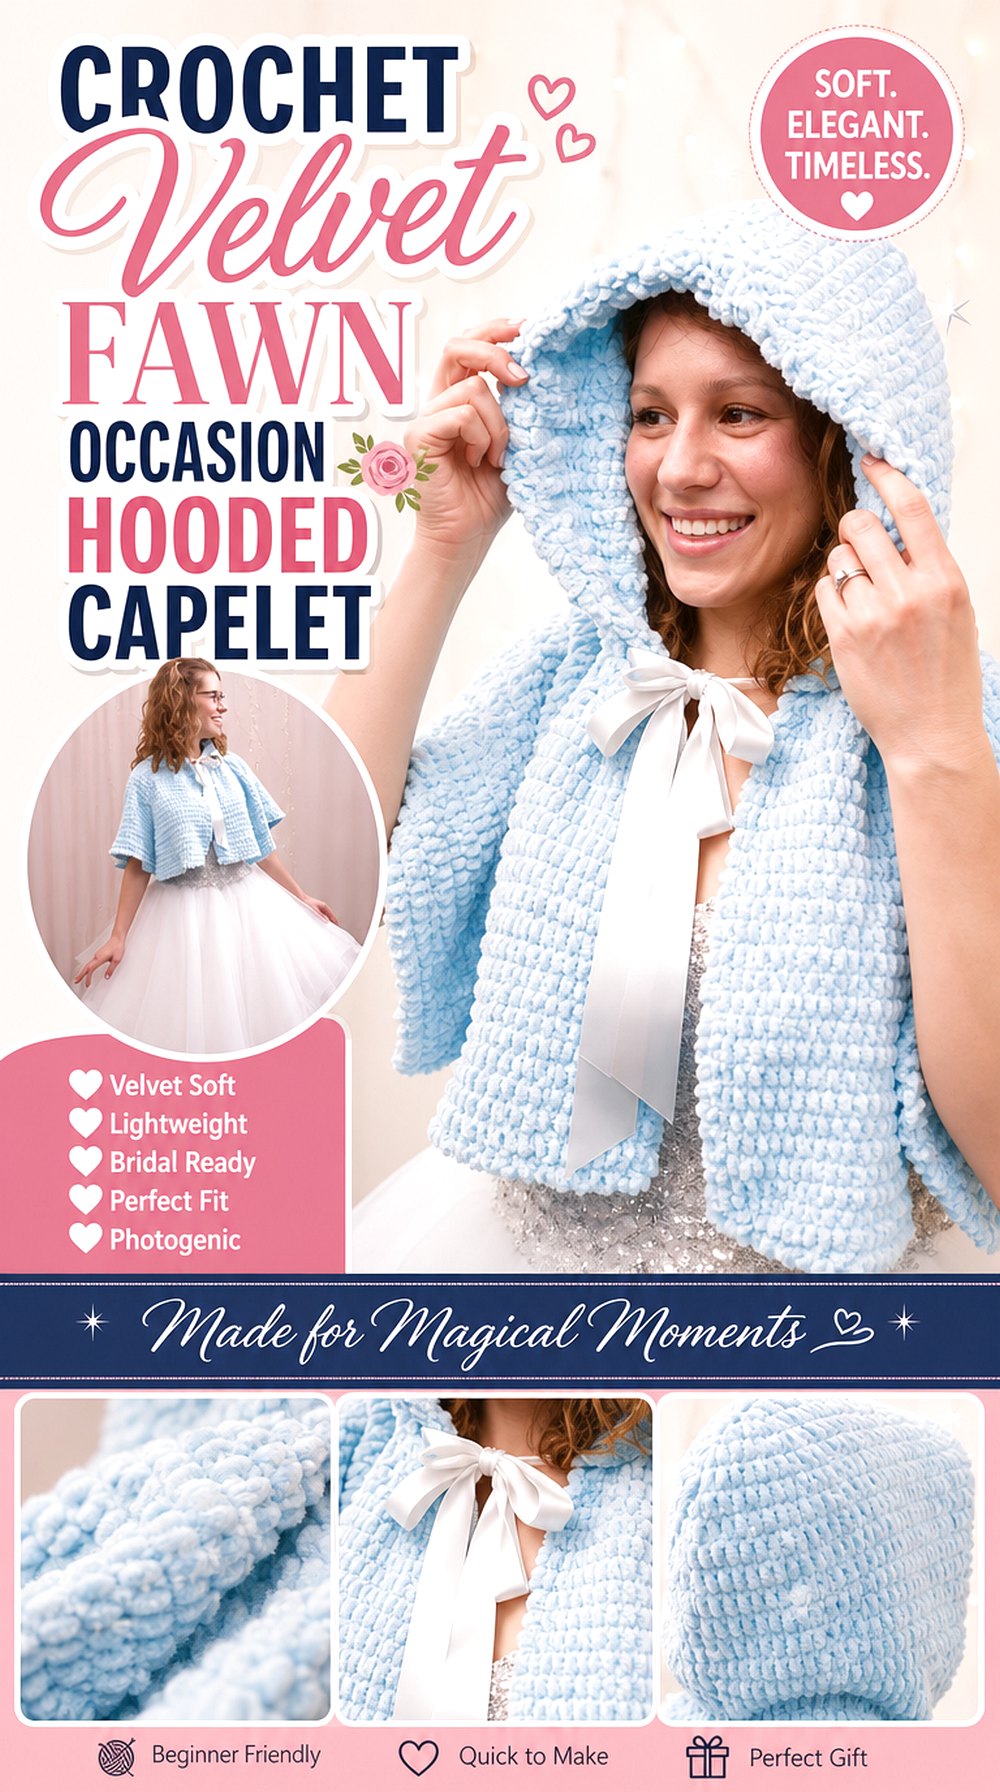
This version takes the fawn theme in a softer, more dressed-up direction. Instead of a rustic forest cape, picture a short caramel, mushroom, or pale brown capelet with a plush surface, cream inner ears, and very restrained markings. It could work over a special-occasion dress or as a refined costume layer where you want the deer reference to remain recognizable but not cartoonish.
The Stitch Sessions tutorial features a short hooded bridal capelet worked in soft velvet yarn and finished with a front ribbon tie. That combination makes it a useful construction reference for a fawn capelet where texture and drape matter more than heavy surface decoration.
Velvet Changes How Small Fawn Details Read
A plush yarn can soften stitch definition, so tiny embroidered or crocheted details may disappear into the surface. Use the fawn theme more selectively: clearly shaped ears, a contrasting inner ear, and perhaps a small group of visible spots will usually communicate more than intricate facial stitching. If you plan embellishments, make a small sample first to see whether their edges remain distinct against the velvet texture.
A Front Tie Needs to Sit Comfortably at the Neck
A ribbon or tie gives a short capelet a graceful closure, but it should not be responsible for pulling an oversized garment into place. Before decorating the hood, confirm that the capelet already sits comfortably on the shoulders and that the closure lies where intended. For a child version, avoid long loose ties and consider whether a different secure closure would be more appropriate for the wearer.
Save Antlers for Costume-First Versions
The plush body already has strong visual presence, so this design can read as a fawn with ears alone. If you add antlers, keep them proportionate to the hood and check whether they cause the back of the hood to sag. A detachable antler concept can also make sense when the capelet needs to move between costume use and a quieter special-occasion look.
Original Tutorial and Creator Credit
Creator: The Stitch Sessions – Crochet & Conversation
Crochet Soft Drape Fawn Hooded Wrap Capelet
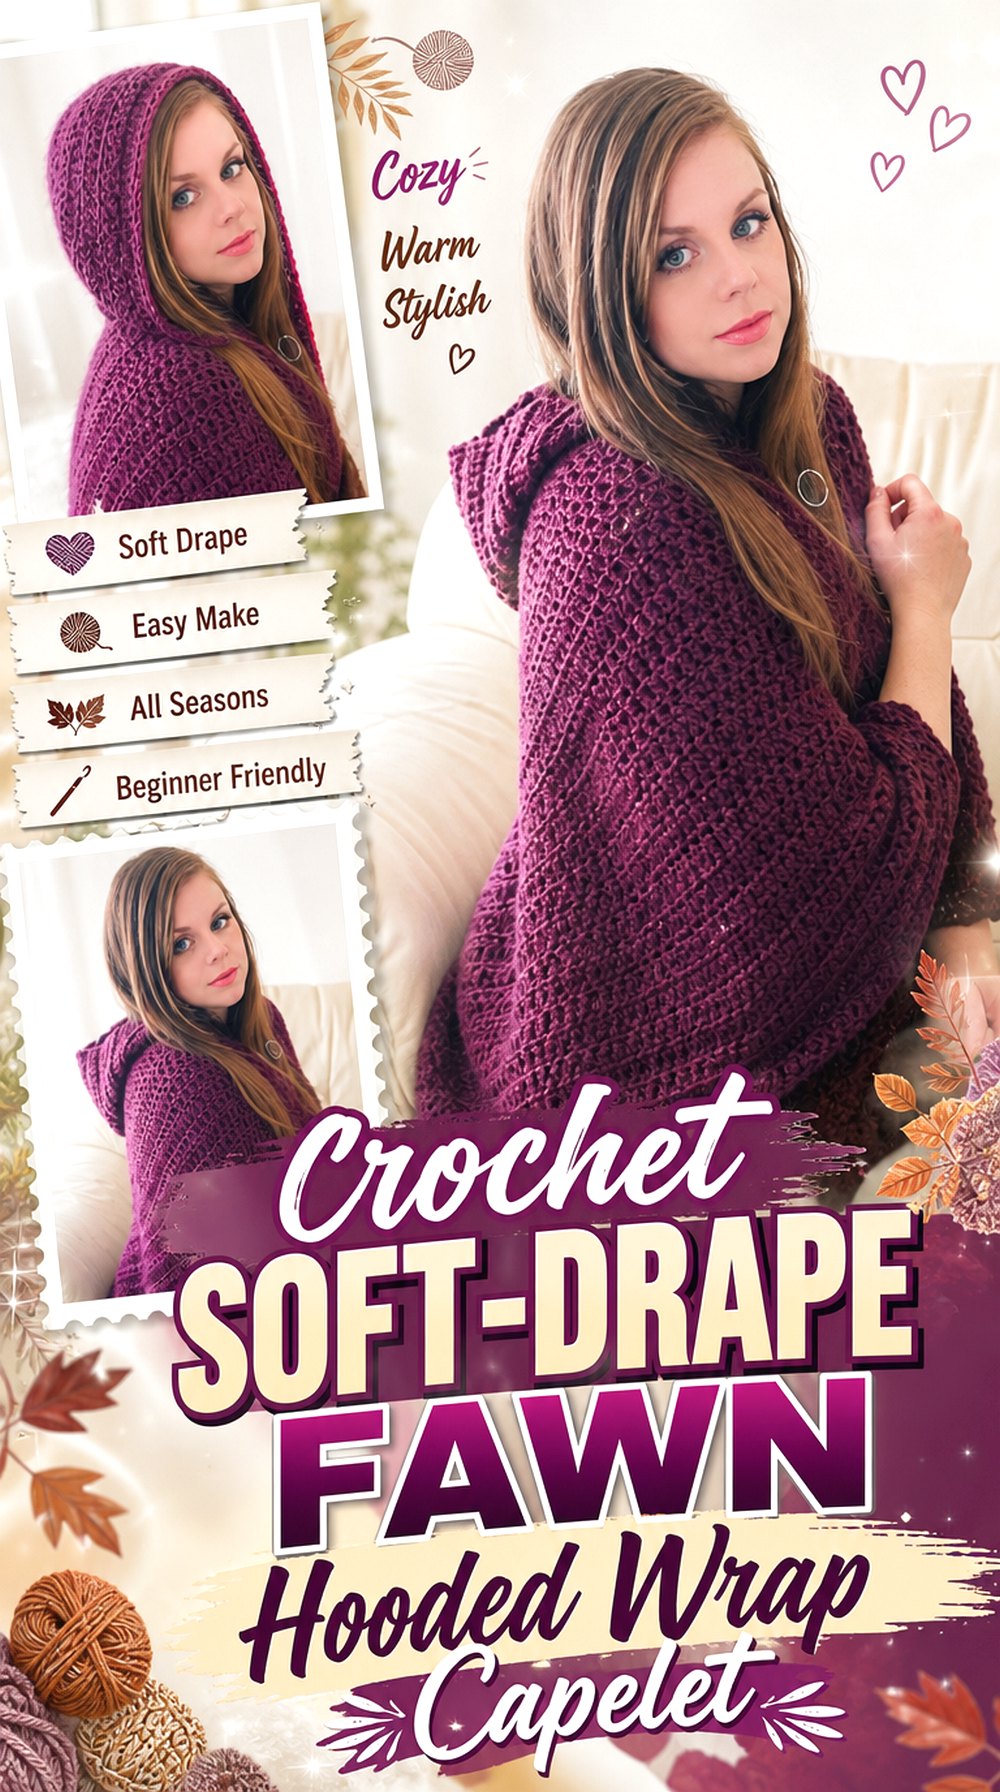
A hooded wrap creates a more fluid fawn silhouette than a circular capelet. The body can fall into a soft V, giving plenty of room for a darker brown center, pale edging, or a controlled scattering of spots toward the outer sections. This is a good direction when the wearer wants woodland styling without a stiff costume shape.
Selina Veronique Crochet’s tutorial shows a hooded shawl/cape construction with a draped wrap shape and an optional button. The body has a very different geometry from the compact moss-stitch capelet, which makes it valuable when choosing between structured shoulder coverage and a softer shawl-like interpretation.
The V-Shaped Drape Creates a Softer Fawn Silhouette
A V-shaped shawl naturally directs attention downward, so deer accents do not need to cover the entire garment. Consider keeping the hood and shoulders mostly solid and placing lighter markings farther down the wings of the wrap. This preserves the flow of the shape. Before committing to motif placement, drape the finished or nearly finished body over the wearer because flat-table spacing can change dramatically once the shawl hangs.
Put the Spots Away From the Hood Seam
The hood-to-body area already has visual and structural activity. Crowding that area with appliqués can make the neckline appear bulky and can obscure the garment’s construction. A cleaner approach is to leave a quieter zone around the hood attachment and introduce spots gradually toward the shoulders or lower edges. This also gives the ears a clearer background when the hood is up.
A Button Can Control How Much the Wrap Shifts
A wrap that hangs beautifully while standing may move more when walking or reaching. If the chosen construction permits a button or similar closure, decide its placement after checking the garment on the wearer. The goal is not to pull the shawl tightly closed but to reduce unwanted shifting. Any added closure should suit the yarn thickness and should not distort the front edge.
Original Tutorial and Creator Credit
Creator: Selina Veronique Crochet
Crochet Everyday Fawn Hooded Poncho Capelet
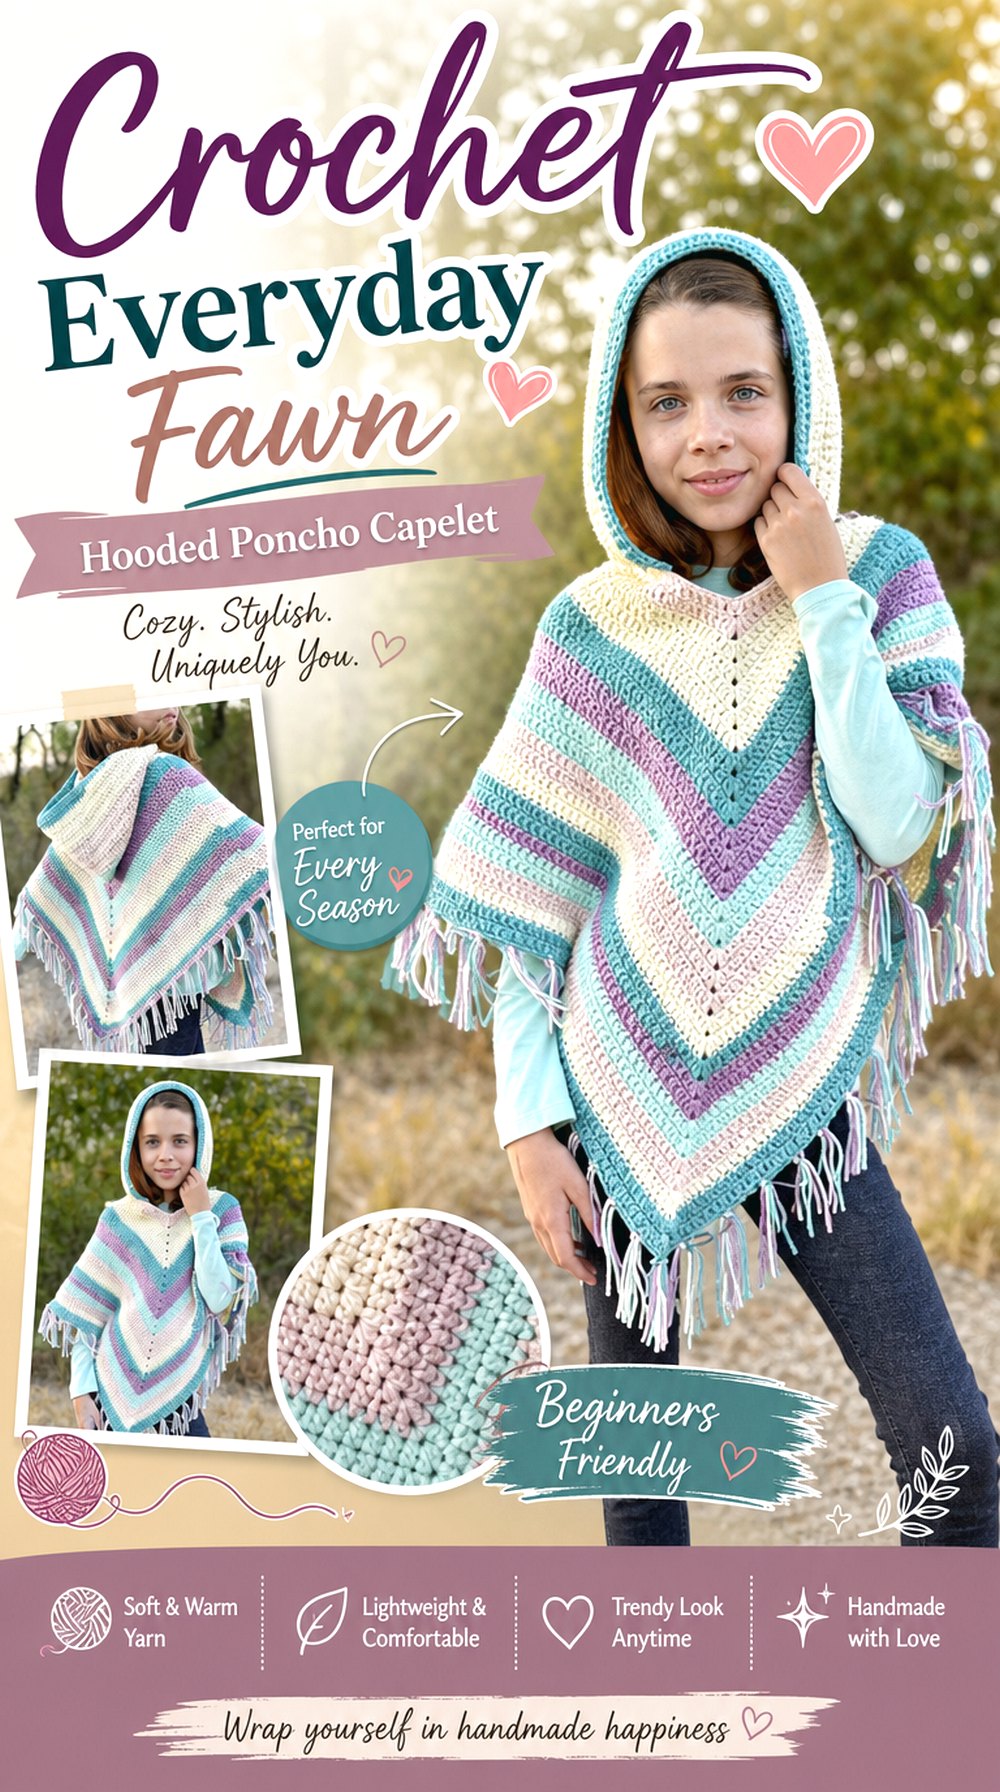
For a straightforward fawn garment with enough surface area for customization, a simple hooded poncho is a practical base. Keep the main body in one warm deer shade, make the hood slightly more character-focused with ears, and decide whether spots belong only across the back or continue around the front. The resulting piece can lean costume-like or remain fairly understated.
Hooked on Homemade Happiness demonstrates a hooded poncho built with double crochet, with kid and adult versions referenced by the creator. The tutorial also includes fringe, giving you a clear choice between retaining that movement or simplifying the hem so the fawn details become the main feature.
Use the Simple Fabric as a Blank Canvas for Markings
A regular, uncomplicated fabric makes contrasting details easier to read. Before adding spots, place paper or scrap-yarn markers where you think they should go and view the cape from several feet away. If the pattern looks crowded, remove rather than add. Larger, fewer spots can create a stronger fawn impression than many tiny pieces while also reducing finishing work and added thickness.
Fringe and Deer Details Compete for Attention
Fringe creates continuous movement around a hem, while spots, ears, and antlers are more specific focal points. Using every feature at once may make the design visually busy. Decide which effect matters more. A woodland-festival version can support fringe, but a recognizable fawn costume may look clearer with a cleaner edge and stronger hood details.
Confirm Head Opening and Shoulder Ease First
Decorative ears can make people focus on the hood before the basic fit is resolved. Complete the core garment and check how comfortably the neckline passes over the head, where the poncho settles on the shoulders, and whether the hood pulls when raised. Make those adjustments before attaching embellishments, because changing the neckline later can shift the ear position and front balance.
Original Tutorial and Creator Credit
Creator: Hooked on Homemade Happiness
Crochet Cuffed Fawn Hooded Poncho
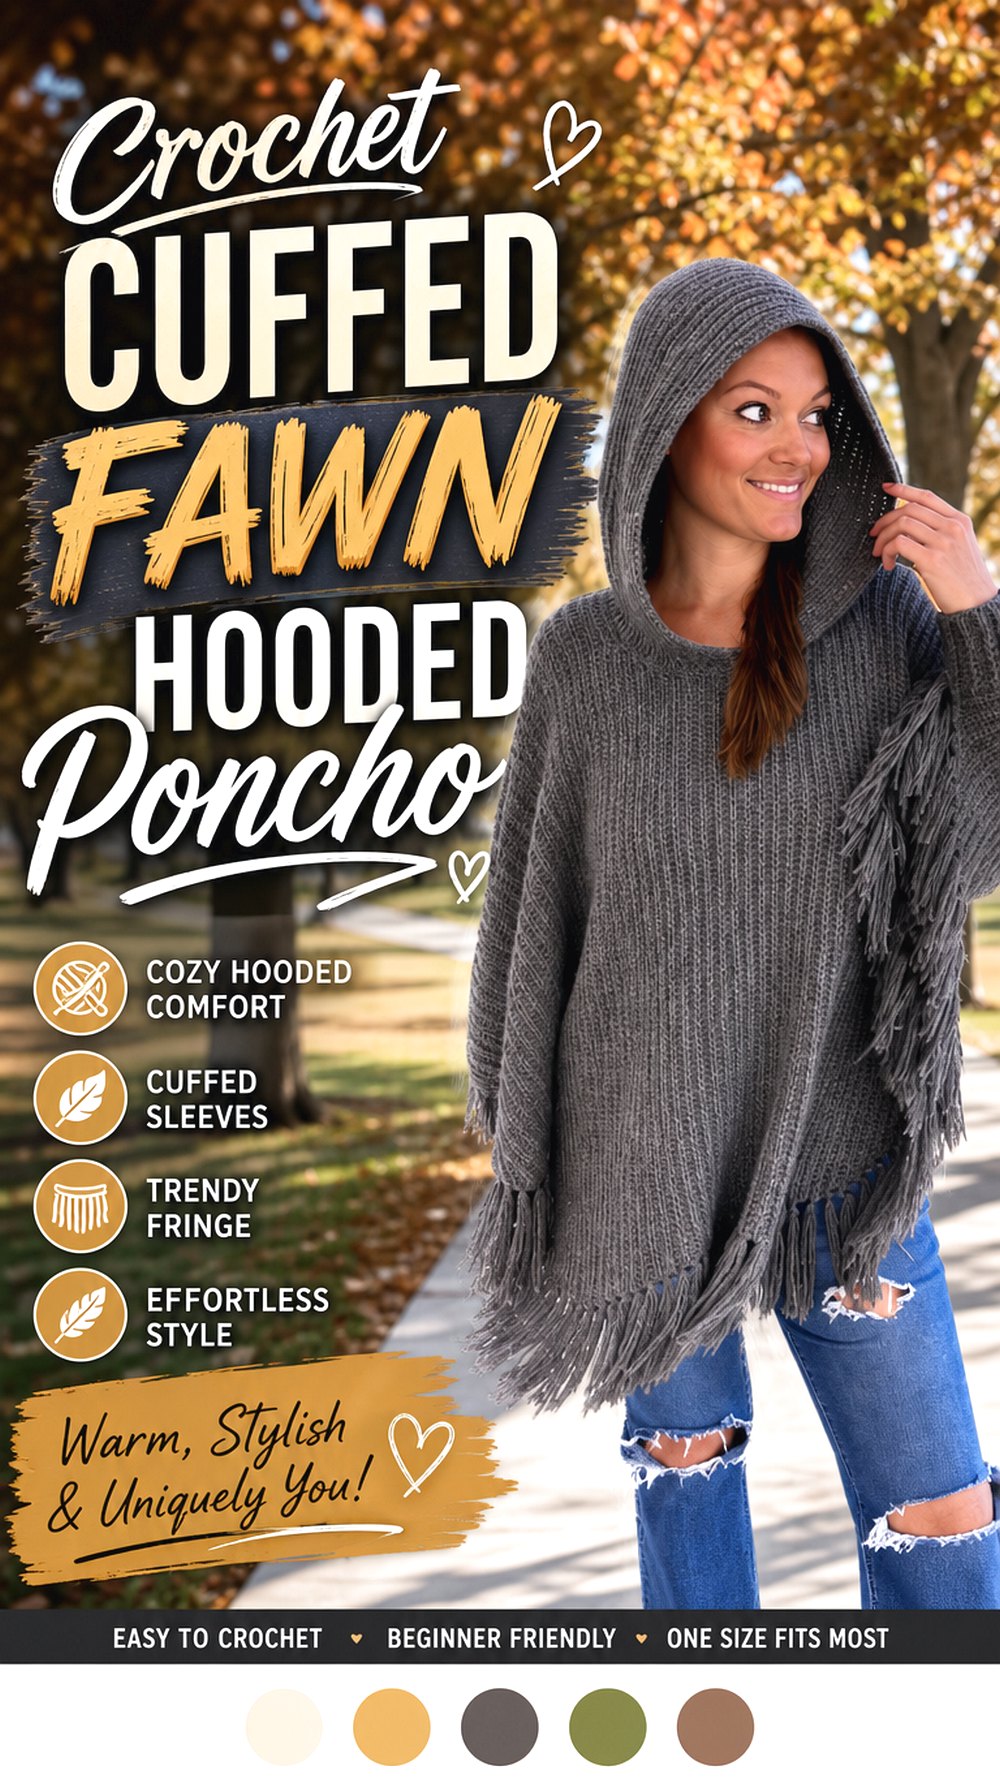
A cuffed hooded poncho feels more anchored than a loose cape because the arm area has additional definition. For a fawn version, that creates an interesting division of labor: the body supplies warmth and coverage, while the hood can carry rounded ears and a subtle cream accent. Rather than spreading animal details across every surface, the cuffs can remain plain so the garment still feels wearable.
Heart Hook Home’s Lori Poncho includes a hood, cuffs, and fringe and is presented for both younger and adult wearers through the creator’s supporting patterns. Those functional details distinguish it from the freer-moving capelets and shawls elsewhere in this collection.
Cuffs Turn the Capelet Idea Into a More Anchored Layer
Cuffs reduce some of the unrestricted movement associated with a classic cape, which may be preferable when the garment is intended for regular cool-weather use rather than photographs or costume wear. Check where the wearer naturally wants their hands and arms to emerge before treating the cuffs as decorative features. A cuff that sits well can help the larger poncho body feel controlled instead of oversized.
Let the Hood Carry the Animal Character
With cuffs and fringe already providing visual structure, the fawn theme can stay concentrated around the face. Rounded ears, pale inner-ear sections, and perhaps a small contrasting hood edge may be enough. This makes the body easier to style with everyday clothes and avoids turning every part of the garment into a competing motif.
Watch the Weight Where Fringe, Cuffs, and Spots Meet
A poncho with several finishing features can become heavier than a plain capelet. Additional appliqués increase that load further. Before covering the back with spots, lift the finished body and notice how the fabric stretches under its own weight. If it already hangs deeply, consider embroidered color accents, fewer appliqués, or a simpler hem rather than adding another dense layer.
Original Tutorial and Creator Credit
Creator: Heart Hook Home
Crochet Scallop Edge Fawn Hooded Poncho
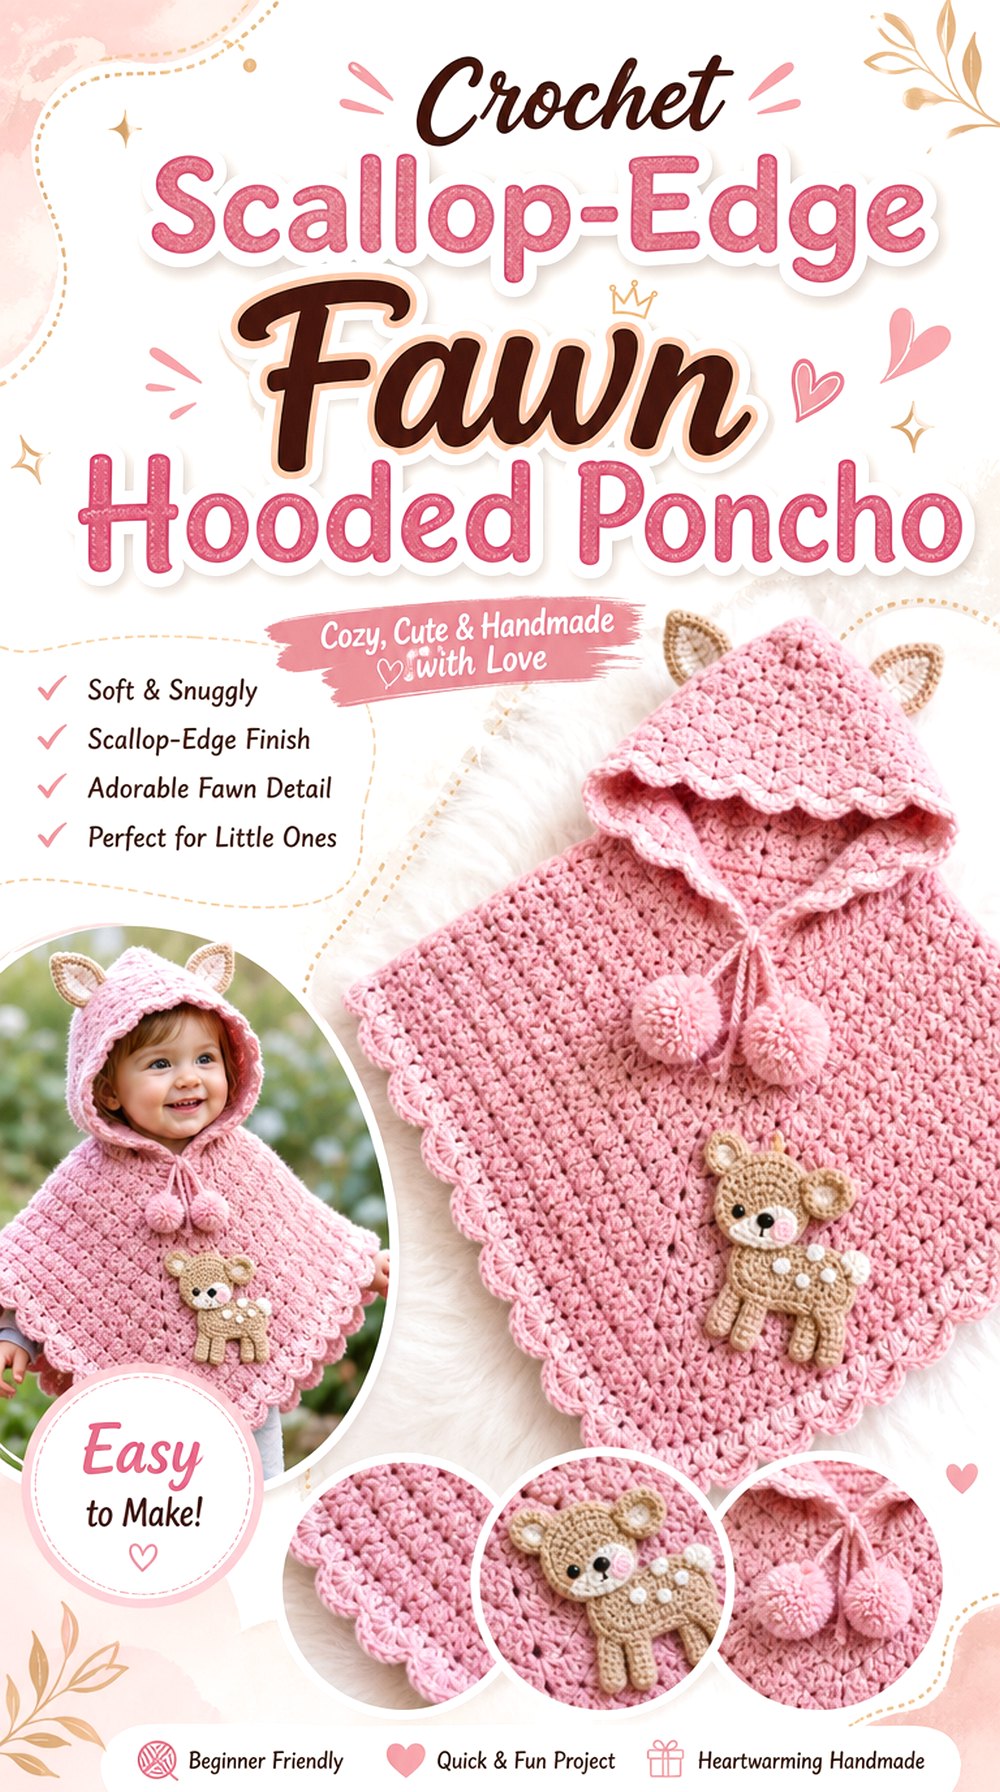
This fawn idea uses the hem as part of the design instead of treating it as a plain finish. A shell-like or softly scalloped border can echo the pale underside of a deer if it is worked in cream against a warm brown body. The hood can stay simple with rounded ears, while the decorative edge provides interest lower on the garment.
BabyCrochetDesigns’ Rainbow Drops Hooded Poncho tutorial demonstrates several neckline and finishing options, including a hood and shell or fringe border. The video uses written instructions on screen rather than spoken narration, which is worth knowing when choosing the learning format that suits you.
The Decorative Hem Can Echo a Fawn’s Light Underside
Instead of adding dozens of spots, use contrast strategically at the border. A pale hem against a deer-brown body can suggest the animal palette while keeping the upper cape visually quiet. Lay the garment flat and then hang it before choosing border depth; a decorative section that seems narrow on the table can become more prominent when the poncho drops vertically.
Choose One Neck Finish Before Planning the Face
This source offers more than one neckline treatment, so decide whether the hood is truly central to your fawn version before developing ears or facial accents. A hood changes where the visual weight sits and can alter how the neckline stretches. Finish and test the hood first, then determine ear scale. Designing the animal pieces before the neckline is settled risks remaking them later.
Skip Hanging Ties for Very Young Wearers
The creator specifically notes that ties are not recommended for babies and young children. For a young child’s fawn poncho, keep the neck area free of unnecessary hanging cords and assess any embellishment for secure attachment and suitability to the wearer. Decorative features should never make the garment harder to remove or create avoidable snagging points.
Original Tutorial and Creator Credit
Creator: BabyCrochetDesigns
Crochet Pointed Woodland Fawn Hooded Capelet
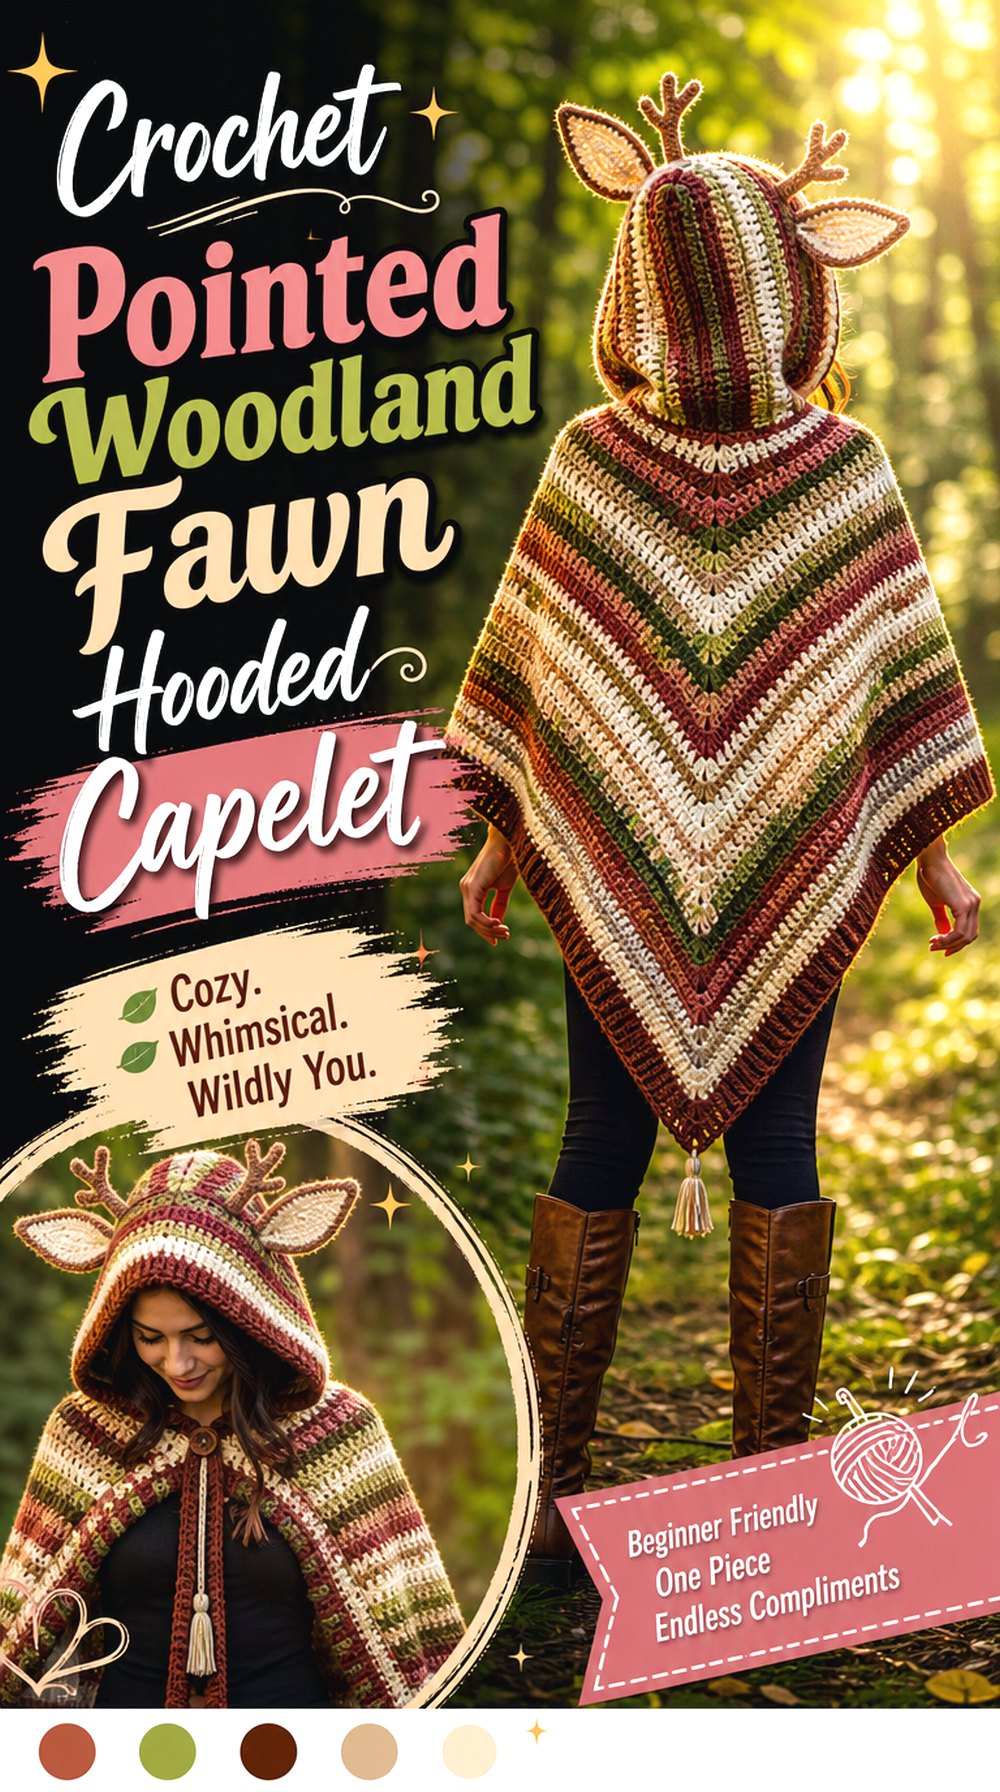
A triangle-based hooded wrap creates one of the strongest fantasy silhouettes in the group. The deep point can resemble a woodland cloak while still remaining closer to a shawl or poncho than a full-length cape. For a fawn adaptation, keep the upper section earthy and quiet, add ears to the hood, and use spots sparingly along the broad back panels.
AstroKnotty’s tutorial builds a made-to-measure hooded wrap shawl with a triangular body and optional-looking fringe and tassel styling. That pointed geometry makes it especially useful for a Ren-faire or forest-inspired fawn interpretation rather than a rounded everyday capelet.
A Pointed Back Gives This the Strongest Fantasy Profile
The long triangular line already communicates storybook styling, so additional costume details should be edited carefully. Small ears may provide enough fawn identity. If antlers are added too, keep the body decoration restrained so the silhouette remains readable. View the garment from behind as well as from the front, because the point and spot layout will be most noticeable from the back.
Measure the Hood After the Shawl Has Settled
A large shawl can change how it hangs after the fabric relaxes or is blocked. That matters because the hood attaches to a body that may pull differently once its full weight is present. Before fixing the ears permanently, let the completed wrap hang, try the hood up and down, and check whether it remains centered. Correcting hood balance first is easier than moving finished embellishments later.
Keep Tassels Separate From the Fawn Motif
Tassels reinforce the fantasy-wrap look, but they do not need to become part of the deer face or ear area. Keeping moving trim low on the garment helps the hood remain visually clean. If tassels feel too busy alongside fawn spots, choose one. A plain edge can make subtle deer markings more noticeable, while tassels may suit a version with no spots at all.
Original Tutorial and Creator Credit
Creator: AstroKnotty
Crochet Toddler Fawn Storybook Hooded Cape
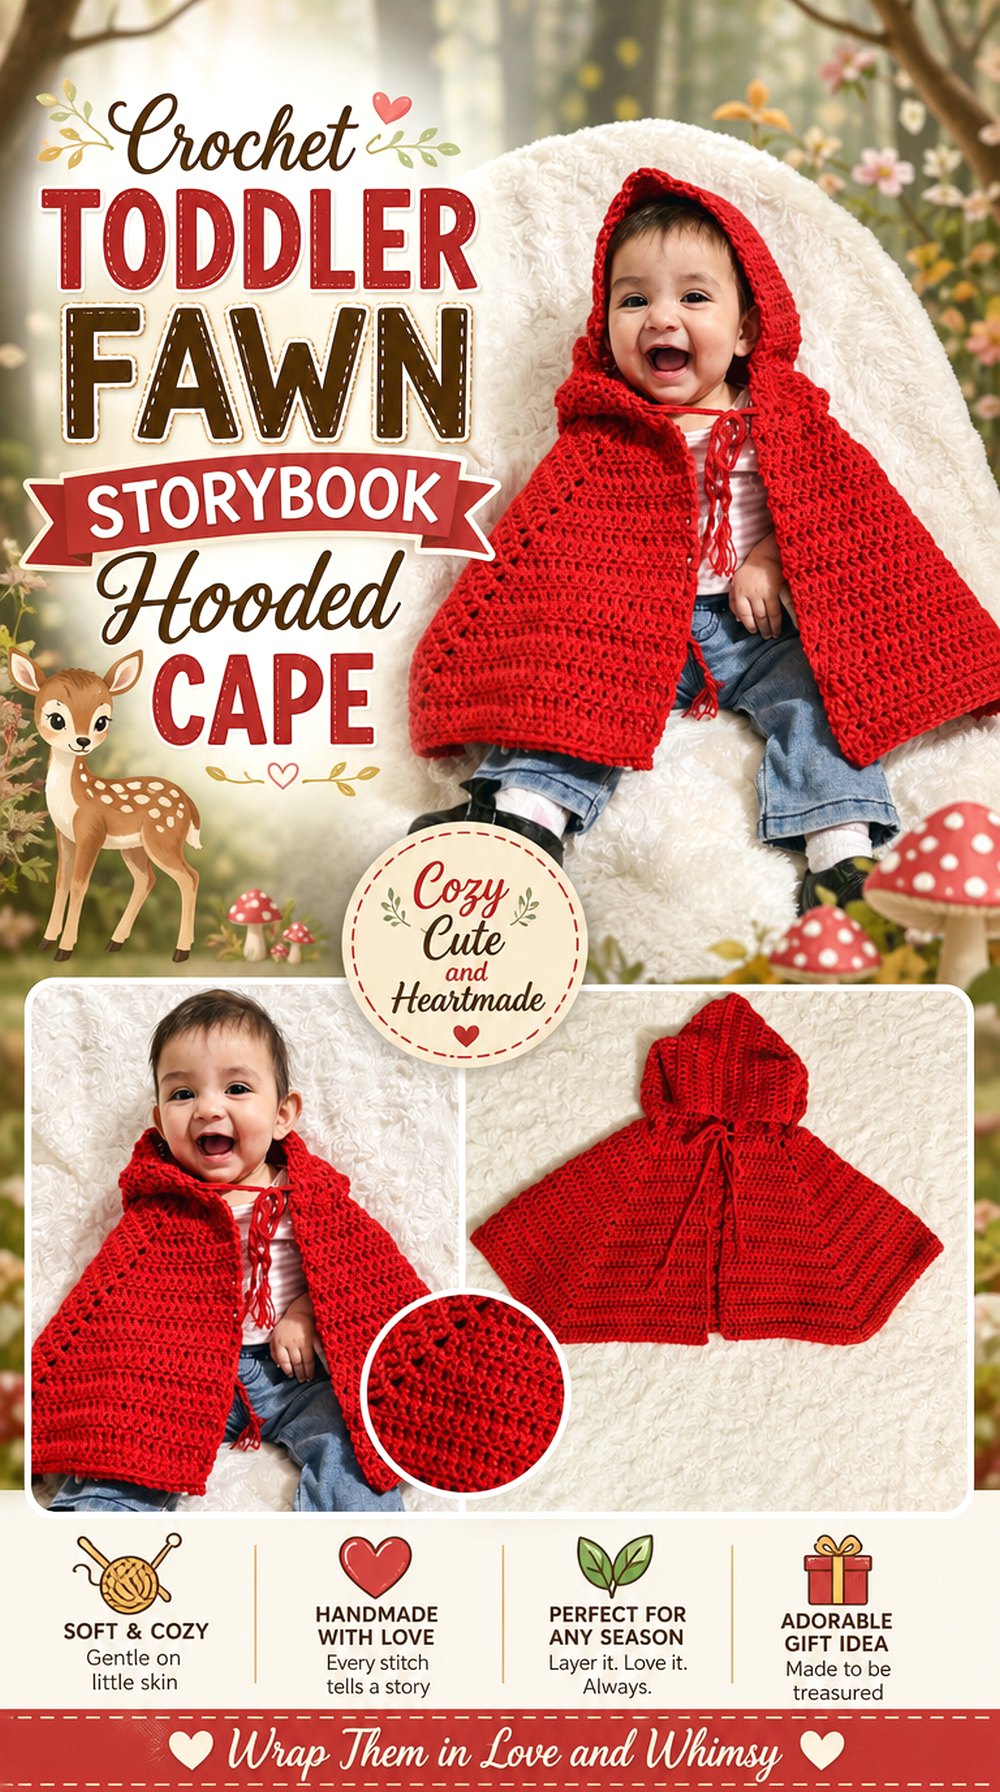
A short child-size cape naturally suits a storybook fawn idea. Instead of making it look like a miniature adult poncho, emphasize the clean cape shape: warm brown body, cream hood accents, two soft ears, and a few broad spots on the back. The design can suggest a woodland character without requiring a detailed crocheted animal face.
The Fiber Diaries demonstrates a Red Riding Hood-style baby cape, giving this project a closer reference for a compact child’s cape rather than a full adult wrap. The source is useful for thinking about proportion and front opening before adding the independent fawn details.
A Short Front Closure Keeps the Storybook Shape Clear
A compact cape looks most intentional when its front edges sit where expected rather than drifting backward over the shoulders. Check the closure position with the child standing and moving. The cape should not rely on a tight neckline to stay in place. If you change the original closure concept, make sure the substitute is secure, comfortable, and easy for the supervising adult to manage.
Child-Sized Fawn Features Need Secure, Low-Bulk Finishing
Large ears or antlers can overwhelm a small hood and make it difficult for the child to turn their head comfortably. Keep embellishments light and firmly attached. Avoid loose small parts that could detach, and consider whether the garment will be used only under supervision as a costume or worn more routinely. That intended use should guide how elaborate the hood becomes.
Plan Growth Room Without Turning the Cape Into a Blanket
Extra room can be useful in a child garment, but simply making every dimension much larger may cause the neckline to slide and the cape to interfere with the hands. If growth is a priority, focus on areas where additional length or ease does not destabilize the shoulders. Confirm the source sizing and construction before making adjustments rather than assuming a larger hook automatically solves the problem.
Original Tutorial and Creator Credit
Creator: The Fiber Diaries
Crochet Seamless Round Yoke Fawn Hooded Capelet
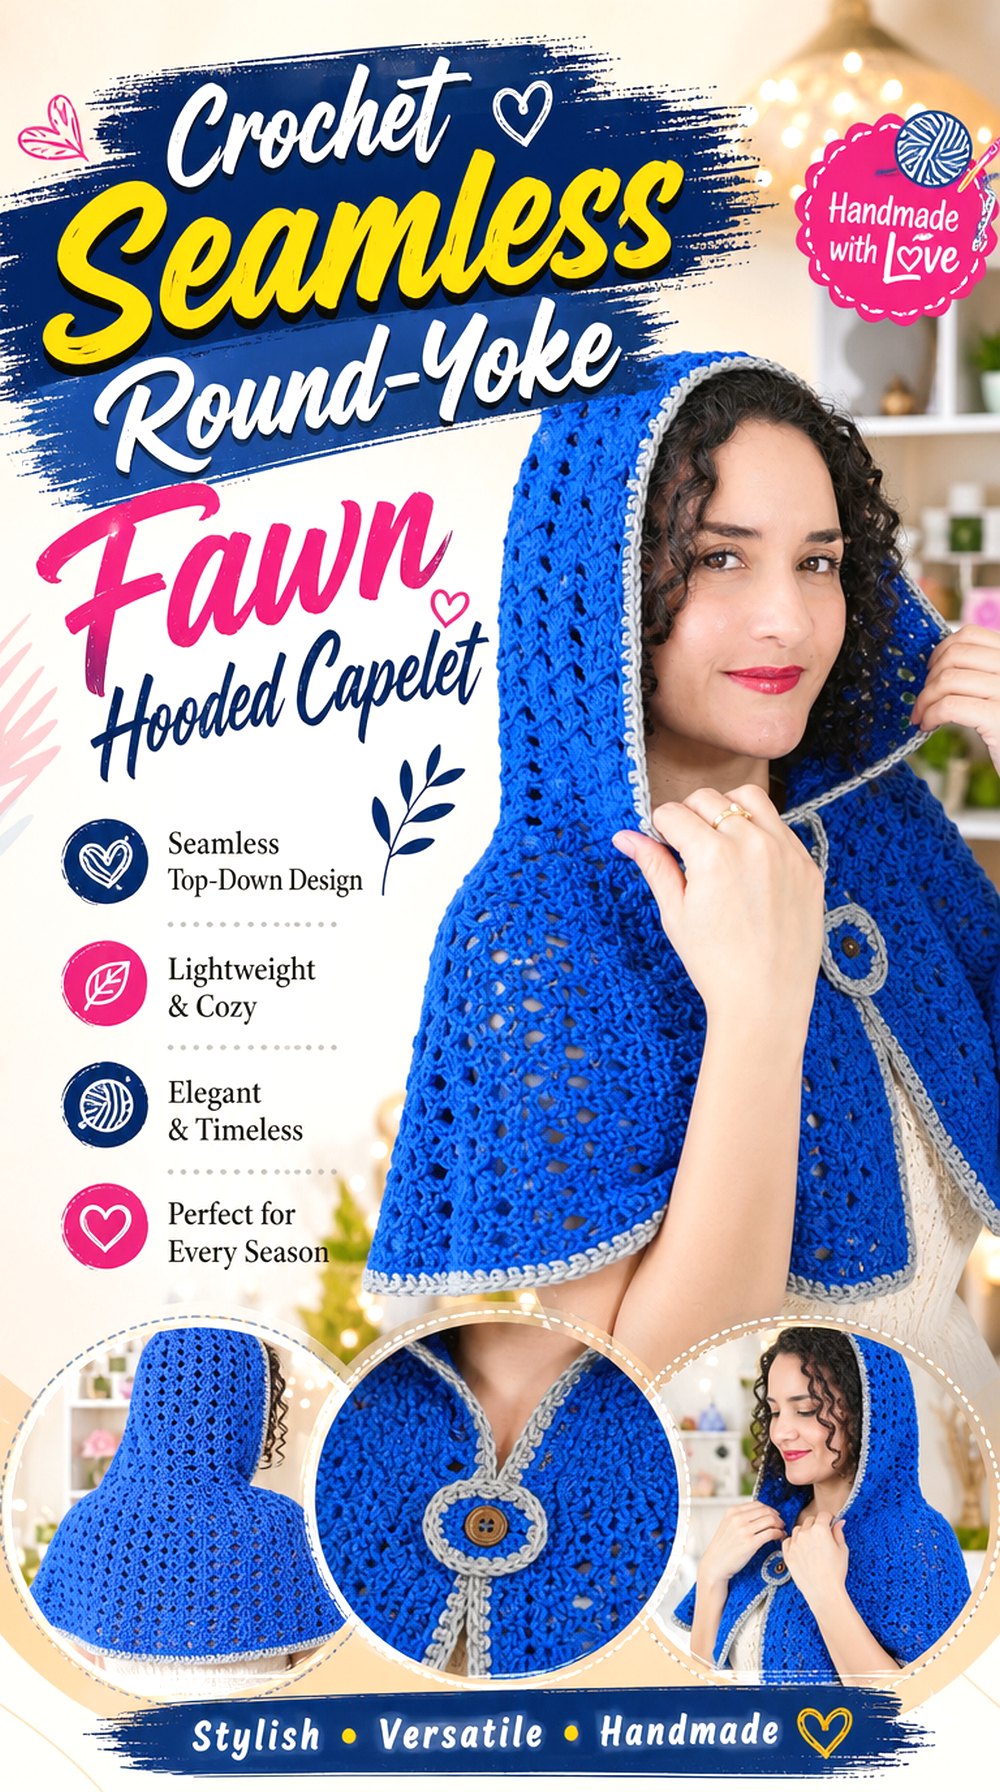
A round-yoke cape has a smooth shoulder line that works especially well when you want the fawn markings to look deliberate rather than interrupted by major seams. The body can expand gradually from the neckline, with a solid hood above and spots arranged across the upper back or lower yoke. Visually, it falls between a traditional cape and a poncho.
Crochet MC’s recent hooded cape tutorial focuses on a round-yoke, seamless approach and describes working from the wearer’s own measurements and available materials. That makes it a useful alternative to rectangular or two-panel constructions.
A Round Yoke Gives the Fawn Cape a Clean Shoulder Line
Because the shape develops around the neckline instead of relying on large rectangular panels, the cape can follow the shoulders in a more continuous way. That is useful when the fawn spots are part of the design. Before placing them, identify the true center back and side points while the cape is worn so the markings remain balanced around the curved yoke.
Seamless Construction Simplifies Balanced Spot Placement
Fewer major seams mean you do not need to stop a motif abruptly at a panel join. Even so, do not place spots by counting fabric sections alone. Pin the motifs around the actual worn cape and compare both sides. Curved fabric can make mathematically equal spacing look visually unequal once it is hanging on the body.
Use the Wearer’s Measurements Before Choosing Ear Scale
The source emphasizes working from measurements, and the same logic should extend to the hood decoration. A larger hood does not automatically need enormous ears. Compare ear size with face width and hood depth first. If the ears dominate the wearer’s head, reduce them before trying to correct the effect with larger spots or antlers elsewhere.
Original Tutorial and Creator Credit
Creator: Crochet MC
Crochet Baby Fawn Panel Hooded Poncho
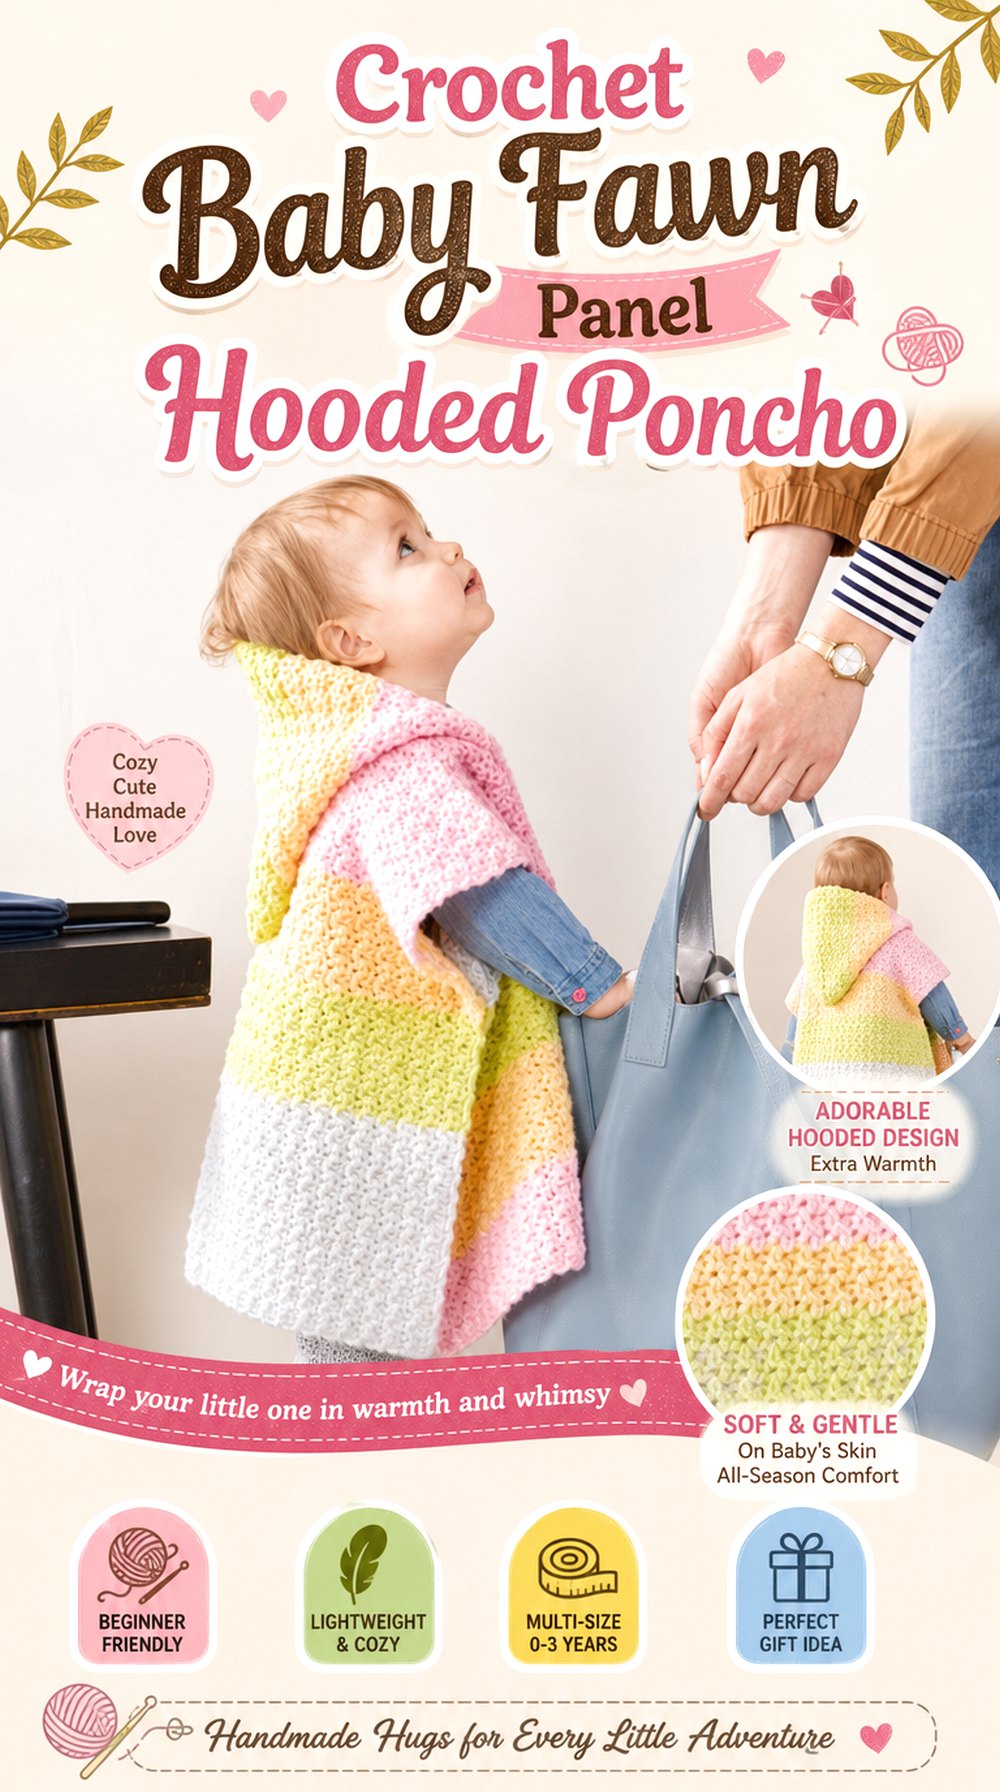
For a baby or young toddler, the strongest fawn idea is often the simplest one. A warm neutral body, pale ear interiors, and perhaps a few broad color accents can create the woodland look without loading the hood with several attached pieces. The poncho shape also provides coverage without adding fitted sleeves.
The Crochet Crowd’s Baby Hooded Poncho tutorial covers a paneled poncho with shaped neckline and hood, with the accompanying source identifying several baby and toddler sizes. That makes it a useful reference when the wearer is much smaller than the adult capelet examples in this collection.
Neck Shaping Matters More Than Decorative Details
On a very small garment, a minor fit problem at the neckline can affect the entire poncho. Complete the neck shaping and hood first and check the source’s size-specific information before adapting anything. Do not enlarge the head opening simply because you plan to add ears; ear decoration should sit on a properly fitting hood rather than compensate for an uncomfortable neckline.
Keep the Fawn Face Simple for a Baby Garment
A baby version does not need beads, buttons, or multiple raised facial pieces to communicate the theme. Color placement and securely attached crochet ears can do most of the work. If the cape is intended as a gift, explain any decorative features to the caregiver and avoid assuming an embellishment is safe merely because it is crocheted rather than made from another material.
Avoid Loose Cords and Detachable Trim Near the Hood
Do not add long drawstrings or casually attached small pieces around a baby’s neck or face. Keep decorative elements secure and minimal, and assess the whole garment for snagging or detachment risks before gifting or using it. If a decorative idea seems more appropriate for a supervised photo prop than routine wear, treat it as such rather than blurring the two uses.
Original Tutorial and Creator Credit
Creator: The Crochet Crowd
Crochet Textured V Point Fawn Hooded Poncho
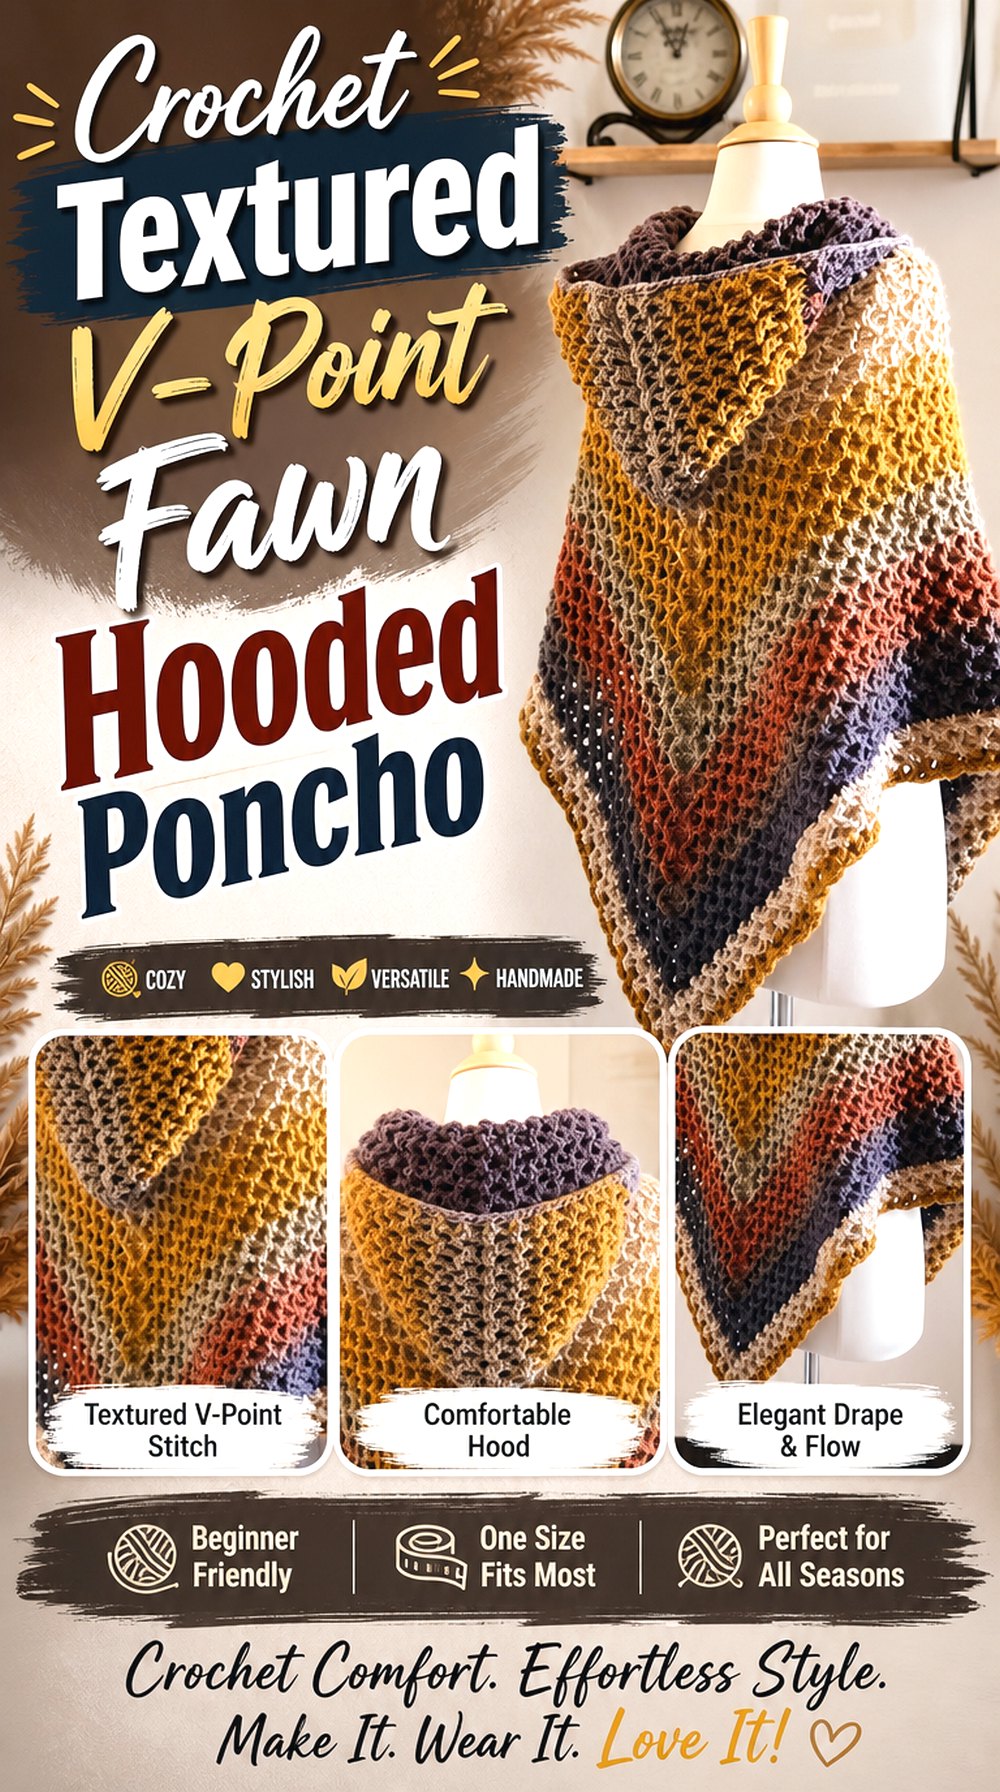
A V-point poncho gives the fawn concept a bolder silhouette. The two-point construction creates strong vertical lines at the front and back, so the garment can look more like a forest costume even without a long cloak. Use a deep chestnut, camel, or gray-brown body with a pale hood edge and restrained spots along the upper back.
The crochetdreamz tutorial shows a textured hooded poncho made in the round with front and back points. The creator also distinguishes the hooded version from a V-neck option, making this a useful choice when you want the hood to be a deliberate part of the design rather than an afterthought.
Two Points Create a Stronger Deer-Costume Silhouette
The front and back points already add drama, so a full set of antlers, spots, fringe, and facial features can become excessive. Decide whether the shape or the hood should be the dominant feature. For an adult costume, ears plus a few back spots may be sufficient. For everyday wear, even the spots can be omitted while keeping the fawn palette.
Texture Can Hide Tiny Colorwork Spots
Raised or visually busy texture may swallow very small contrasting marks. Test one spot at full size against the completed fabric before producing a whole set. If it lacks definition, increase its visual scale, simplify its shape, or move the fawn reference to a smoother area such as the hood edging. Do not add more motifs merely because the first ones are hard to see.
Test Hood Weight Before Adding Antlers
A hood attached to a substantial poncho already has the weight of the body below it. Add ears first, put the garment on, and observe whether the hood remains comfortably positioned. Only then decide whether antlers are worth the additional structure. If the hood begins sliding backward, reducing decorative weight is usually more sensible than tightening the neck opening.
Original Tutorial and Creator Credit
Creator: crochetdreamz
Crochet Relaxed Adult Fawn Hooded Capelet
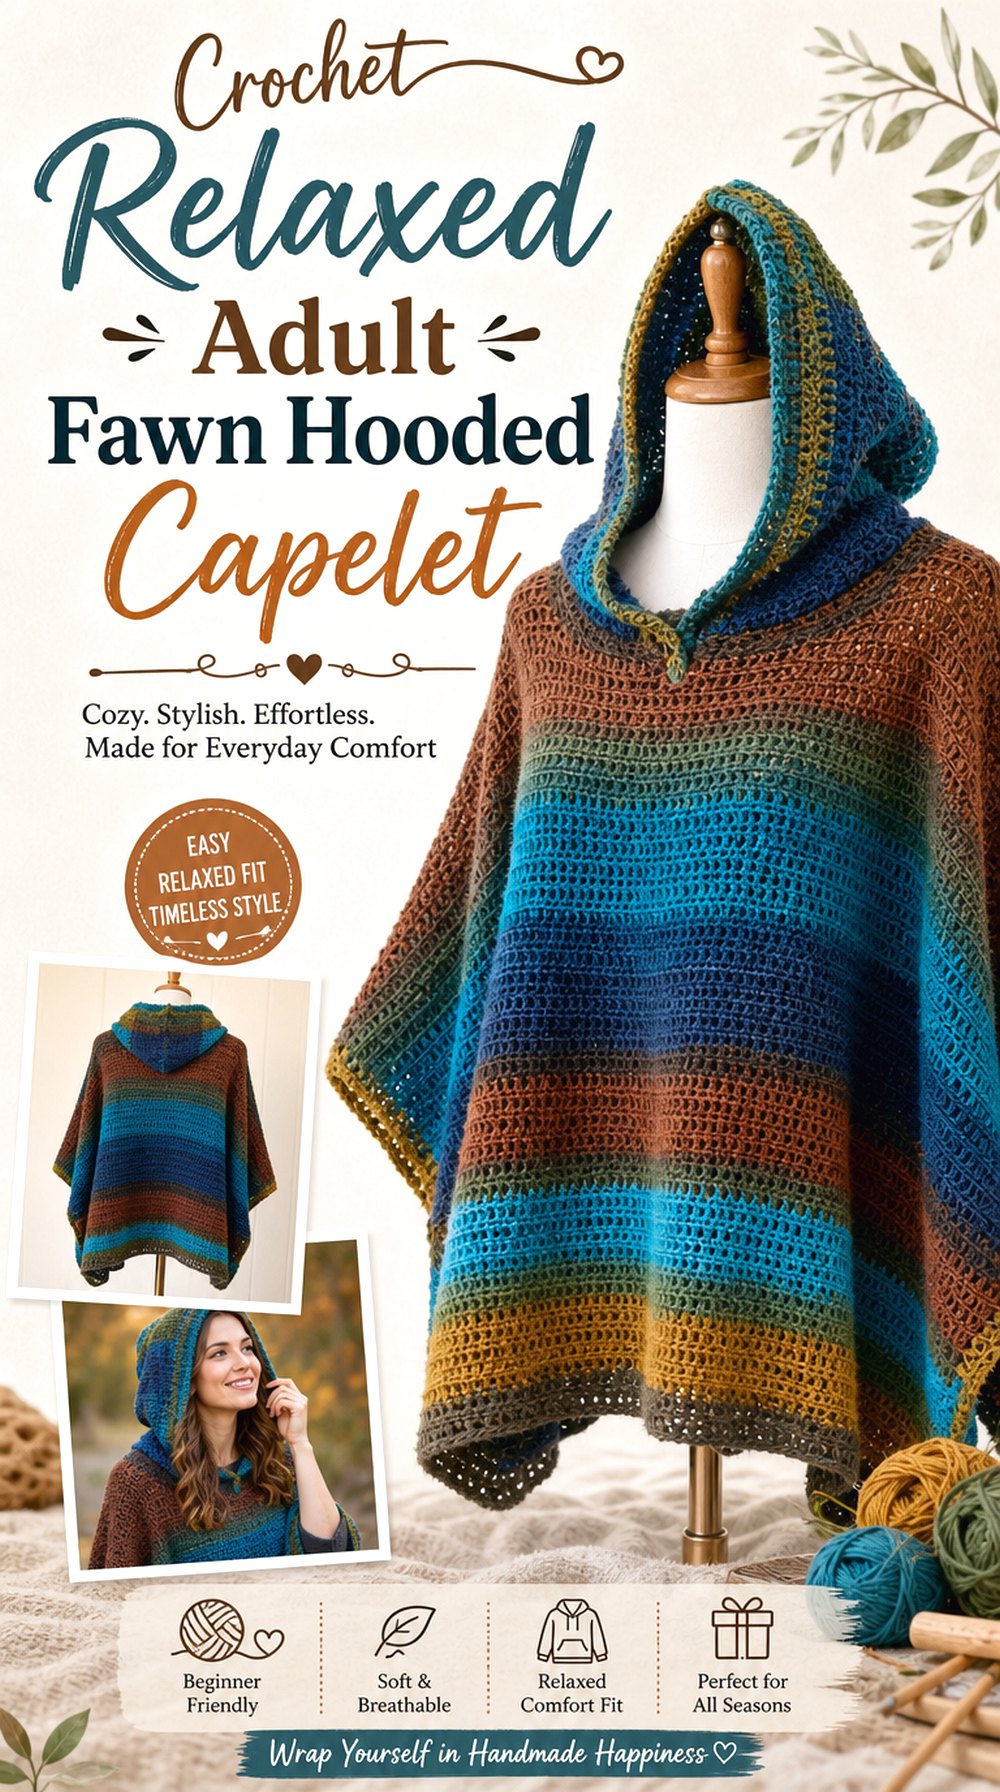
The final idea keeps the fawn influence mature and understated. Start with a roomy adult hooded poncho, use natural deer-inspired neutrals, and make the hood recognizable with softly rounded ears. Spots can be limited to the back shoulders, or omitted entirely for a version that still hints at a woodland animal without reading as a full costume.
Lucky Platypus Crochet’s hooded poncho tutorial provides a relaxed adult construction and notes that the project can be made with different yarn choices. That makes it a flexible reference for readers more interested in the overall silhouette than in matching one exact yarn or highly specific decorative finish.
A Roomier Body Suits an Adult Fawn Interpretation
Adult woodland styling often works better when the garment itself remains sophisticated. Let generous drape create the visual impact and keep the deer details concentrated near the hood. Before increasing length or width beyond the source, consider whether extra fabric will make the poncho harder to wear under a coat, at a festival, or while using the hands.
Fawn Colors Can Be Subtle Instead of Costume-Literal
Fawn does not require bright white spots over a medium-brown base. Mushroom, taupe, camel, oatmeal, and cream can create the reference through tonal contrast alone. This approach makes the capelet easier to pair with ordinary clothing. If you want removable costume character, attach ears in a way that can be changed without damaging or distorting the hood.
The Hood Should Still Work When the Ears Are Removed
A successful adaptation begins with a functional hood. Before adding anything, check that it falls comfortably when down and provides the intended coverage when raised. If temporary ears or antlers are removed, the remaining hood should not have obvious sagging, stretched attachment points, or a distorted crown. That makes the garment more versatile and easier to maintain.
Which Fawn Capelet Shape Should You Choose?
| Style Direction | Projects to Compare | Main Advantage | Main Check Before Decorating |
|---|---|---|---|
| True short capelet | 1 and 2 | Compact shoulder coverage and a clear hood focal point | Make sure ears do not overpower the smaller body |
| Draped woodland wrap | 3 and 7 | Softer movement and a strong fantasy silhouette | Let the completed wrap settle before placing spots |
| Functional adult poncho | 4, 5, 11 and 12 | More torso coverage and room for layering | Check total garment and hood weight |
| Baby or child cape | 6, 8 and 10 | Storybook proportions suited to smaller wearers | Keep neck details secure and avoid unnecessary cords |
| Seamless rounded cape | 9 | Smooth shoulder line and uninterrupted motif placement | Mark center back and spot positions while worn |
Conclusion
For the closest classic capelet look, start with the short moss-stitch or velvet constructions. The triangle wraps work better when you want a stronger woodland-fantasy silhouette, while the deeper ponchos give you more coverage and a larger surface for subtle spots. For babies and small children, keep the fawn identity simple and put secure fit ahead of extra embellishment.
Whichever direction you choose, finish the basic hood and body before deciding how large the ears, spots, or optional antlers should be. Use the original tutorials linked with each project for their exact construction and size-specific details, then treat the fawn styling as a separate adaptation layer.
Frequently Asked Questions
Can any crochet hooded poncho be turned into a fawn capelet?
Not automatically. First decide whether the base shape still matches what you consider a capelet. A long poncho may give far more coverage than a shoulder cape, while a triangular shawl behaves differently from both. The fawn styling can transfer between them, but neckline fit, hood shape, fabric weight, and arm movement should be evaluated on the original garment before adding ears or spots.
Should crochet fawn ears be attached before or after the hood is finished?
Usually it is more useful to finish the hood first so you can evaluate its real width, depth, and drape. Temporarily pin the ears while the hood is being worn and compare their position from the front, side, and back. Permanent attachment made from flat measurements alone can place the ears too close together, too far backward, or at an angle that changes once the hood is on a head.
What yarn qualities matter most when a fawn hood has ears or antlers?
The body and decorations may need slightly different characteristics. A capelet can benefit from enough drape to sit comfortably over the shoulders, while ears need enough structure to remain visible. Rather than assuming one yarn will perform both jobs perfectly, make small samples. Also check whether heavier decorative pieces cause the hood to pull backward before permanently attaching them.
Where should white fawn spots go on a hooded capelet?
Start with the back and outer shoulder area, where the markings can be seen without crowding the face. Leave some visual space around the hood attachment, closure, and any decorative border. Pin several temporary spot shapes to the finished garment and view it while worn. If the pattern looks busy from a distance, reduce the number rather than shrinking every spot until they lose definition.
What should I change when making a fawn cape for a baby or small child?
Keep the design simpler and inspect every added detail for secure attachment and suitability to the intended use. Avoid long loose cords around the neck and do not rely on small detachable pieces for the animal effect. Prioritize the source tutorial’s neckline and sizing information before making decorative changes. A pair of securely attached ears and careful color placement can communicate the fawn theme without extra hardware.
How can I make a fawn hooded capelet wearable beyond costumes?
Use a restrained deer palette and make the hood details the only obvious animal feature. Taupe, camel, oatmeal, chocolate, and cream can suggest a fawn without requiring a spotted body. Small ears are also easier to integrate than large antlers. If you want stronger costume details occasionally, consider a removable concept only when it can be attached securely without stretching or damaging the finished hood.