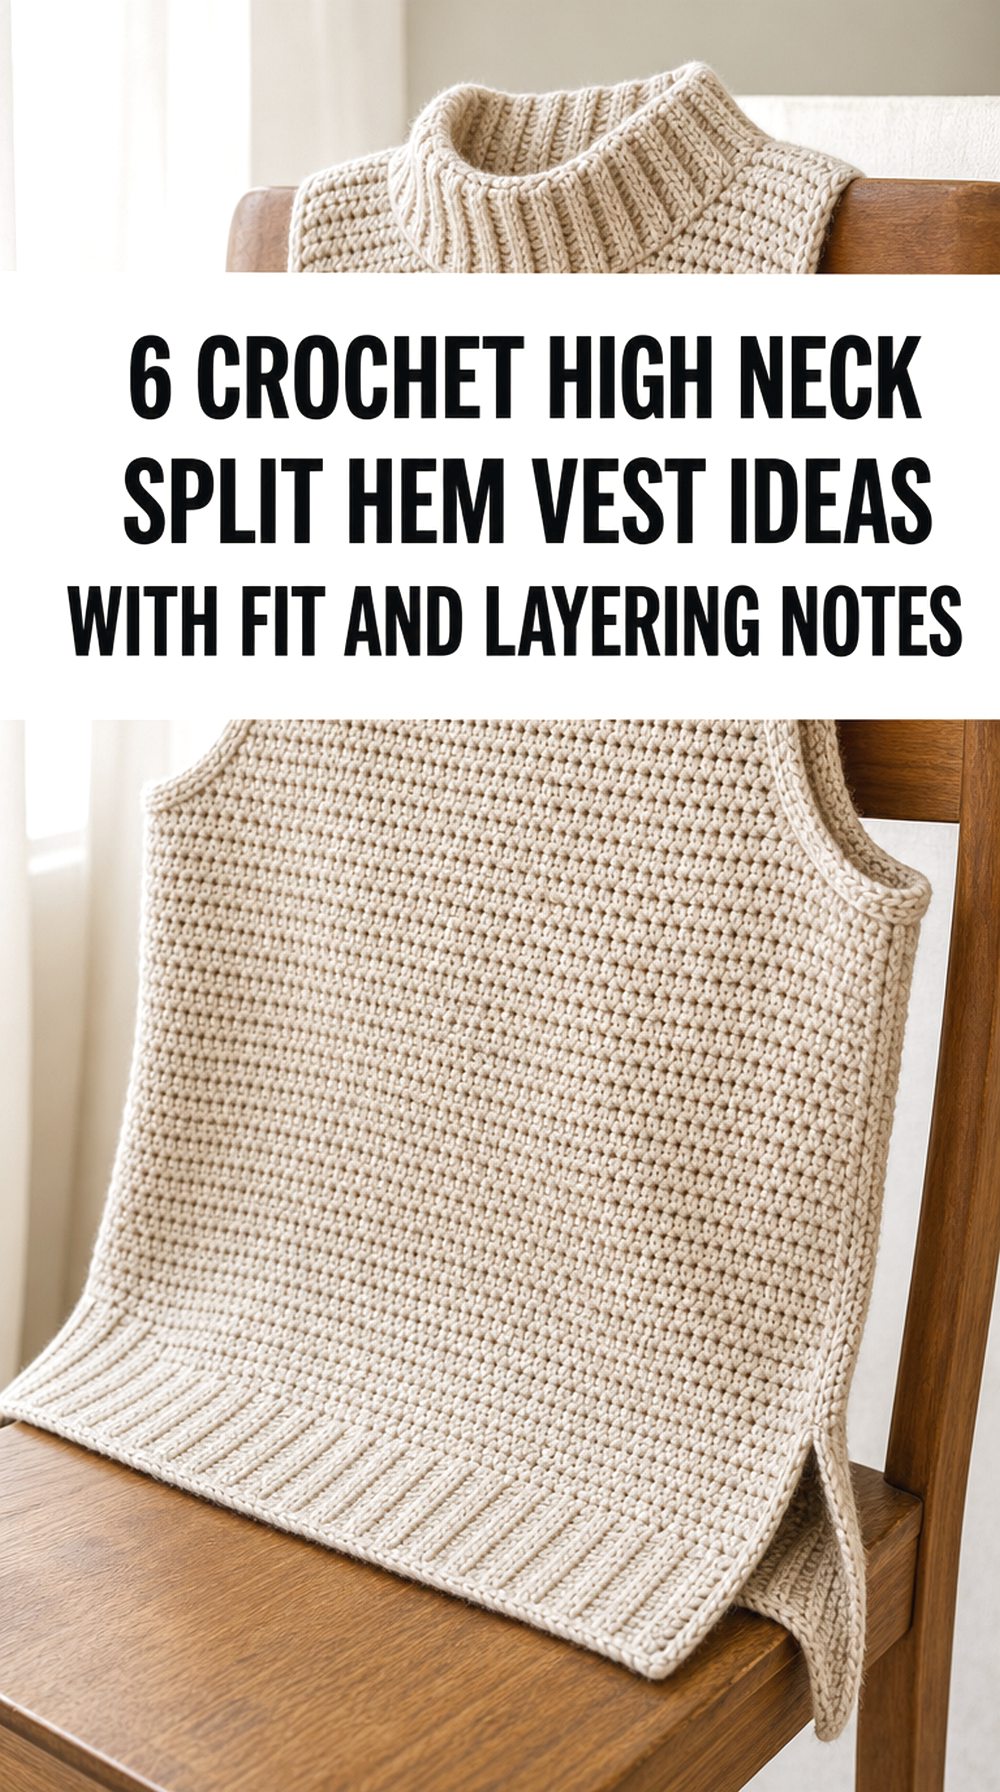
A Crochet high neck split hem vest can combine warmth around the neckline with extra movement at the lower edge, but free designs do not always include both features in one set of instructions. This guide therefore covers two useful routes: Crochet vests with built-in turtlenecks that provide the high-neck shape, and split-hem or open-side vests that create the look when layered over a fitted roll-neck top. Across the six ideas, you can compare ribbing, granny-square panels, side slits, buttoned bands, picot edging, and corded side openings. Practical notes explain how to judge collar comfort, choose enough ease for layering, position a split without exposing too much of the base layer, and match yarn weight to the amount of structure or drape you want.
Quick List
- Crochet Ribbed Turtleneck Vest as a High-Neck Base
- Crochet Made-to-Measure Turtleneck Vest with Custom Fit
- Crochet Granny-Square Split-Hem Vest for High-Neck Layering
- Crochet Side-Slit Sleeveless Vest with Picot Edging
- Crochet V-Neck Split-Hem Vest over a High-Neck Base
- Crochet High-Turtleneck Poncho Vest with Corded Sides
How to Choose a Crochet High Neck Split Hem Vest for Fit and Layering
Start with the collar. A high neckline should sit closely enough to hold its shape without feeling restrictive, so compare the finished opening with a comfortable sweater you already wear. Folded ribbing gives a substantial finish, while a taller single layer may feel lighter. Next, allow enough body ease for the shirt, blouse, or turtleneck underneath. Deep armholes improve layering room, although very wide openings can reveal more of the base garment.
Consider where the hem split begins. A short opening preserves coverage and simply releases the lower edge; a higher split or open-side construction creates more movement but may need careful styling. Yarn weight also changes the result. Bulky yarn makes ribbing and collars feel more structured, whereas lighter yarn can give side-slit panels a softer fall. Before joining panels, block them to the intended dimensions and check that both side openings start at the same height. Neat edge finishing matters because the collar, armholes, and split edges remain highly visible.
Crochet Ribbed Turtleneck Vest as a High Neck Base
Design Details
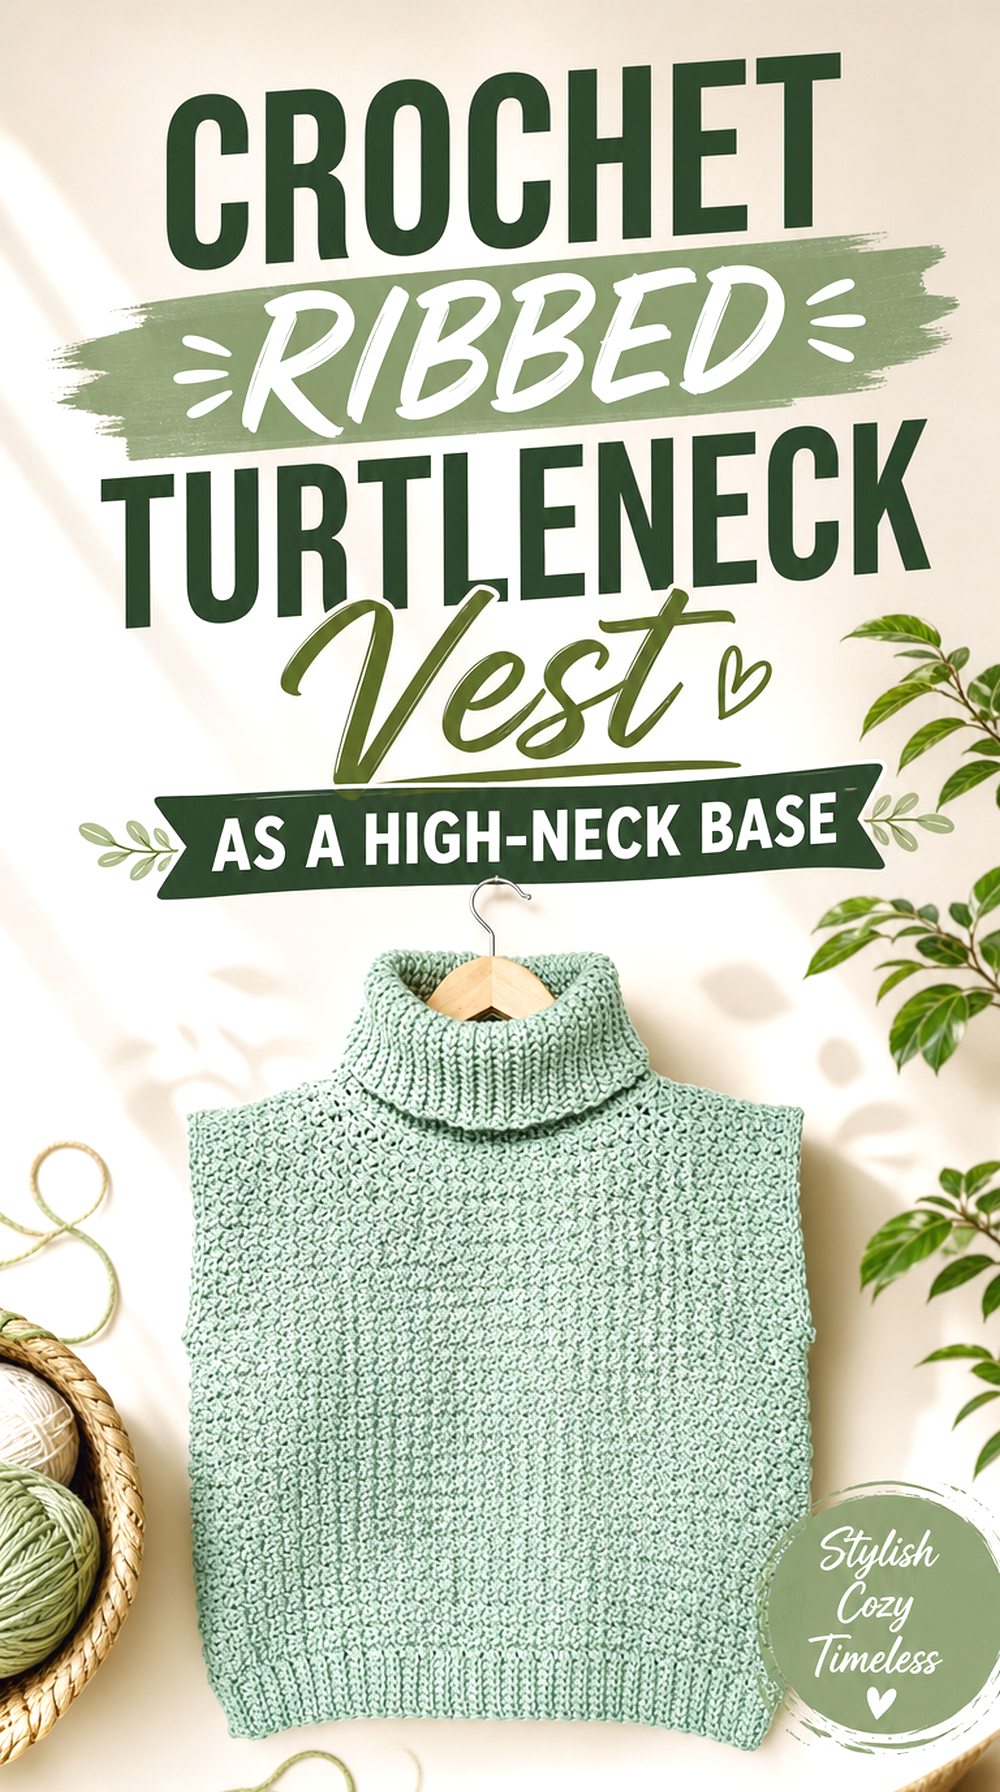
The linked vest uses separate front and back panels with a substantial ribbed lower band and a separate oversized collar. Its main fabric has a compact, pebbled texture that contrasts clearly with the vertical ribbing, giving the sleeveless shape a winter-ready appearance. The collar is attached after the body is assembled, so its height becomes a strong visual feature.
Best Use
This Crochet option suits readers who want the built-in high neck to be the priority. Wear it over a slim long-sleeved top so the armholes remain comfortable and the collar stays central to the outfit.
Before You Choose
The original instructions seam the sides rather than forming split hems. Treat it as a high-neck base design and compare its construction with a separate split-side reference before planning any alteration.
Crochet Made to Measure Turtleneck Vest with Custom Fit
Fit and Finish
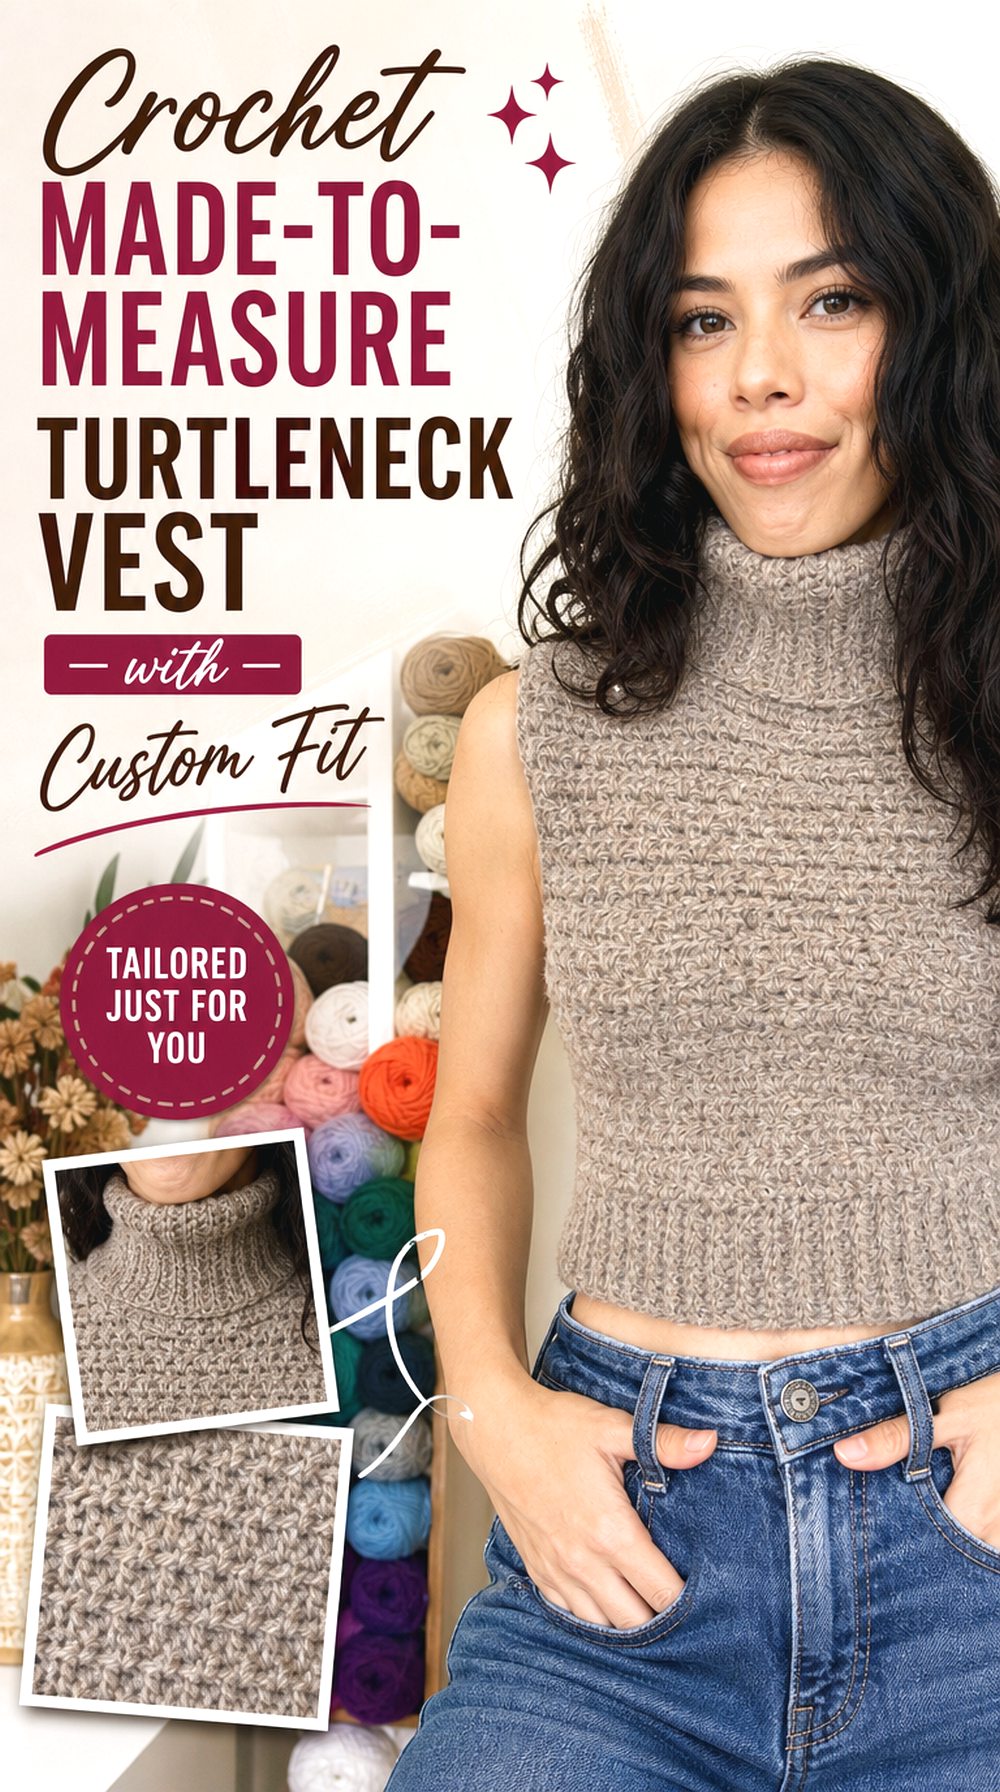
This sleeveless Crochet sweater is planned from body measurements and built from front and back panels. The fitted ribbed turtleneck is made separately, joined into a loop, folded for extra depth, and attached around the neckline. Bulky yarn gives the surface a pronounced texture and helps the collar remain visually substantial.
Who It Suits
The made-to-measure approach may suit anyone who struggles with fixed garment sizing or wants to extend the body toward tunic length. Check the intended underlayer before finalising width, especially if you prefer a shirt rather than a thin jersey top beneath it.
Practical Point
The linked version closes the side seams to the hem, so it is not a ready-made split-hem vest. Any side opening would be a personal modification and should preserve enough joined seam for stability.
Crochet Granny Square Split Hem Vest for High Neck Layering
What Stands Out
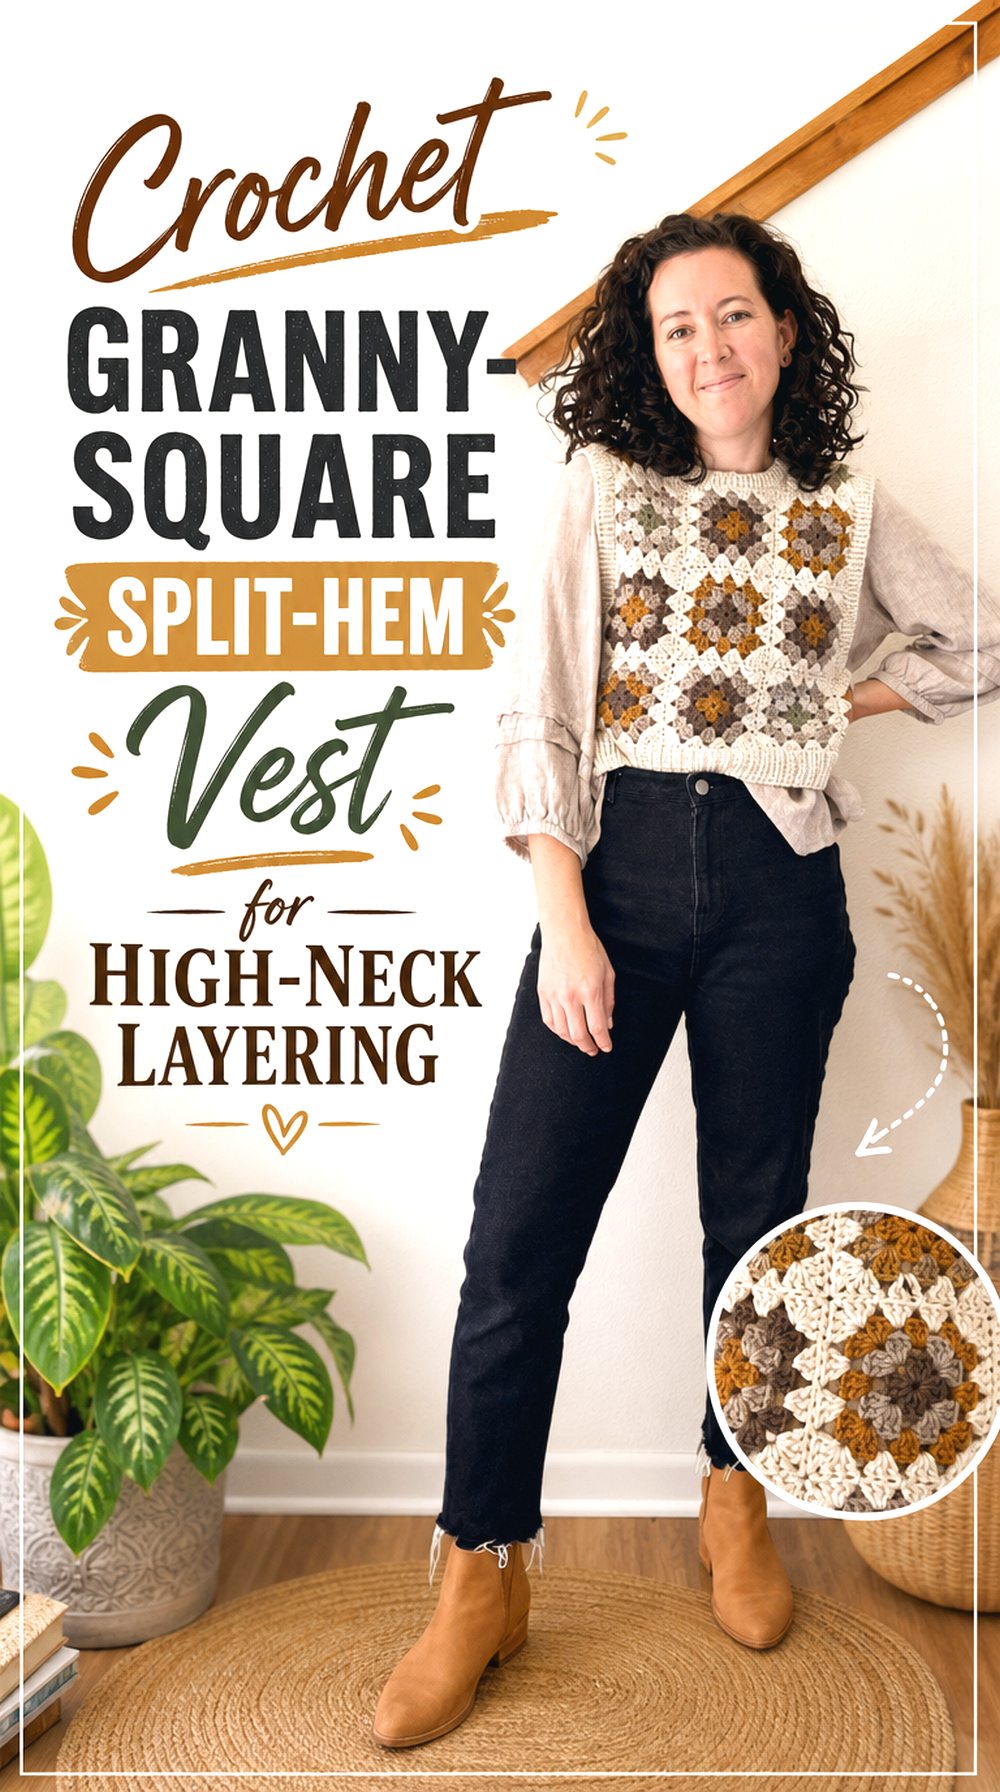
The Agnes vest arranges Crochet granny squares into a boxy sleeveless shape, with the back extending lower than the front and a defined split at each side. Colour placement becomes part of the structure, while the open motif joins give the garment a lighter, more graphic appearance than a dense stitched vest.
Best Use
Layer it over a plain fitted turtleneck to create the requested high-neck look without competing with the square motifs. A restrained base-layer colour helps the Crochet colours remain clear.
Good to Know
The tutorial uses knitted ribbing for the neckline, armholes, and hem, although it notes that Crochet ribbing may be substituted. Readers wanting an all-Crochet finish should plan that change carefully and sample the edging so it does not pull the joined squares out of shape.
Crochet Side Slit Sleeveless Vest with Picot Edging
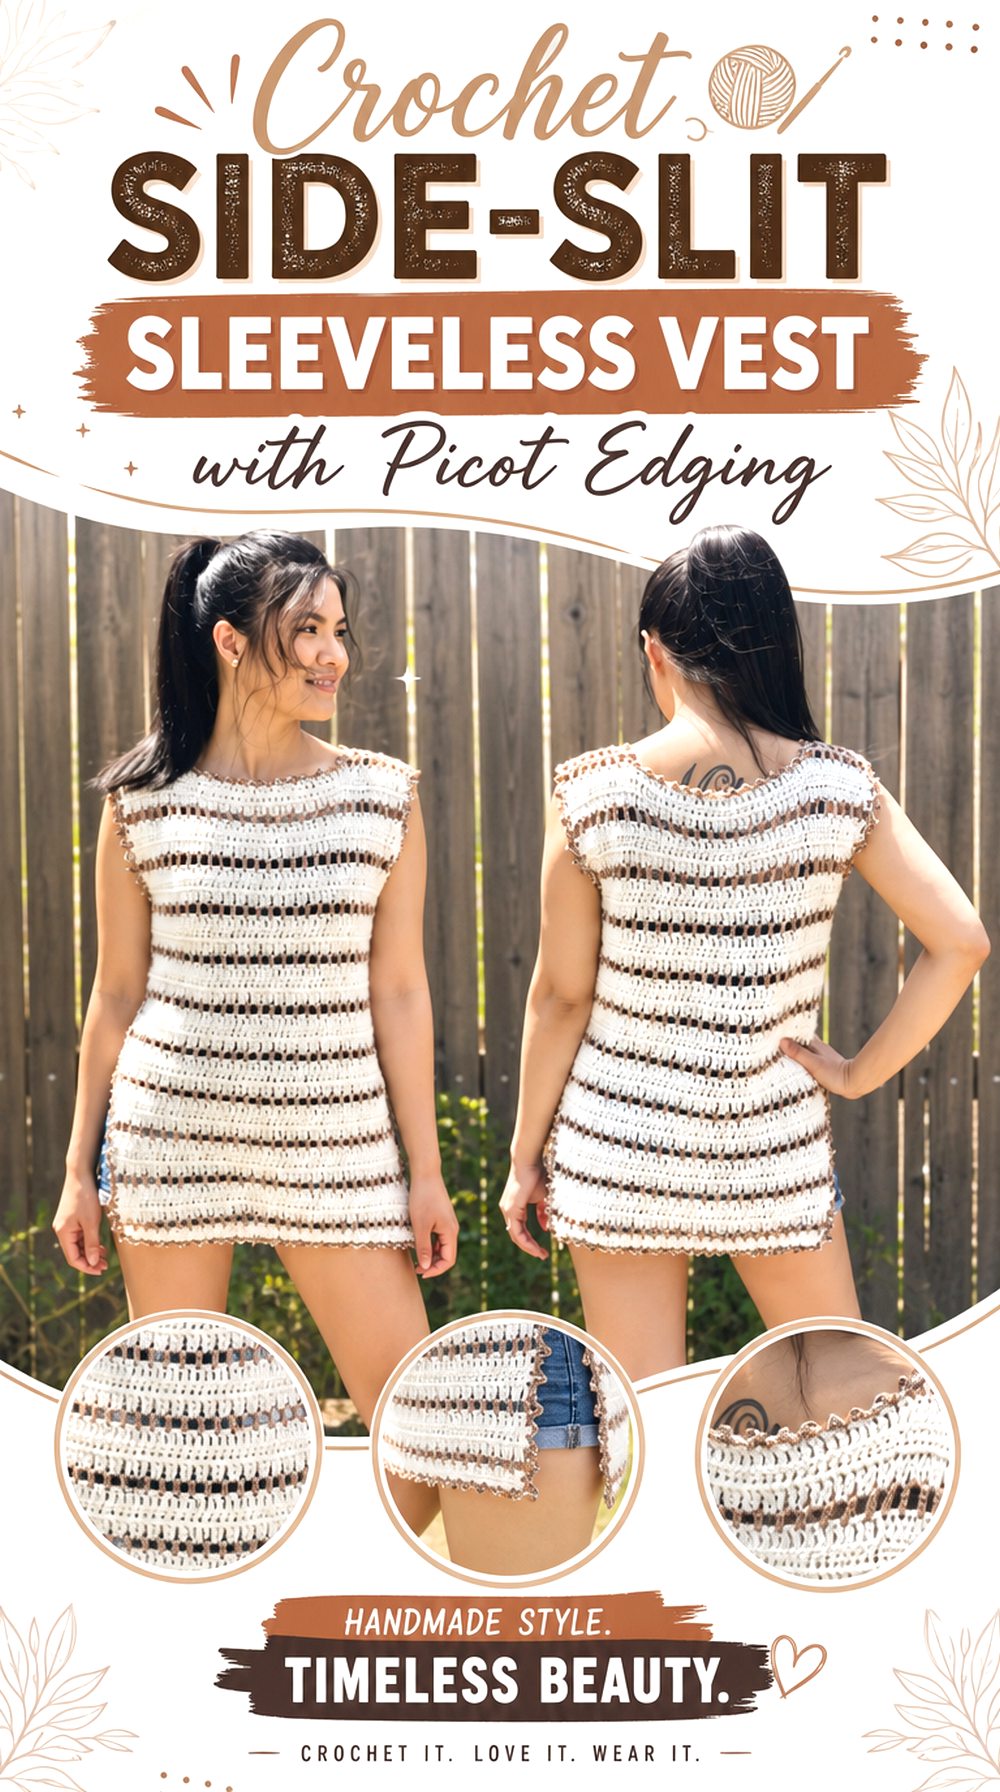
Design Details
This lightweight sleeveless top is worked as two Crochet pieces and joined while leaving lower sections open to form side slits. A delicate picot finish outlines the neckline and outer edges, adding definition without the weight of deep ribbing. The straight body can also be lengthened, which makes the slit placement useful for preserving movement in a longer version.
Styling Direction
Wear it over a close-fitting mock neck or roll neck when you want a high-neck silhouette with a lighter outer layer. Tonal colours create a streamlined look, while a contrasting underlayer makes the open sides more noticeable.
Before You Choose
The linked neckline is open rather than high. It delivers the split-hem element directly, but the high neck must come from the garment underneath. Check armhole depth against your planned base layer before seaming.
Crochet V Neck Split Hem Vest over a High Neck Base
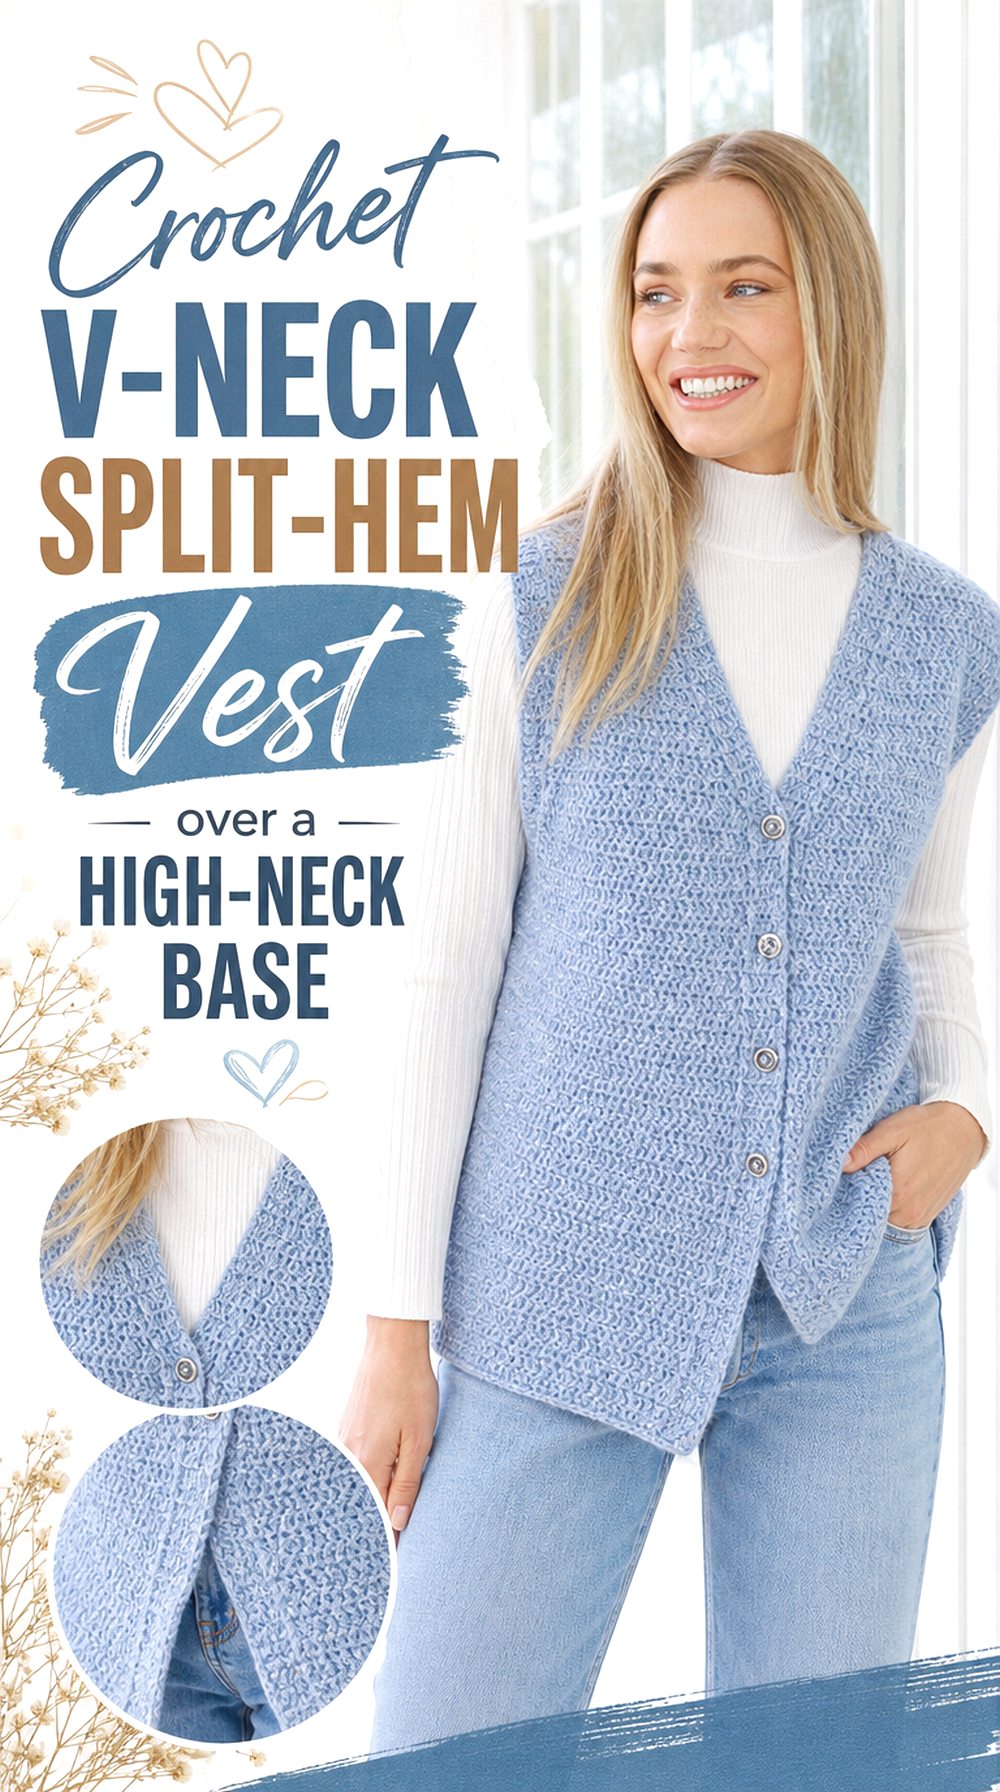
Construction Focus
Hazy Dew is a bottom-up Crochet vest with side splits, a V-shaped neckline, and textured bands created with raised stitch work. The front edging includes buttonholes and buttons, giving the garment a more tailored opening than a simple pullover. Its longer line and defined vertical borders can work well over a smooth, fitted turtleneck.
Why It Works
The low neckline leaves the full high collar of the base garment visible, while the side openings prevent the lower edge from looking rigid. Matching the turtleneck to one of the vest colours can keep the layers visually connected.
Care Note
Raised bands and buttoned edges may respond differently to blocking than the main fabric. Shape the vest flat, align both split hems, and avoid stretching the front bands. This is a layered high-neck look rather than an integrated collar design.
Crochet High Turtleneck Poncho Vest with Corded Sides
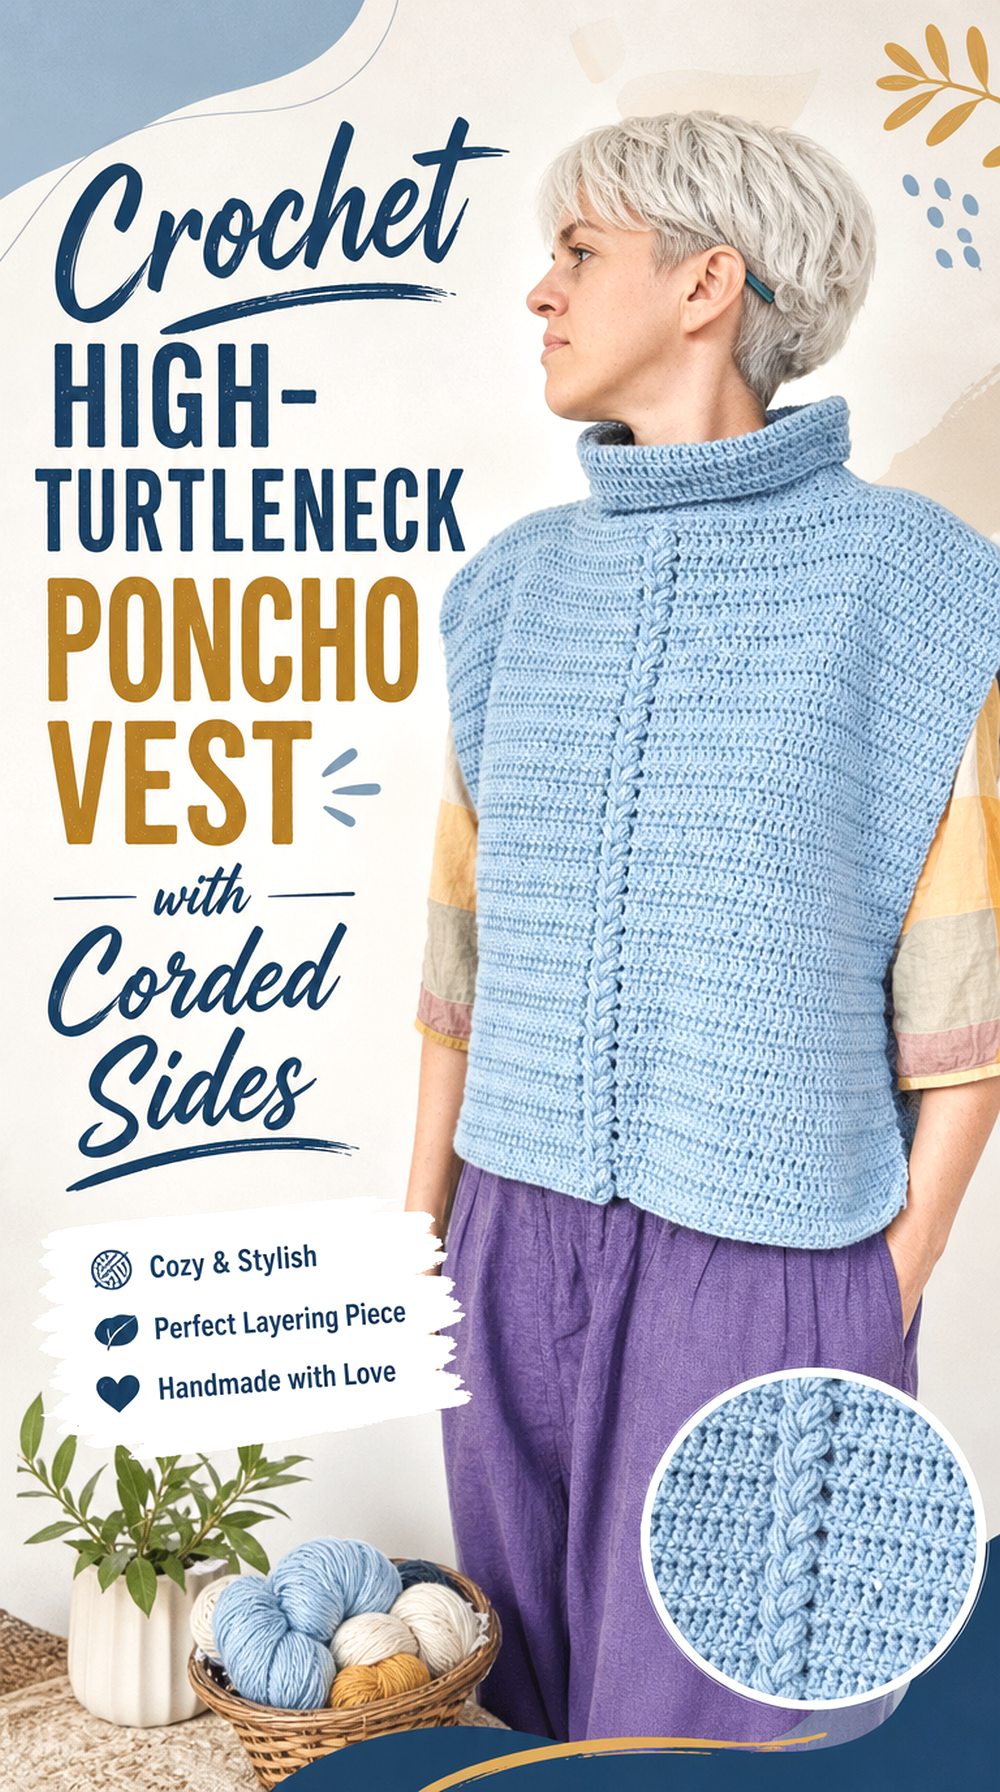
What Stands Out
Apu combines a tall Crochet turtleneck with broad front and back panels. The panels are joined at the shoulders, while cords at the sides control the open silhouette instead of conventional seams. This creates a poncho-vest shape with substantial side openings and a clean, minimalist surface.
Who It Suits
This route may appeal to readers who want both a built-in high neck and generous movement around the hem. It layers readily over sleeves because the sides remain open, and the cords can become a quiet colour accent.
Practical Point
The design is wider and more open than a standard fitted vest, so it will not give the same close side-split profile. Check cord placement and knot security, and consider how much of the underlayer you want visible when the garment moves.
Useful Crochet Notes
Check Collar Comfort Before Finishing
Try the collar around your neck before permanently attaching it. Ribbing can draw inward, and a doubled turtleneck may feel tighter than its flat measurement suggests. Leave enough stretch to pull the vest on comfortably without making the opening so loose that it collapses. A soft, smooth yarn may also reduce irritation at the jawline.
Plan the Split Around Your Layers
Pin the vest sides while wearing the thickest base layer you expect to use. This reveals whether the split begins at a flattering point and whether the armholes allow free movement. A high opening increases swing and visibility, while a short split keeps more coverage. Mark both sides together so their starting points remain level.
Block Panels Before Final Seaming
Blocking can change panel length, width, and the way textured stitches sit. Shape both body pieces to matching dimensions before sewing shoulders or sides, then recheck the hem line. When working with granny squares or raised bands, use light, even handling rather than forcing the fabric, which can distort joins and decorative edges.
Conclusion
Choose the feature that matters most before selecting a project. A built-in turtleneck gives the clearest high-neck shape, while a true split-hem vest offers easier movement and can be layered over a separate roll neck. Granny squares suit colour-focused wardrobes; picot edges feel lighter; raised bands look more tailored; and open poncho sides provide the most layering room. Let fit, finishing time, and preferred silhouette guide the final choice.
FAQs
Can every high-neck Crochet vest be given a split hem?
Not automatically. A split changes how much of the side seam supports the garment, so simply leaving part of a seam open may affect stability or fit. Compare the panel shape with a proven side-slit design, reinforce the top of each opening, and test the alteration with removable markers before final seaming.
How much ease should a layered Crochet vest have?
The right ease depends on the thickness of the underlayer and the intended silhouette. Measure a vest or sweater that already fits comfortably over your chosen top, then compare that width with the planned garment. Extra room at the chest and armholes helps movement, but too much can make the neckline and shoulders shift.
Which yarn works well for a high collar?
Choose a yarn that feels comfortable against the neck, springs back after stretching, and supports the intended collar shape. Bulky fibres can create a firm, warm turtleneck, while lighter yarns may fold more softly. Make a ribbed swatch, stretch it several times, and hold it against the skin before committing.
Can a V-neck split-hem vest still create a high-neck look?
Yes. A fitted mock neck or turtleneck underneath can provide the high collar while the Crochet vest supplies the split hem, texture, and outer shape. This approach also makes the outfit more flexible across seasons. Keep the base layer relatively smooth so it does not catch on open stitches or textured edging.
How can I keep split hems from stretching out of shape?
Reinforce the top of each split, keep both openings equal, and avoid hanging a heavy wet vest by its shoulders. Dry it flat in the intended shape. A firm border can help define the edges, but it should not be so tight that it pulls the lower panels inward or causes the hem to flare.


