A crochet peplum top can take several noticeably different forms. The flare might begin as a concentrated waist ruffle, open gradually into a skater shape, or fall more softly like the lower panel of a babydoll top. Necklines, straps, sleeves, fabric density, and the position of that flare can change both the look and the fit.

These 15 ideas cover clean tanks, halters, shaped-cup tops, sleeved blouses, textured designs, mesh fabrics, and top-to-dress options. Some source tutorials are explicitly labeled peplum tops; others teach closely related babydoll or ruffle constructions that are useful when planning a peplum-style silhouette. Use the comparisons below to choose the shape you actually want, then rely on each original creator for exact measurements, stitch information, and construction details.
Quick List
- Crochet Ruffle-Strap Peplum Crop Top
- Crochet Size-Graded Babydoll Peplum Cami
- Crochet Short Babydoll Peplum Crop Top
- Crochet Sleeved Peplum Blouse
- Crochet Skater-Flare Peplum Top
- Crochet Size-Inclusive Classic Peplum Top
- Crochet Scalloped Tie-Strap Babydoll Peplum Top
- Crochet Basketweave Halter Peplum Top
- Crochet Floral-Waist Primrose Peplum Top
- Crochet Tube-Bodice Peplum Tank
- Crochet Shaped-Cup Peplum Top
- Crochet Textured Cotton Peplum Top
- Crochet Square-Neck Everyday Peplum Tank
- Crochet Open-Back Halter Peplum Top
- Crochet Sleeve-Optional Babydoll Peplum Top
Plan Where the Peplum Flare Starts
The waist transition deserves as much attention as bust width or strap length. A ruffle beginning near the natural waist produces a different proportion from a babydoll panel that begins higher on the torso, while a longer skater flare can extend toward the high hip. Before choosing a tutorial, compare the creator’s finished garment with a top you already like wearing.
For made-to-measure designs, measure the bodice portion separately from the planned lower flare. If you change the bodice length, remember that you are also moving the visual starting point of the peplum. That can matter more than simply adding or removing length at the final hem. Always use the individual tutorial’s sizing method rather than assuming the same waist placement works across all 28 constructions.
Match Yarn Drape to the Kind of Flare You Want
Peplum fabric needs enough body to show the silhouette but enough movement to avoid becoming an unintentionally rigid shelf around the waist. A softly gathered babydoll section generally benefits from fabric that can fall downward, while pronounced texture or a defined ruffle may intentionally create more structure.
Changing fiber, yarn weight, hook size, or tension can alter both effects. A substitution that makes the bodice thicker may also make a wide peplum noticeably heavier. Conversely, a very loose fabric can stretch and make a carefully positioned waistline drop. When substituting, compare your fabric with the tutorial’s sample for density, stretch, and drape rather than matching color alone. If the creator supplies gauge or yarn-substitution guidance, treat that information as the primary reference.
Check the Bodice Before Customizing the Hem
The flare is visually prominent, but a peplum top still depends on a stable upper section. Square-neck tanks need straps and armholes that sit where intended; halters depend heavily on neckline and back fit; cup-based tops add another coverage decision; sleeved versions introduce shoulder and underarm fit.
Finish or temporarily secure enough of the bodice to evaluate it before making major changes to the peplum. If the upper portion pulls upward, slips downward, or sits too loosely, adding more lower fabric will not solve the underlying fit problem. Also consider garment weight: a long or heavily textured peplum can place more downward pull on straps, joins, and waist transitions than a short ruffle. Confirm those areas against the original tutorial before extending the design.
Crochet Ruffle Strap Peplum Crop Top
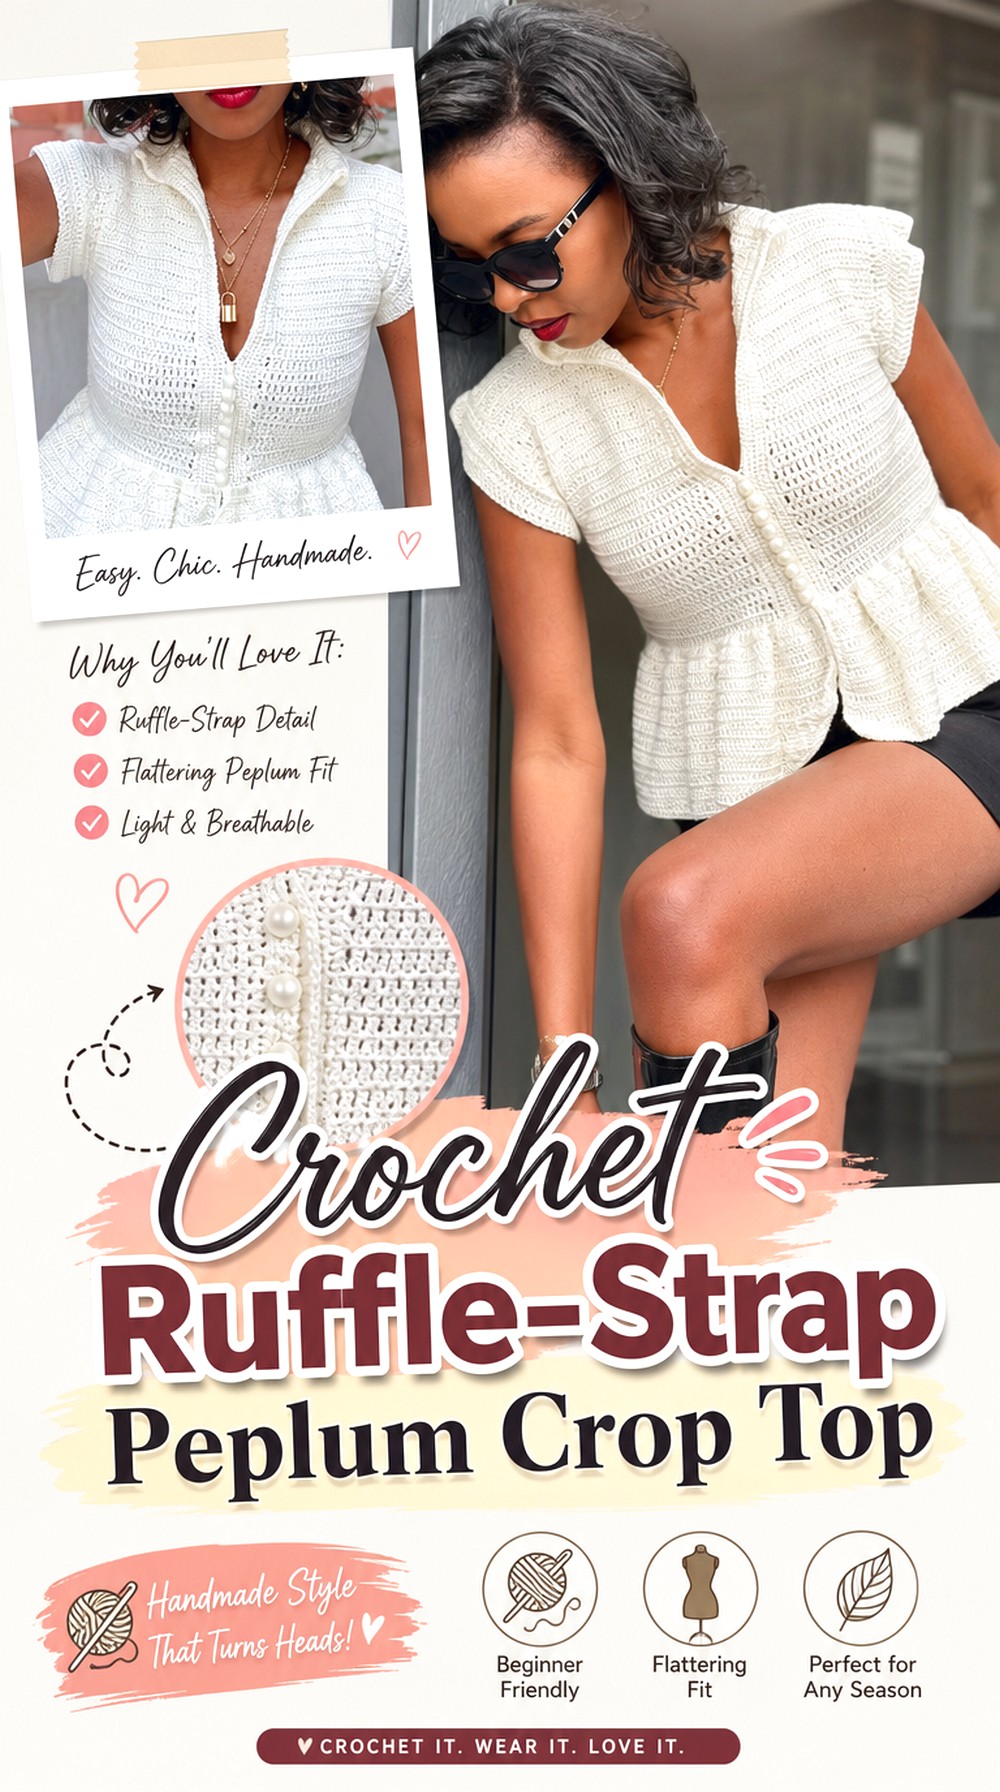
This version puts the ruffle at the center of the design. AC Crochets’ tutorial is specifically presented as a peplum and ruffle-top project, making it a good reference when you want the lower flare to read clearly rather than blend gradually into the bodice. The finished style is compact and summery, with the decorative lower edge giving a small top more visual movement.
Choose this direction when you prefer a recognizable waist-to-ruffle transition instead of the softer silhouette of a long babydoll panel. Pay particular attention to how the bodice length determines where that fuller section begins.
Let the Ruffle Define the Proportion
With a concentrated peplum, even a modest change in bodice length shifts the visual waist. Compare the tutorial’s finished position with your own preferred crop length before altering anything. Extending only the straight section can move the flare downward, while extending the ruffle itself changes both coverage and visual volume.
Keep the Upper Edge Visually Balanced
A decorative lower section already draws attention, so strap width and neckline placement matter to the overall balance. Check the finished front and back rather than judging the peplum in isolation. If you adapt strap placement, make sure the change does not also alter how the bodice hangs before the ruffle begins.
Crochet Size Graded Babydoll Peplum Cami
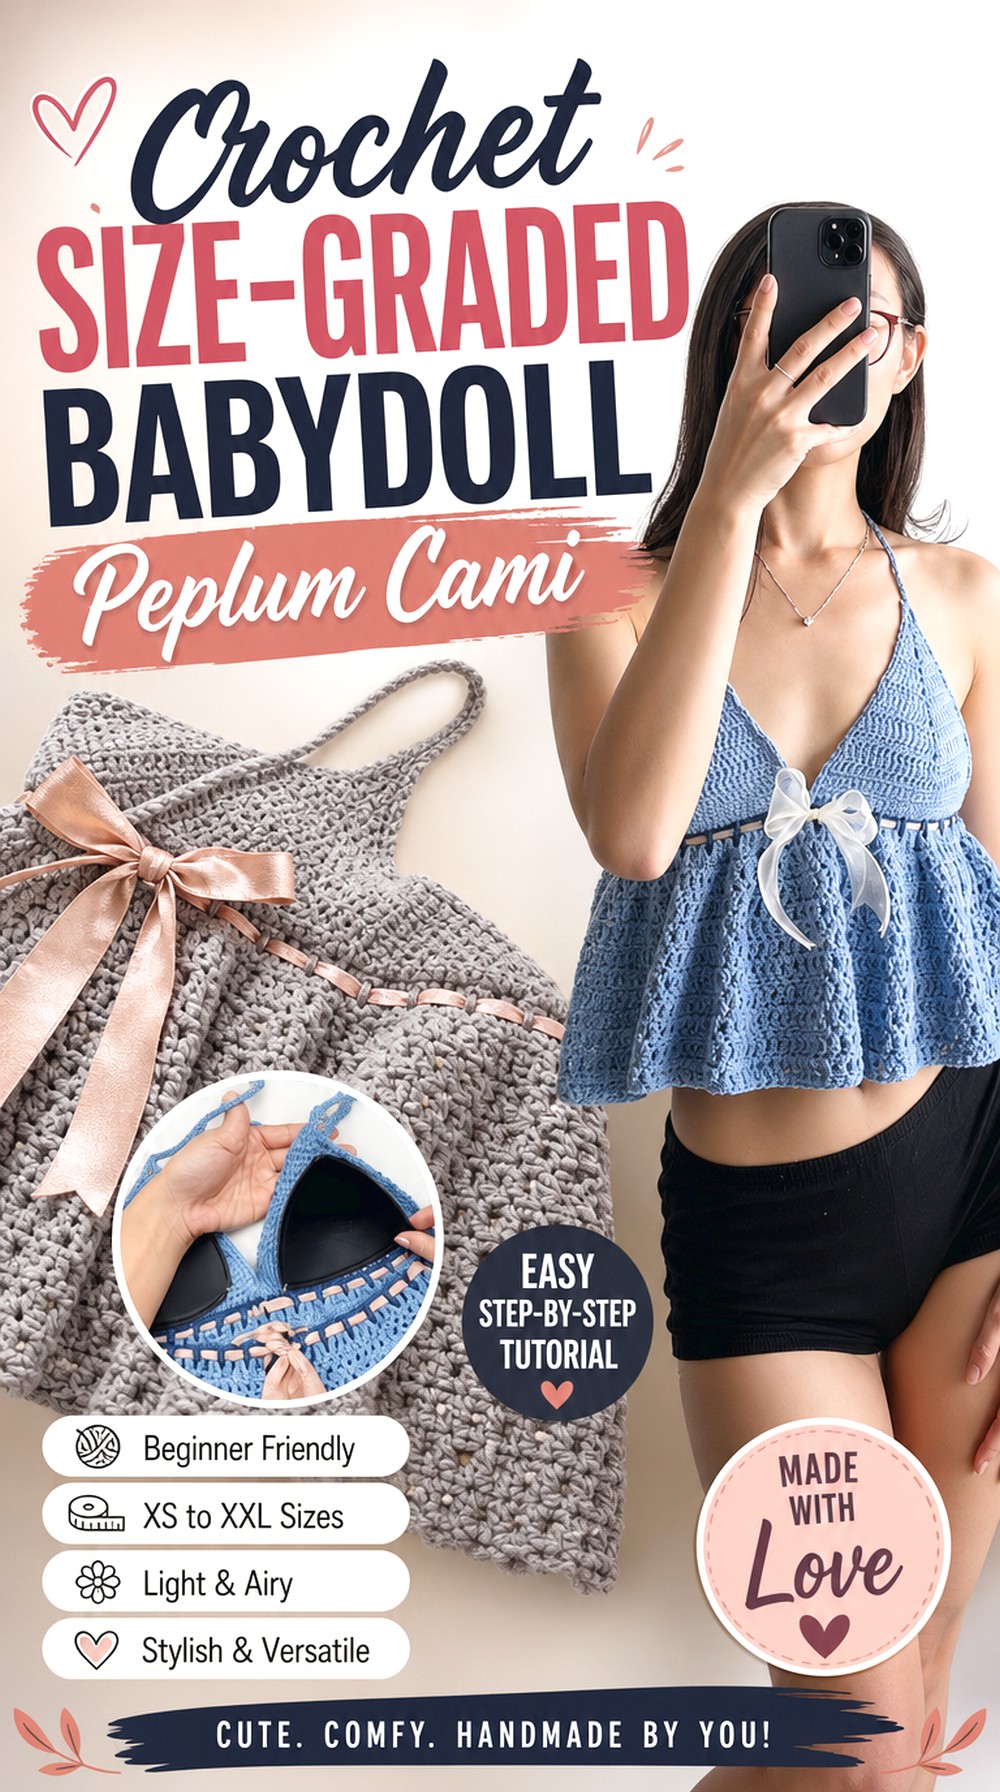
ABoC Studio’s babydoll tutorial covers sizes XS through XXL in the title, providing a useful alternative to purely made-to-measure garment videos. The shape is softer than a sharply gathered waist ruffle: a closer upper portion gives way to a flared lower body, which can be read as a relaxed peplum when kept at top length.
This is a useful choice if you prefer a cami-like upper section and want the lower fabric to skim away rather than project outward dramatically. Because the source calls it a babydoll top rather than a peplum, use the finished views to decide whether its flare placement matches the silhouette you have in mind.
Use the Size Range as a Starting Point
A printed size label does not replace measurement comparison. Check how the creator wants you to select a size, then compare that with the bust fit and ease you prefer in crochet tops. A peplum can appear much fuller when the bodice above it is more fitted.
Decide How Soft You Want the Transition
This construction favors a gentler change between upper and lower sections. If you want a crisp waist ruffle, another tutorial will be a closer match. If you want movement without a strongly cinched appearance, the babydoll approach provides a more relaxed planning direction.
Original Tutorial and Creator Credit
Creator: ABoC Studio
Crochet Short Babydoll Peplum Crop Top
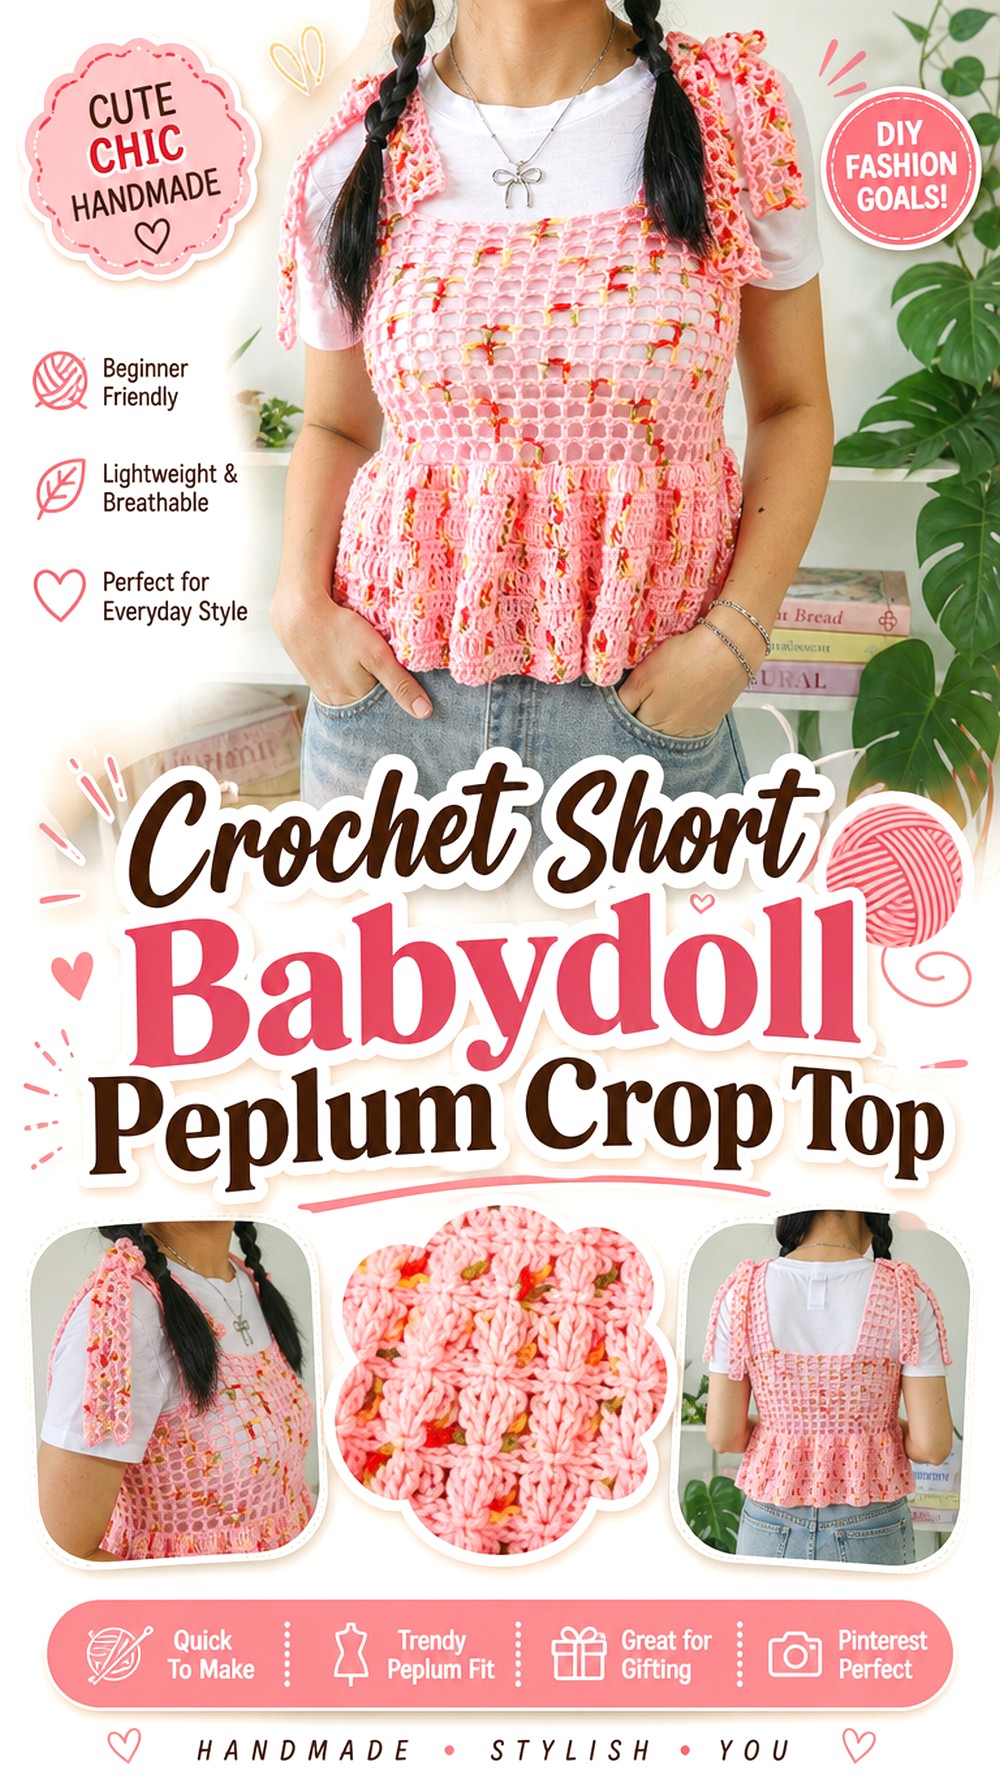
Vyva ‘s Crochet demonstrates a compact babydoll crop with separate upper, lower, and strap portions identified in the video chapters. That short lower section makes this a useful reference for a peplum that stays playful and cropped rather than extending toward tunic length.
The finished shape has narrow straps and a visibly different lower body, but the flare remains softer than a dense layered ruffle. It can work well as inspiration when your priority is a small amount of extra movement below a fitted top. Because the source is explicitly a babydoll crop top, compare its flare position carefully before treating it as a direct peplum substitute.
Cropped Length Makes the Flare More Prominent
A short garment gives the lower panel less vertical space, so its widening becomes an important part of the whole silhouette. Before lengthening it, consider whether the original compact proportion is what attracted you. Adding considerable length could turn the result into a different babydoll shape rather than simply “more coverage.”
Check Both Strap Placement and Upper Height
The creator separates the strap portion from the main top in the chapter structure. That is a reminder to evaluate the upper body before finishing the garment. Strap placement, bodice height, and the start of the flare work together to determine where the top appears to sit.
Original Tutorial and Creator Credit
Creator: Vyva ‘s Crochet
Crochet Sleeved Peplum Blouse

For more coverage, the I love my crochet tutorial moves away from camis and halters and into blouse territory. Its video chapters specifically identify preparation of the lower part and sleeve preparation, so the peplum is paired with a more substantial upper garment rather than minimal straps.
This makes the design useful for readers who want a crochet peplum to feel like a shirt rather than a warm-weather crop top. Sleeves also change the fitting priorities: shoulder, underarm, and upper-body movement need to work before the lower flare can hang properly. The additional fabric means overall garment weight deserves more attention as well.
Evaluate the Peplum With the Sleeves Attached
Sleeves can change how a crochet bodice settles on the shoulders. A waistline that appears correctly positioned while the garment lies flat may sit differently once the upper body is complete. Check the worn shape before making large length adjustments to the peplum.
Balance Coverage With Lower-Body Volume
A covered upper section already carries more visual and physical weight than a strappy top. Decide whether you want a gentle lower flare or a more pronounced blouse-like silhouette. Keeping the two sections in proportion prevents the hem from overwhelming the sleeve shape.
Original Tutorial and Creator Credit
Creator: I love my crochet
Crochet Skater Flare Peplum Top
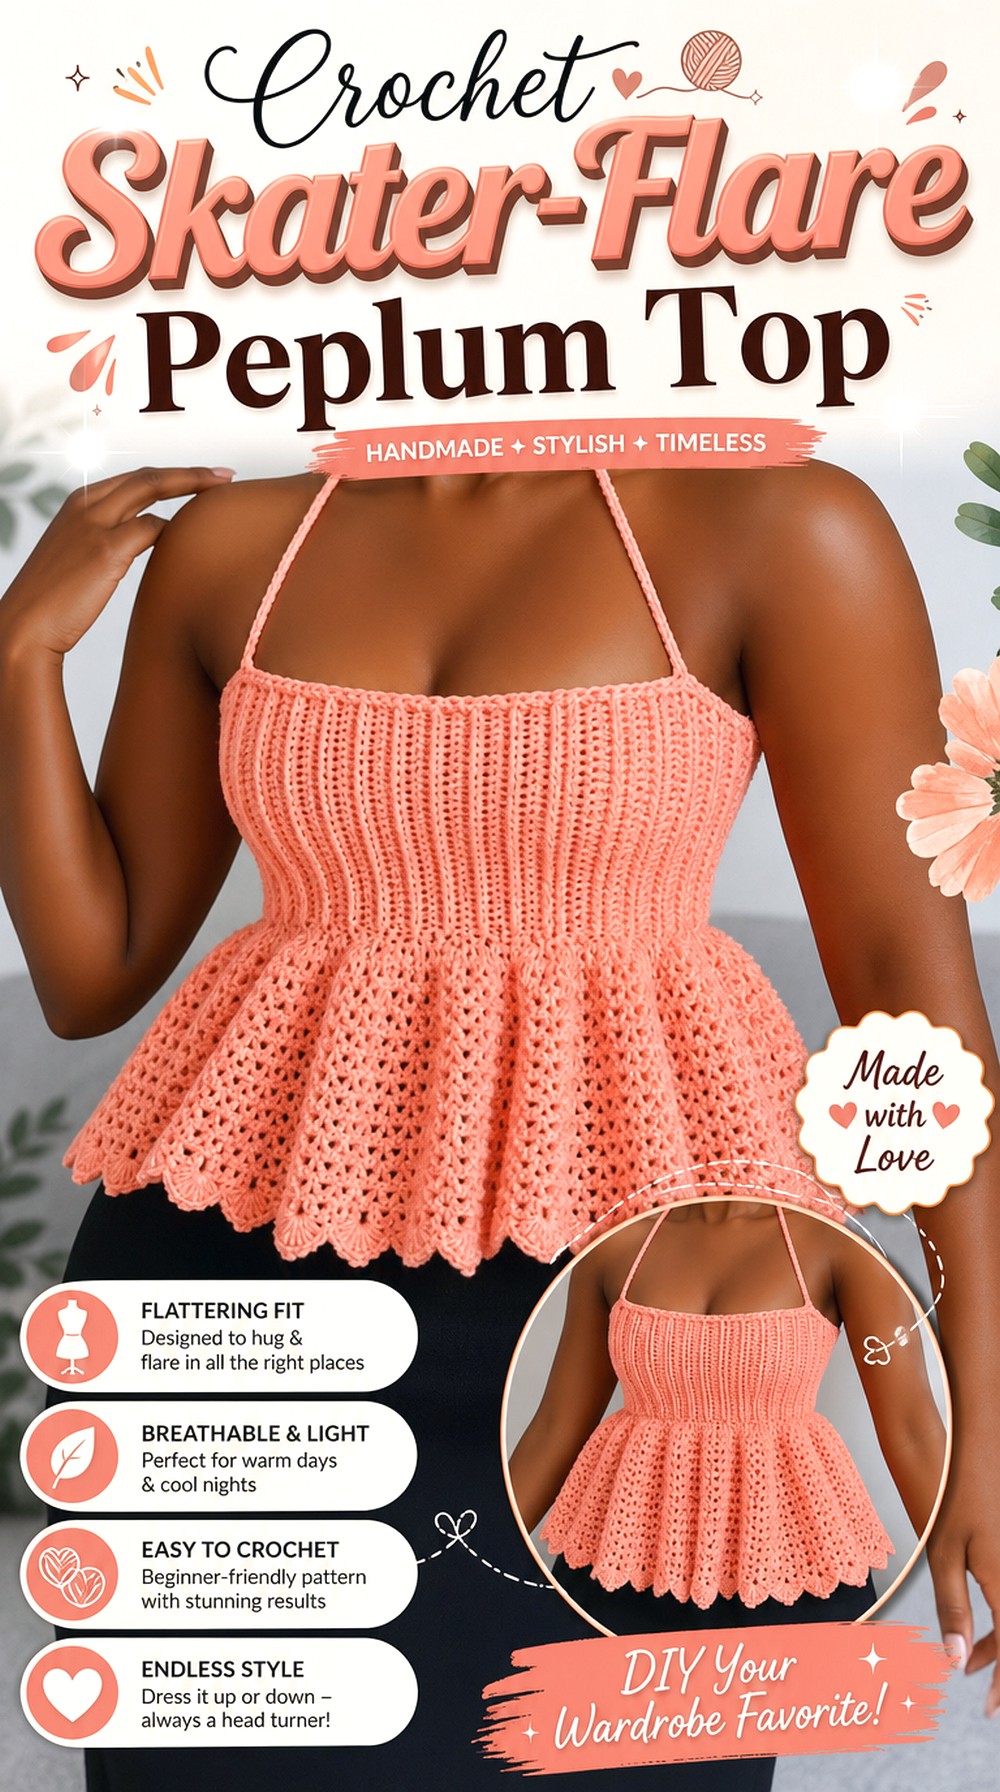
KnotKisses describes this project as both a peplum top and a crochet skater top. That combination points to the most important feature: rather than concentrating all the fullness into a small ruffle, the lower shape spreads more broadly away from the fitted upper section.
A skater-like profile works well for readers who want the entire lower silhouette to create movement. It also deserves careful side-view checking because a wider flare can look quite different from the front, side, and back. Compare the finished shape with shorter peplum designs before deciding how much volume you actually want around the waist and high hip.
Judge the Flare From More Than the Front
A broad peplum can appear moderate in a straight-on photograph while showing considerably more projection from the side. Review the creator’s finished views and think about how the top will pair with your usual bottoms before choosing this wider silhouette.
Keep the Fitted-to-Flared Contrast Intentional
The skater effect depends on contrast. If the upper section becomes very loose, that visual transition can disappear; if it is much tighter than intended, comfort can suffer. Follow the creator’s fit guidance for the upper portion rather than compensating later with more flare.
Original Tutorial and Creator Credit
Creator: KnotKisses
Crochet Size Inclusive Classic Peplum Top
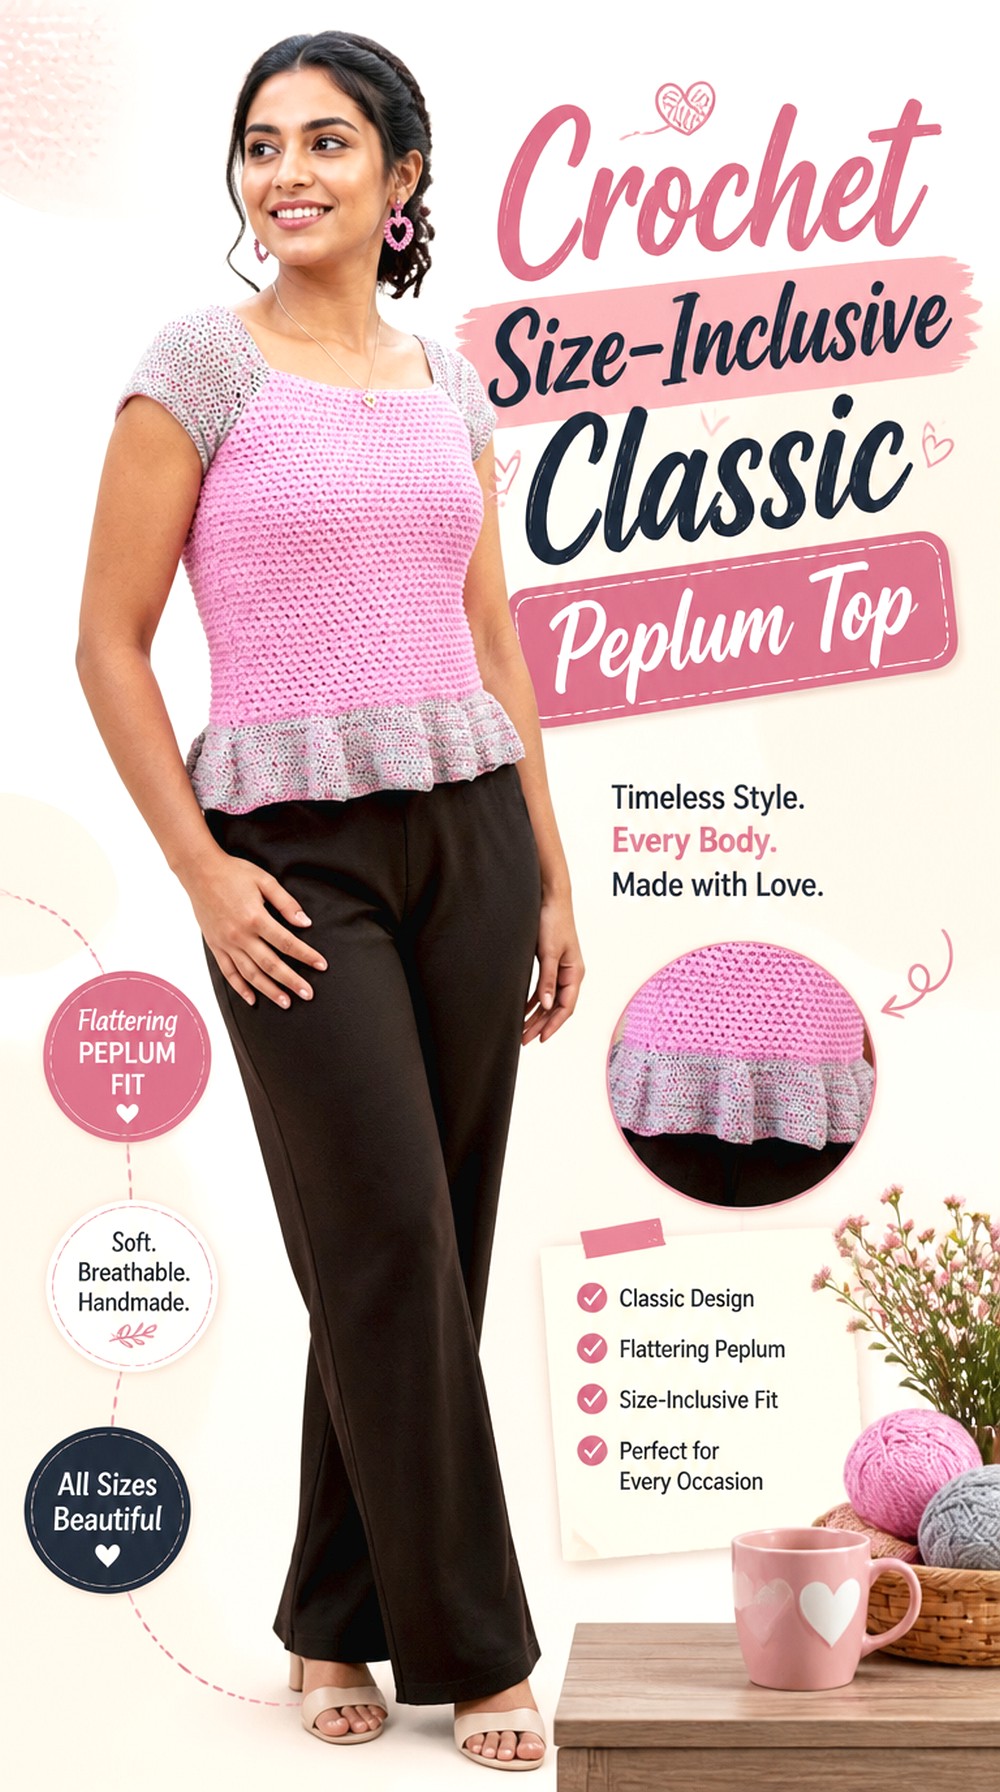
Yarn Craftee’s tutorial is paired with written pattern support, and the video description states that the pattern covers XS through 4XL. That makes this option useful for crocheters who prefer to cross-reference a video with written garment information instead of relying on a video alone.
The overall concept stays close to a classic peplum: a defined upper top leading into a flared lower section without relying on oversized sleeves, bold colorwork, or an unusually open neckline. It is therefore a sensible comparison point for the more decorative projects later in the list.
Written Support Can Simplify Fit Checking
When both written and video resources are available, use them together. The video helps with the visual appearance of the garment, while the written source can make it easier to revisit sizing and customization notes. Confirm which information is freely available and which resources are separate before starting.
Keep Substitutions Tied to Fabric Behavior
The creator supplies specific material information, so avoid choosing another yarn based only on matching thickness. Crochet peplum fabric must work in both a fitted upper area and a flared lower one. Compare gauge and drape with the original guidance before committing to a large garment.
Original Tutorial and Creator Credit
Creator: Yarn Craftee
Crochet Scalloped Tie Strap Babydoll Peplum Top
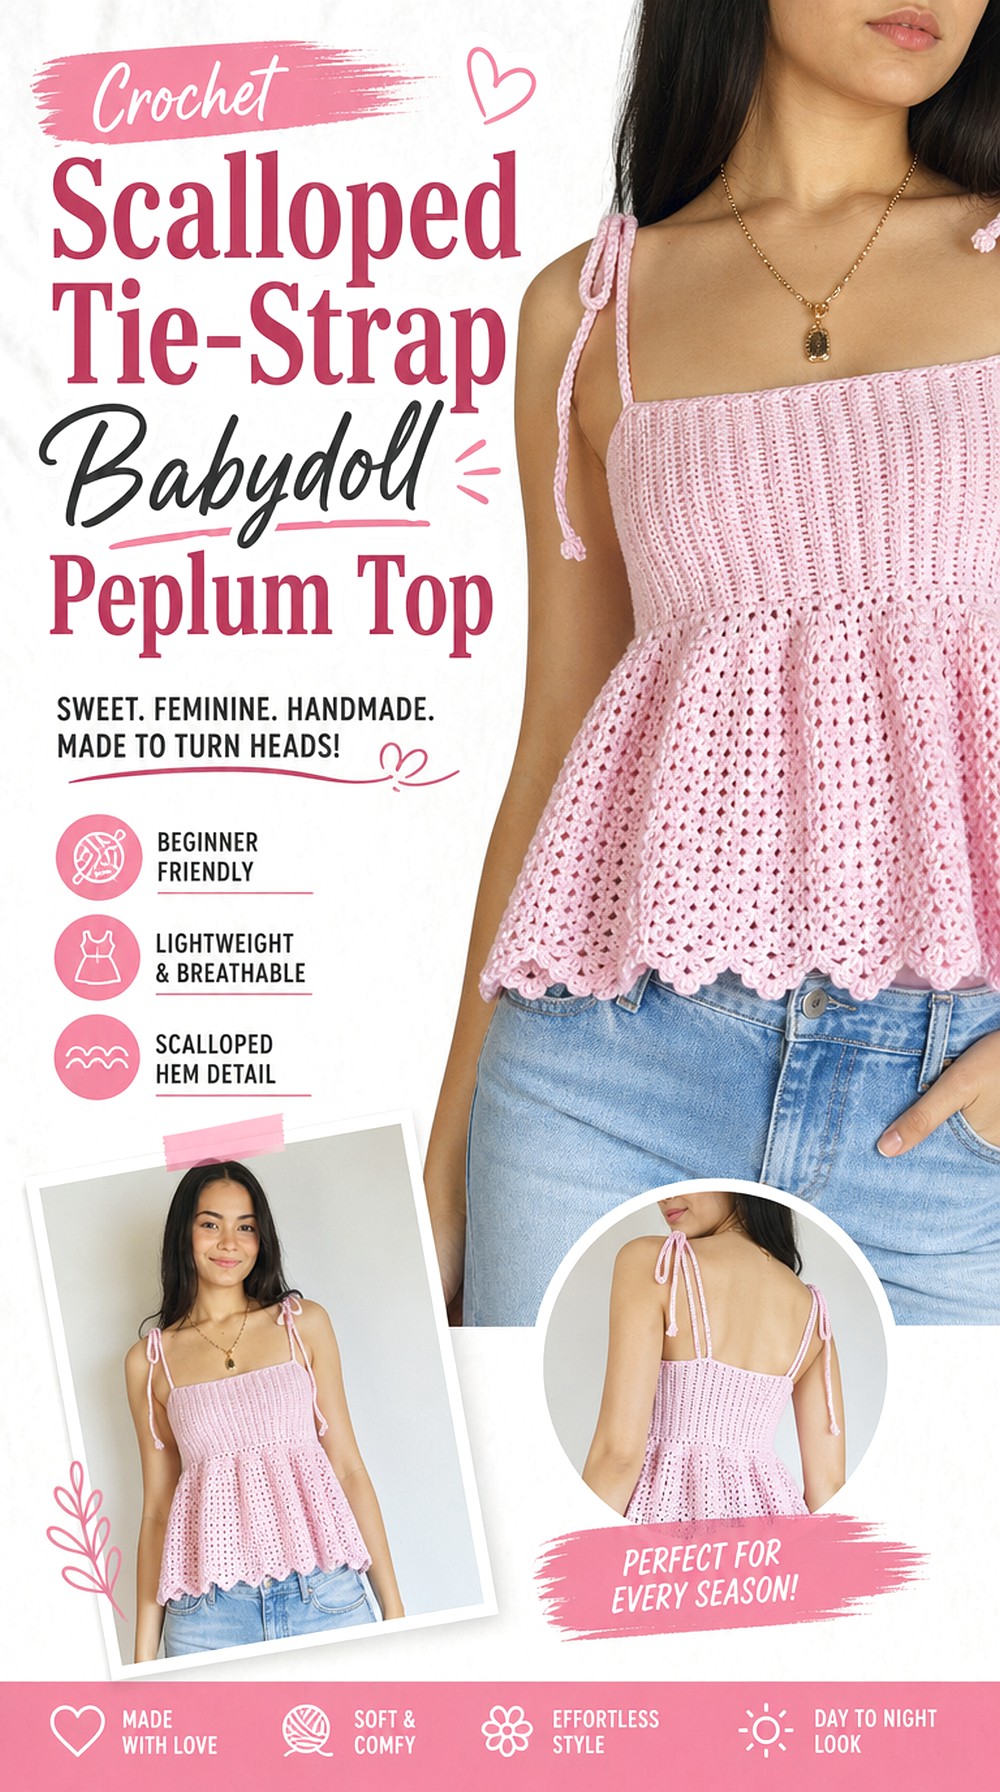
Granny Gaia’s tutorial teaches a babydoll top that can also be extended into a dress. Its description identifies a made-to-measure approach and includes the lower portion, scalloped edging, strap marking, and straps as distinct parts.
For a peplum interpretation, the strongest features are the softer flared body, adjustable-looking tie-strap styling, and decorative hem. It has a more romantic finish than the cleaner tanks in this roundup. Because length is flexible, decide before starting whether you want a short peplum-style top or a substantially longer babydoll silhouette.
Scallops Change the Visual Hemline
Decorative edging adds apparent depth even when the main lower panel stays the same length. When planning coverage, look at the finished garment including the scallops rather than measuring only to the beginning of the edging. A clean straight hem would give the same body a noticeably different character.
Strap Marking Is a Fit Check, Not Decoration
The tutorial includes a strap-marking stage, highlighting how placement affects the upper silhouette. Check symmetry and neckline position before finalizing the straps. A soft lower flare works best when the upper portion is not being pulled unevenly from one side.
Original Tutorial and Creator Credit
Creator: Granny Gaia
Crochet Basketweave Halter Peplum Top
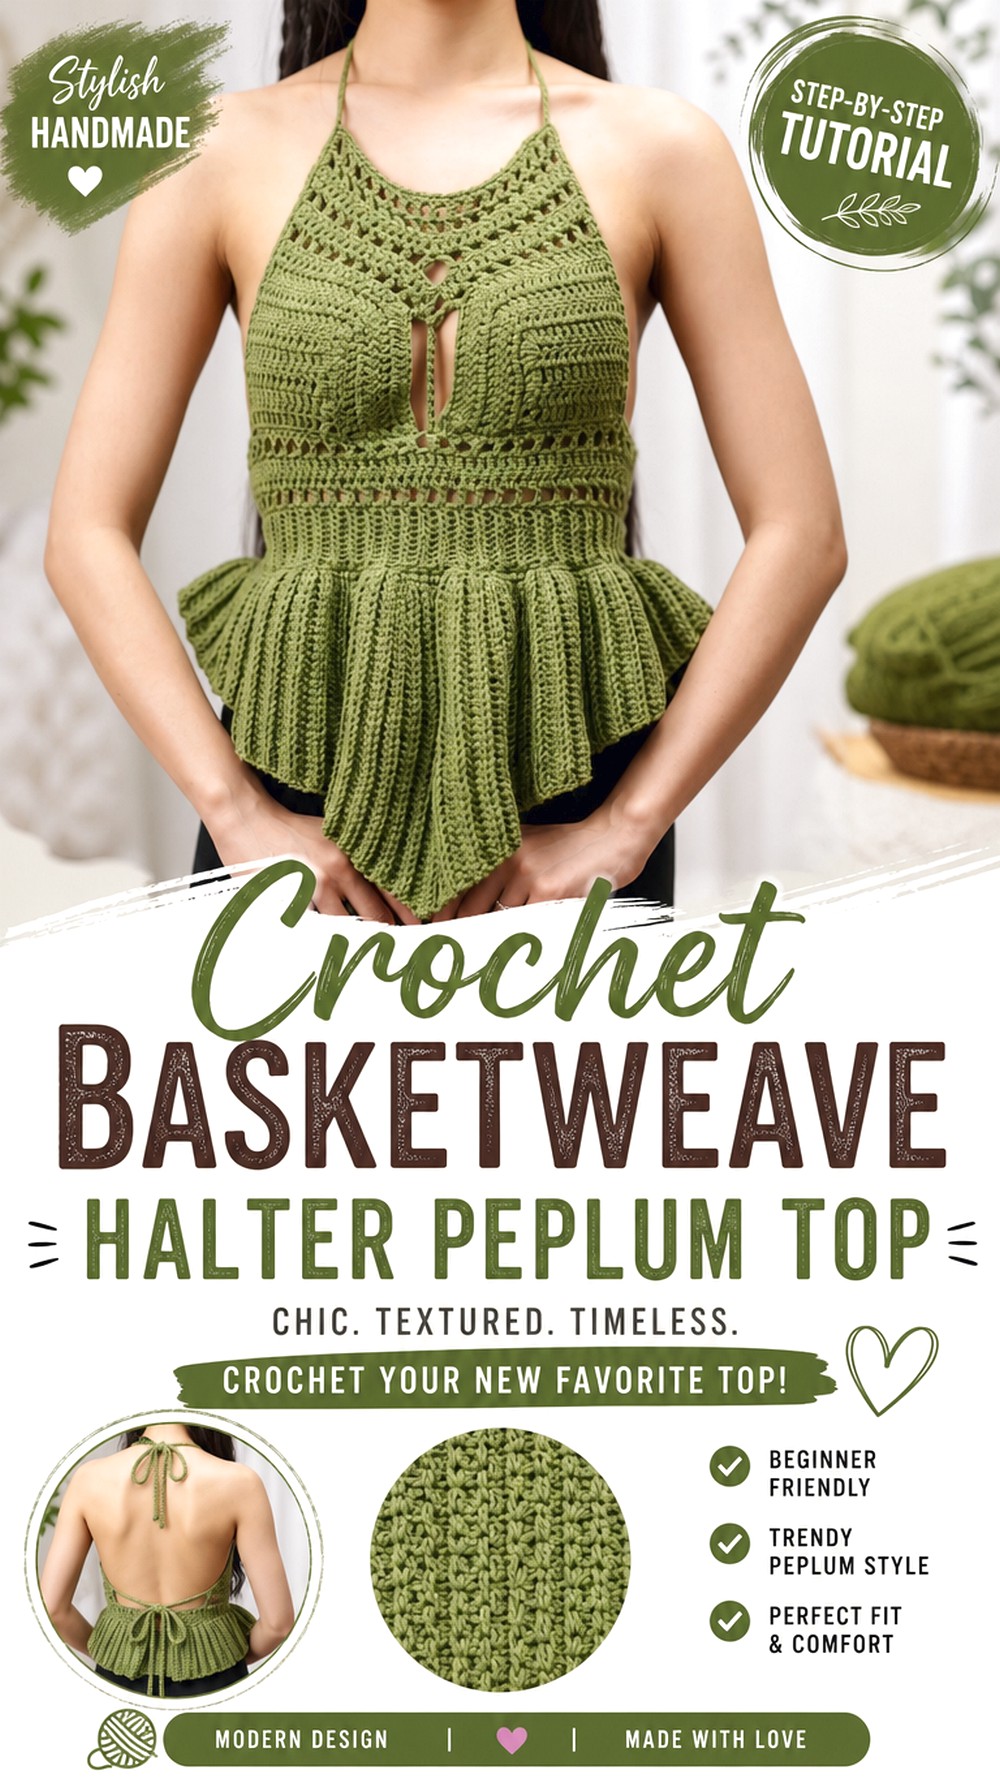
TCDDIY’s halter peplum introduces stronger surface texture than the smooth cami and babydoll options. The source material identifies a waistband, basketweave detail, peplum section, straps, and neckline finishing, giving the garment several visually distinct zones.
That texture makes this a good choice when the stitch surface should be as noticeable as the silhouette. It also changes yarn-selection priorities: a highly varied colorway can compete with raised texture, while a clearer color treatment lets the relief remain visible. The halter construction keeps the shoulders open, balancing the visually heavier body.
The Waistband Controls Two Design Areas
Here, the waistband is more than a divider. It helps establish the fit of the upper body and the point where the lower flare begins. Check its placement against your torso before assuming that simply extending the peplum will give the proportion you want.
Give Raised Texture Enough Visual Space
If basketweave is the feature you want to emphasize, compare yarn choices under normal lighting before beginning the whole top. Busy color changes can make raised stitches harder to read, while a plainer yarn lets the texture provide the complexity.
Keep the Halter Neck From Fighting the Fabric Weight
A textured body can carry more visual and physical substance than an open lace top. Review the strap and neckline sections carefully so the halter sits as the creator intends rather than relying on tighter ties to compensate for an incorrect body fit.
Original Tutorial and Creator Credit
Creator: TCDDIY
Crochet Floral Waist Primrose Peplum Top
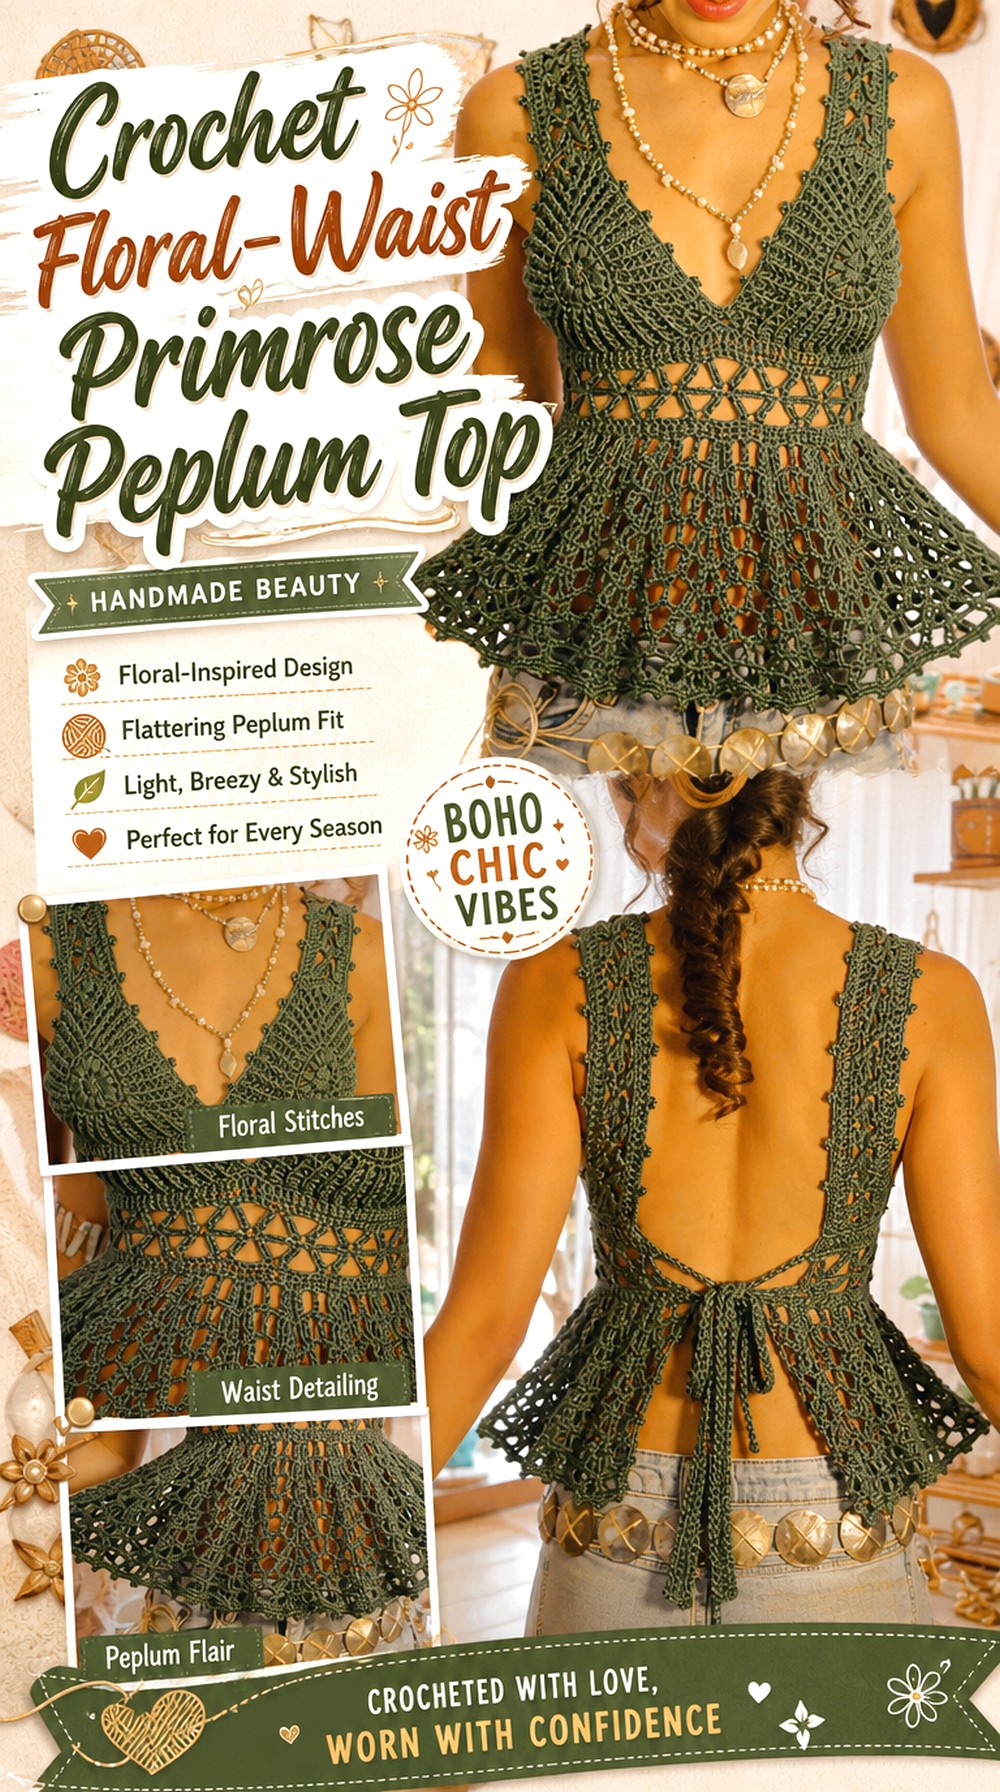
The Primrose Peplum Top from Baecrochett by Lizzy & Becky combines shaped cups, a flower-focused waistband, and a flared lower panel. The designer’s pattern page confirms that these areas are separate construction features, making this one of the most decorative and structurally distinctive tops here.
Choose this direction if you want the waist transition itself to become a focal point rather than simply the place where increases begin. It has a boho, statement-garment feel and asks for more fit planning around the cups than a square-neck tank or tube bodice.
Cup Fit Comes Before Peplum Placement
A cup-based top introduces coverage and placement questions that straight bodices do not. Follow the creator’s sizing and adjustment information closely. If the cup area sits higher or lower than intended, the floral waistband and peplum will also shift position on the body.
Protect the Floral Waist From Visual Competition
The waistband contains a distinct decorative element, so consider whether your color and yarn choices help it remain visible. Too many competing changes can make the flowers, cups, and lower flare fight for attention. A deliberate palette lets each construction zone read clearly.
Check What the Video and Pattern Each Provide
The YouTube tutorial links to a separate digital pattern. Before starting, determine which sizing, charts, or other exact information belongs to each resource. That prevents reaching a fit-sensitive stage and discovering that the detail you need is located elsewhere.
Original Tutorial and Creator Credit
Creator: Baecrochett by Lizzy & Becky
Crochet Tube Bodice Peplum Tank
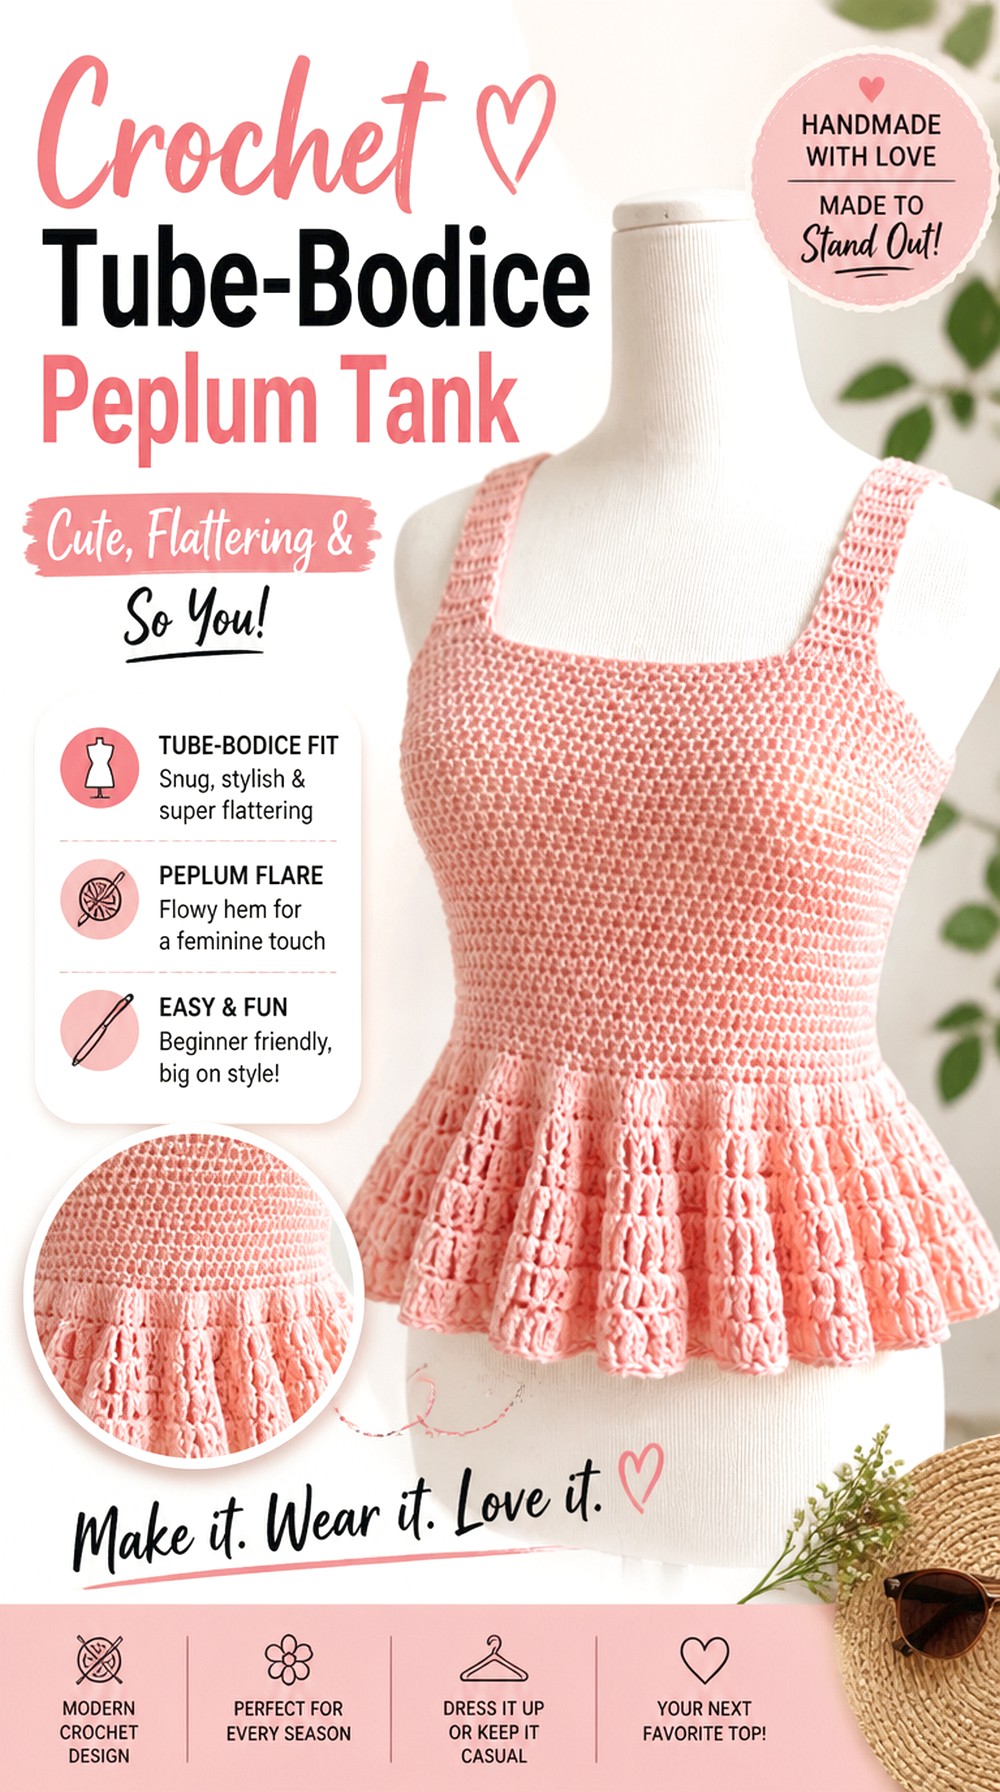
Fiber Flux’s Strawberry Cream Peplum Tank uses a comparatively simple upper concept: the description identifies a bodice tube, peplum ruffle, crocheted-on straps, sizing information, and finishing.
That makes it a useful contrast with cup-based or sleeved designs. The upper body is visually clean, allowing the ruffled peplum to provide most of the shape. Readers who want a classic sleeveless warm-weather piece without a complicated neckline may prefer this construction. Since the bodice supports both straps and ruffle, however, its circumference and height still deserve careful checking before moving to the decorative portions.
Get the Tube Fit Right Before the Ruffle
A straightforward bodice can tempt you to move quickly, but it establishes the entire garment. Check whether it sits securely and at the intended height before adding lower volume. A ruffle will not correct an upper section that is already too loose or too short.
Treat the Straps as Structural Finishing
Because the straps are worked as part of the project, use the creator’s strap section rather than improvising their position early. Length and attachment points influence neckline height, underarm coverage, and how much load the bodice carries.
Original Tutorial and Creator Credit
Creator: Fiber Flux
Crochet Shaped Cup Peplum Top
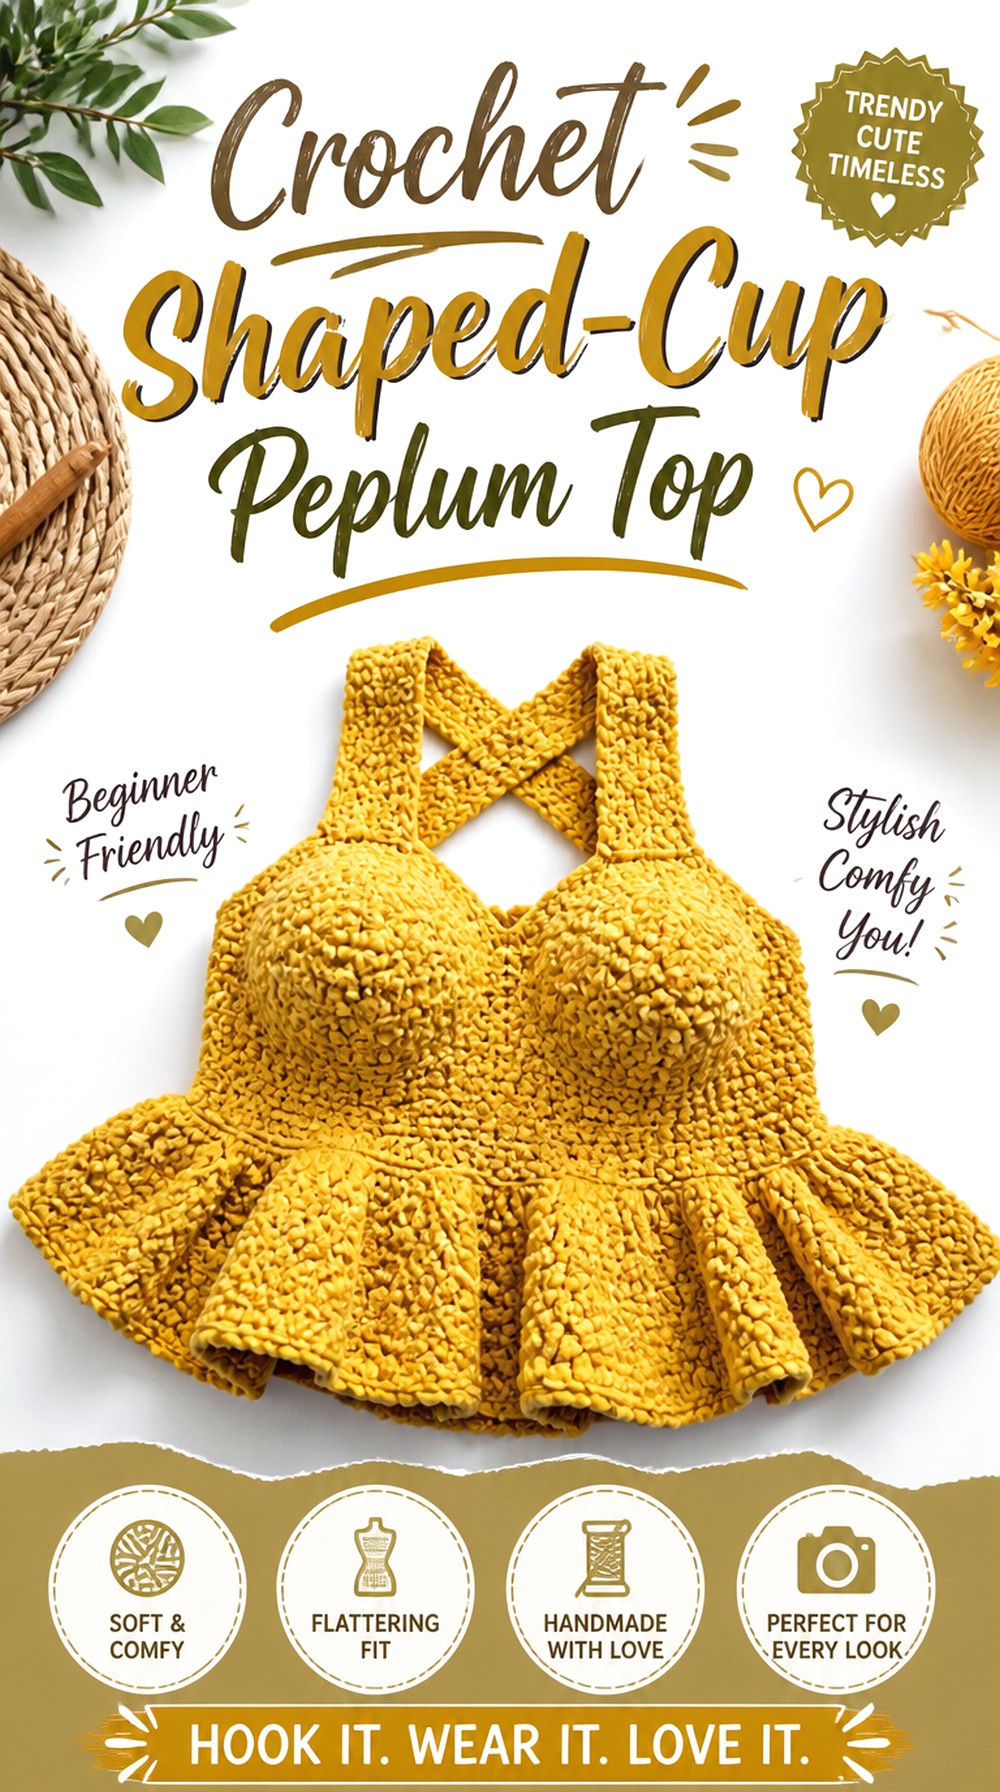
Nirvana Crochet’s tutorial teaches a peplum top with shaping around the bra-cup area and identifies sizes S through XL in the description. The video also calls out cup measurement and cup joining as important stages.
This is a useful choice when you want more contour in the upper garment than a rectangular or tube bodice provides. That extra shaping means fit decisions need to happen before the peplum is considered finished. Rather than treating the lower flare as the main sizing tool, make sure the cups, joins, and upper circumference work with your intended coverage first.
Cup Measurement Has a Ripple Effect
A change in the upper fit can alter neckline coverage and where the waist section begins. Follow the creator’s size-specific guidance instead of borrowing cup proportions from another crochet top. The peplum should be planned around the completed upper shape, not used to disguise a mismatch there.
Compare Sizes With Your Own Measurements
The tutorial supplies named sizes, which is useful, but handmade garments still require measurement checking. Pay attention to the creator’s measurement points and use them rather than relying on the clothing size you usually buy from a store.
Original Tutorial and Creator Credit
Creator: Nirvana Crochet
Crochet Textured Cotton Peplum Top
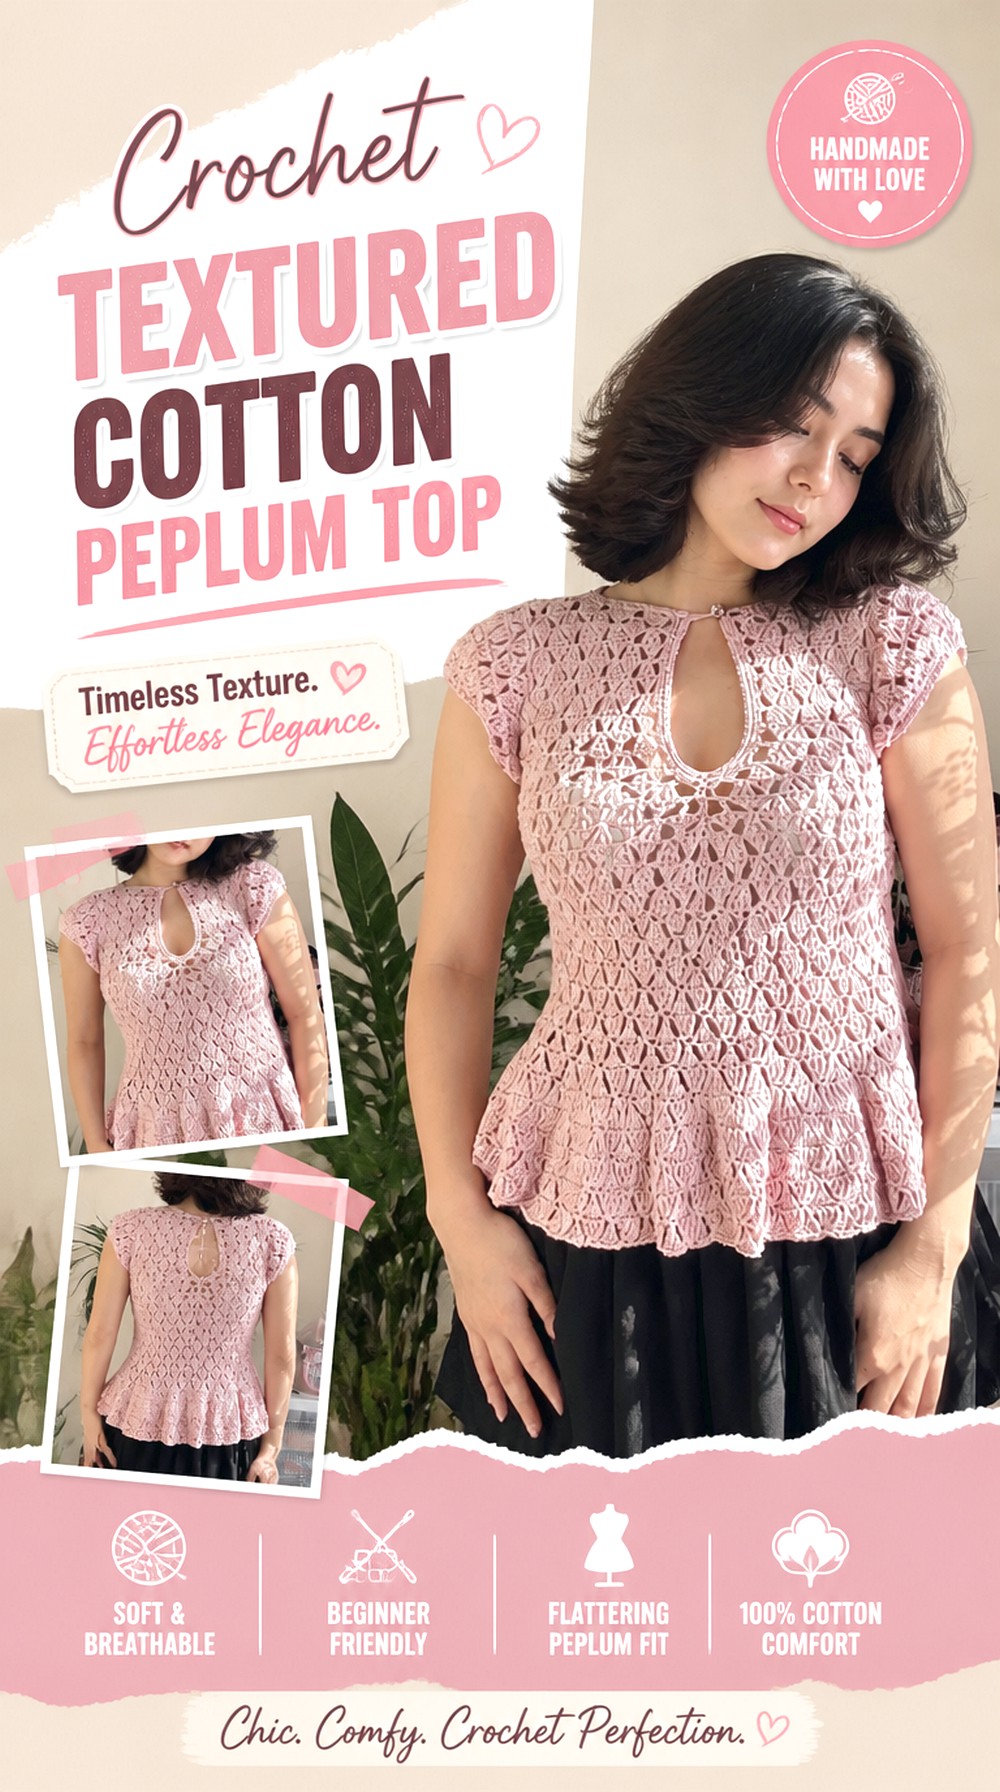
Yaan_Vlogs’ tutorial focuses on a peplum top with detailed stitch texture throughout the design. The creator lists cotton yarn in the materials and notes that the stitch pattern may require patience from complete beginners, so this option is better chosen for its surface detail than for a deliberately plain garment.
Texture changes the character of the peplum itself: instead of relying entirely on a large ruffle, the fabric provides interest across the whole garment. It is a strong choice if you want a single-color top that still looks detailed. Make fabric behavior part of your swatching decision because texture, density, and flare need to coexist.
Texture Can Affect Apparent Bulk
A pronounced stitch pattern can make fabric look heavier than smooth crochet even at similar dimensions. Study the finished lower section before increasing its length or fullness. More fabric is not always the best way to make a textured peplum more noticeable.
Keep Stitch Definition in Mind When Substituting
If you change yarn, consider how clearly it shows the stitch pattern as well as how it drapes. Fuzzy or strongly variegated yarn can soften fine surface details. Use the creator’s original material information and fabric appearance as comparison points rather than assuming every similarly weighted yarn will look alike.
Original Tutorial and Creator Credit
Creator: Yaan_Vlogs
Crochet Square Neck Everyday Peplum Tank
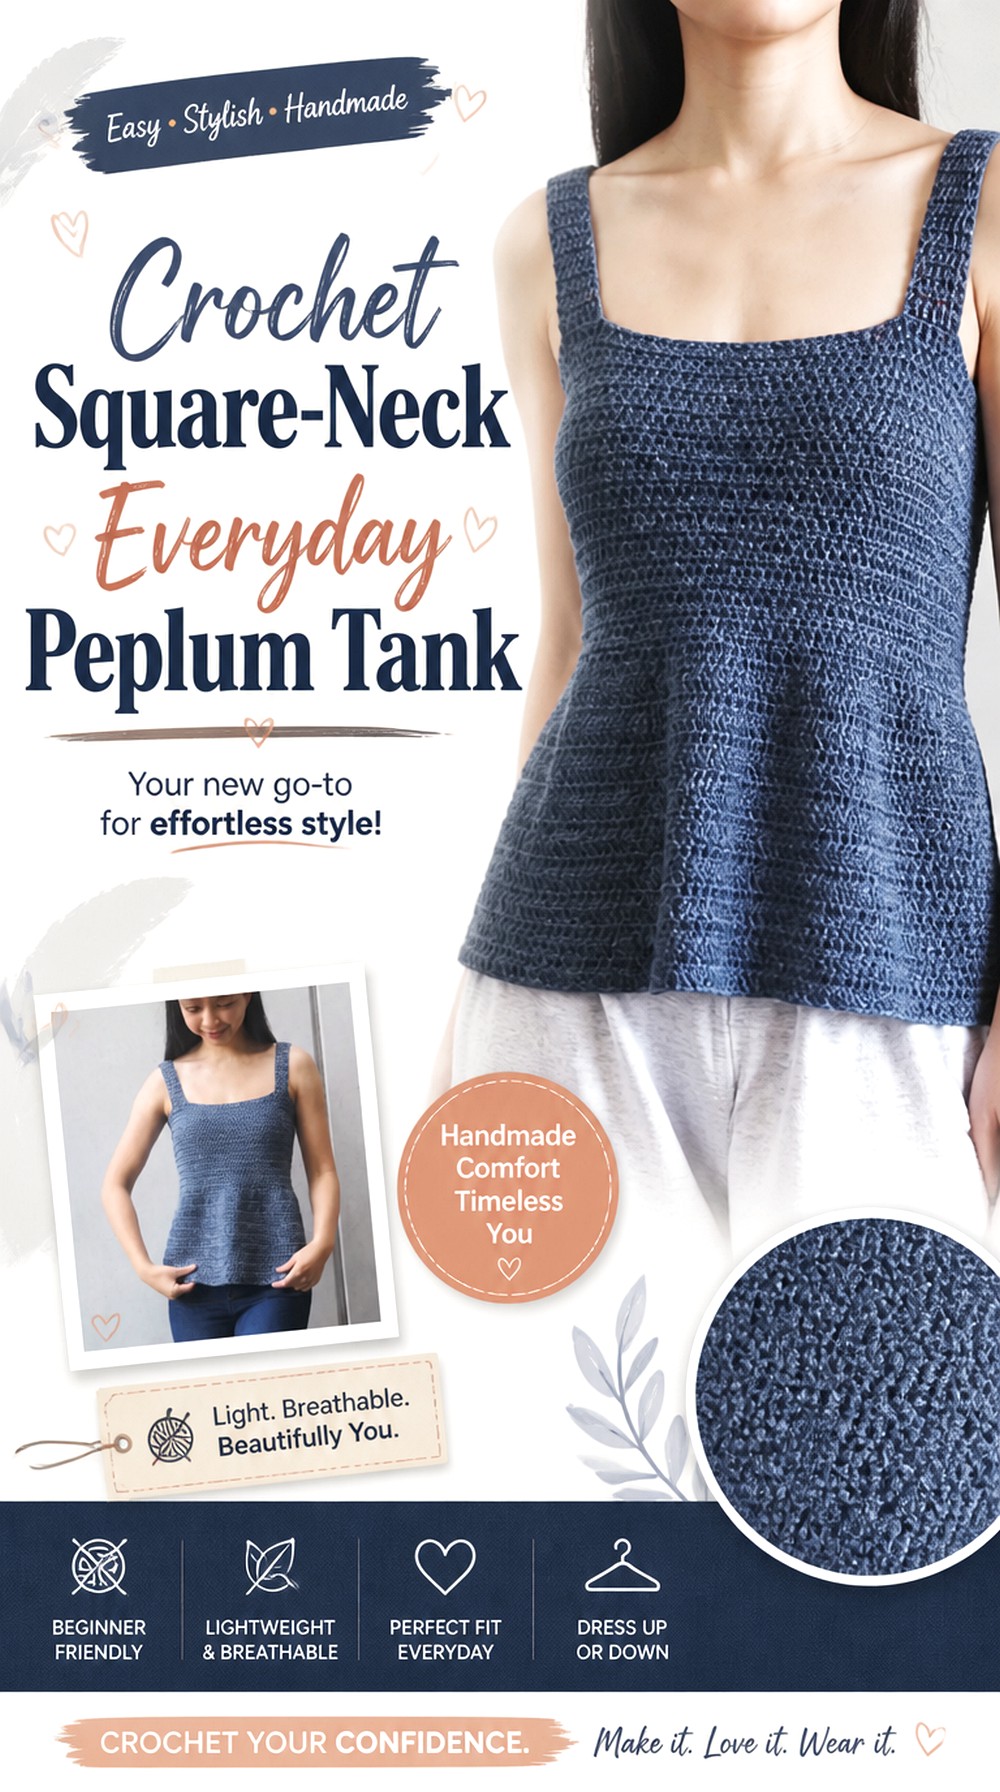
The Emilia Tank from forthefrills pairs a square neckline with a lightly flared peplum. The creator’s tutorial description presents it as a top-down design and lists sizes XS through 3XL, making it one of the cleaner, less ruffle-heavy silhouettes in this collection.
This style works well when you want the peplum to soften a practical tank rather than turn the hem into the dominant feature. The square neck gives the upper body a crisp line, so neckline depth and strap placement are worth comparing with tops you already find comfortable.
A Square Neck Makes Strap Symmetry Obvious
Straight neckline lines quickly reveal straps that are positioned differently or pulling unevenly. When checking fit, look at both shoulder placement and the horizontal front edge. Correcting those details before adding more length keeps the finished tank looking balanced.
A Light Flare Is Easier to Layer
Compared with highly gathered ruffles, a modest peplum can sit more quietly under an open cardigan or jacket. If layering matters, resist assuming that a larger flare is automatically better. The cleaner silhouette may be exactly what makes this project useful in an everyday wardrobe.
Original Tutorial and Creator Credit
Creator: forthefrills
Crochet Open Back Halter Peplum Top
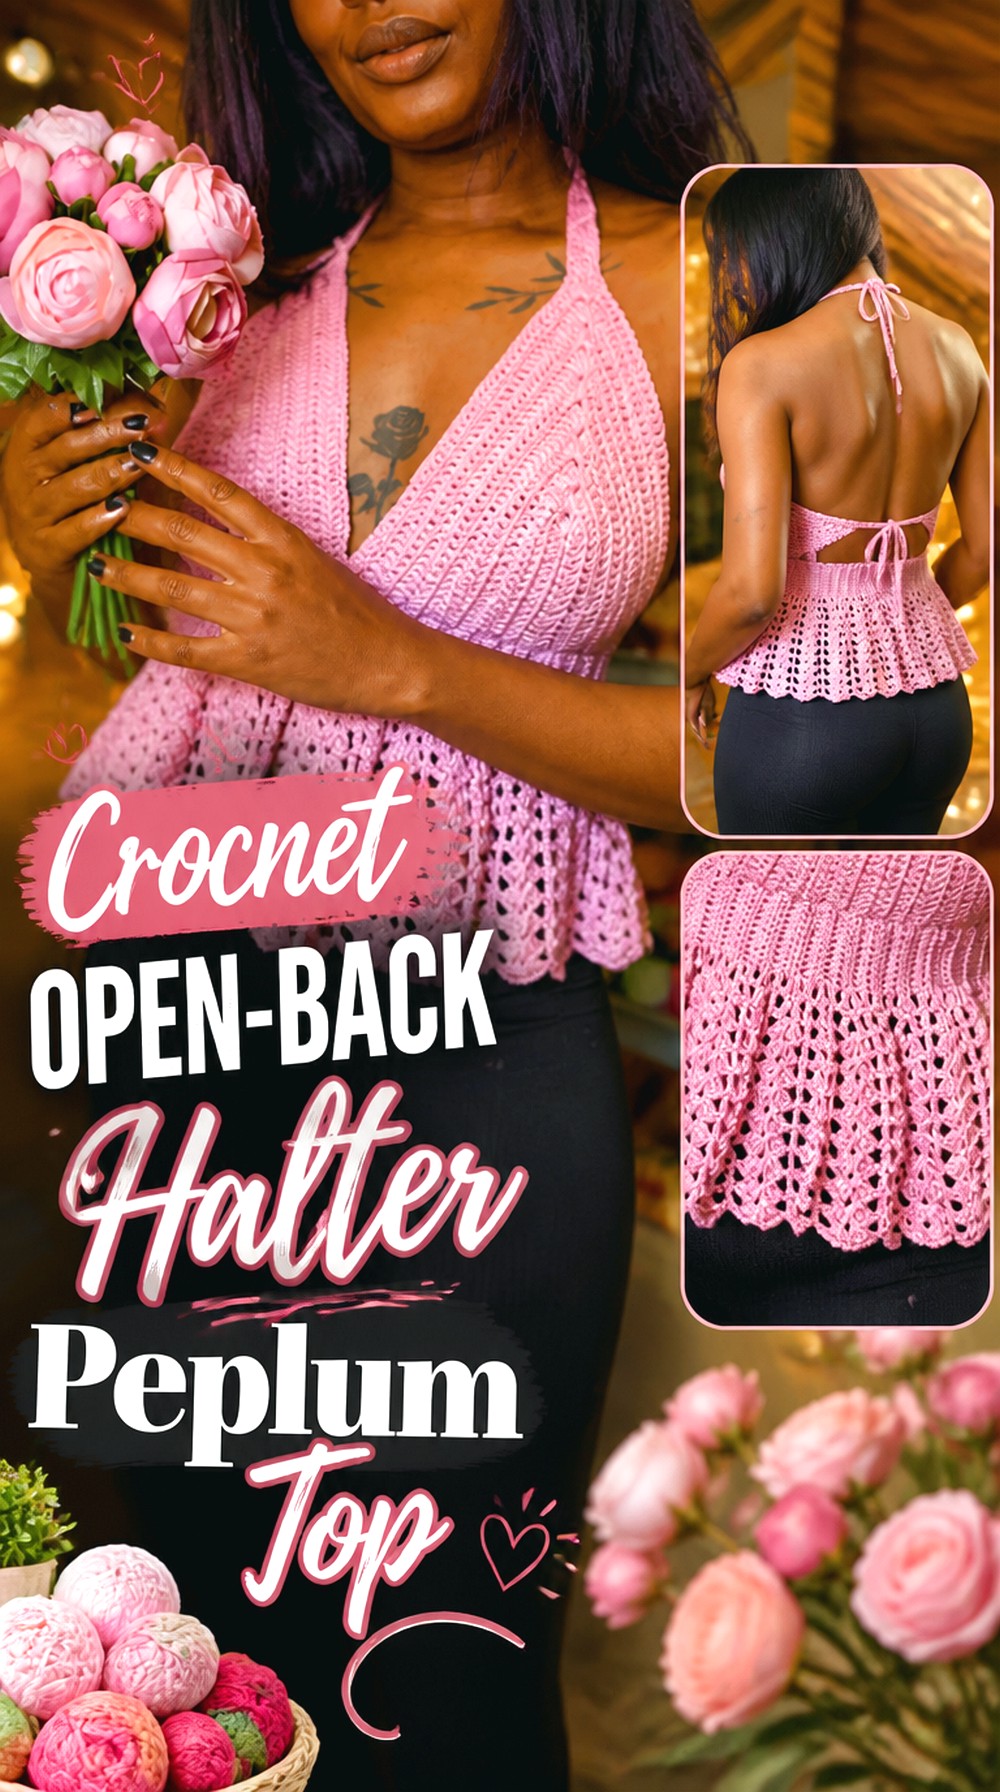
Stitched_goddess presents a peplum halter with an open-back shape and flowy flare. The creator describes the design as adjustable and custom-fit, which makes it particularly relevant for readers who prefer measurement-led fitting over a rigid standard-size construction.
The open back distinguishes this project from square-neck tanks and sleeved blouses. Because there is less upper-back fabric stabilizing the garment, the halter and body fit need to work together. It is better suited to someone comfortable checking coverage and tie or strap placement carefully while following the source.
Open Backs Shift the Support Question
With less fabric across the back, the neckline and halter area play a larger role in how the top sits. Do not solve looseness merely by pulling a neck tie tighter. Check the creator’s intended body fit and attachment points so comfort is not sacrificed for stability.
Let the Peplum Fall Instead of Forcing It Outward
The appeal here is a flowier lower section rather than rigid architecture. When considering yarn substitutions, compare how the fabric hangs vertically. A significantly stiffer result could turn a soft open-back design into a much more structured silhouette.
Original Tutorial and Creator Credit
Creator: Stitched_goddess
Crochet Sleeve Optional Babydoll Peplum Top
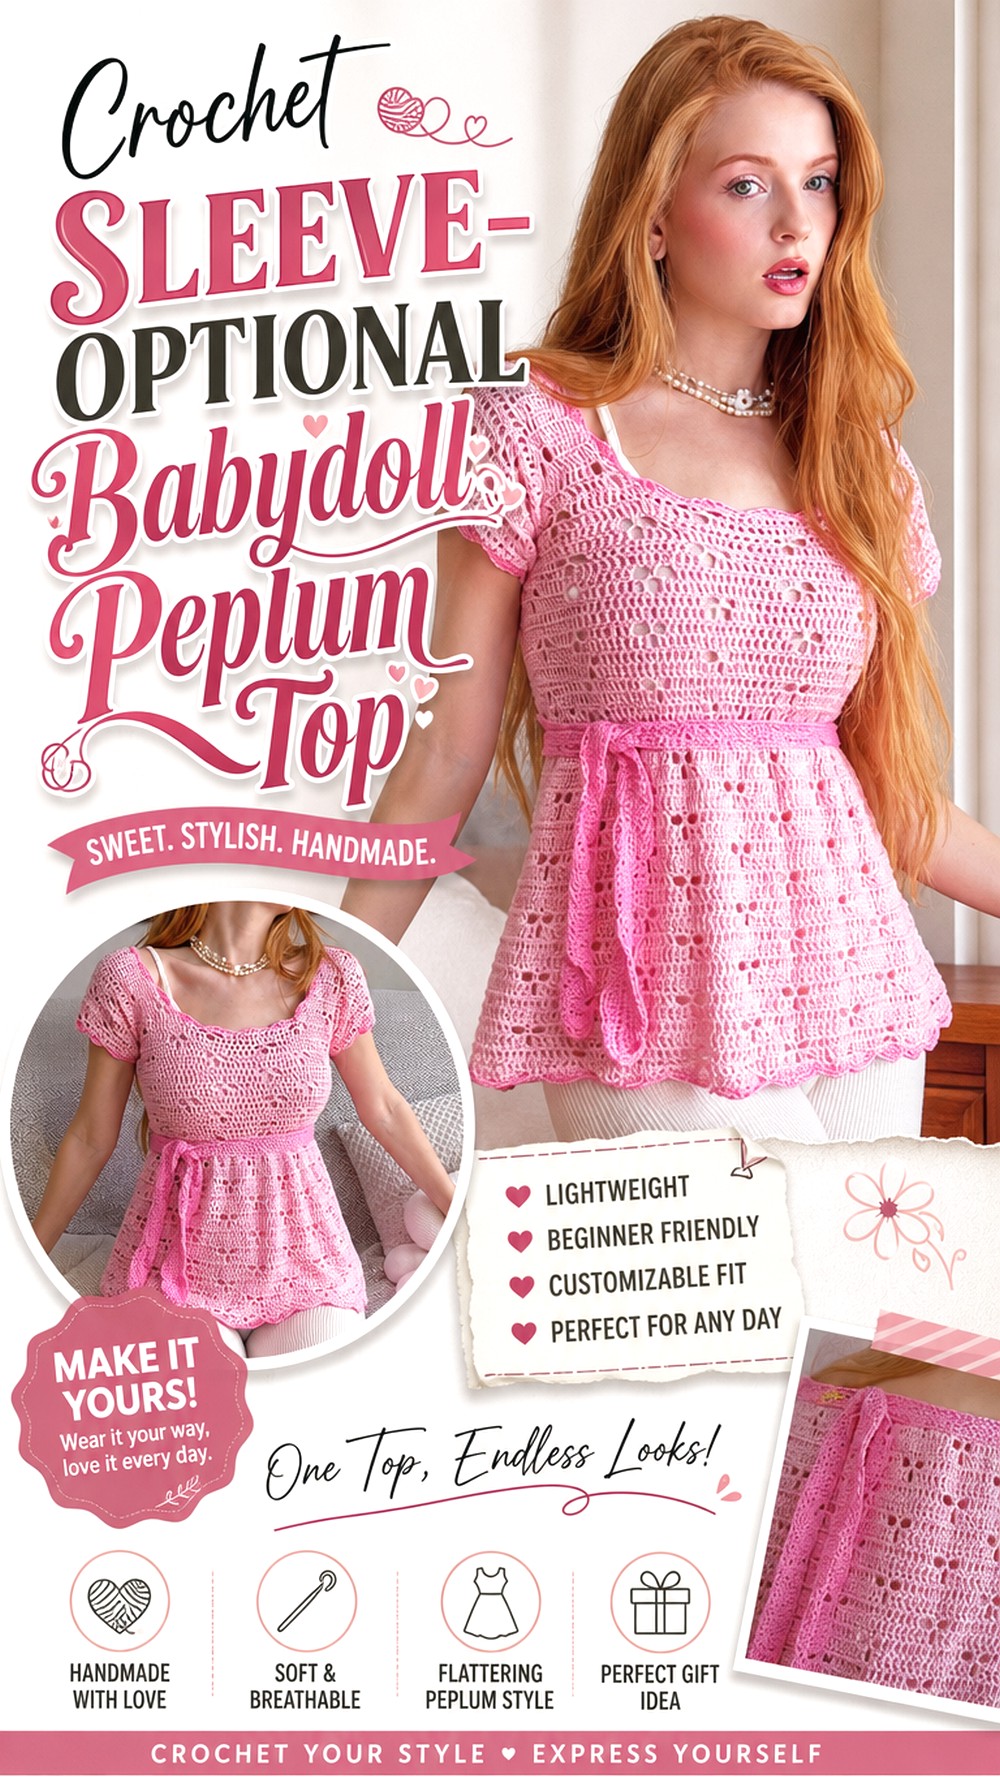
WONDER NETTING’s babydoll tutorial is unusually flexible in visible styling: the video chapters cover a tube top, straps, sleeves, two bottom options, edging, a waistband, and the finished result.
For peplum inspiration, that makes it valuable when you have not yet decided between a simple strappy upper body and a more romantic sleeved version. The source is labeled a babydoll top rather than a peplum, so retain the shorter lower option if you want the garment to read more clearly as a top with a flare rather than as the beginning of a dress.
Sleeves Change More Than Coverage
Adding sleeves alters the visual weight of the upper garment and may change how the shoulder area sits. Decide on the sleeved or sleeveless version before judging the balance of the lower flare. A peplum that feels full beneath narrow straps may appear more moderate beneath sleeves.
Compare the Bottom Options Before Committing
The presence of two lower-body approaches is useful for customization, but preview both first. Choose according to the amount of flare and final length you want rather than automatically following the first option shown.
Choosing Among the 28 Peplum Shapes
Start with silhouette rather than decoration. For a restrained everyday shape, the square-neck Emilia tank, tube-bodice tank, or classic size-inclusive top keeps the flare relatively easy to style. Babydoll options suit readers who prefer a softer transition, while the AC Crochets, Happy Hooker, and Shyler designs put more emphasis on an obvious ruffle. Choose the TCDDIY or Yaan projects when texture matters, the I love my crochet or Jennyandteddy versions when sleeves are part of the look, and Meribella or Penelope when you want a source that intentionally allows a longer garment direction. Cup-based halters need the most attention to upper fit before the peplum is planned.
Conclusion
The most useful way to choose among these crochet peplum top ideas is to decide where you want the flare, how much volume you want, and how much upper-body structure you are comfortable fitting. A square-neck tank gives a cleaner everyday result, babydoll construction creates softer movement, and concentrated ruffles make the waist transition more obvious. Sleeves, cups, mesh, basketweave texture, color changes, and dress-length options add further decisions.
Once you have the right silhouette, compare yarn behavior, coverage, straps, and garment length before making substitutions. Use the original tutorials linked above for exact construction, measurements, stitch information, and finishing details.
Frequently Asked Questions
Where should the flare begin on a crochet peplum top?
There is no universal position because the design may use a natural-waist ruffle, higher babydoll transition, or longer skater-style flare. Compare the creator’s finished garment with your torso and with a top whose waist placement you already like. If you change the bodice length, remember that you also move the peplum transition, so reevaluate the whole silhouette before continuing.
What kind of yarn works well for a crochet peplum?
Choose according to the tutorial first, then consider the balance between shape retention and drape. A stiff fabric can make a broad peplum project outward, while a very heavy or stretchy fabric can pull the flare downward. When substituting, compare yarn weight, gauge, fiber behavior, and the feel of your swatch with the creator’s sample rather than choosing only by appearance.
Can a crochet babydoll top be used as a peplum-top idea?
Yes, when the visible construction has the fitted-to-flared relationship you want, but the terms are not interchangeable in every design. Babydoll tops often have a softer or higher transition, while a conventional peplum may create more defined waist shaping. When a source in this roundup is labeled babydoll rather than peplum, follow its actual tutorial and treat the peplum description as styling inspiration rather than a claim about the creator’s pattern.
How can I tell whether a peplum will be too full?
Study the finished front, side, and back views, not just a flat photo. Look at how abruptly the fabric widens and how deep the lower section is. If you are considering modifications, change one proportion at a time. Increasing both the depth and fullness of a ruffle can produce a much more dramatic silhouette than the tutorial sample.
Should I finish the bodice before changing the peplum length?
Whenever the construction allows a fit check, that is the safer planning order. The neckline, straps, cups, armholes, or sleeves determine how the upper garment sits, which in turn determines where the lower flare falls. Adding a large amount of peplum fabric before correcting an upper-body problem can add weight without fixing the actual source of poor fit.
Can I extend a crochet peplum top into a dress?
Only assume that when the creator provides a dress option or the construction has been evaluated carefully for that change. A dress requires more fabric and adds more hanging weight than a short peplum, which can affect the bodice and straps. The Meribella, Granny Gaia, WONDER NETTING, and Penelope sources explicitly provide top-to-dress context; follow their individual guidance rather than applying one universal extension method.