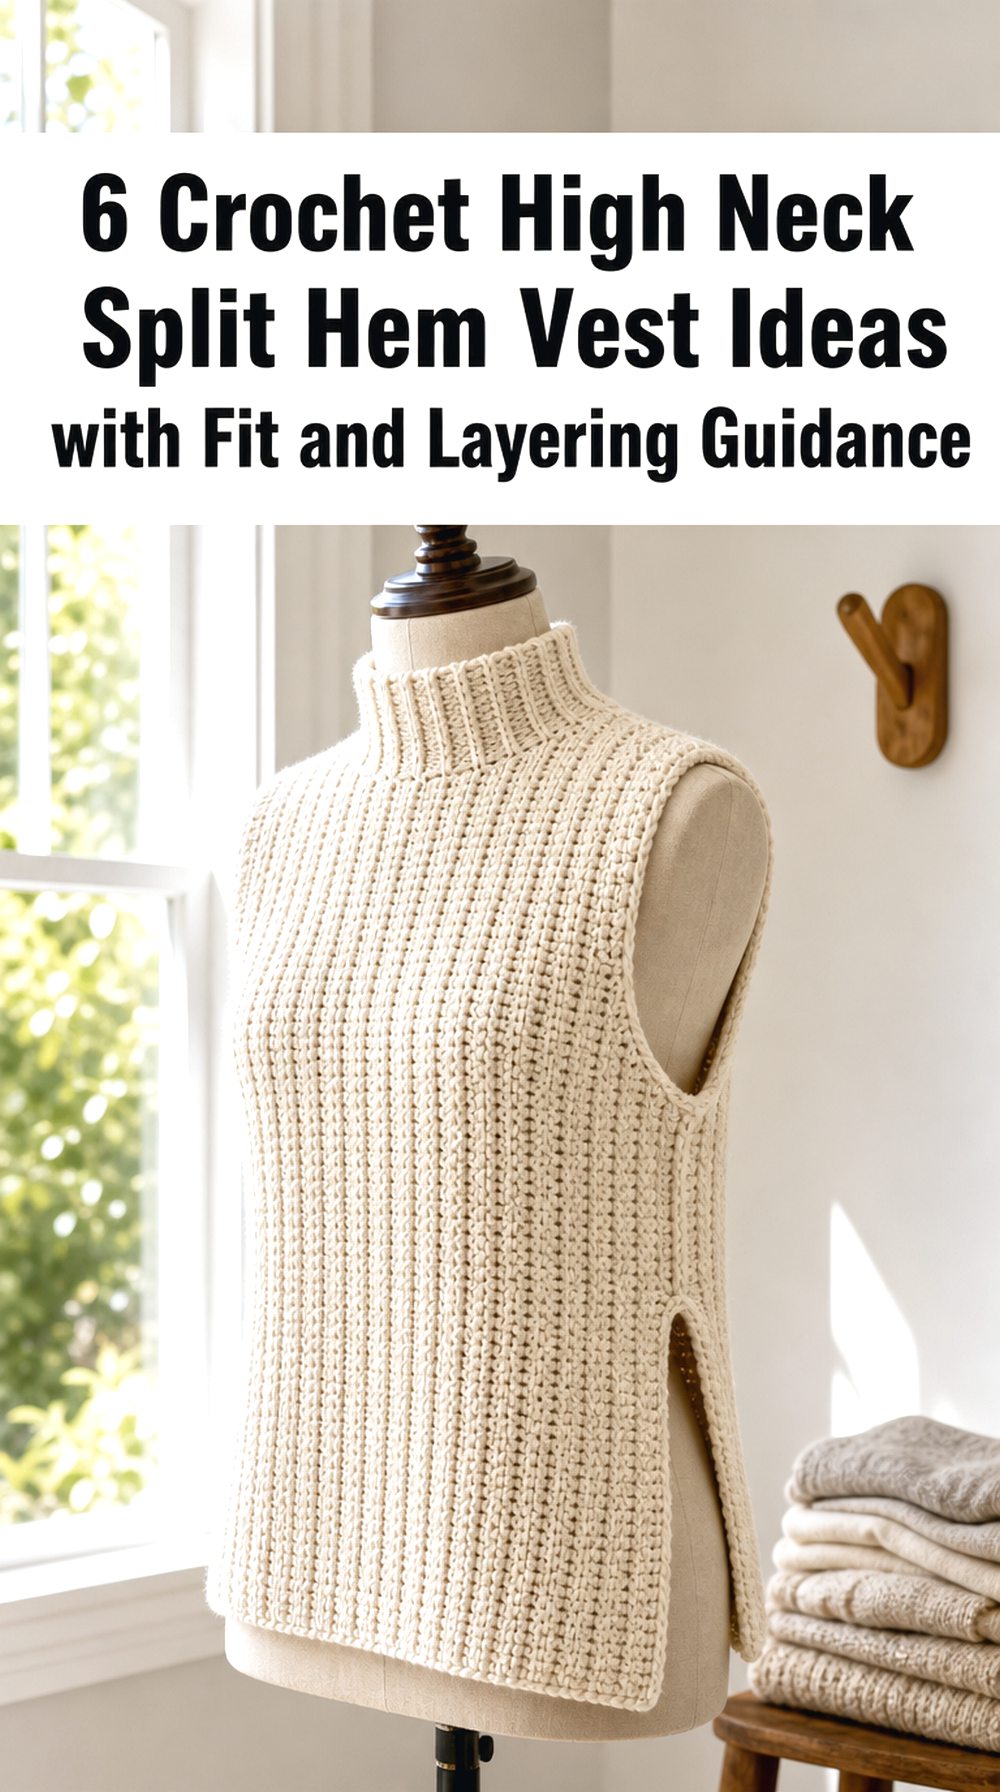
High-neck vests bring warmth and structure around the neckline, while split hems make a sleeveless layer easier to wear over shirts, dresses, and fuller waistlines. These six Crochet ideas explore both sides of that combination. Some linked designs provide the turtleneck or oversized-collar foundation; others offer a clearly constructed split hem that can be paired with a taller neck finish. Each entry explains which feature appears in the original project and which change would be a custom adaptation. You will also find guidance on ease, collar comfort, split depth, yarn behaviour, blocking, and layering. Whether you prefer dense winter texture, lightweight openwork, or colourful granny squares, the aim is to help you choose a Crochet vest shape that looks balanced and remains comfortable in use.
Quick List
- Crochet Bulky Turtleneck Vest with a Short Split Hem
- Crochet Oversized Collar Vest with an Offset Split Hem
- Crochet Textured Split-Hem Vest with a Raised Neck Finish
- Crochet Granny Square Split-Hem Vest with a Deeper Collar
- Crochet Openwork Split-Hem Vest with a Structured High Neck
- Crochet Long Side-Slit Vest with a Separate High-Neck Layer
How to Choose a Crochet High Neck Split Hem Vest for Fit and Comfort
A high neck should feel secure without making the garment difficult to pull over the head. Before attaching a folded collar, test the unfinished opening and remember that dense ribbing may stretch less than the body fabric. Next, decide how much ease the vest needs over its intended base layer. A close fit can work over a camisole, while a shirt or fine sweater usually needs more room through the bust, armholes, and shoulders.
The split hem should begin high enough to release the fabric at the hips but not so high that the side seam loses stability. Match both sides carefully, reinforce the top of each opening, and finish exposed edges with consistent tension. Yarn choice also changes the result: bulky fibres create a firmer collar and heavier drape, while sport-weight yarns produce a lighter vest that may suit a shorter mock neck. Block panels before final assembly so the neckline, armholes, hem edges, and side openings can be compared at their finished dimensions.
Crochet Bulky Turtleneck Vest with a Short Split Hem
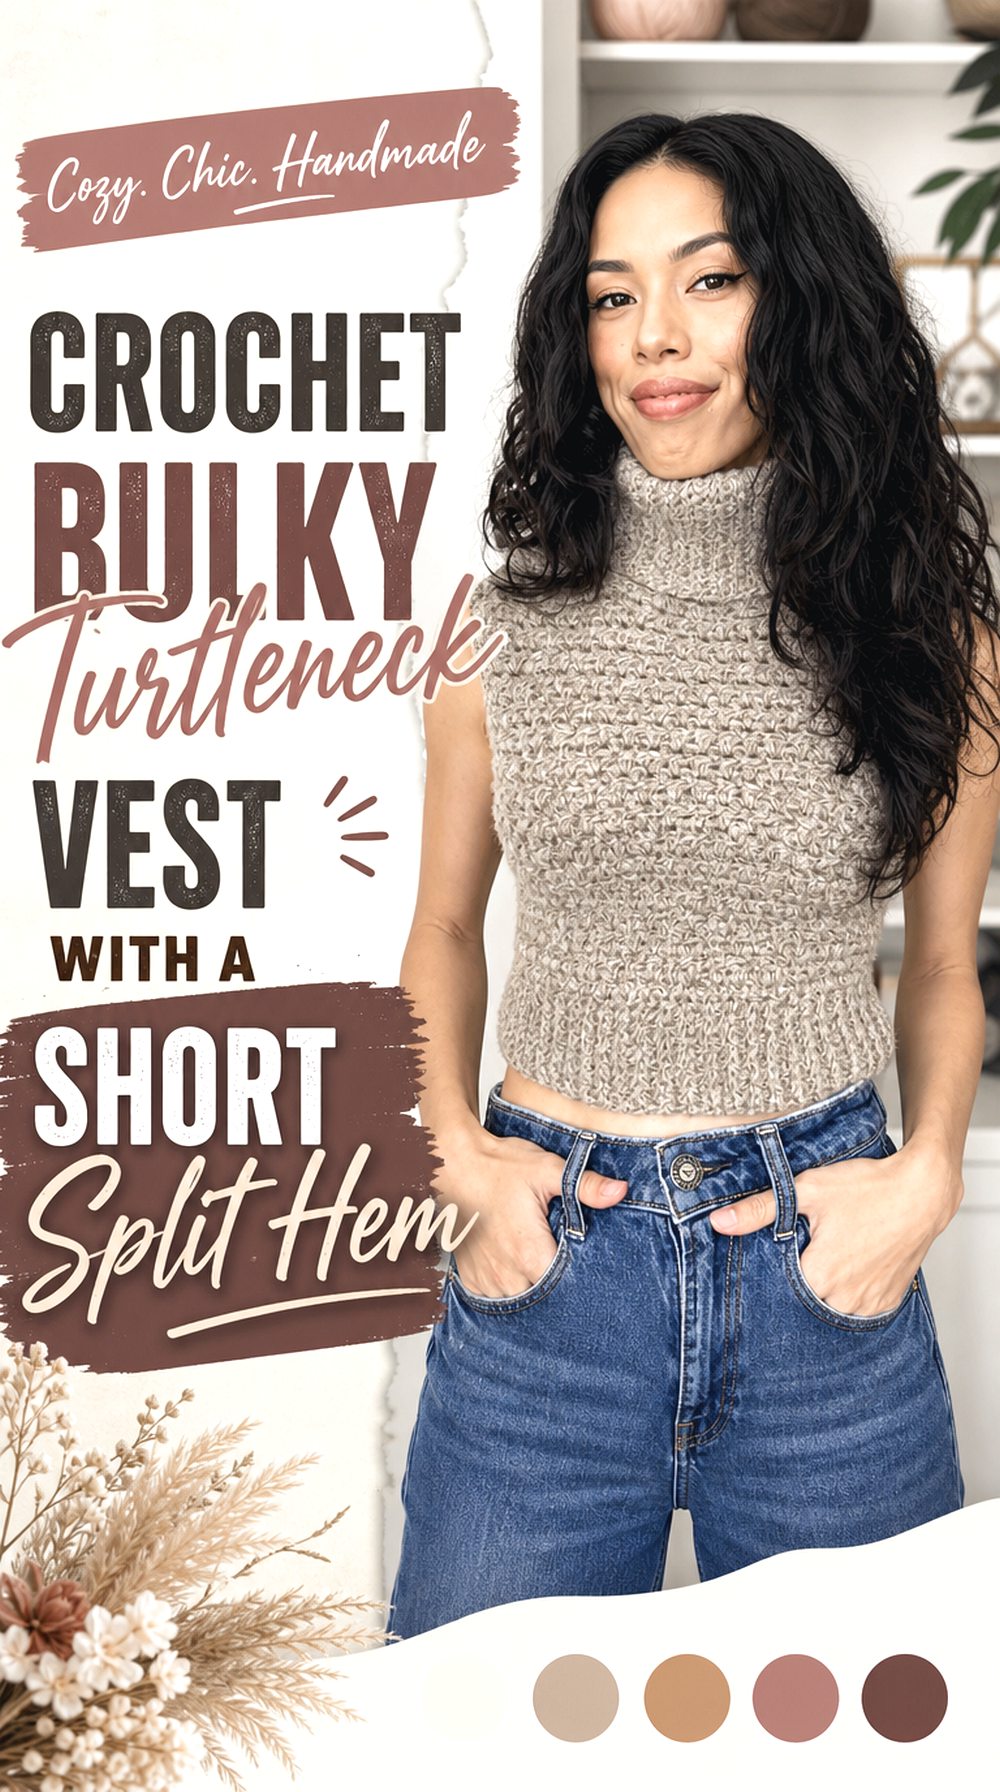
Design Details: The linked Crochet vest uses a made-to-measure front-and-back panel construction, close textured fabric, a ribbed lower band, and a double-thick turtleneck. Its bulky yarn gives the neckline clear structure and makes the silhouette feel winter-ready.
Split-Hem Plan: The original sides are seamed down to the hem, so the split is an adaptation rather than a source feature. Leave matching lower sections unseamed, then finish both exposed edges neatly so the openings do not look accidental.
Best Use: This version suits fitted shirts, fine-gauge sweaters, and straight trousers. Keep the split fairly short if the vest is cropped; a very deep opening can make a compact shape flare outward. Test the neck loop over the head before final attachment.
Crochet Oversized Collar Vest with an Offset Split Hem
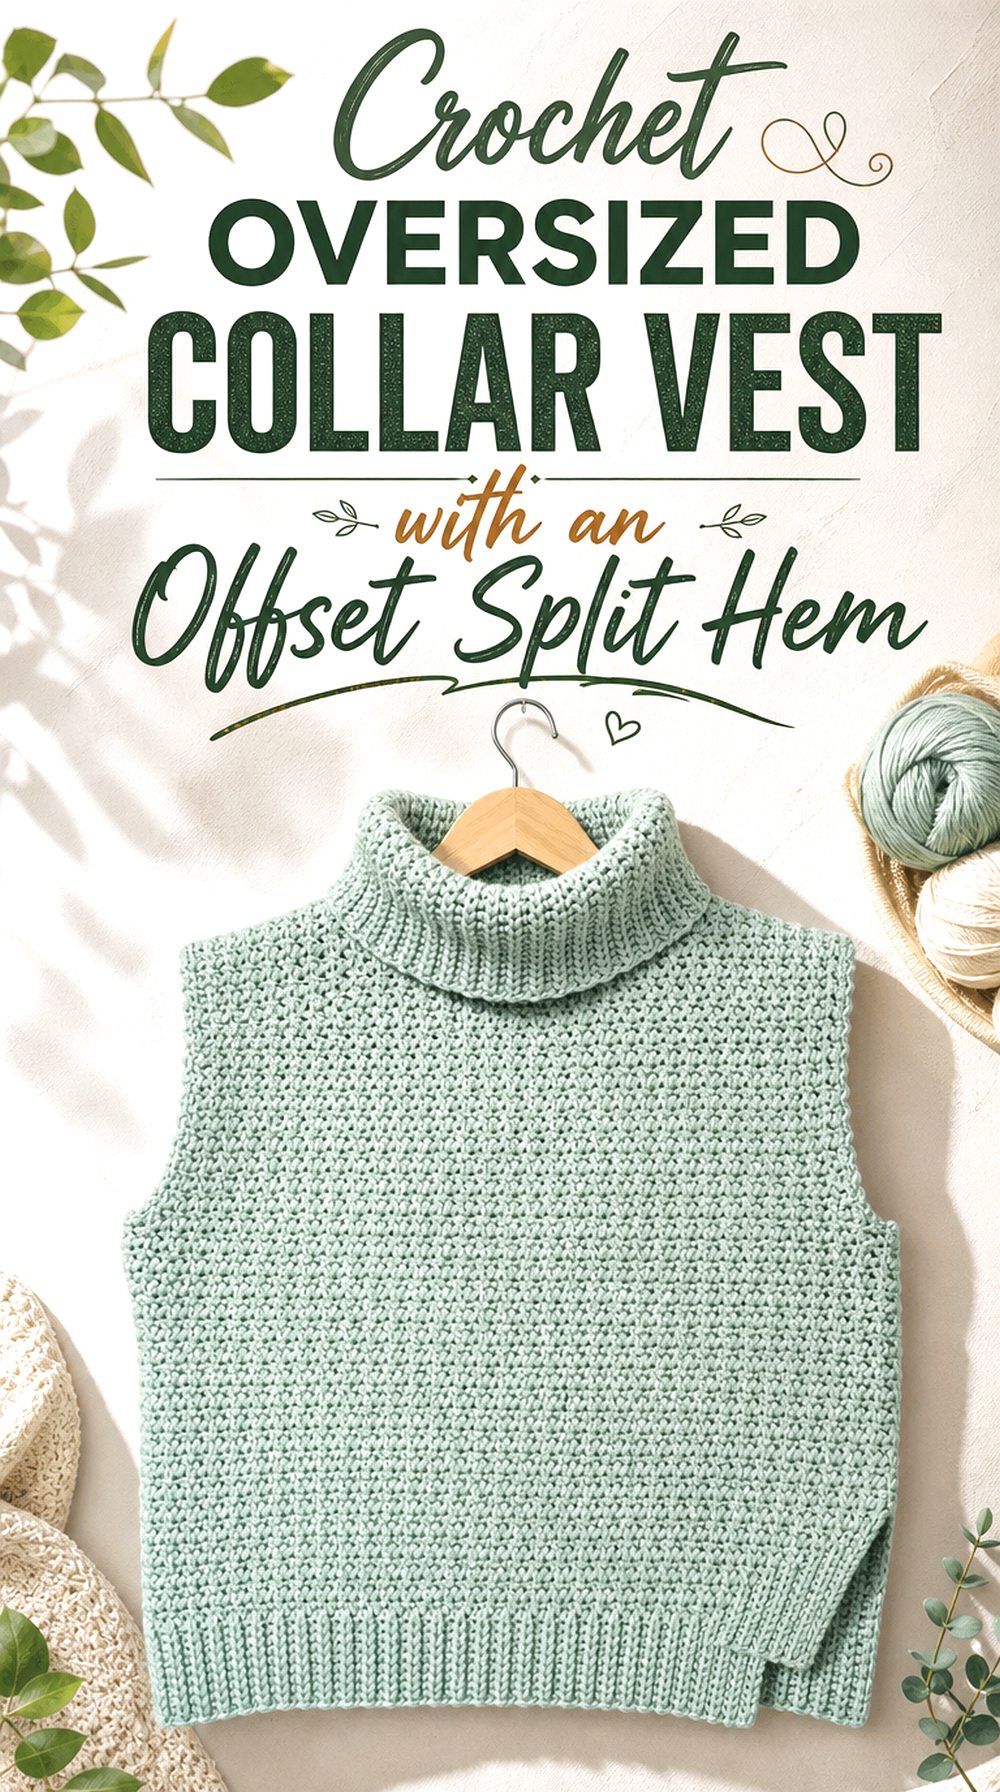
What Stands Out: This Crochet sweater vest combines a roomy sleeveless body with a large separately made collar, ribbed lower edge, and a moss-like main texture. The source provides graded sizing and a layered cold-weather shape rather than a close-fitting tank.
Customisation Idea: To introduce the split hem, stop the side seams the same distance above the lower band. An offset version, with the back slightly longer than the front, can add movement, but it requires careful measuring so both side openings align.
Fit and Finish: The oversized collar is the visual focus, so use a fibre that feels comfortable against the neck. This shape works over shirts with slim sleeves, although the bulky fabric may feel crowded under a fitted coat. Block the front and back to matching dimensions before seaming.
Crochet Textured Split Hem Vest with a Raised Neck Finish
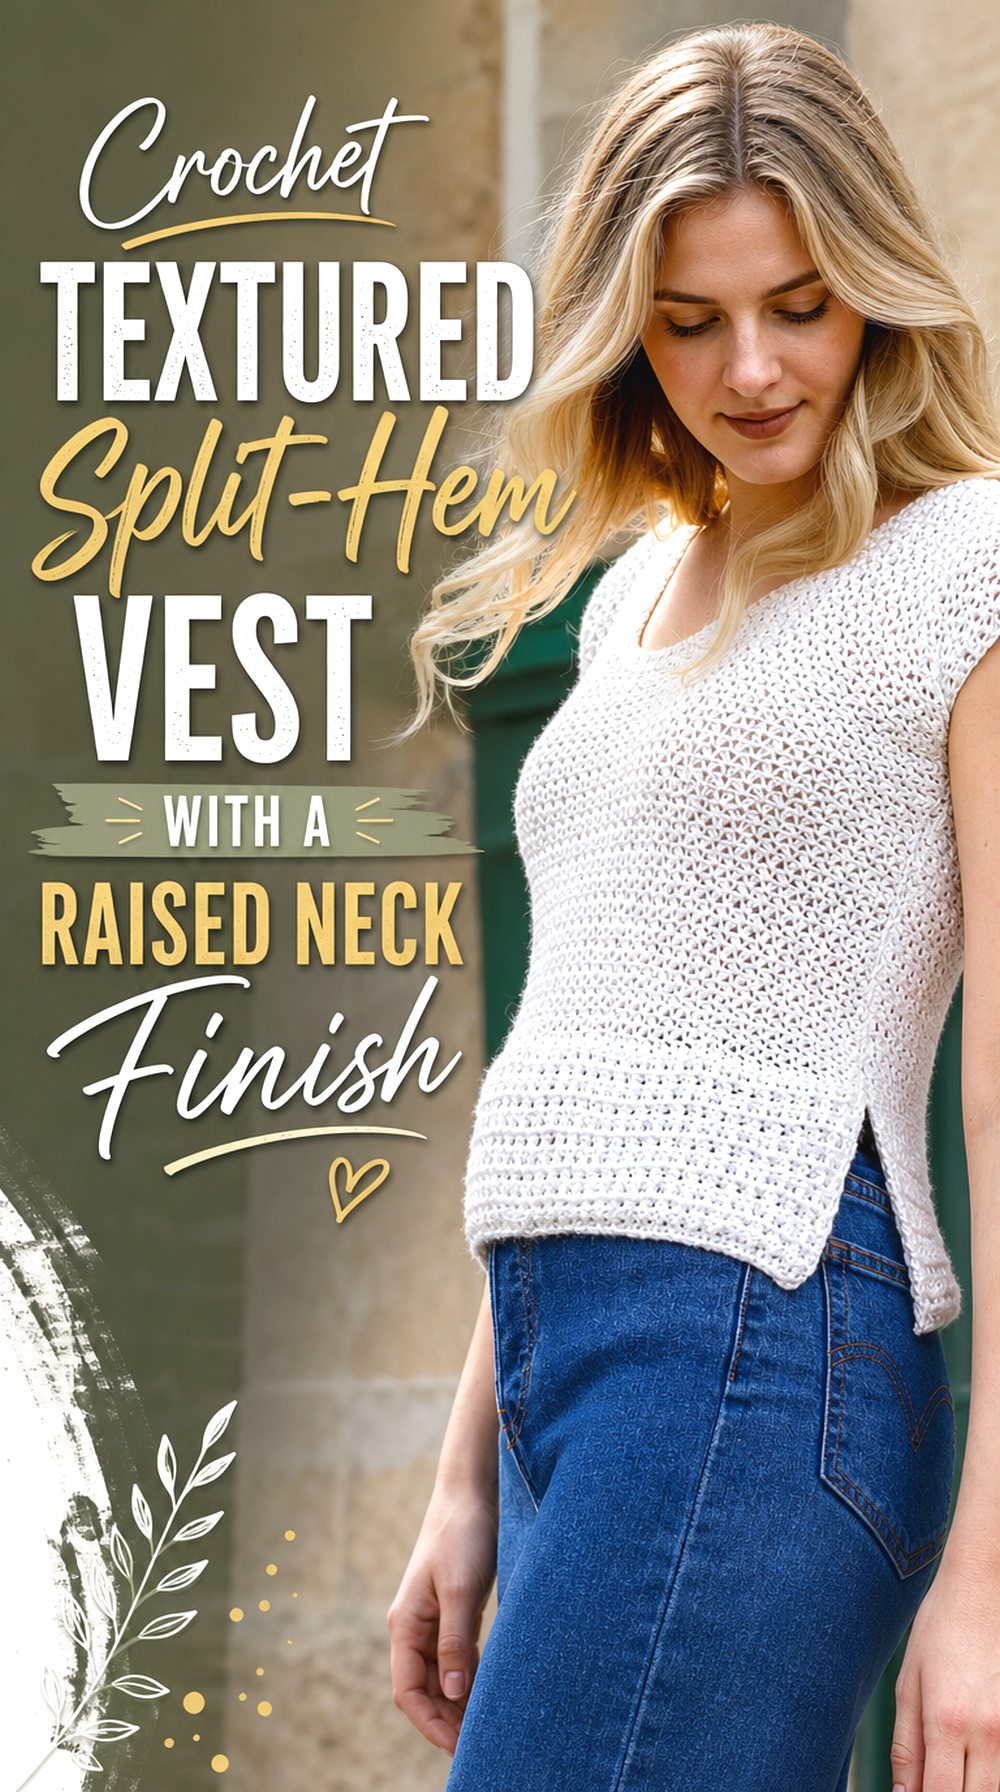
Construction Focus: The Teulon Tank supplies a verified split hem, two-panel construction, ribbed lower texture, and a lightweight body worked in alternating solid stitches and chain spaces. Its original neckline is a modest scoop, not a high neck.
High-Neck Option: Treat the source neckline as the base and add a separate ribbed mock-neck band only after checking that the opening passes comfortably over the head. A shorter stand collar will keep the sport-weight fabric balanced; a heavy folded collar could pull on the shoulders.
Who It Suits: This Crochet idea works well for transitional layering because the fabric is lighter than a bulky vest and the side openings give extra room at the hips. Choose a smooth, resilient yarn if you want the textured lower section to stay crisp after blocking.
Crochet Granny Square Split Hem Vest with a Deeper Collar
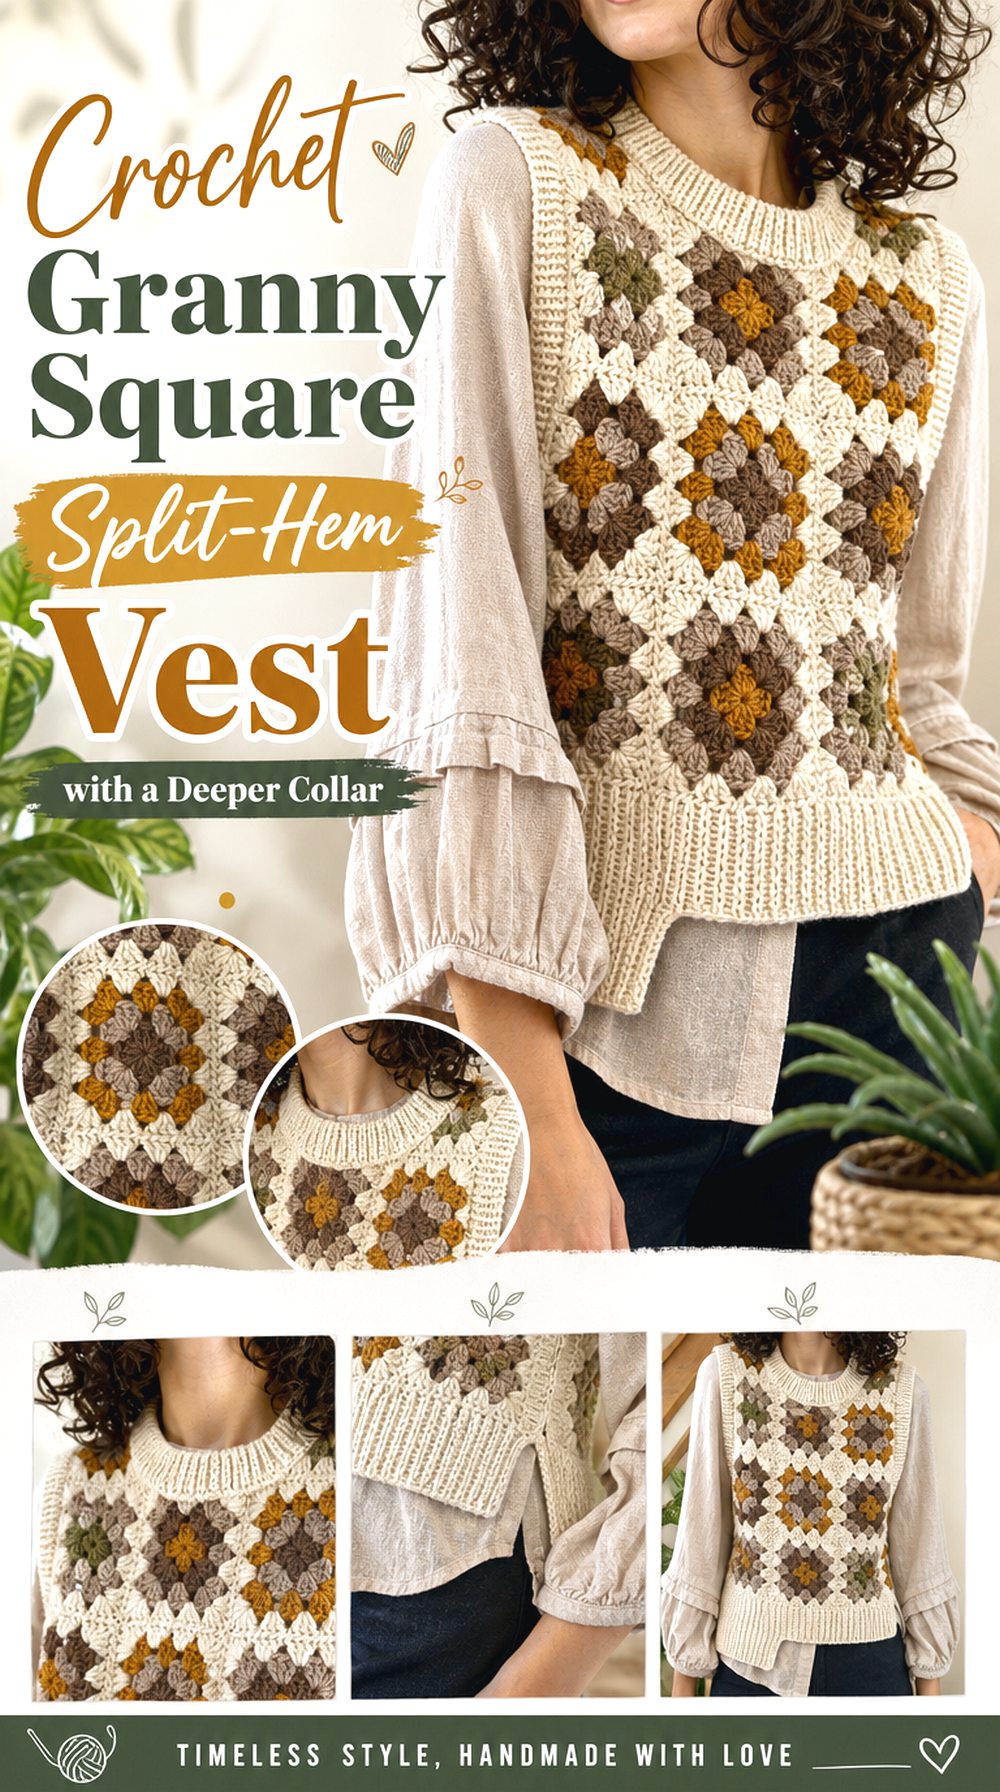
Design Details: The Agnes vest is assembled from granny squares and finished with oversized armholes, a cropped body, collar edging, armhole edging, and a true split hem. The free tutorial is intentionally flexible, making colour placement and square arrangement part of the design.
Before You Choose: The original sample uses knitted ribbing around the collar, armholes, and hem, although the page notes that Crochet edging can replace it. For an all-Crochet high-neck version, add a deeper ribbing band gradually and keep the opening wide enough for dressing.
Practical Point: Motif seams and the split endpoints carry visual weight, so join squares consistently and reinforce the top of each opening. This style suits colour lovers and scrap-yarn planning, but it involves more ends and joins than a plain-panel vest.
Crochet Openwork Split Hem Vest with a Structured High Neck
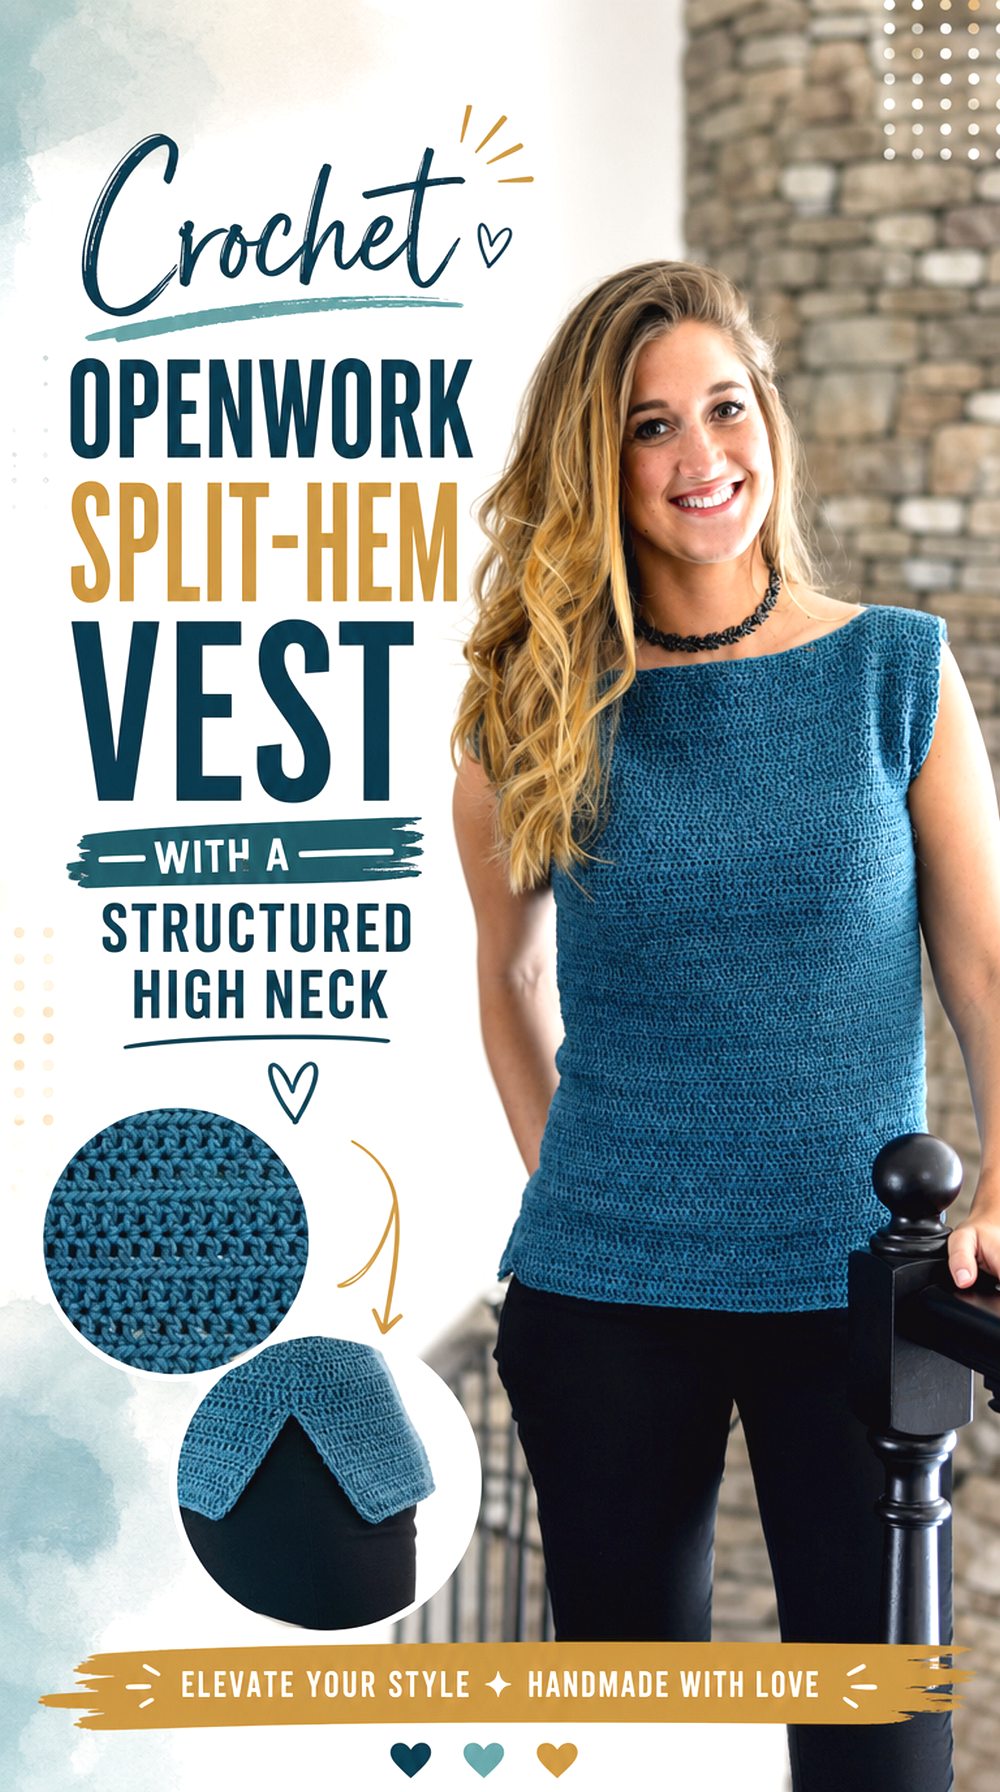
Why It Works: This seamless Crochet summer top has an openwork upper back, subtle waist-shaping options, a relaxed sleeveless body, and a confirmed split hem formed near the lower edge. The construction moves from the upper body into joined rounds, so there are no shoulder or side seams to interrupt the fabric.
Raised Neck Finish: The linked design does not include a high collar. A narrow stand-neck edging can create a cleaner high-neck impression without overwhelming the airy fabric, but the opening must remain large enough to pull on comfortably.
Styling Note: The split hem and light openwork suit warm-weather layering over a camisole or dress. Use a draping yarn for movement, and avoid an overly dense collar that could make the upper section sag or distort.
Crochet Long Side Slit Vest with a Separate High Neck Layer
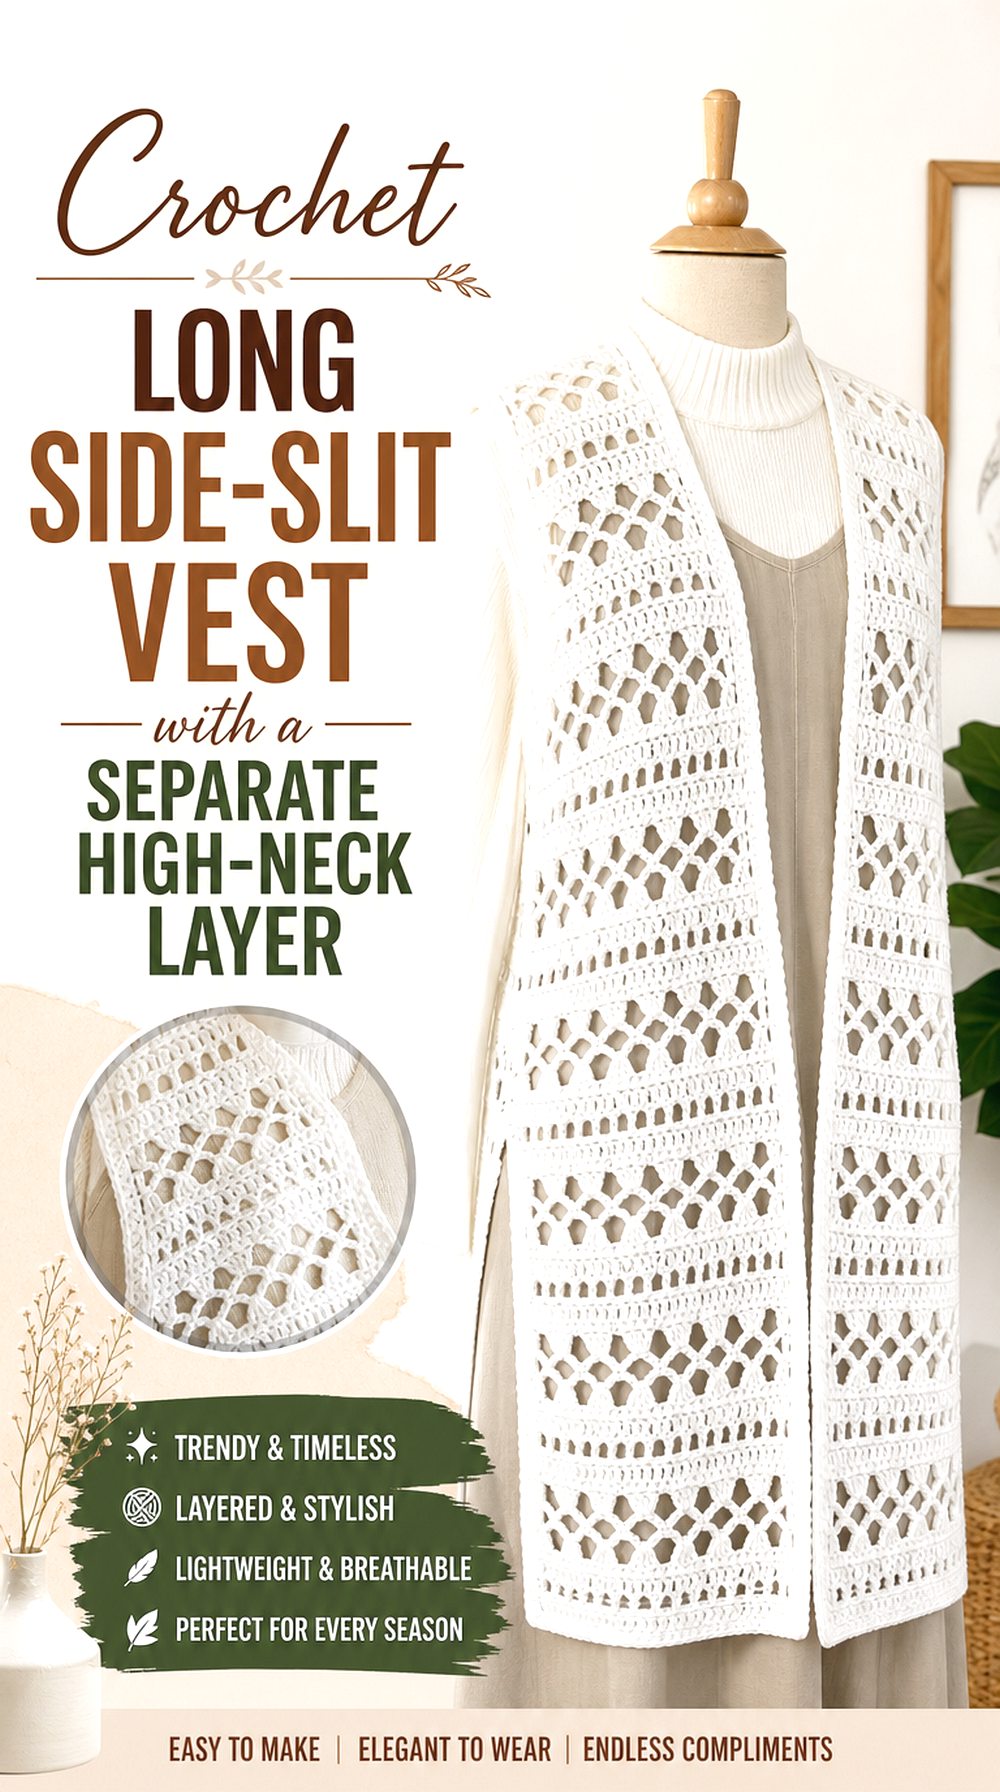
Best Use: The Valerie vest offers a long open-front silhouette, lacy panel texture, tassel detail, and a substantial side slit. It is not a closed high-neck vest, so it works here as a split-side layering interpretation rather than a direct high-neck construction.
High-Neck Layering: Wear it over a fitted turtleneck to create the covered neckline while keeping the vest open and fluid. A monochrome combination gives a quieter line; contrasting colours make the open front and lace repeats more visible.
Good to Know: This Crochet option provides more hip freedom than a short pullover vest and can work over dresses or jeans. The longer length and tassels add movement, but they also require more care during storage and washing. Reinforce the top of each slit and check that the front panels hang evenly.
Useful Crochet Notes
Check the Neck Opening Early
A collar can look generous while still being too firm to pass over the head. Try the vest on before the neck band is permanently joined, especially when using bulky yarn or tight back-loop ribbing. A shorter mock neck often needs less stretch than a folded turtleneck, making it a practical choice for denser Crochet fabric.
Strengthen the Split Endpoints
The top of each split absorbs movement when the wearer sits, bends, or layers the vest over a wider garment. Secure that point with a tidy reinforcement method suited to the construction, then check that both openings begin at the same height. Avoid pulling the edging too tightly, which can make the hem kick outward.
Block Before Final Seaming
Front and back panels may appear equal straight from the hook but change after blocking, particularly when ribbing, openwork, or granny squares are involved. Shape the pieces to matching dimensions before closing shoulder and side seams. This makes it easier to align armholes, balance the hem, and keep a tall collar centred.
Conclusion
Choose the bulky turtleneck versions when warmth and a strong collar matter most, or start with a sport-weight split-hem design for lighter layering. Granny squares offer the most colour freedom, while seamless or plain-panel shapes reduce joining work. Whichever route you take, prioritise a comfortable head opening, enough ease for the intended underlayer, and clean reinforcement where each side split begins.
FAQs
How high should a Crochet vest neckline be?
A mock neck that stands just above the collarbone is often easier to layer than a deep folded turtleneck. The right height depends on yarn thickness, neck comfort, and whether the vest must fit beneath a coat. Test the collar in stages rather than committing to its full depth immediately.
How deep should the split hem be?
The opening should release the fabric around the hips without weakening too much of the side seam. Cropped vests usually need a shorter split, while longer tunic shapes can accommodate more depth. Pin or mark the proposed opening on both sides and try the vest over its intended layers before finishing.
Which yarn works well for a high-neck split-hem vest?
Choose yarn according to the silhouette. Bulky yarn creates a substantial collar and a more structured body, while sport or DK yarn gives lighter drape and a less imposing neckline. Softness matters near the face, and good stitch definition helps ribbing, openwork, or motif joins remain visible.
How much ease should I add for layering?
Base the decision on what will be worn underneath. A vest for a thin top can sit closer to the body, but a button-up shirt or sweater needs extra room through the bust, shoulders, and armholes. Measure over the actual underlayer rather than relying only on body measurements.
Why does a Crochet split hem flare outward?
Flaring may come from tight side edging, uneven blocking, heavy collar weight, or a split that begins too low for the wearer’s hip shape. Relax the edge tension, compare front and back lengths, and block the openings flat. Severe distortion may require reopening part of the side seam.


