Crochet amigurumi plushies can cover a wide range of shapes, from tiny desk-sized animals to round sea creatures and dressed character-style toys. This collection keeps the projects varied, so readers can compare ears, fins, wings, tails, accessories, body shapes, and finishing details before choosing what to make.
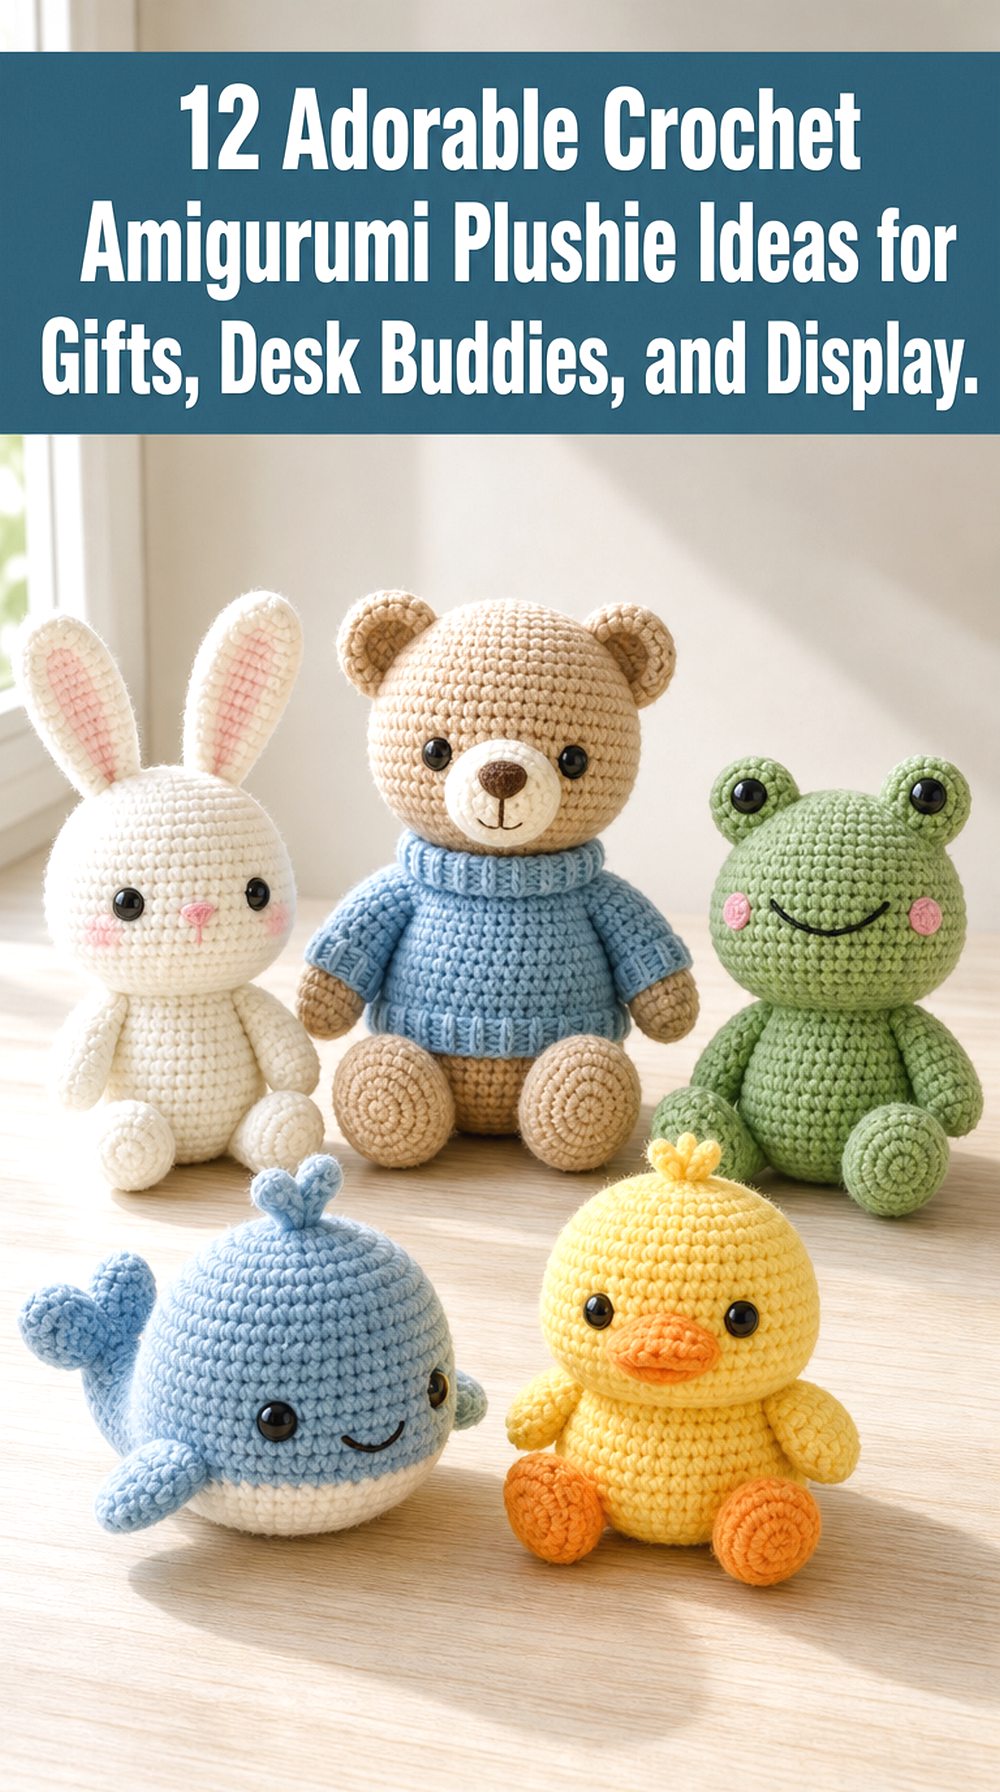
Some plushies in this list feel compact and simple in shape, while others include more personality through clothing, color changes, or extra attached features. Use the project notes to decide whether you want a small display piece, a soft giftable animal, or a plushie with a more detailed character look.
Quick List
- Crochet Mini Bunny Plushie with Tiny Accessories
- Crochet Teddy Bear Plushie with a Little Sweater
- Crochet Pink Cat Amigurumi Plushie
- Crochet Small Green Frog Amigurumi Plushie
- Crochet Soft Dinosaur Plushie
- Crochet Classic Octopus Amigurumi Plushie
- Crochet Little Blue Whale Plushie
- Crochet Striped Bee Amigurumi Plushie
- Crochet Farm Cow Plushie
- Crochet Black-and-White Penguin Plushie
- Crochet Axolotl Amigurumi Plushie
- Crochet No-Sew Duck Plushie
Why These Crochet Amigurumi Plushies Are Worth Making
Amigurumi plushies are useful when you want a project with a clear finished character rather than a flat item or wearable. The shape matters right away: ears make the bunny feel different from the bear, fins separate the whale from the duck, and small facial details give each piece its own mood.
This category also gives readers plenty of choice for gifting and display. A compact animal can sit on a desk or shelf, while a dressed bear or detailed axolotl may feel more like a keepsake. Before starting, it helps to compare how many separate details are involved and whether the finished plushie needs extra care around eyes, stuffing, or attached parts.
Crochet Mini Bunny Plushie with Tiny Accessories
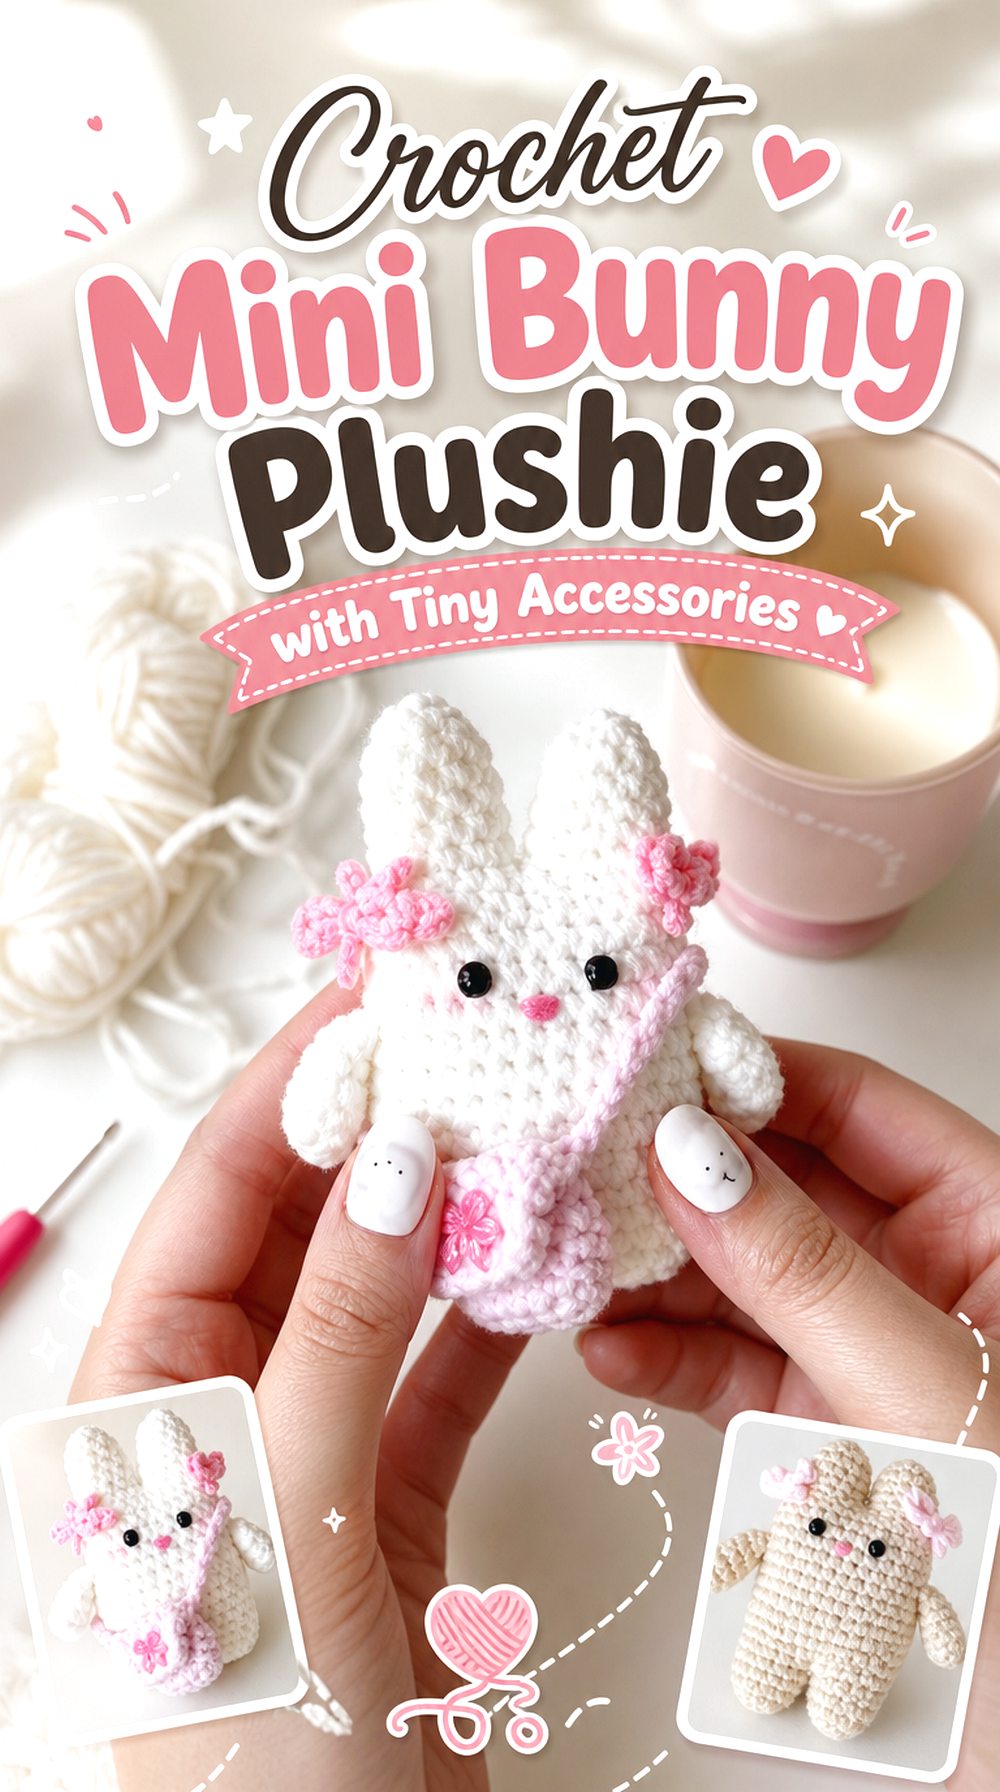
The mini bunny stands out because it combines a small stuffed animal shape with extra character details. Its long ears, rounded body, face, bow detail, and tiny sling bag give it more personality than a plain oval plushie. This is a good pick for readers who want a sweet rabbit design that can work as a desk buddy, shelf piece, or small handmade gift.
Compared with the other animals in this list, the bunny has a softer dressed-up look because the accessories become part of the finished presentation.
Look at the Ear Shape
The ears are one of the main features that make this bunny read clearly as a rabbit. Before choosing it, readers should look at how tall and soft the ears appear in relation to the body. Longer ears can change the balance of a small plushie, so it is useful to compare the finished front view with the side view when following along.
Check the Accessory Details
This bunny includes decorative extras, so the finished result depends on more than the base animal shape. The bow and tiny sling bag add charm, but they also mean there are small details to track. Readers who prefer very plain plushies may want to review the full guide first and decide whether to include every decorative part.
Prepare for the Face Finish
The face gives a small plushie most of its expression. For this bunny, the eyes and nose placement should be checked carefully because small changes can affect the final look. Anyone making the project for a young child should review the creator’s method for the facial details and avoid assuming that every eye option is suitable for play.
Original Tutorial and Creator Credit
Creator: Mucie Studio
Crochet Teddy Bear Plushie with a Little Sweater
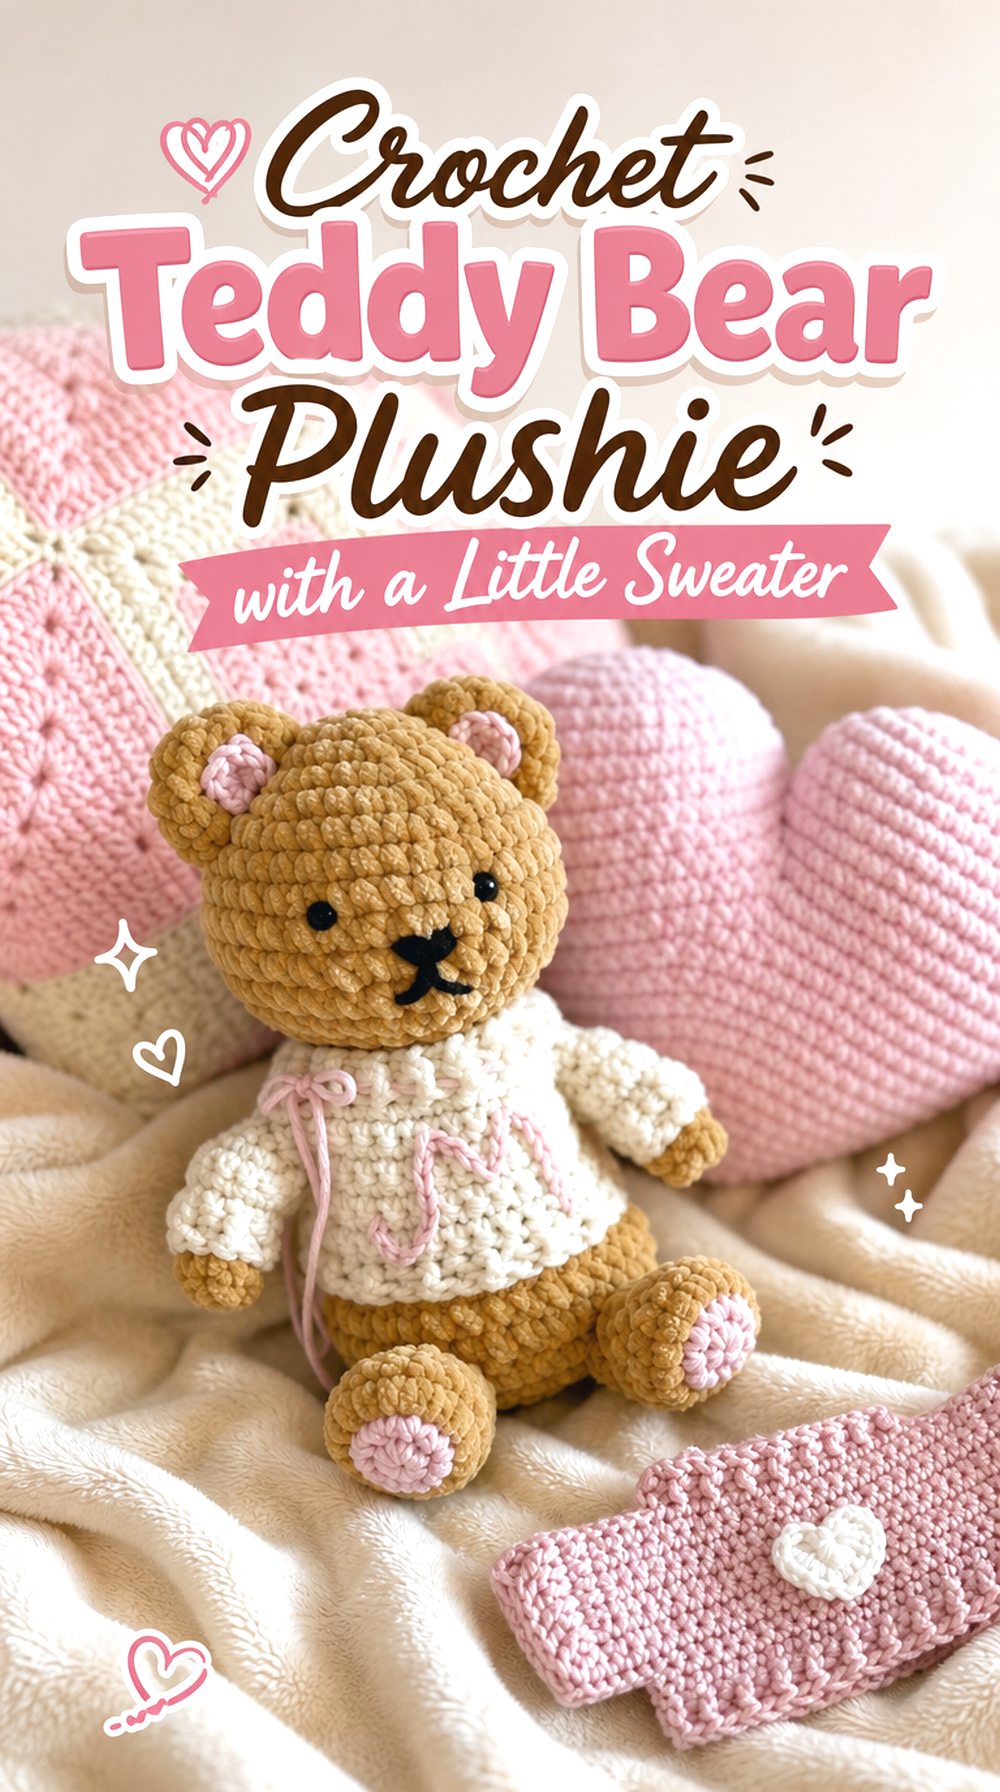
This teddy bear has a classic plush toy shape, but the little sweater gives it a dressed character style. The round bear body, ears, arms, legs, and clothing detail make it feel different from the simpler animal forms in this list. It may suit readers who like amigurumi with a cozy, gift-style finish.
The sweater is the feature to notice most. It turns the bear into more of a personalized plushie, especially for readers who enjoy small clothing pieces and want a finished toy with extra visual interest.
Think About the Sweater Look
The sweater changes the mood of the bear and adds a second design element to the finished plushie. Readers should decide whether they want a plain teddy or a dressed bear before starting. Clothing on an amigurumi can affect the final proportions, so it is worth watching how the sweater sits around the neck, body, and sleeves.
Compare the Bear Proportions
A teddy bear depends on balanced ears, limbs, head, and body. Before moving too quickly, readers should compare each section with the finished example so the bear keeps its soft toy shape. This is especially helpful when the project includes clothing, because the sweater should support the character rather than hide the bear’s main form.
Check the Custom Detail Options
The tutorial information mentions sweater customization, including small decorative additions. Readers who want initials, hearts, or other personal details should review those sections before deciding on colors. It is better to plan the decorative finish early than to add it after the plushie already feels complete.
Original Tutorial and Creator Credit
Creator: mahum 🎀
Crochet Pink Cat Amigurumi Plushie
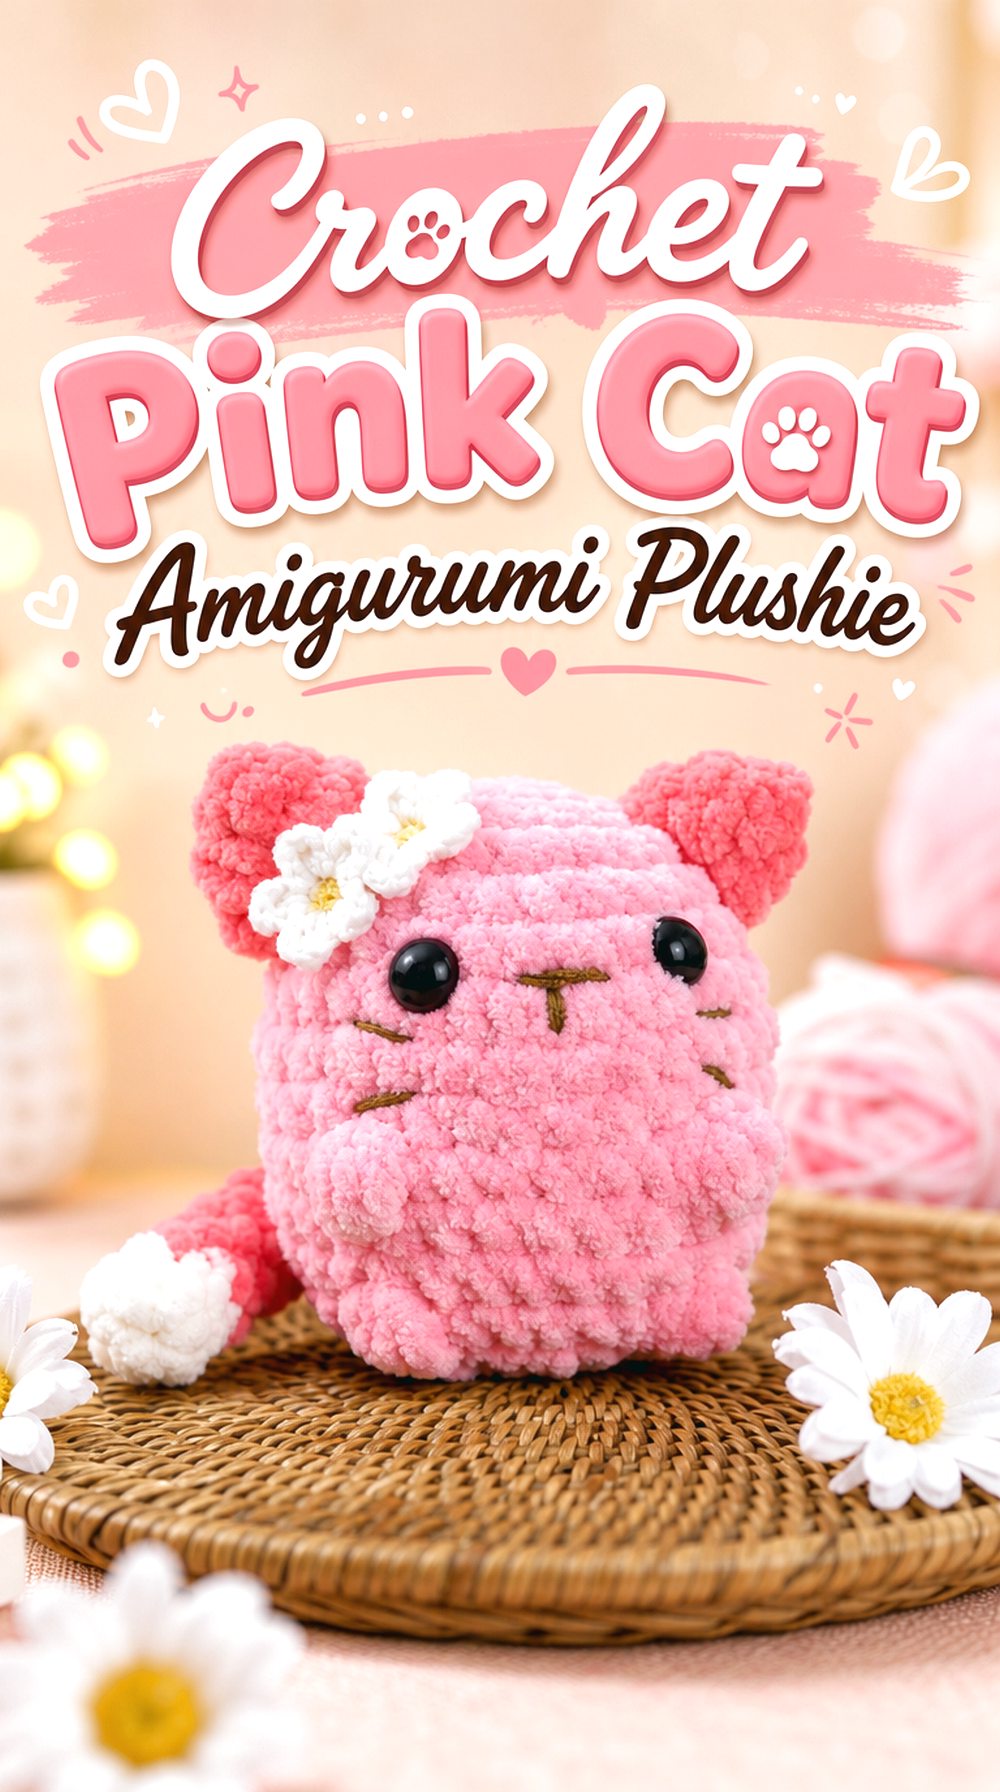
The pink cat plushie brings a different silhouette into the collection, with pointed ears and a feline face instead of round bear or bunny features. The soft color direction and small animal shape make it feel playful without needing clothing or a large accessory. It is a useful option for readers who want a recognizable pet-inspired plushie.
Unlike the sea animals and farm-style plushies later in the list, this cat depends heavily on ear placement and face details. Those small features are what make the finished piece read clearly as a cat.
Check the Ear Placement
Cat ears need to sit clearly enough to frame the face. If they are too low, too wide, or hard to see from the front, the finished plushie may lose its cat shape. Readers should compare the ear placement with the head shape before the final finishing stage, especially if they are changing yarn thickness or overall size.
Confirm the Finished Size
The source information gives an approximate finished size, which helps readers understand the scale before choosing this project. Size matters for amigurumi because a small plushie may work for display, while a larger one may need more stuffing and finishing attention. Readers should keep the creator’s size notes nearby when planning supplies.
Review the Face Materials
The listed materials include facial components, so readers should check those details before buying supplies. Eyes, nose, and embroidery-style features can change both the look and the intended use of the plushie. For any toy meant for handling, the finishing method should be chosen carefully rather than treated as only decorative.
Original Tutorial and Creator Credit
Creator: MeoW Amigurumi
Crochet Small Green Frog Amigurumi Plushie

The frog adds a simple animal shape with a bright, friendly face. Its appeal comes from the round body and frog-like features rather than clothing or accessories. This makes it feel different from the teddy bear and bunny, which rely more on extra details and dressed-up styling.
A frog plushie can work well as a small shelf friend, bag-side display, or playful handmade gift, depending on the final size and finish. The key is keeping the facial area clear so the frog expression remains easy to recognize.
Keep the Frog Face Clear
The face is the strongest part of this project. Readers should pay close attention to how the eyes and mouth area are positioned because those details carry the frog’s expression. A clean front view also helps the plushie look intentional, especially when the body shape is compact and most of the character comes from the face.
Consider the Small Plushie Use
A small frog may suit a desk, shelf, or light decorative spot better than heavy handling. Readers should decide where the finished frog will live before choosing yarn and finishing details. If it is meant to be carried around often, the attachment points and facial features deserve extra review before the project is finished.
Follow the Shape Changes Slowly
Small amigurumi animals can change shape quickly as rounds build up. With a compact frog, it helps to pause at major shape changes and compare the work with the finished example. This keeps the body from becoming too flat, too tall, or hard to recognize before the final details are added.
Original Tutorial and Creator Credit
Creator: Crochet Jewel
Crochet Soft Dinosaur Plushie
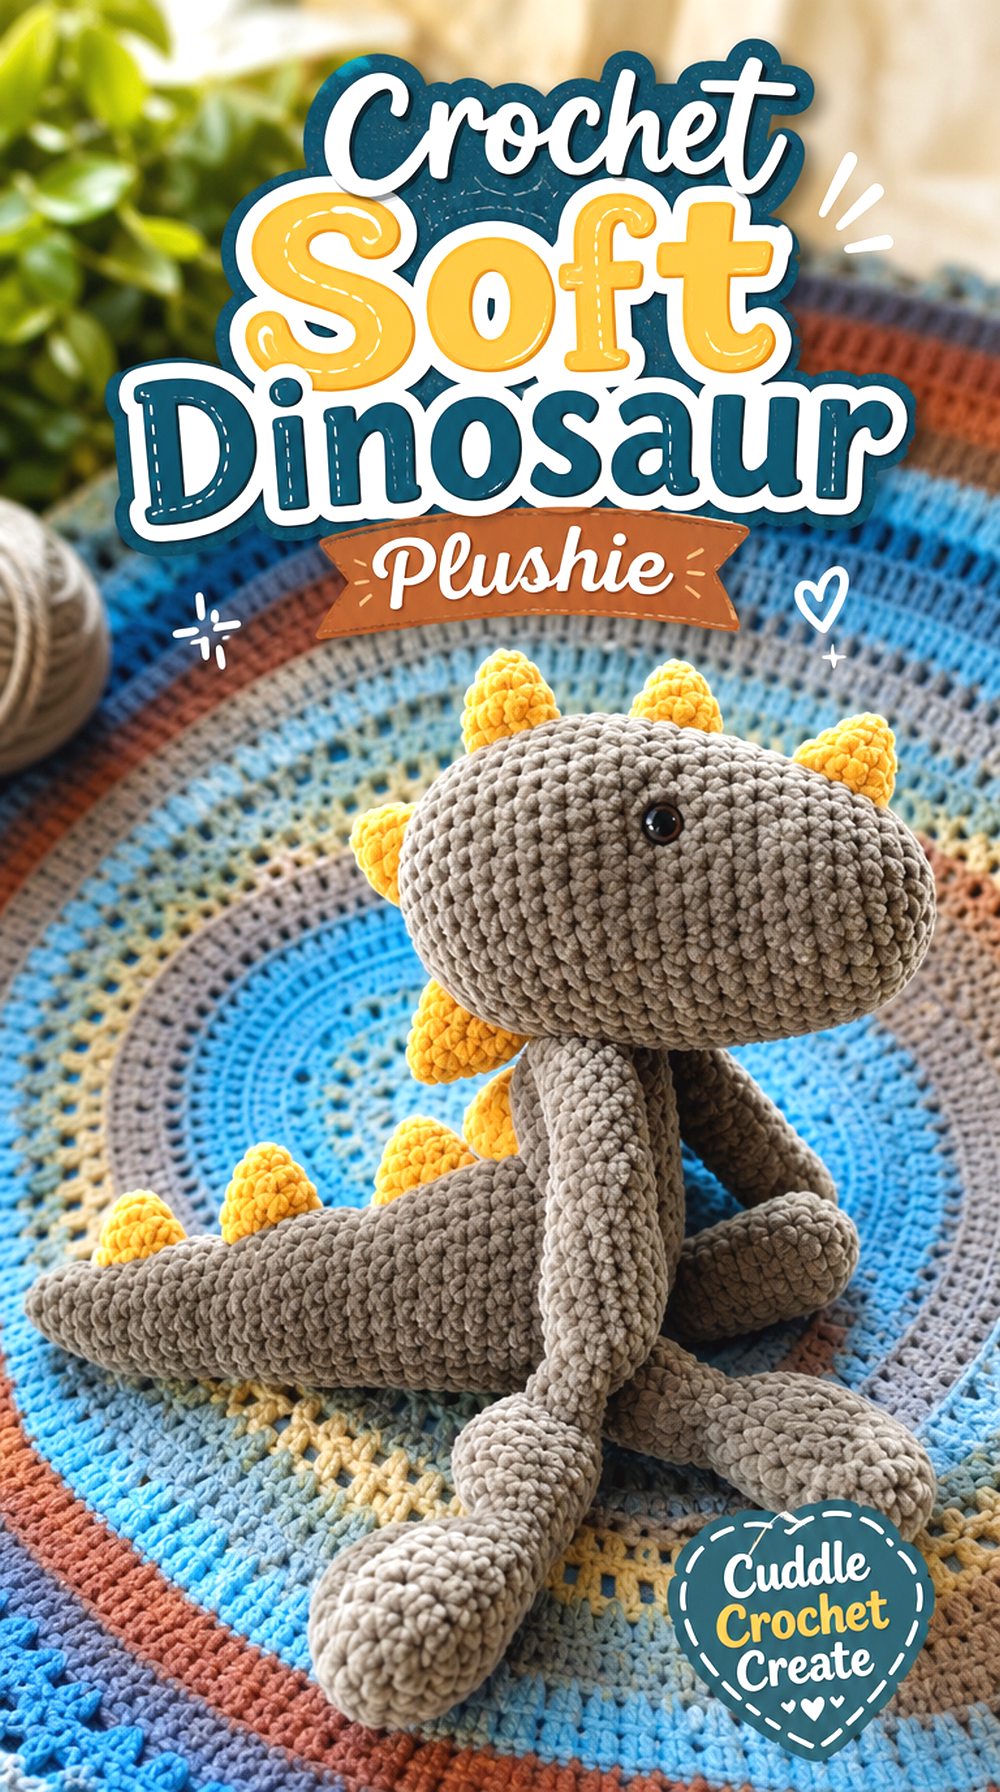
The dinosaur brings a playful prehistoric shape into the plushie mix. It has a different profile from the round sea animals and the smaller pet-style plushies because the body, head, tail, and back details create a longer character outline. This makes it a useful choice for readers who want a plushie with more shape direction.
The finished dinosaur can feel cute rather than realistic, which is common for amigurumi animals. Readers should focus on the main silhouette and how the decorative back details help the dinosaur stand apart.
Look at the Dinosaur Silhouette
A dinosaur plushie needs a clear body direction, not just a round stuffed shape. The head, body, tail, and back details should work together so the finished animal is easy to identify. Readers may want to compare the side view as they work, because the silhouette matters more here than it does for a round bee or octopus.
Check the Back Details
The raised or contrasting back features are part of what gives this dinosaur its personality. Before starting, readers should review whether those pieces require separate attention and how they are placed on the body. This is not a section to rush, because uneven spacing can distract from the clean dinosaur outline.
Plan Around Plush Yarn Behavior
The source lists plush-style yarn information, so readers should review the creator’s material notes before substituting. Thicker yarn can make a dinosaur feel soft and rounded, but it may also hide small stitch details. Anyone changing yarn should confirm how that change may affect the finished size and shaping.
Original Tutorial and Creator Credit
Creator: Jayme’s Humble Home
Crochet Classic Octopus Amigurumi Plushie
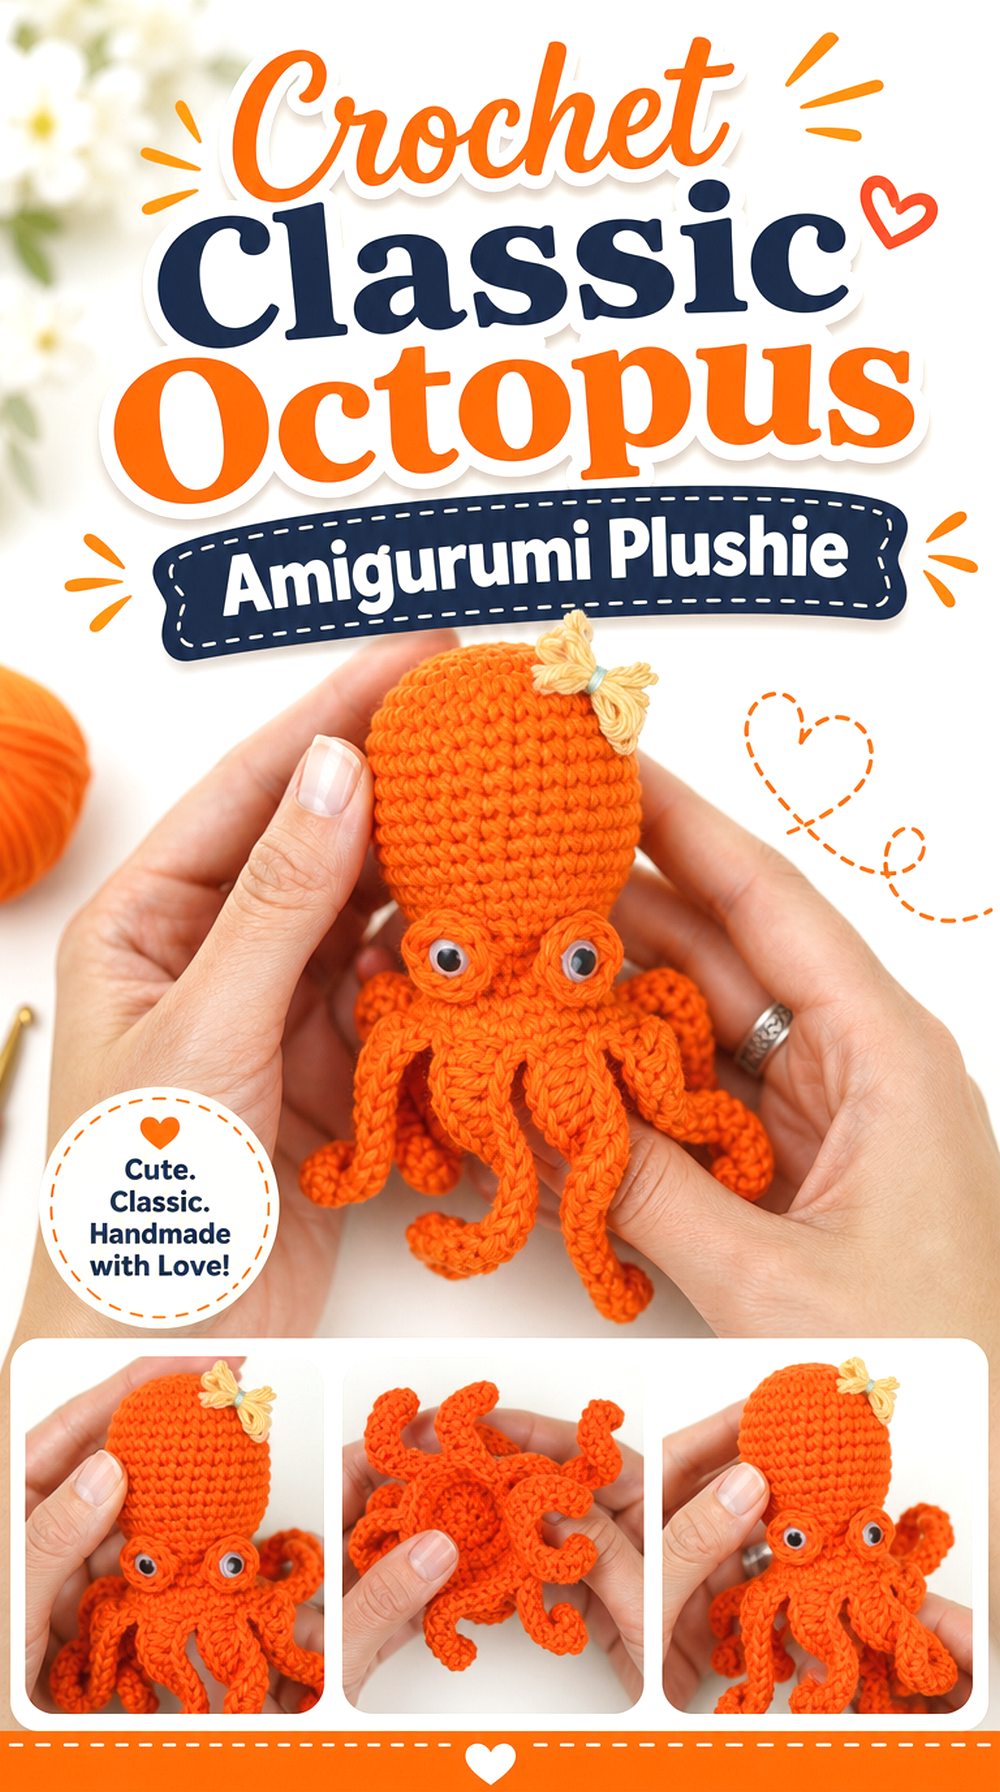
The octopus is one of the clearest shape changes in this collection. Instead of ears, wings, or a tail, it depends on a rounded head and tentacles to create the character. This gives it a soft sea-creature look that can sit nicely with the whale while still feeling completely different.
A classic octopus plushie is a good option for readers who like amigurumi with repeated lower details. The tentacles become the main finishing feature, so the final shape should look even and balanced from the front.
Check the Tentacle Shape
The tentacles are the feature that separates this octopus from a simple ball plushie. Readers should look for even spacing and a clear lower edge as they follow the guide. If the tentacles vary too much in size or direction, the finished piece may still be cute, but it may not have the clean octopus shape shown in the tutorial.
Think About Display Position
An octopus plushie often looks best when the lower details can be seen. Before finishing, readers should think about whether it will sit on a shelf, rest on a desk, or be used as a small gift. The display position matters because the tentacles can disappear visually if the plushie is tucked into a crowded spot.
Use the Written Pattern Link Carefully
The creator’s information includes a written pattern link, which may help readers who like to check details away from the video. Even with that support, the exact construction should stay with the original source. Readers should use the linked materials to follow the designer’s own instructions rather than relying on copied notes elsewhere.
Original Tutorial and Creator Credit
Creator: Croby Patterns
Crochet Little Blue Whale Plushie
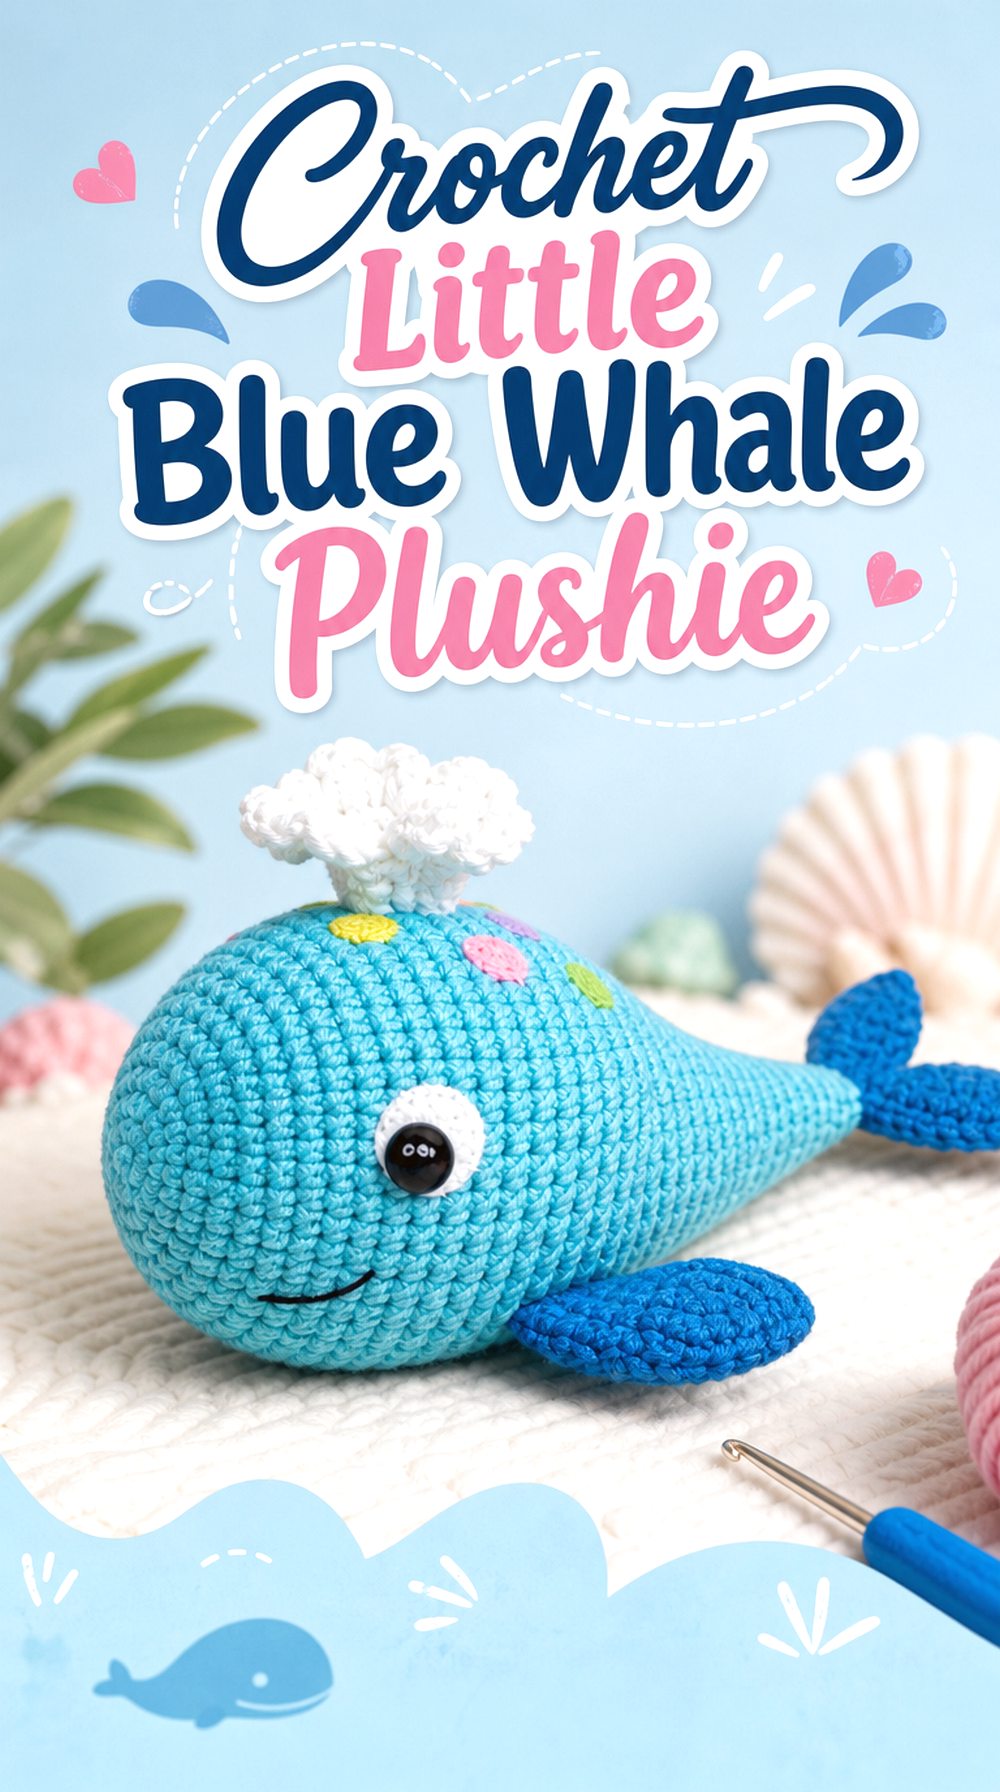
The little blue whale has a smooth sea-animal shape with a rounded body and fins. It feels calmer and more streamlined than the octopus because the character comes from a simple body line instead of many lower details. This makes it a strong choice for readers who want a clean, compact plushie.
The source information describes the whale as a small blue whale and includes an approximate finished length. That scale can help readers decide whether the project fits their display or gift plan before choosing materials.
Notice the Smooth Body Shape
A whale plushie depends on a smooth body rather than many separate features. Readers should watch the overall curve and make sure the stuffing supports the shape without making it lumpy. The cleaner the body line looks, the more clearly the finished animal reads as a whale instead of a general sea creature.
Confirm the Length First
The source description gives an approximate finished length, which is useful for planning. Readers who want a tiny shelf item, a larger plush, or a gift-sized piece should compare that information with their own goal. If yarn weight or hook size changes, the final whale may not match the stated scale.
Check Fin and Tail Placement
Fins and tail details give the whale its direction. Before closing the project fully, readers should review where those parts sit so the whale looks balanced from the side and top. Placement is especially important on a compact plushie because small shifts can make the body look twisted or uneven.
Original Tutorial and Creator Credit
Creator: KnittingKitty
Crochet Striped Bee Amigurumi Plushie
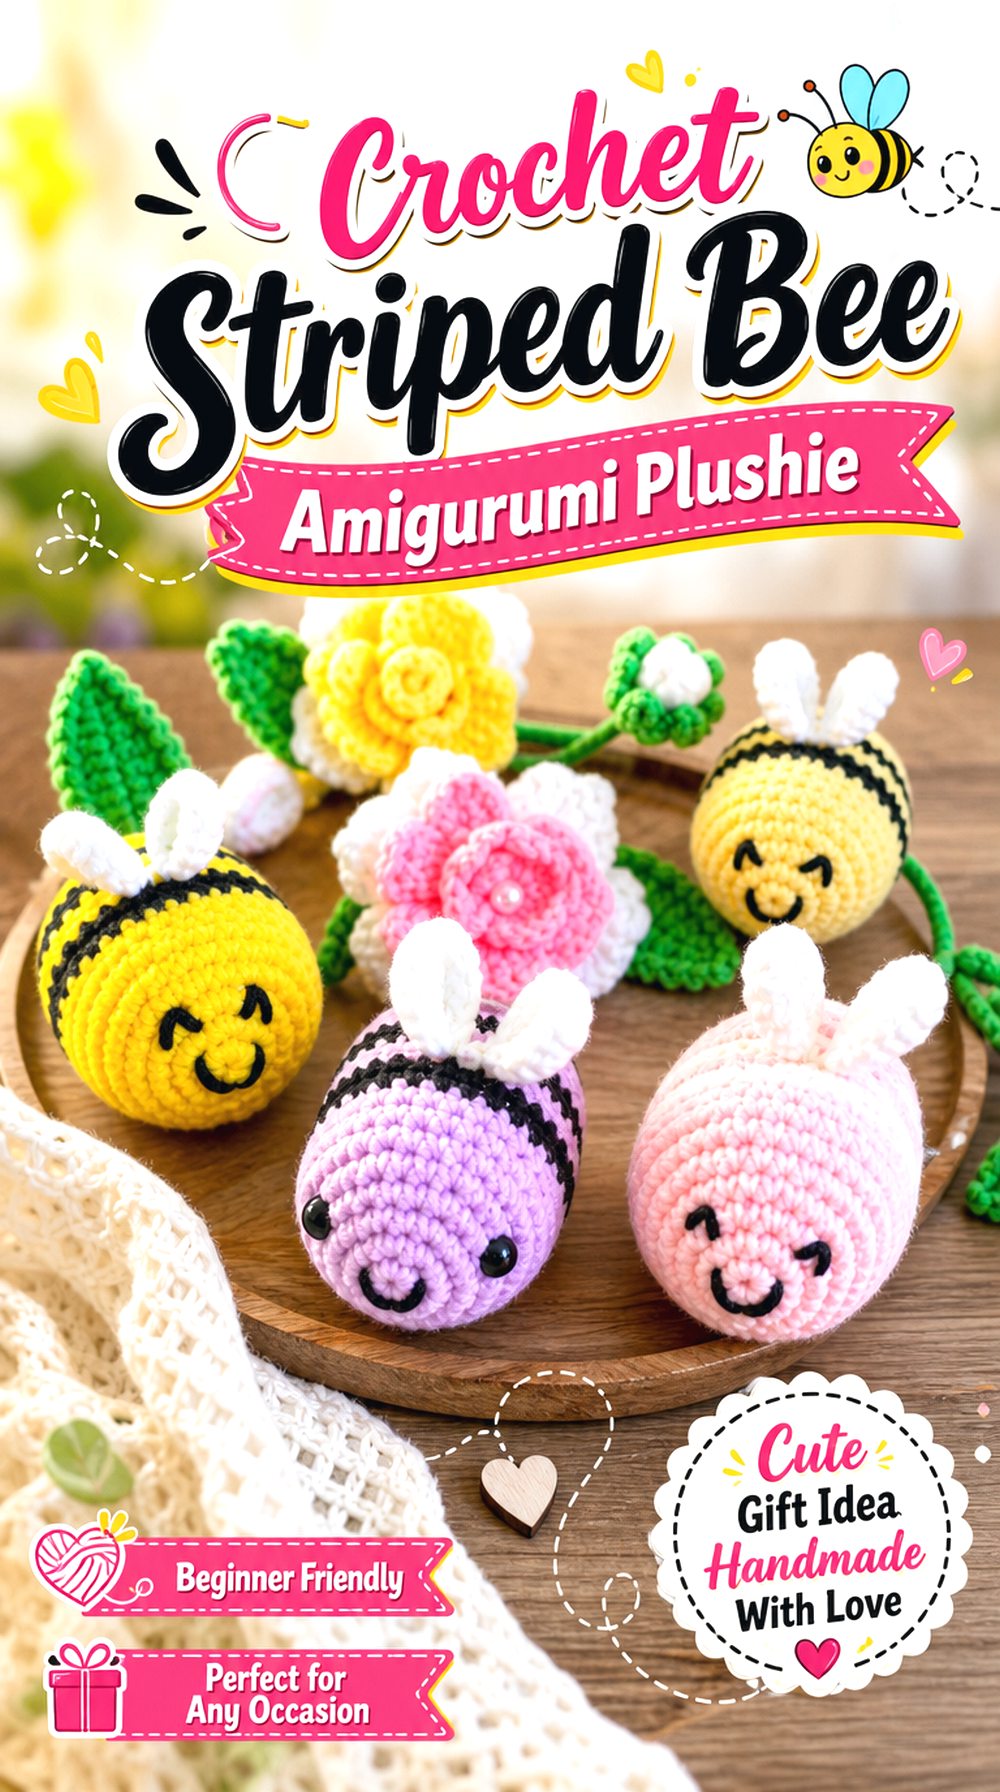
The bee adds stripes, wings, and a cheerful rounded body to the collection. Its shape is simple at first glance, but the color changes and wing placement give it a distinct look. This makes it different from the whale, which is smooth and solid, and from the duck, which relies on a beak and body stance.
A striped bee plushie works well for readers who want a small animal with high visual contrast. The bands and wings should stay clear so the bee shape remains easy to read.
Keep the Stripes Even
The stripe layout is one of the most noticeable parts of a bee plushie. Readers should pay close attention to the color sections so the body looks balanced from front to back. If the stripes become uneven or hard to see, the finished piece may lose some of the bee identity even if the body shape is correct.
Check the Wing Placement
Wings add width and softness to the bee, but their placement matters. They should sit where they support the body shape without overwhelming the face or stripes. Readers may want to review the finished view before attaching or finishing those details, especially if their yarn creates thicker wings than expected.
Review the Supply List
The creator’s description includes a simple supply list, so readers should check it before gathering materials. Small amigurumi plushies often need more than yarn and a hook, especially when stuffing, eyes, needles, or scissors are included. Reviewing the list first helps avoid stopping midway through the finishing stage.
Original Tutorial and Creator Credit
Creator: Crochet Cuties Creations by Esther
Crochet Farm Cow Plushie
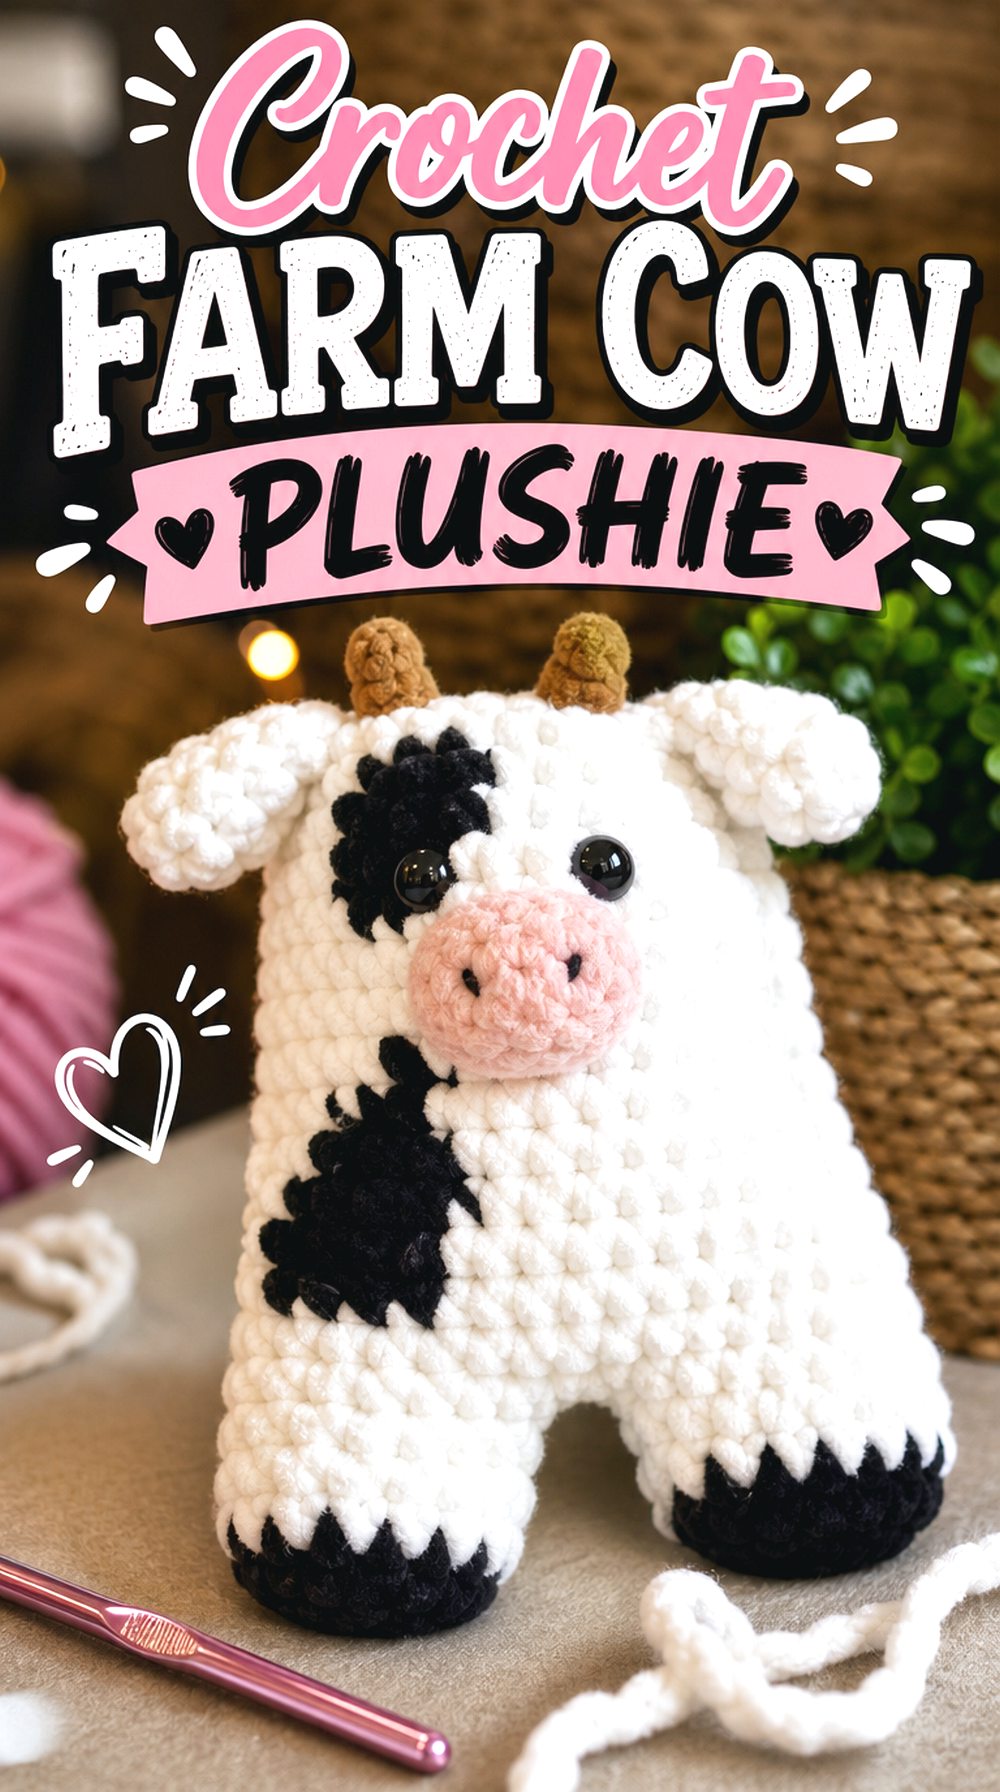
The cow plushie brings a farm-animal option into the article and gives readers a different kind of color placement to consider. Unlike the bee, where stripes are regular, a cow usually depends on spots and face features to create the animal look. That makes the project more about balanced markings and expression.
This choice is useful for readers who want a soft animal plushie with a familiar, giftable theme. The head, ears, body, and color areas should all work together so the finished cow looks clear and intentional.
Watch the Spot Placement
Cow markings can change the whole look of the plushie. Readers should look at how the spots are placed on the finished example and avoid treating them as random decoration. Balanced markings help the cow read clearly from the front and side, especially when the body shape is soft and rounded.
Check the Head and Ear Shape
The face and ears carry much of the cow character. Before the final assembly or finishing stage, readers should compare those parts with the completed plushie view. If the ears are hidden or the face details are too small, the finished animal may look less like a cow and more like a general stuffed animal.
Review the Full Tutorial First
This cow tutorial is a complete plushie project rather than a single small motif. Readers should review the full video before beginning so they understand how the main sections relate to each other. A quick preview can also help identify any separate pieces, color changes, or finishing details that need extra attention.
Original Tutorial and Creator Credit
Creator: Brico Craft Co.
Crochet Black and White Penguin Plushie
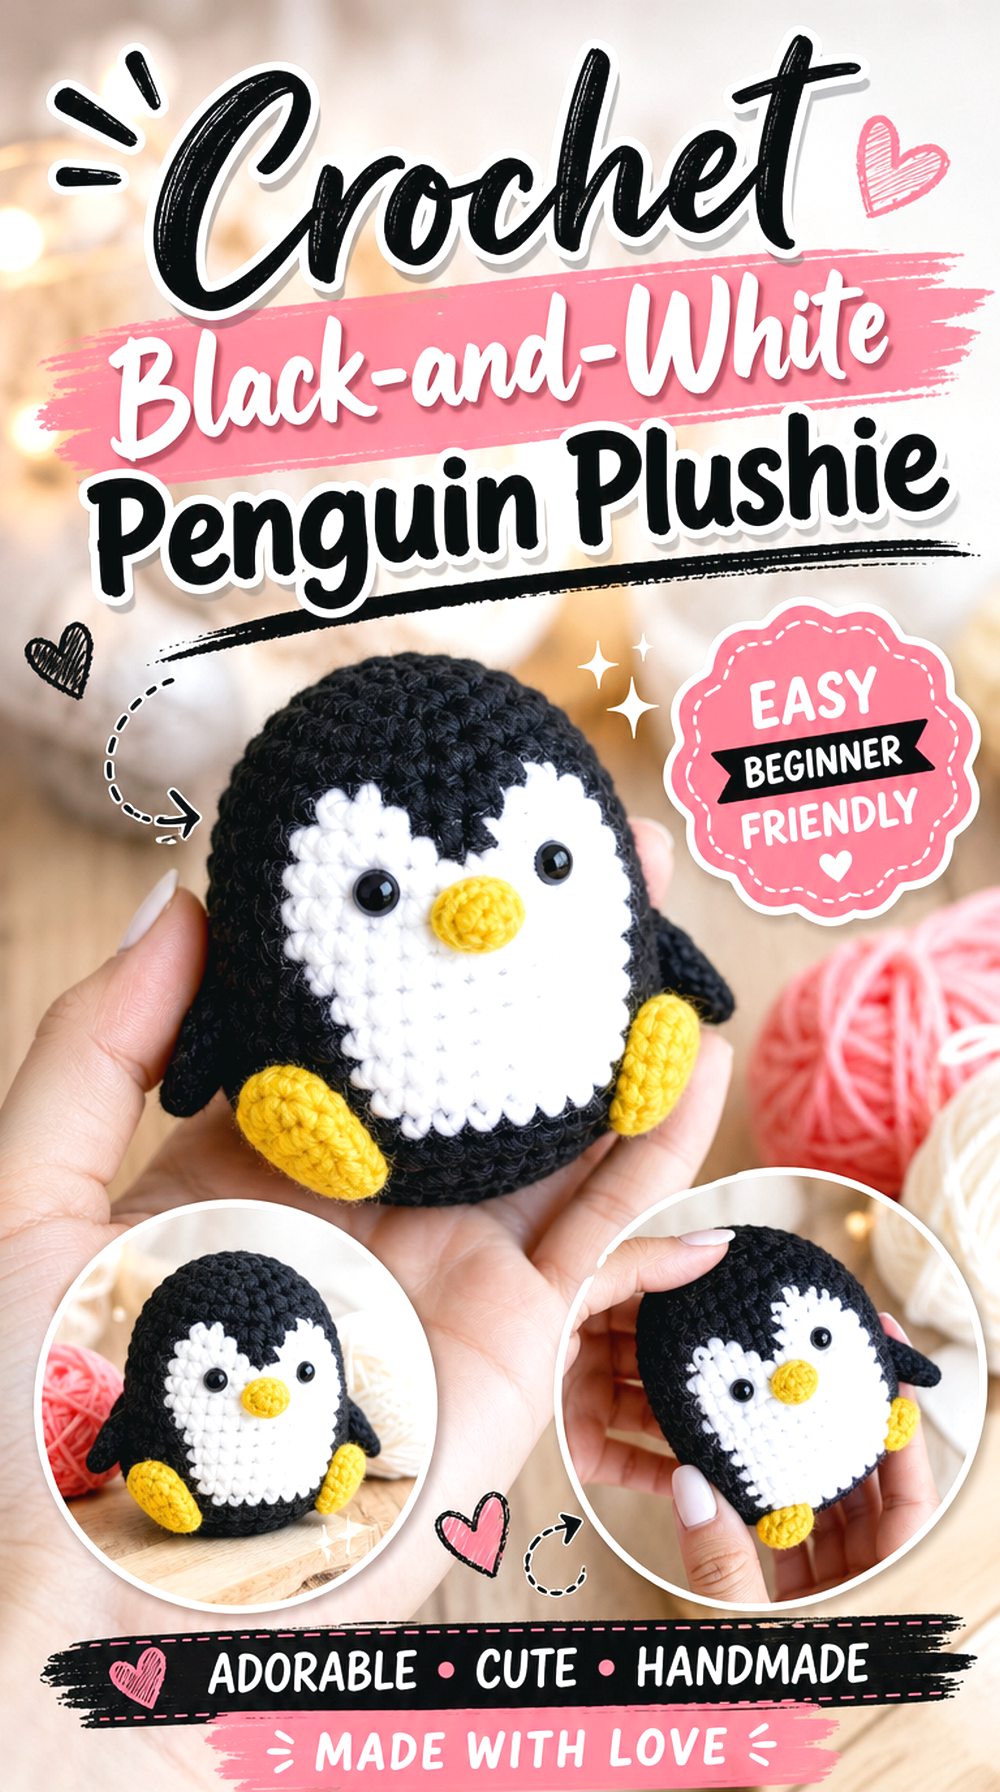
The penguin plushie has a neat upright look with strong color contrast. Black, white, and yellow details help define the face, belly, and small features, giving it a different feel from the soft green frog or the striped bee. It is a good project idea for readers who like animal plushies with a clean front view.
Because penguins rely on clear contrast, the finishing needs to stay tidy. The face, belly area, and feet should be easy to see so the plushie keeps its recognizable penguin shape.
Think About the Front View
A penguin is usually recognized from the front, so the face and belly area matter a lot. Readers should compare the finished view as they work and make sure the contrast remains clear. If the white section or face details become uneven, the whole plushie may look less balanced even if the body shape is correct.
Check the Small Color Details
The source information lists black, white, and yellow yarn, which points to color being part of the design. Readers should plan those colors before starting instead of choosing them at the end. Small yellow features, in particular, can affect the penguin’s expression and should not be rushed during finishing.
Confirm the Eye Method
The listed supplies include safety eyes, so readers should check how the creator uses them and decide whether that finish matches the intended use. For plushies that may be handled by children, do not assume safety based on appearance alone. The eye style, attachment method, and recipient should all be considered.
Original Tutorial and Creator Credit
Creator: MJ Crochet Hub
Crochet Axolotl Amigurumi Plushie
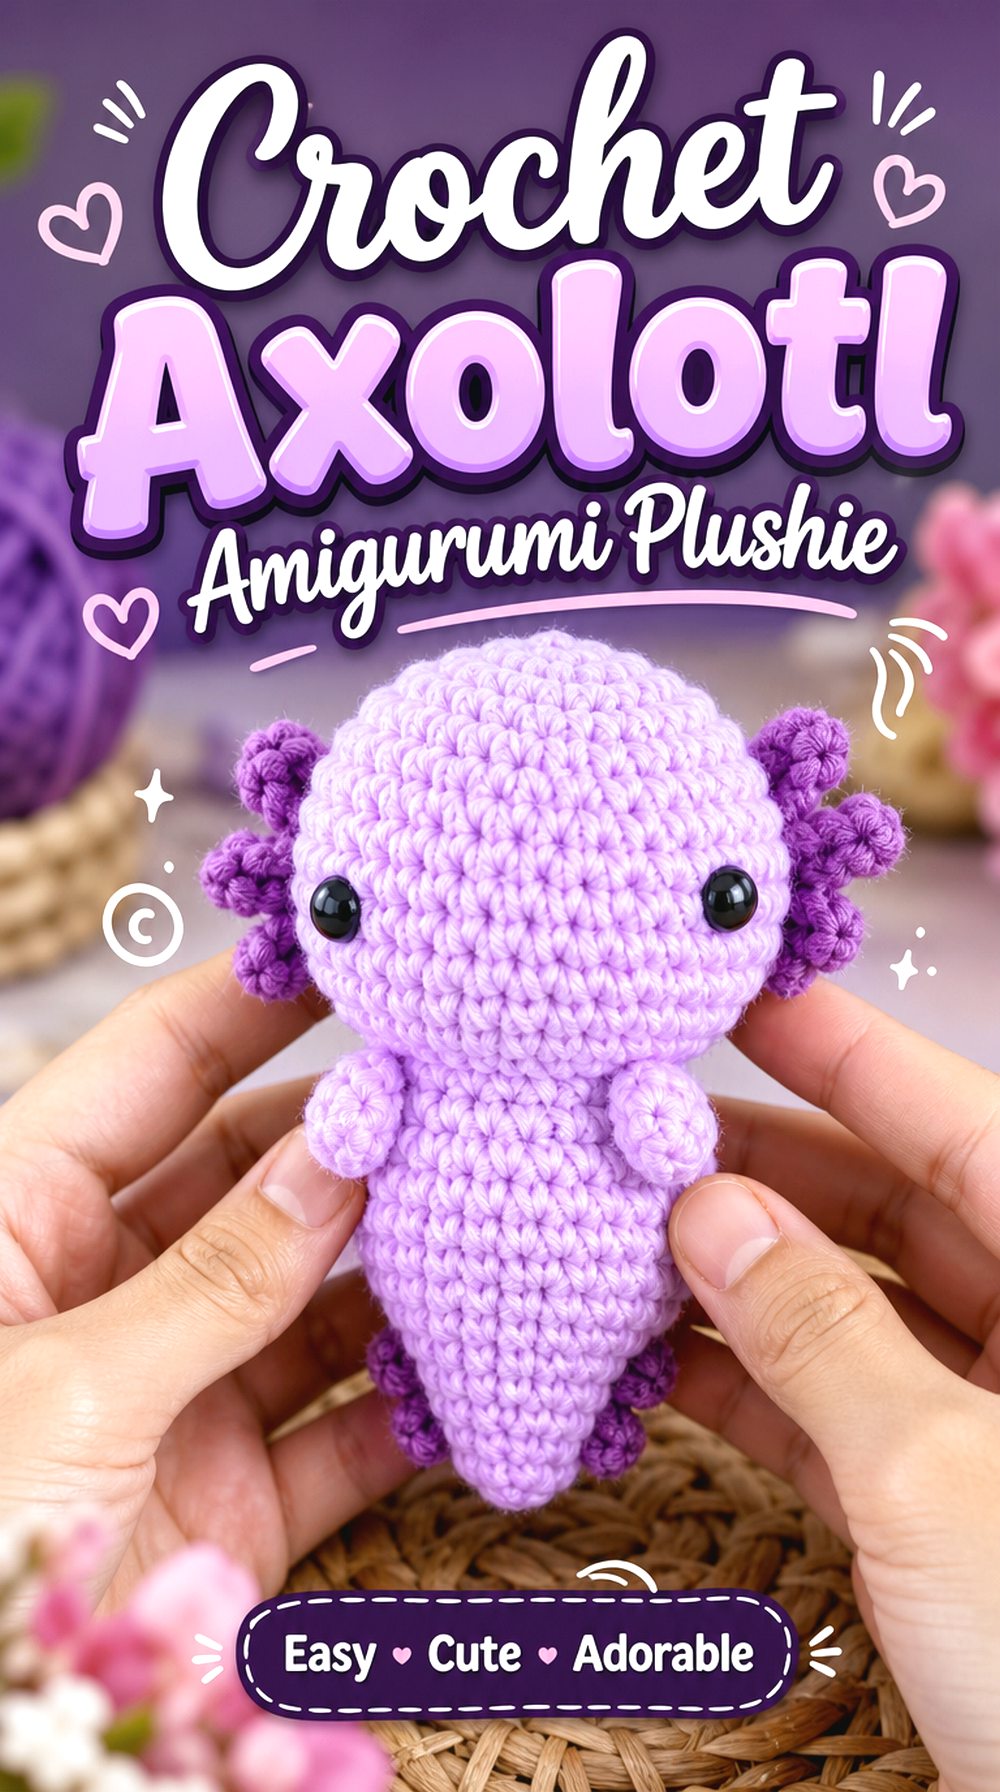
The axolotl adds a more unusual animal shape to the list. Its charm comes from the soft body and the side features around the head, which make it stand apart from more familiar animals like the bunny, bear, and cat. This is a good choice for readers who want a plushie that feels a little more unexpected.
Because the axolotl’s identity depends on its head details, the finishing should stay clear and balanced. Small side pieces and facial placement are especially important for this project.
Focus on the Head Details
The axolotl’s side features are what make the plushie recognizable. Readers should look closely at their position and balance before finishing. If those details sit unevenly or blend too much into the body, the character may not read clearly. A careful front view check can help preserve the axolotl shape.
Compare the Body Length
Unlike a round bee or octopus, an axolotl usually has a more stretched body direction. Readers should compare the length and shape with the finished example as they work. This helps keep the plushie from becoming too squat or too narrow, especially if yarn thickness changes the proportions.
Check the Creator’s Notes
The source description presents this as an amigurumi tutorial, but readers should still review the creator’s notes before starting. Supply details, separate features, and any extra finishing points should be confirmed from the original source. That is especially helpful for an animal with several small identity-defining parts.
Original Tutorial and Creator Credit
Creator: craftswithfee
Crochet No Sew Duck Plushie
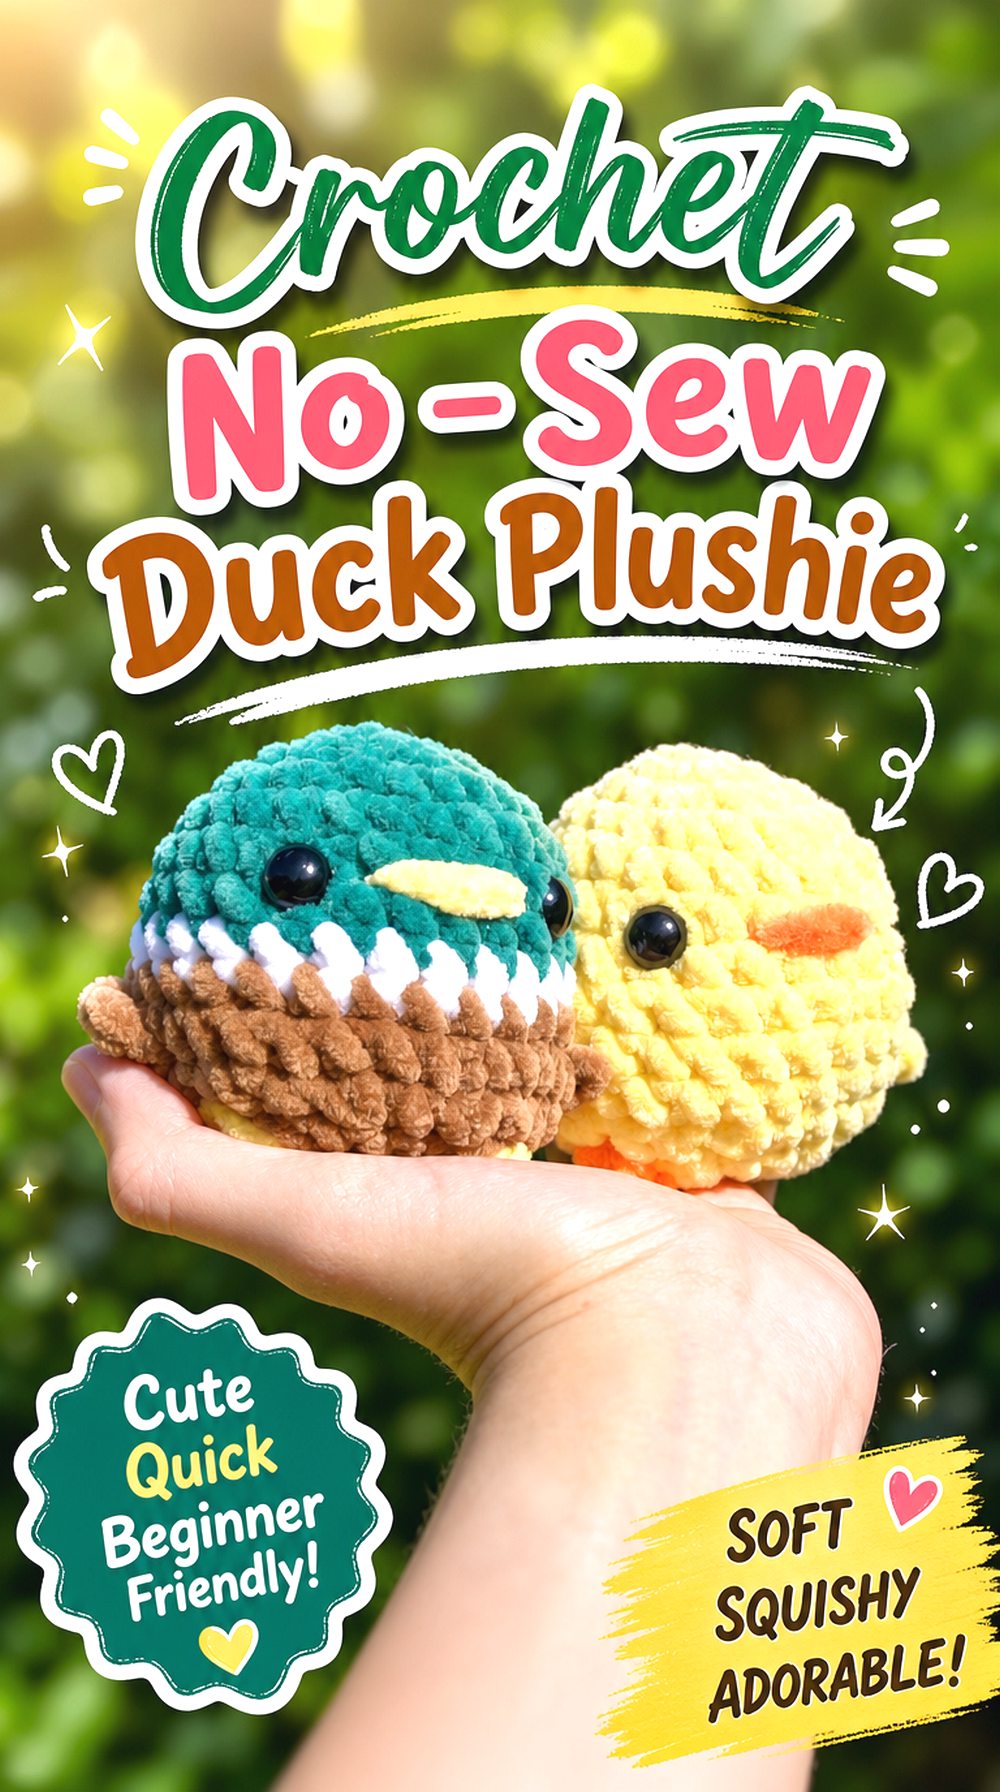
The duck closes the list with a simple animal shape and a bright beak-focused face. Its no-sew style makes it different from projects that include more separate accessories or detailed assembly, while the duck shape still gives readers a clear finished character. It may suit someone who wants a compact plushie with a cheerful front view.
The beak and body stance are the details to watch. Those features separate the duck from other round amigurumi animals and help the finished piece look purposeful rather than plain.
Check the Beak Placement
The beak is the main feature that makes this plushie read as a duck. It should sit clearly on the face and stay balanced with the eyes. Readers should slow down during the facial finishing stage because a small shift in beak placement can change the expression and the overall character.
Understand the No-Sew Format
The creator describes this as a no-sew duck, which can appeal to readers who prefer fewer attached pieces. Even so, no-sew does not mean no finishing. Readers should still watch how the shape is closed, how the facial details are handled, and whether any embroidery or small additions need careful placement.
Review the Short Sections First
The tutorial information includes clear time sections for materials, crochet, embroidery, and closing content. Readers can use that structure to preview the whole project before beginning. This helps identify where the main making ends and where the decorative finish begins, which is useful for keeping the duck neat.
Original Tutorial and Creator Credit
Creator: The duck closes the list with a simple animal shape and a bright beak-focused face. Its no-sew style makes it different from projects that include more separate accessories or detailed assembly, while the duck shape still gives readers a clear finished character. It may suit someone who wants a compact plushie with a cheerful front view.
The beak and body stance are the details to watch. Those features separate the duck from other round amigurumi animals and help the finished piece look purposeful rather than plain.
Check the Beak Placement
The beak is the main feature that makes this plushie read as a duck. It should sit clearly on the face and stay balanced with the eyes. Readers should slow down during the facial finishing stage because a small shift in beak placement can change the expression and the overall character.
Understand the No-Sew Format
The creator describes this as a no-sew duck, which can appeal to readers who prefer fewer attached pieces. Even so, no-sew does not mean no finishing. Readers should still watch how the shape is closed, how the facial details are handled, and whether any embroidery or small additions need careful placement.
Review the Short Sections First
The tutorial information includes clear time sections for materials, crochet, embroidery, and closing content. Readers can use that structure to preview the whole project before beginning. This helps identify where the main making ends and where the decorative finish begins, which is useful for keeping the duck neat.
Original Tutorial and Creator Credit
Creator: One Cent Crochet
Conclusion
These crochet amigurumi plushie ideas offer a useful range of shapes and finishing styles. Choose the bunny or teddy bear if you want extra personality through accessories or clothing. Pick the whale, octopus, axolotl, or duck for animal shapes with strong silhouettes. The bee, cow, penguin, frog, cat, and dinosaur each bring a different mix of color, face detail, and body structure.
Before starting, compare the amount of finishing each plushie needs. Then use the original tutorials for the exact construction details, supplies, and creator-specific instructions.
FAQs
How do I choose the right crochet amigurumi plushie first?
Start by choosing the shape that matches your patience for finishing. A round whale or duck may feel more direct than a dressed bear or accessory bunny. Look at the number of small parts, color changes, face details, and attached features before deciding which plushie suits your current comfort level.
Are these crochet plushies suitable for children?
Do not assume every amigurumi plushie is child-safe. Check the creator’s materials, especially eyes, small accessories, stuffing, and attached details. If a plushie is intended for a baby or young child, review safer finishing options from the original source and follow current safety guidance for toys.
Can I change the yarn for these amigurumi plushies?
Yarn changes can affect size, firmness, stitch visibility, and the way small details sit. Before substituting, check whether the creator gives yarn weight, hook size, or finished measurements. If those details are not clear, expect the final plushie to differ from the example and plan extra care around shaping.
What should I check before following a YouTube amigurumi tutorial?
Review the full tutorial, description, material list, and any linked written pattern before starting. Look for finished size, separate pieces, facial details, stuffing notes, and whether the project uses sewing or no-sew construction. This helps you avoid stopping halfway because of a missing supply or unclear finishing step.
Can I sell plushies made from these YouTube tutorials?
Do not assume selling is allowed just because the tutorial is public. Check the creator’s terms in the video description, linked pattern, website, or shop listing. Some creators allow finished-item sales with credit, while others may limit use. When terms are unclear, ask the creator directly before selling finished plushies.