12 Crochet Forest Animal Set Ideas for a Cozy Woodland Display
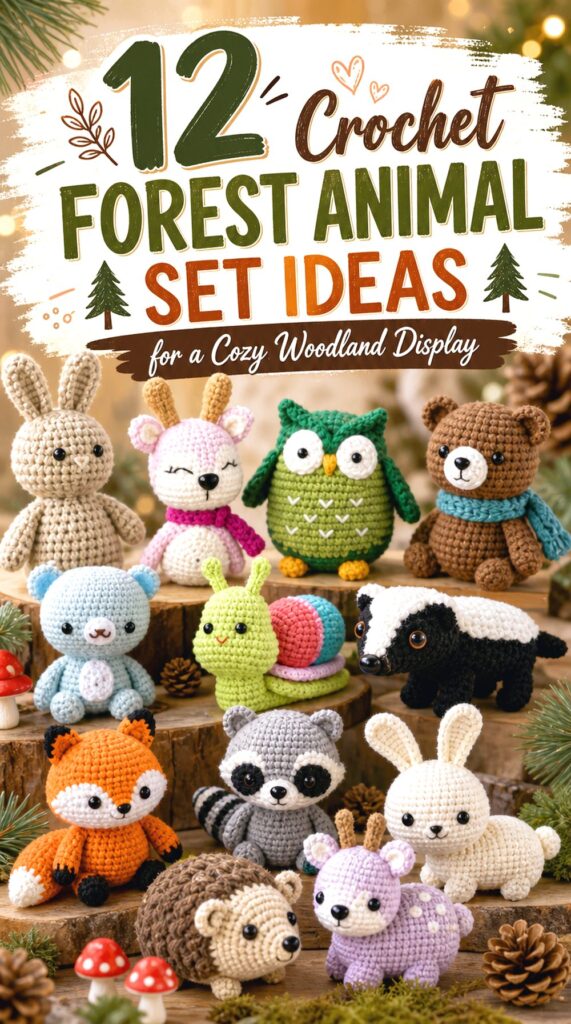
Crochet forest animal sets work well when the animals feel connected but not identical. A fox, deer, owl, bear, hedgehog, squirrel, raccoon, bunny, beaver, badger, skunk, and snail each bring a different shape, face style, body size, and woodland detail to the group. Some sit neatly on a shelf, while others add long tails, antlers, wings, stripes, spikes, or small floor-level charm.
This collection helps readers choose a balanced animal mix instead of making twelve similar plush toys. The tutorials cover different silhouettes and finishing details, so the final set can feel like a small handmade forest scene for display, gifting, nursery decor, or seasonal styling.
Quick List
- Crochet Seated Fox Amigurumi
- Crochet Gentle Deer Amigurumi
- Crochet Round Bear Amigurumi
- Crochet Wide-Eyed Owl Amigurumi
- Crochet Textured Hedgehog Amigurumi
- Crochet Tiny Squirrel Amigurumi
- Crochet Masked Raccoon Keychain
- Crochet Long-Eared Bunny Amigurumi
- Crochet Flat-Tailed Beaver Amigurumi
- Crochet Honey Badger Amigurumi
- Crochet Striped Skunk Amigurumi
- Crochet Woodland Snail Amigurumi
Why These Crochet Forest Animals Are Worth Making
A crochet forest animal set gives you plenty of room to build variety without leaving one theme. The taller deer and bear can anchor the group, while smaller animals like the squirrel, snail, and hedgehog help fill low spaces on a shelf or table. Animals with strong markings, such as the fox, raccoon, badger, and skunk, add contrast even when the palette stays earthy.
These projects also let makers compare different amigurumi decisions before committing to a full set. Some animals depend on face placement, some on tail shape, and others on texture or assembly. That makes the collection useful for display planning, thoughtful gifting, and choosing which creature to make next.
Crochet Seated Fox Amigurumi
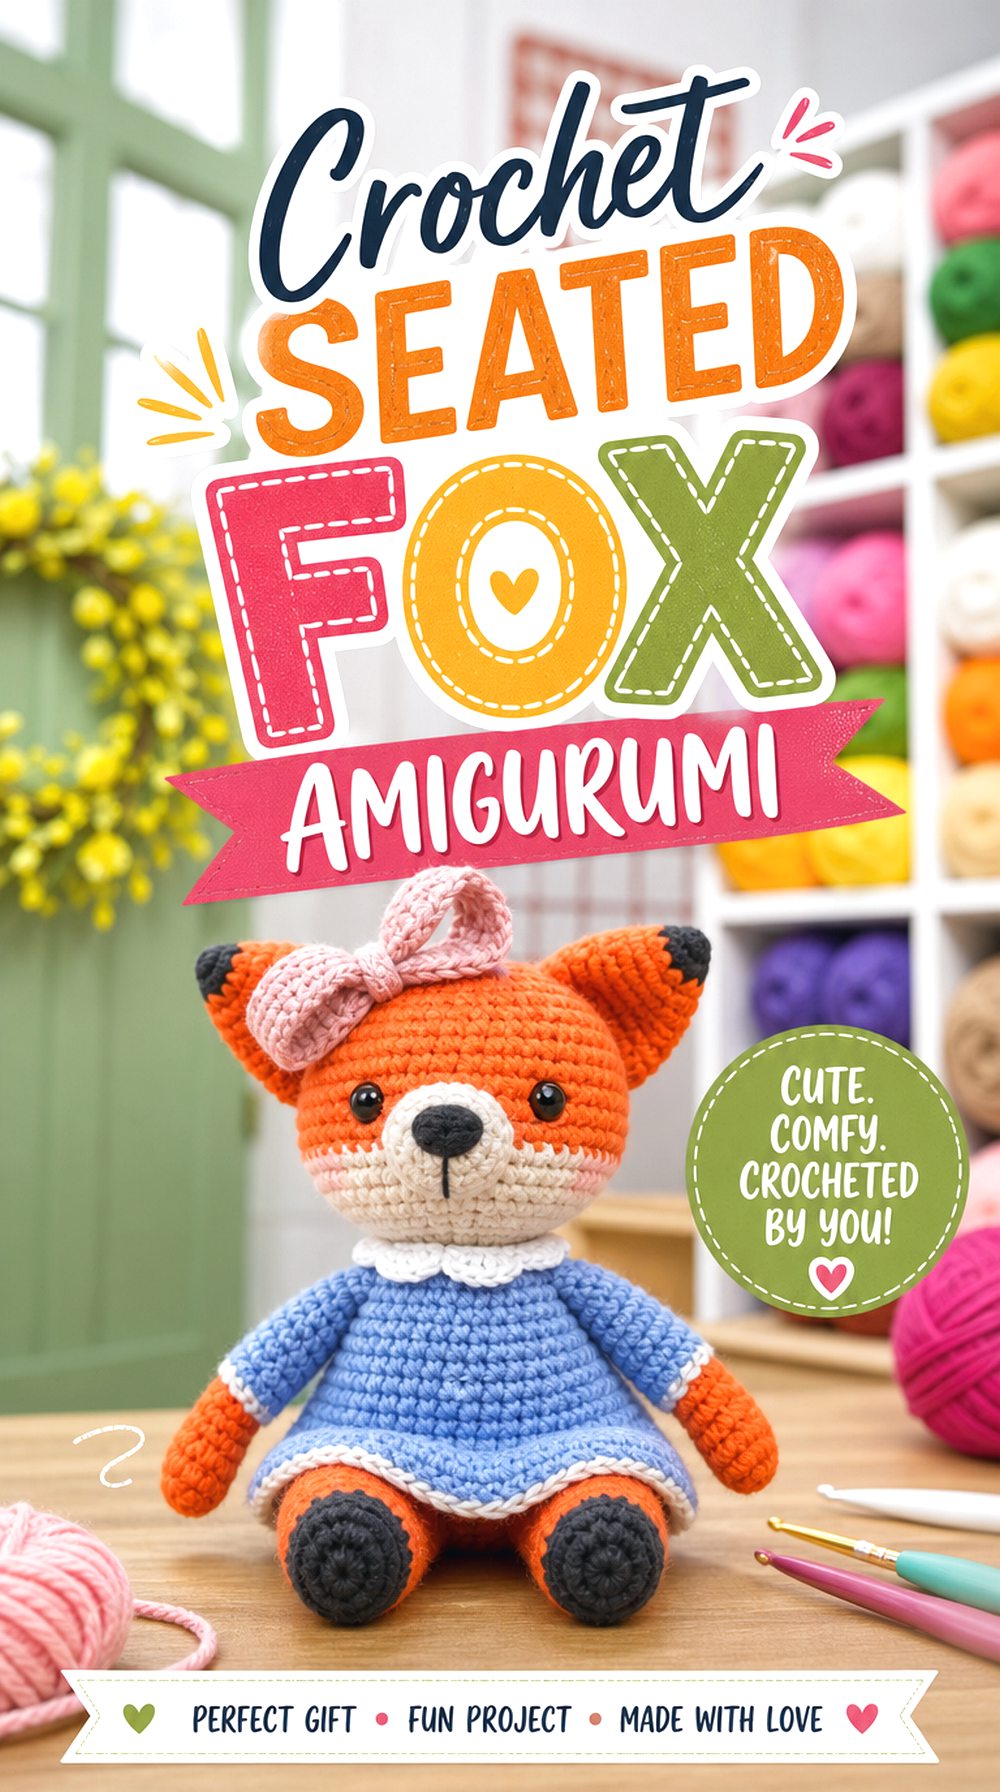
A seated fox gives a forest animal set its classic woodland starting point. The pointed ears, orange body, pale face area, and tail make the finished toy easy to recognize beside softer brown animals. This version also has a dressed, character-like look, so it can stand out as the most decorative piece in the group rather than blending into the background.
The fox is a strong first choice when the set needs a warm color anchor. Its upright posture works well near a deer, bear, or owl because the shape reads clearly from the front.
Keep the Fox Shape Recognizable
The most important visual feature is the fox outline: pointed ears, narrow face, and tail. Before choosing colors, think about contrast between the face, body, ear tips, and tail end. Even soft nursery colors can work, but the finished animal should still read as a fox when placed with the rest of the set.
Check the Clothing Details
This fox includes extra character details, so readers should review the material list and finished look before starting. Small decorative parts can affect the final style, especially if the goal is a natural woodland set rather than a dressed-animal display. Confirm which pieces are essential to the design and which details fit your planned scene.
Review the Full Guide First
A fox with several color areas is easier to follow when the whole tutorial is reviewed before crocheting. Pay attention to where face and tail color changes appear, then use the original source for the exact counts and placement. This helps avoid a finished toy whose markings feel uneven or hard to identify.
Original Tutorial and Creator Credit
Creator: Elise Rose Crochet
Crochet Gentle Deer Amigurumi
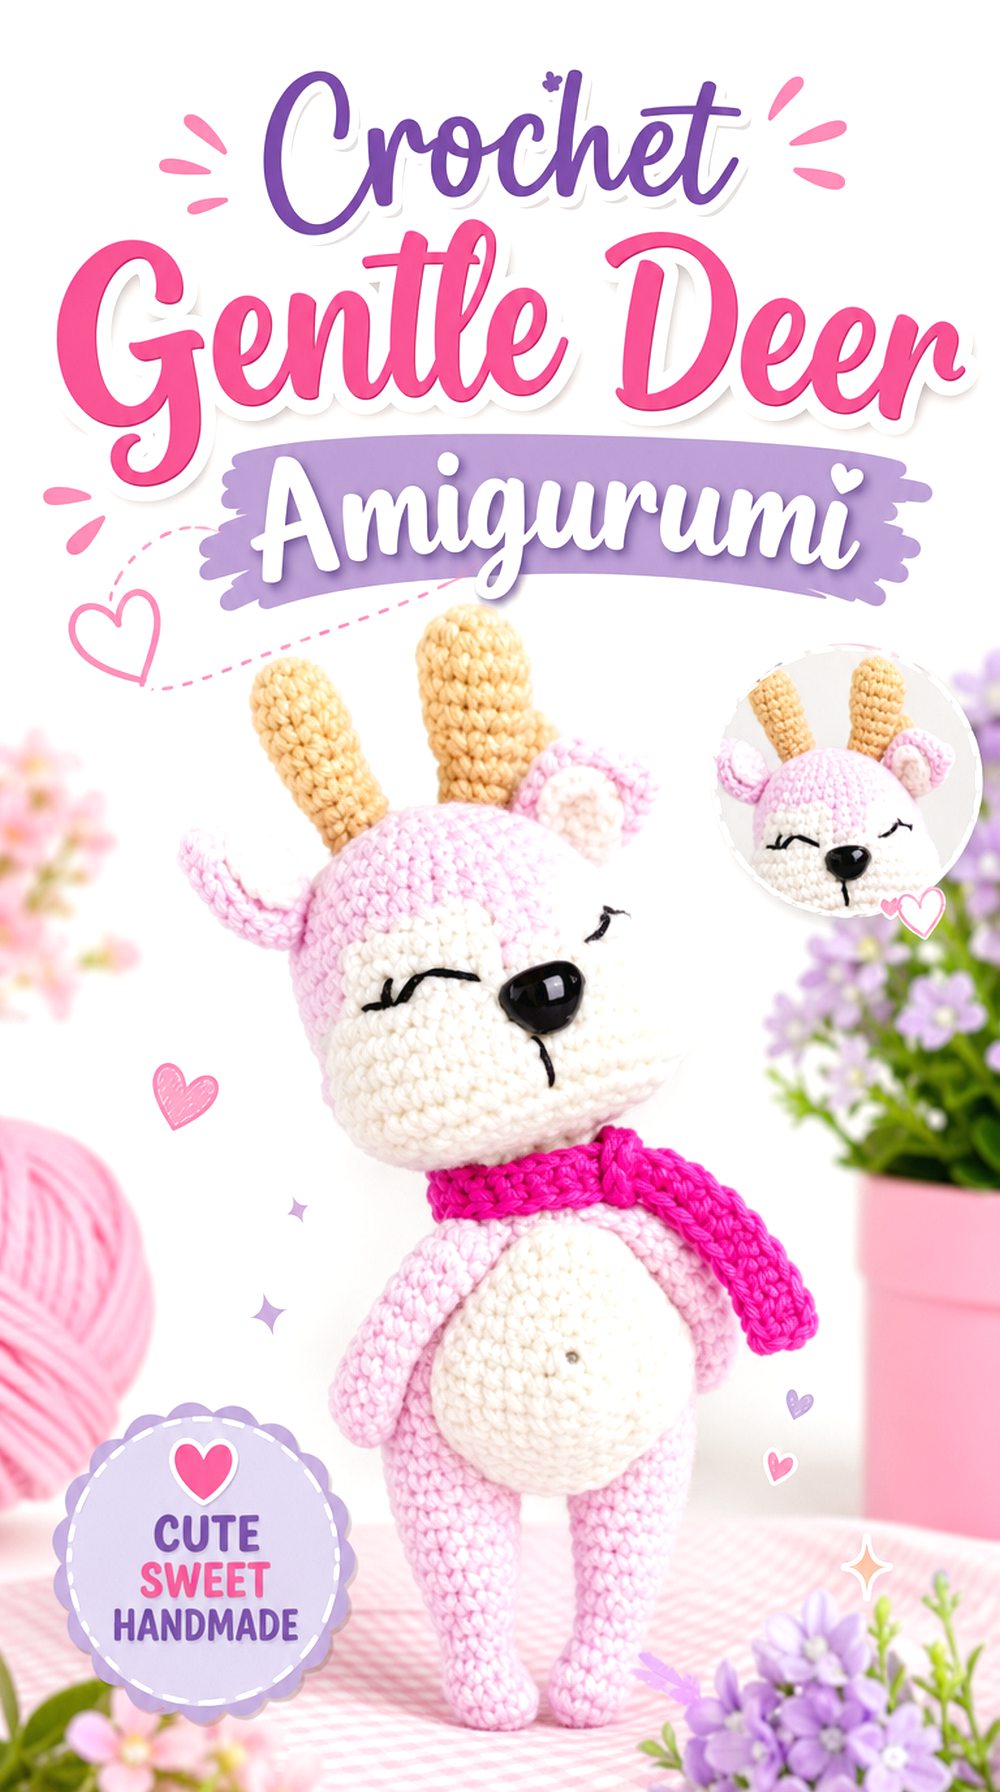
A deer brings height, softness, and a calmer woodland feeling to the set. The long face, small ears, and gentle posture make it different from rounder animals like the bear, hedgehog, and owl. In a display, it can sit near the center because the deer shape naturally draws attention without needing bright colors.
This project is a useful pick when the forest set needs an animal that feels light and graceful. It also pairs well with a fox or bunny because the body shape and head proportions create clear contrast.
Focus on the Face Placement
The deer’s expression depends heavily on where the eyes, nose, and ears sit. Readers should pause before final attachment and compare the front view with the finished example. A small shift can change the animal from gentle to off-balance, so face placement is worth checking slowly.
Confirm the Antler or Ear Details
Before starting, look closely at whether the deer includes antlers, ears, or other small head details in the source. These pieces affect the finished silhouette and may determine whether the animal looks like a young deer, fawn, or more mature woodland deer. Do not assume optional details are included unless the creator clearly shows them.
Use the Final Assembly View
The deer has more visual impact when the head and body line up neatly. Use the final assembly view to check how the pieces sit together, especially around the neck and face. The original tutorial should be followed for exact construction details rather than trying to recreate the shaping from a finished photo alone.
Crochet Round Bear Amigurumi
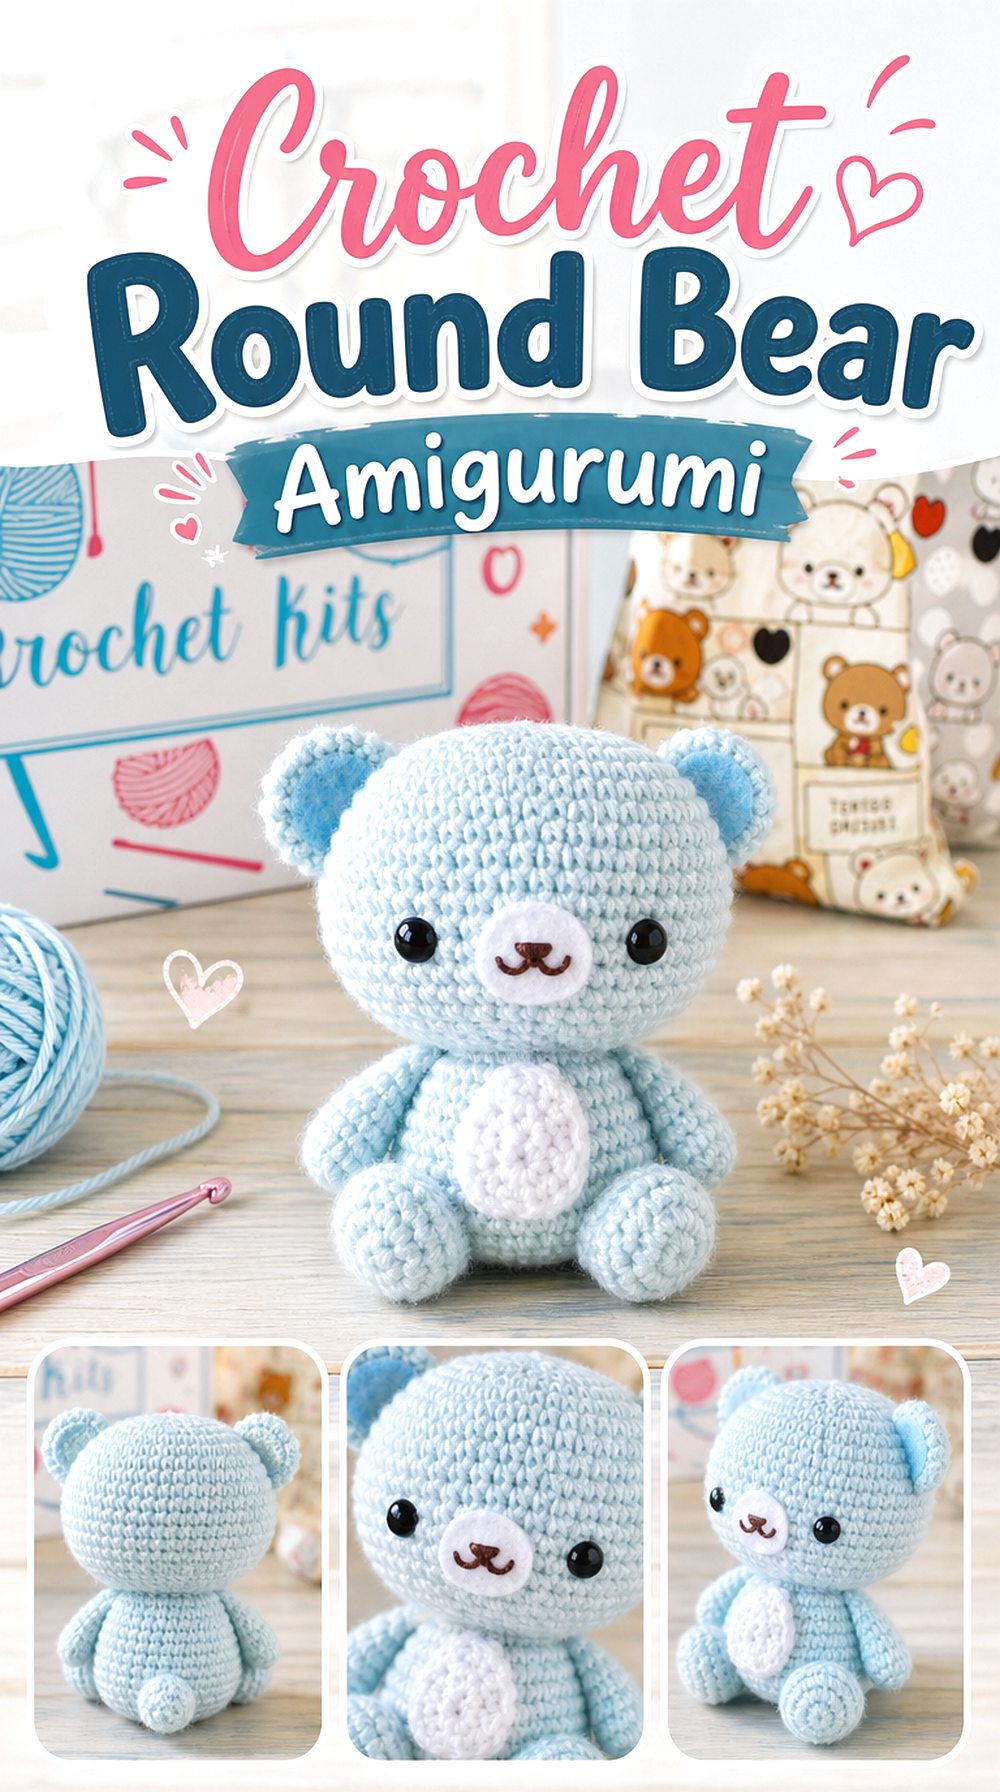
A bear adds a sturdy, rounded shape to a forest animal set. Compared with the fox and deer, this project feels simpler in outline, with the focus moving toward the ears, muzzle, and compact body. That makes it a helpful middle piece when arranging several animals together, because it gives the display a soft visual pause.
The bear can work as a shelf sitter, nursery accent, or companion animal in the group. Its familiar shape also helps balance less common choices such as the badger, skunk, or snail.
Think About Display Balance
A rounded bear can visually ground the forest set. Place it near taller or more detailed animals so the group does not feel too busy. In a finished arrangement, the bear may work well between a deer and owl, or beside a fox, because its simple shape lets stronger markings stand out nearby.
Check the Muzzle Shape
The bear’s face depends on the muzzle being neat and centered. Before attaching or finishing the face, check the front view and side view if they are shown. A slightly uneven muzzle can make the animal look tilted, so this is one of the best details to review before moving to final assembly.
Look for Written Support
This source links to a written pattern, so readers who prefer following text should check the creator’s notes before starting. Use the video for visual guidance and the creator’s own written material for exact instructions. Avoid relying on memory when working small face or ear details.
Original Tutorial and Creator Credit
Creator: HappyBerry Crochet
Crochet Wide Eyed Owl Amigurumi
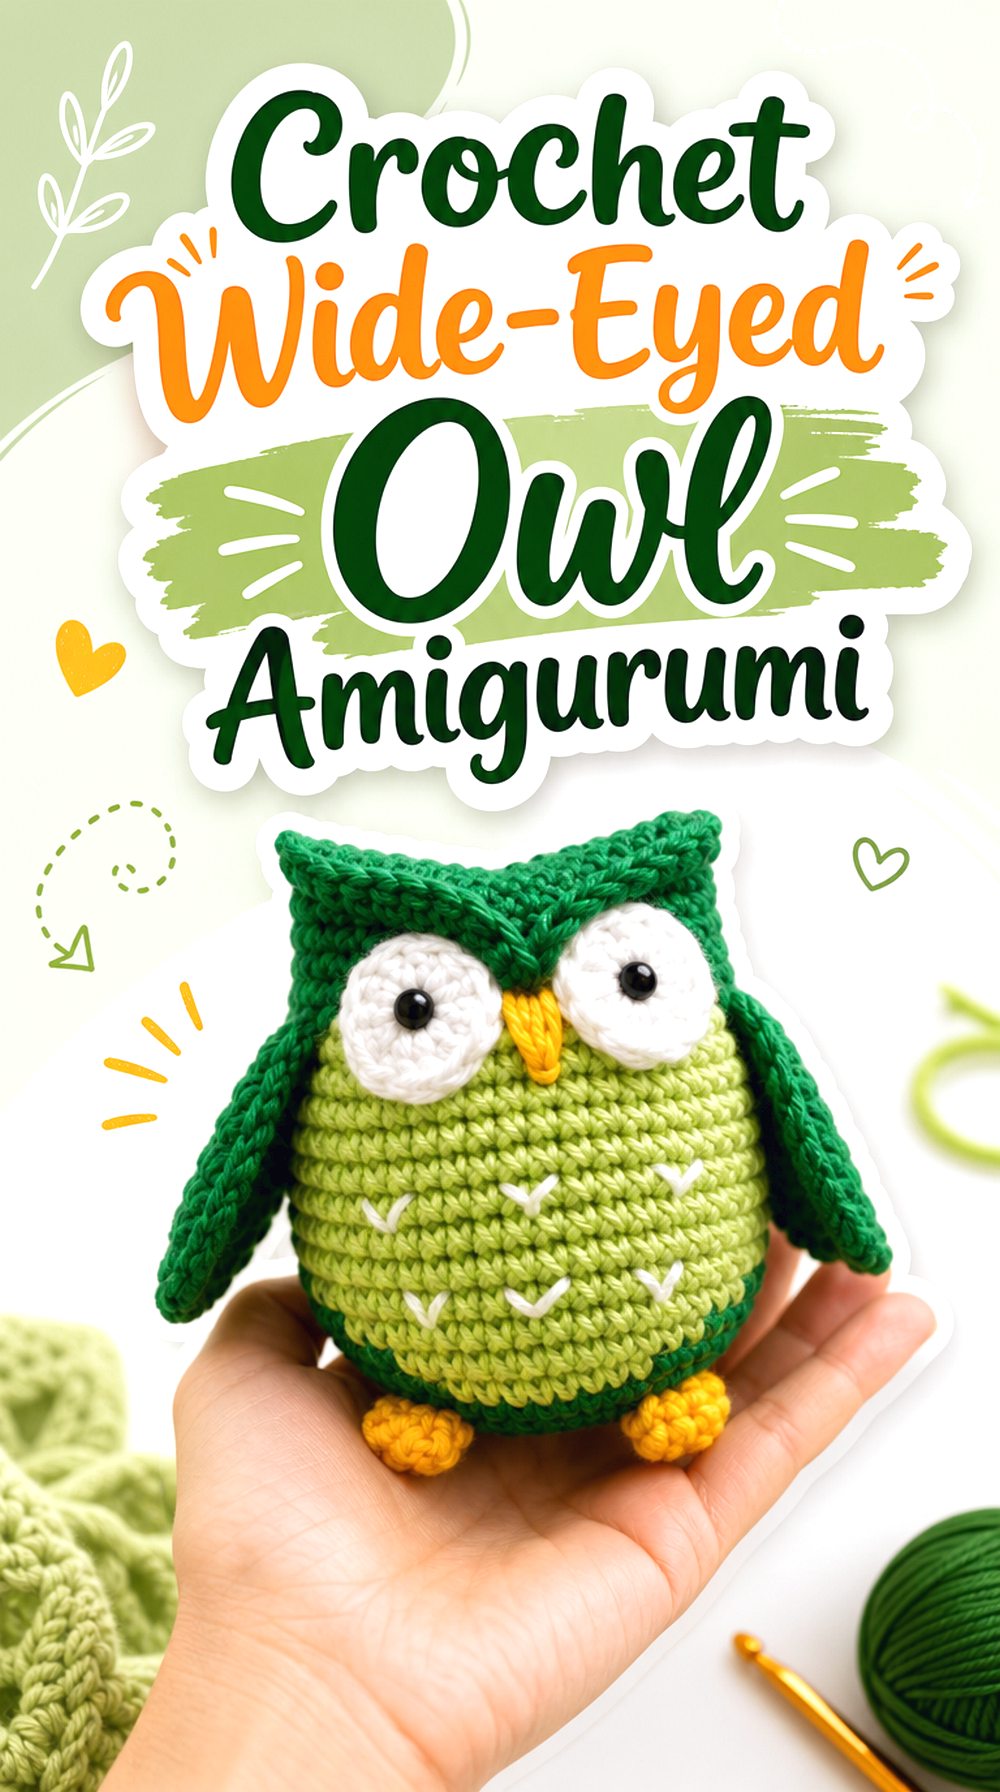
An owl gives the forest set a bird shape instead of another four-legged animal. The round body, large eye area, small beak, and wing placement create a clear difference from the fox, bear, and deer. It can sit slightly higher in a display, especially if the set is arranged like a woodland shelf scene.
This project is also useful for adding face detail without using long limbs or a tail. The owl’s personality comes mostly from symmetry, eye contrast, and a clean front view.
Keep the Eyes Even
The owl’s face depends on matching eye placement. Before fixing the details, compare both sides carefully and check that the beak sits centered between them. Uneven eyes are more noticeable on an owl than on many other forest animals because the face is the main feature.
Choose a Clear Front View
An owl often looks best when displayed straight on. Think about where it will sit before making the full set, because a front-facing bird can break up a row of side-facing animals. This makes it a useful centerpiece for a small group of crochet forest creatures.
Slow Down the Face Details
The eye area, beak, and wings are the parts most worth reviewing slowly. Pause at the detailed sections and compare the shape before continuing. For exact stitch counts, shaping, and placement, follow the creator’s original instructions rather than copying the finished appearance by sight.
Original Tutorial and Creator Credit
Creator: Maia Maia crochet
Crochet Textured Hedgehog Amigurumi
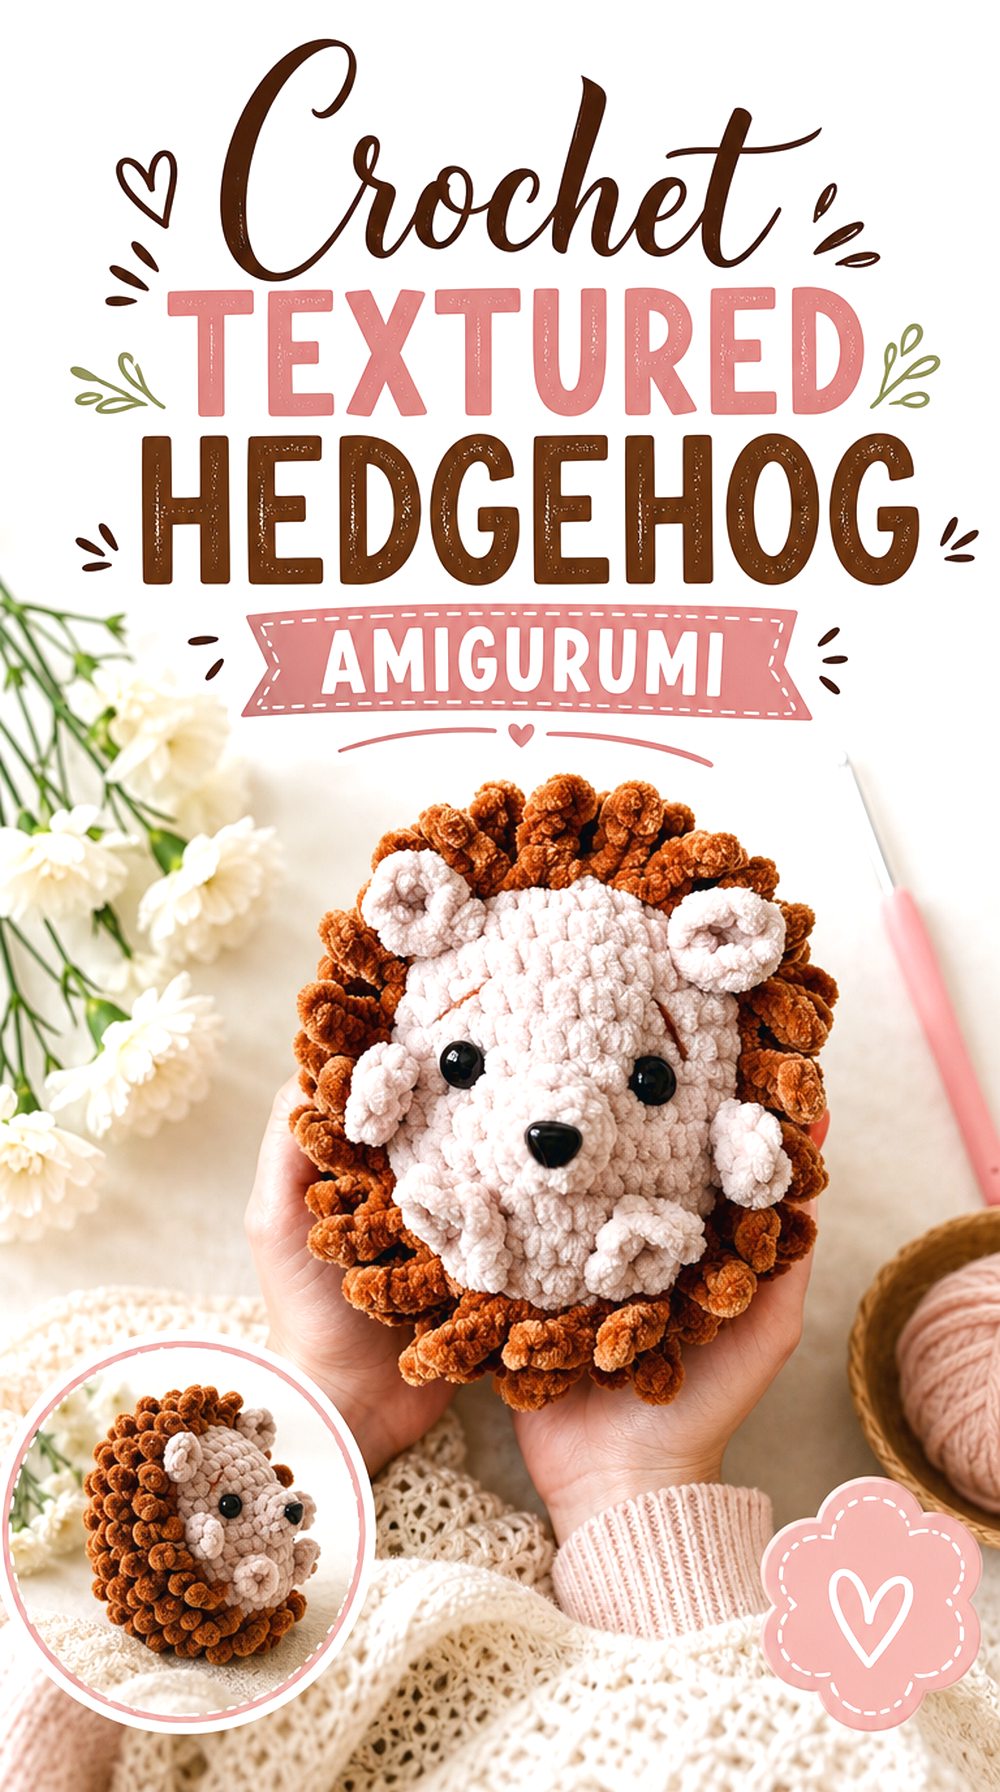
A hedgehog adds surface texture to the forest animal set. Unlike the smooth fox, deer, bunny, and bear, this project has a spiky-looking back area that makes it easy to identify. The small body, little face, ears, legs, and raised texture give the finished animal a low woodland-floor shape.
This is a useful choice when the set needs something compact but detailed. It can sit near the snail or squirrel to create a lower front row in a shelf display.
Let the Texture Stand Out
The hedgehog’s main feature is the contrast between the smoother face and the textured back. Choose colors that let that difference show clearly. If the face and spikes are too similar in tone, the animal may lose some of its hedgehog character when displayed with larger animals.
Check the Small Attached Pieces
Legs, arms, ears, and facial details can affect how balanced the hedgehog looks. Before final attachment, pin or hold the pieces in place and look at the animal from the front. Small pieces do not need to be large to matter; their placement helps the finished hedgehog look alert and stable.
Prepare for the Finishing Stage
This project includes several finishing details, so it is worth setting aside time for the later sections instead of rushing after the body is complete. The original tutorial should be used for exact placement and shaping, especially around the face and spike area.
Original Tutorial and Creator Credit
Creator: Double Dutch Crochet
Crochet Tiny Squirrel Amigurumi
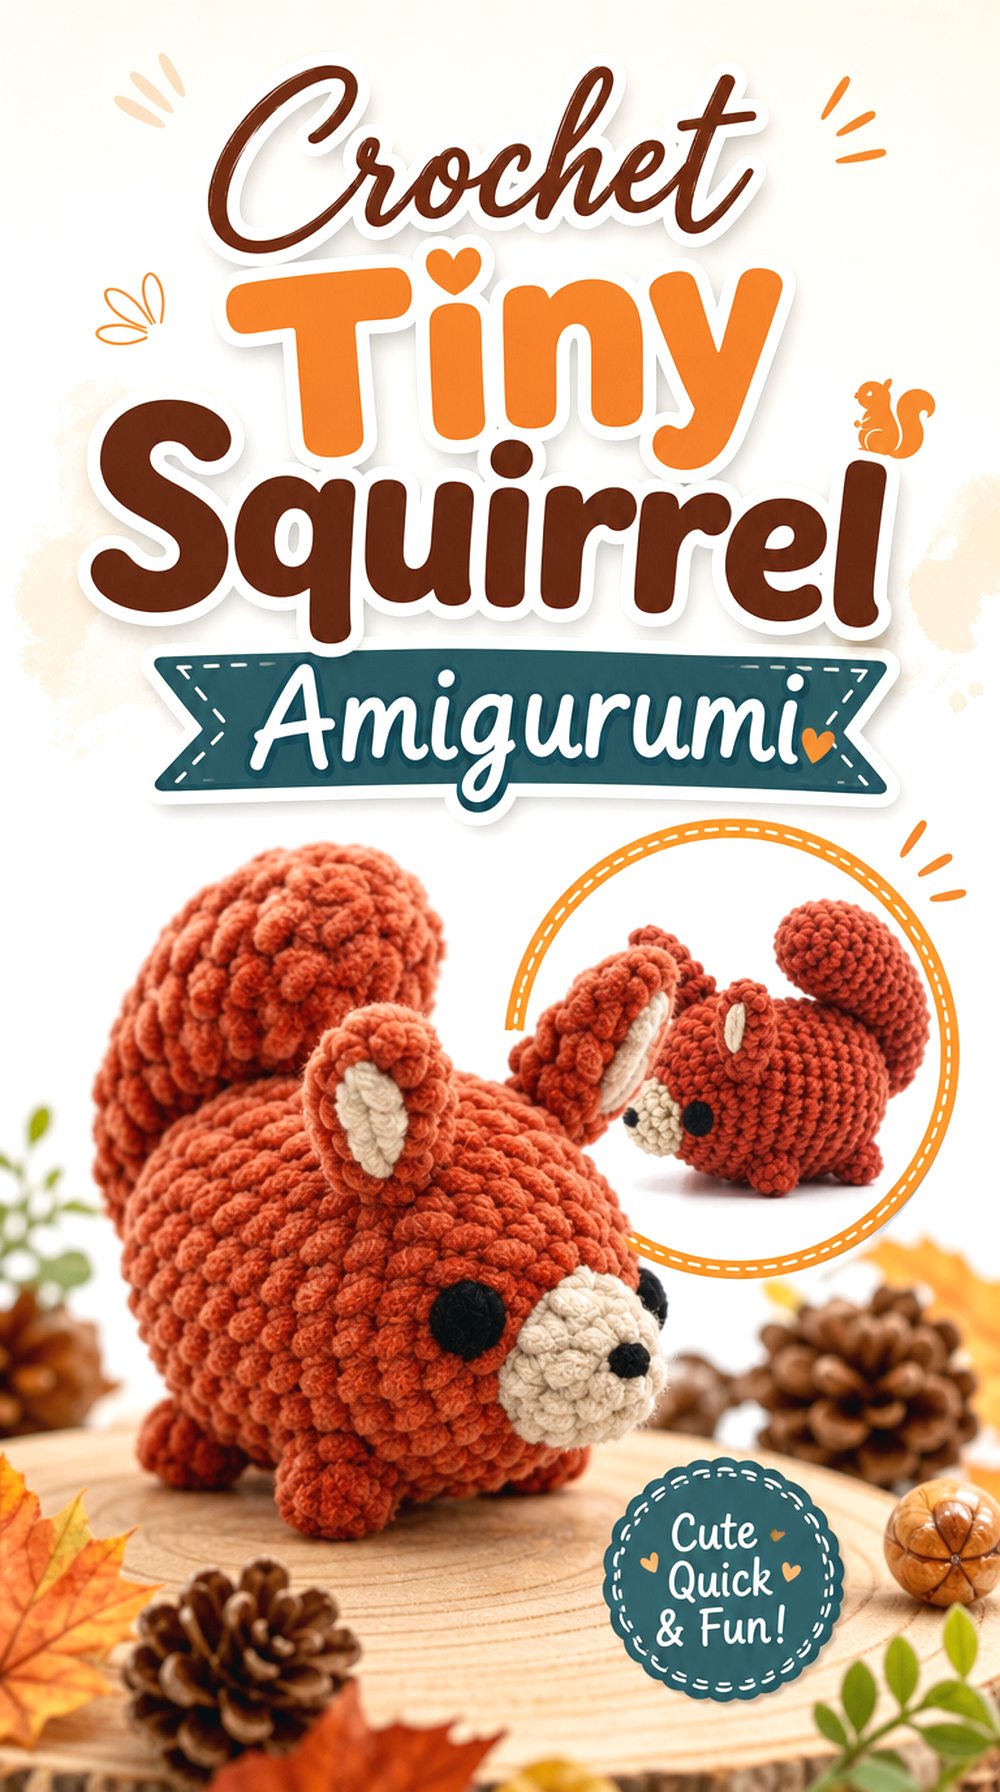
A tiny squirrel adds movement and a lighter scale to the forest set. The long tail, small paws, pointed ears, and compact body make it different from the round bear and owl. It can also fill a small gap in a display, especially near the fox, raccoon, or hedgehog.
Because the squirrel is smaller than many woodland animals, its tail becomes the most important shape feature. A clear tail curve or upright tail helps the finished animal read as a squirrel instead of a generic small plush.
Give the Tail Visual Space
The squirrel’s tail should not be hidden behind larger animals in the set. When arranging the display, leave enough space around the back or side so the tail remains visible. That one feature is what separates the squirrel from other compact forest creatures.
Confirm the Finished Scale
This source discusses the project in a mini format, so readers should confirm the finished size and yarn choice before placing it in a larger set. A very small squirrel can look intentional beside a big bear or deer, but only if the display uses height differences thoughtfully.
Compare the Shape as You Work
A small squirrel can change quickly as pieces are added. Compare the body, ears, legs, and tail shape at each major stage. Use the original tutorial for the exact instructions, and avoid guessing the tail placement from the finished photo alone.
Crochet Masked Raccoon Keychain
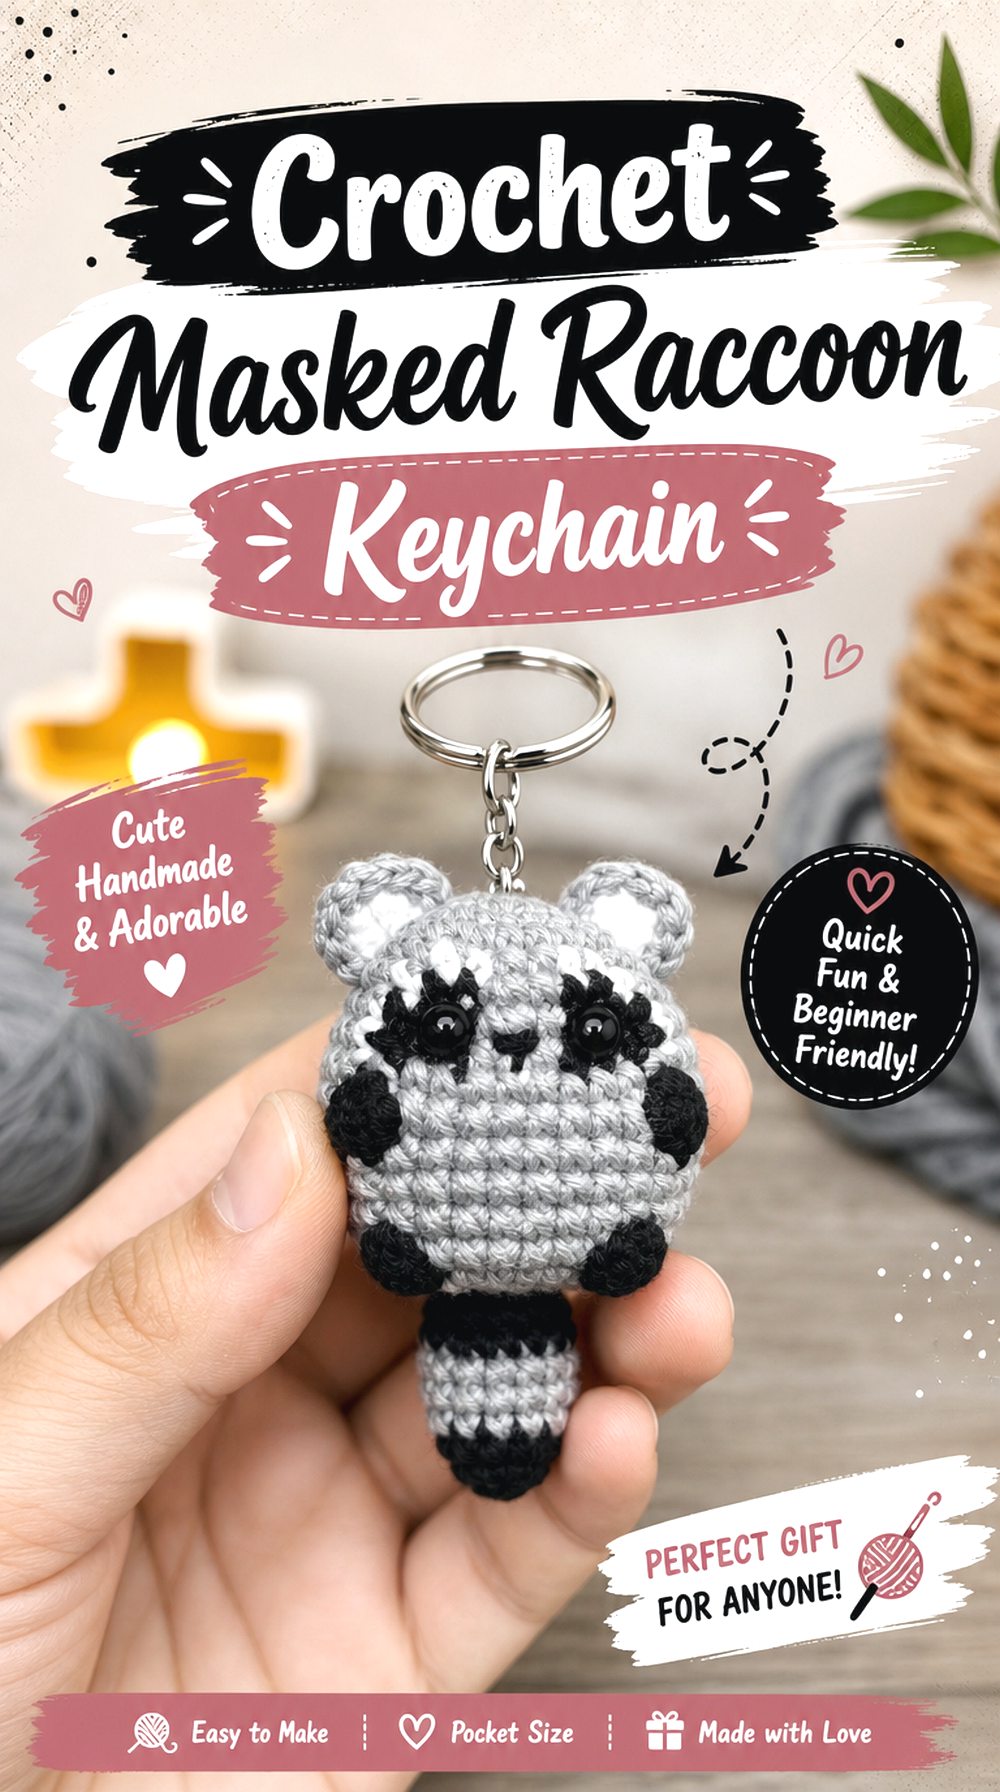
A raccoon brings strong facial markings and a striped tail into the crochet forest animal set. This version is presented as a keychain-style amigurumi, so it can be smaller and more compact than the larger plush animals. The mask, ears, arms, legs, and tail details give it plenty of character even at a reduced scale.
The raccoon is useful when the set needs contrast. Its darker face detail can sit between softer animals like the bunny, deer, or snail without disappearing into the group.
Keep the Mask Clear
The raccoon’s eye mask is the detail that makes the animal recognizable. Choose contrast carefully and check that the dark face area does not cover the expression too heavily. A neat mask helps the raccoon stand apart from the bear or skunk in the same forest collection.
Consider Keychain Use
Because this raccoon is framed as a keychain, readers should decide whether they want it as a hanging piece or a display animal. If it will join a shelf set, confirm whether any hanging hardware is included or optional in the source before preparing materials.
Watch the Tail and Ear Sections
The tail and ears help the small raccoon read correctly. Pay close attention when those pieces are formed and attached. The creator’s original tutorial should be followed for exact counts, color changes, and placement so the stripes and mask stay balanced.
Original Tutorial and Creator Credit
Creator: Cefichet | Amigurumis elsie
Crochet Long Eared Bunny Amigurumi
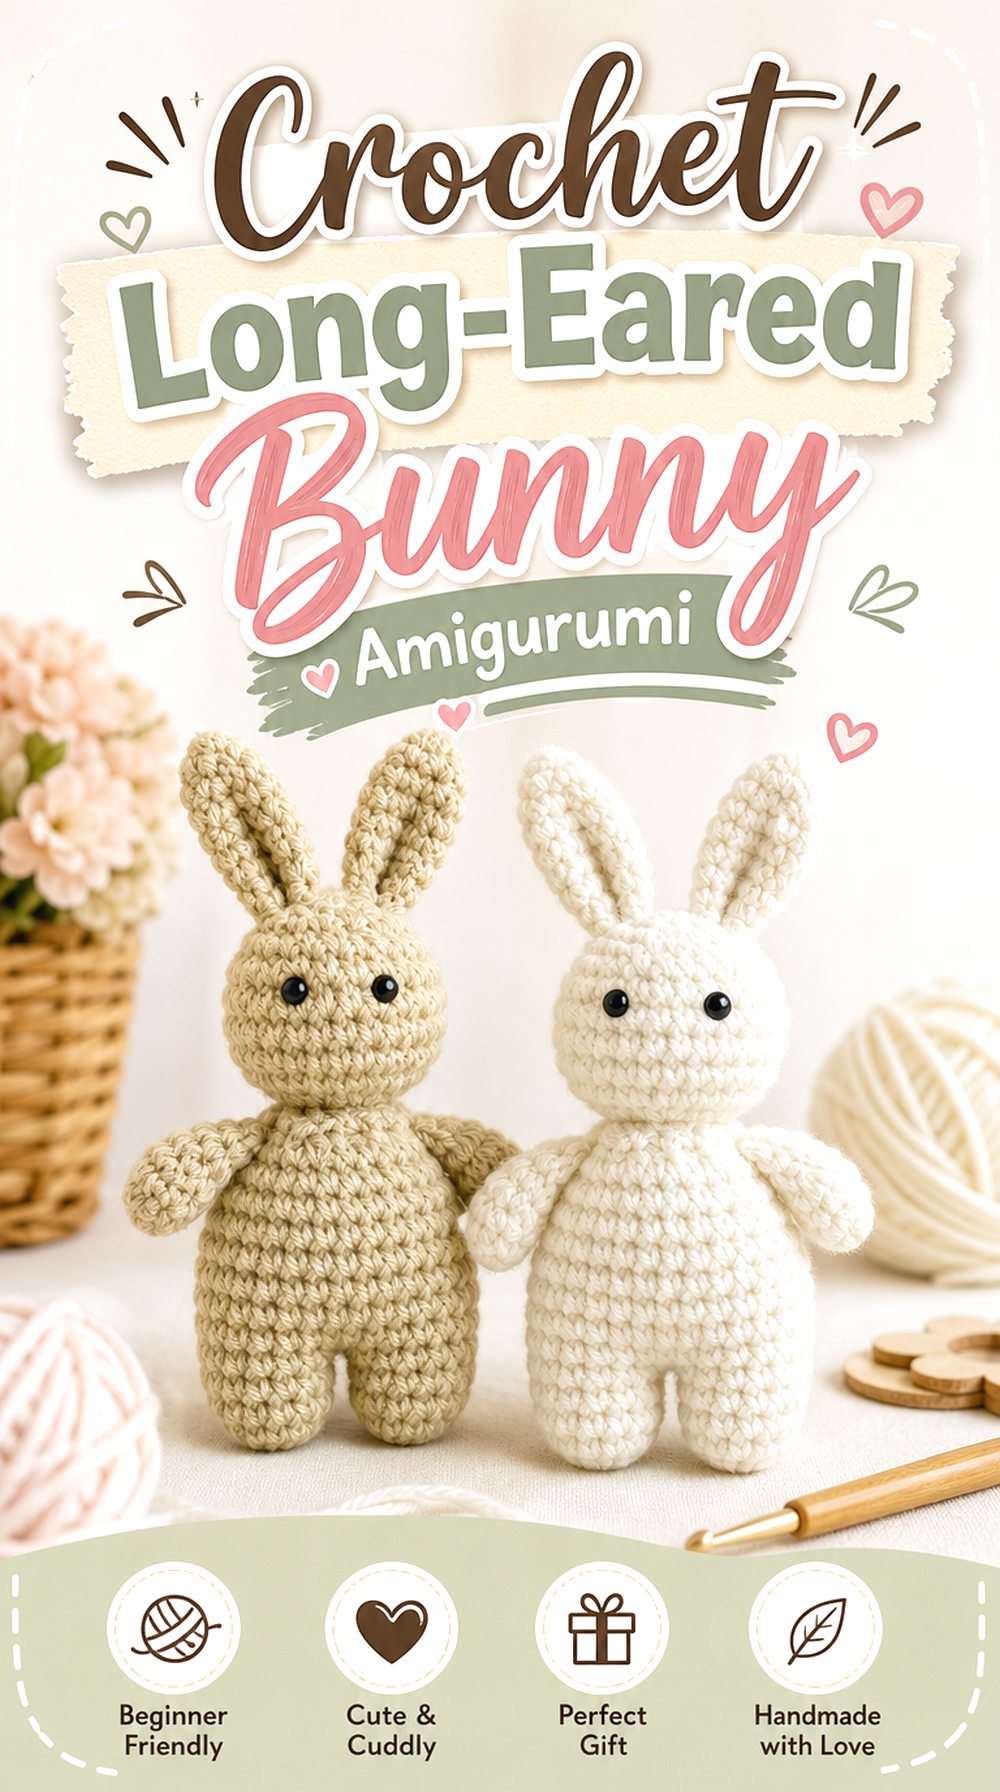
A bunny softens the forest animal set with long ears and a simple rounded body. It is different from the fox and raccoon because the main feature is not strong color marking, but the gentle ear shape and compact pose. In a woodland display, it can sit beside the deer or snail for a quieter corner.
This project also adds a familiar animal that works well for spring displays, nursery shelves, or gift sets. The finished look depends on neat ears, face placement, and body proportion.
Check the Ear Position
Long ears can change the whole personality of a crochet bunny. Before final attachment, compare the height, angle, and distance between the ears. Ears placed too far apart or too low may make the animal harder to recognize in a group of forest creatures.
Think About a Softer Color Role
The bunny does not need the strong contrast of a fox, raccoon, or skunk. It can work well in cream, gray, tan, or another soft color that gives the eye a rest. This makes it helpful when planning a full set with several darker or striped animals.
Follow the Body-to-Head Order
The source separates major parts such as legs, body, head, arms, and ears. Review that structure before beginning so the project does not feel scattered. Use the original tutorial for the exact sequence and counts, especially where body shaping and ear placement matter.
Original Tutorial and Creator Credit
Creator: VivCrochets
Crochet Flat Tailed Beaver Amigurumi
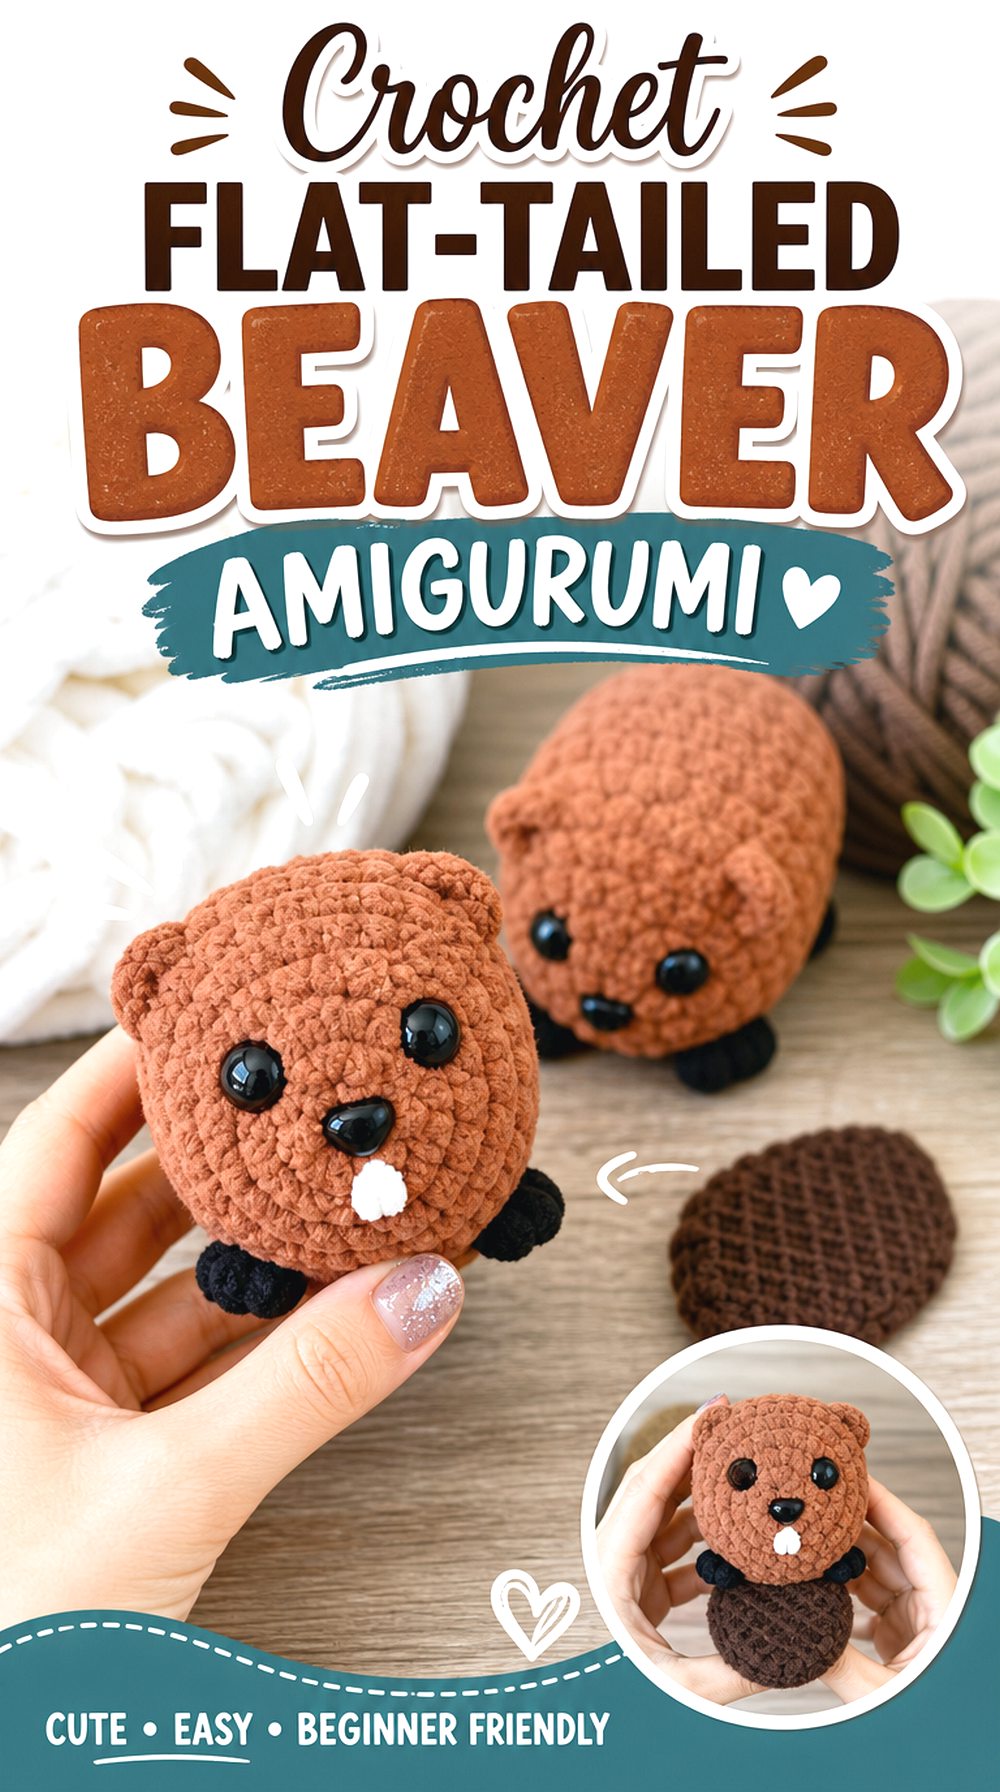
A beaver adds a different tail shape to the forest set. Instead of a fluffy fox tail or striped raccoon tail, this animal depends on a flatter tail, small ears, and a rounded body. That makes it a strong choice for a woodland or riverbank corner in the collection.
The beaver can sit near the squirrel or snail to create a ground-level group. It also helps the set feel broader than only the most common forest animals, especially when paired with a deer, owl, or badger.
Highlight the Tail Shape
The flat tail is the beaver’s clearest feature, so it should stay visible in the finished display. Avoid tucking it too far behind other animals. When planning the set, give the beaver a slight angle so the tail can be seen without hiding the face.
Confirm the Project Match
The video title identifies the project as a beaver, while the description also mentions a groundhog amigurumi. Readers should look at the finished result and creator notes before starting so they understand exactly what animal and details are included in the tutorial.
Check the No-Sew Structure
A no-sew or low-assembly design changes how the animal comes together. Review the full guide first, especially if you prefer attaching separate pieces later. The original tutorial should be followed carefully where shaping and built-in features replace traditional sewing.
Original Tutorial and Creator Credit
Creator: Crafts Go Bloom
Crochet Honey Badger Amigurumi
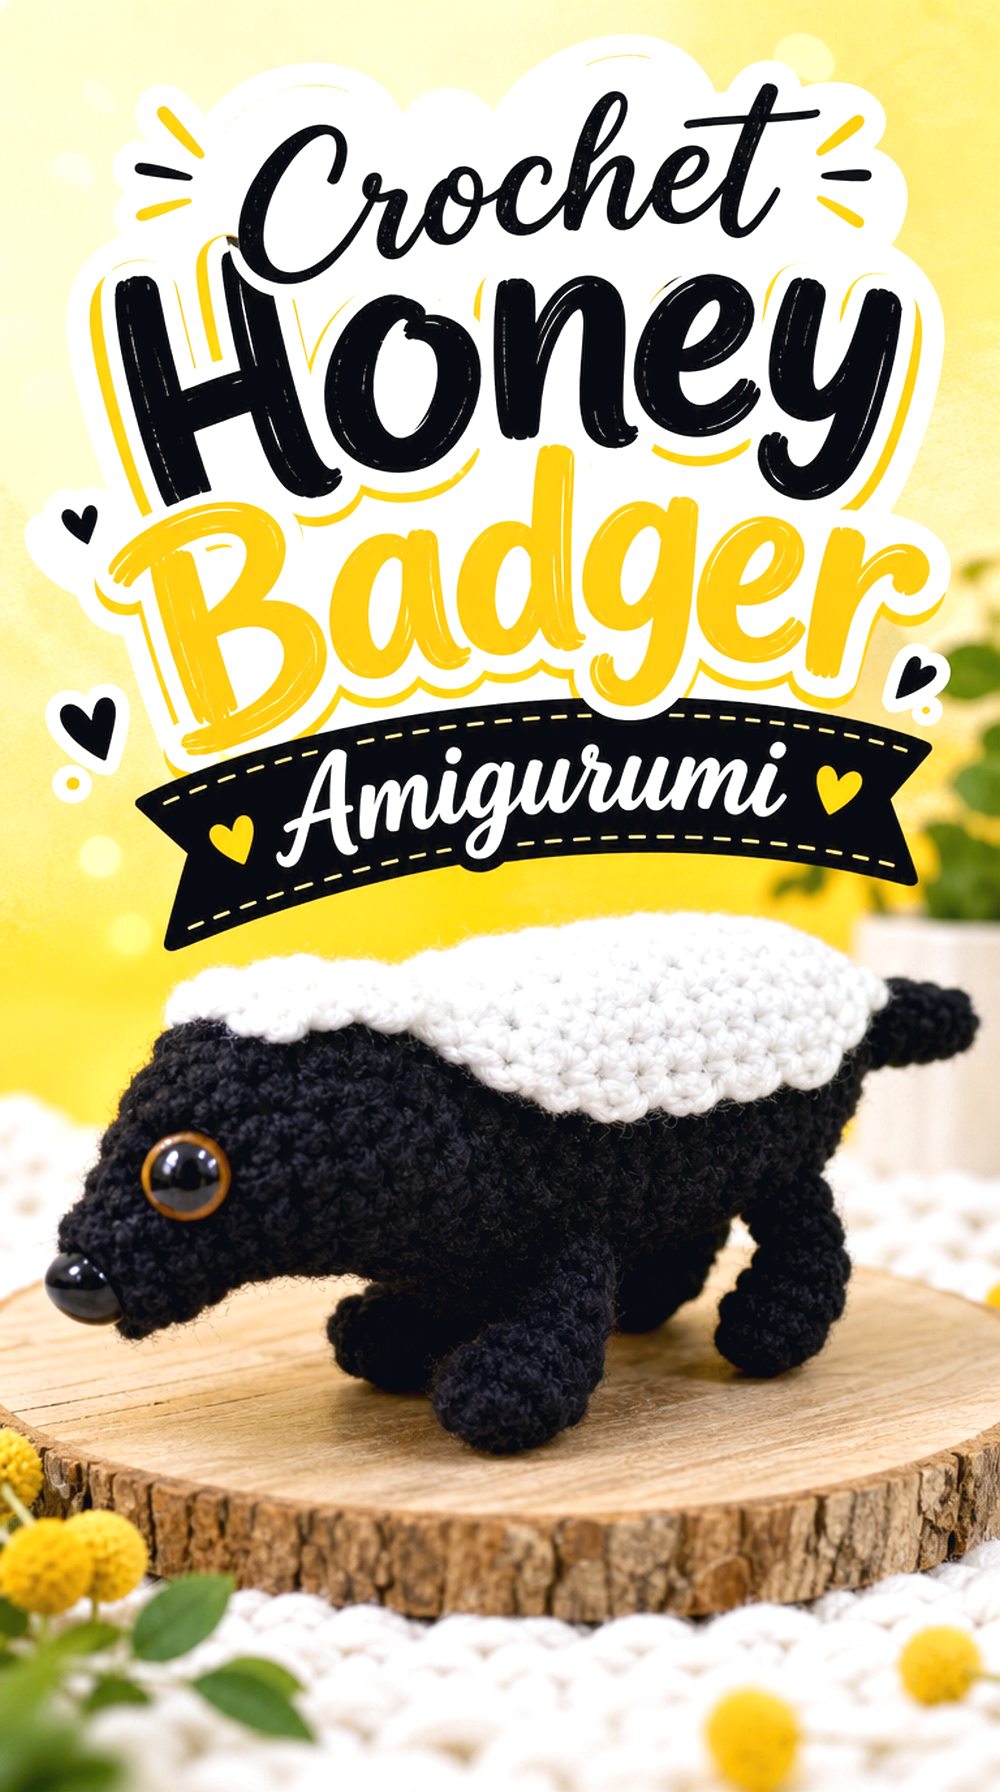
A honey badger gives the forest set a low, sturdy animal with a bold back marking. Its long body, short legs, and light patch across the top make it different from both the raccoon and skunk, even though all three use strong contrast. This project can add a slightly wilder, ground-dwelling shape to the group.
The badger works well near the hedgehog and beaver because all three feel close to the forest floor. It also helps the set avoid looking too soft or nursery-only.
Keep the Back Patch Neat
The badger’s top patch is a major identifying feature. Check that the light area is clean and centered enough to read clearly. In a group with a skunk and raccoon, this marking helps the badger stay distinct instead of blending into another black-and-white animal.
Think About Low Display Placement
A honey badger shape may sit lower than the fox, deer, owl, or bear. Place it near the front of a shelf or table so the body and back marking remain visible. This helps the finished set feel layered rather than arranged in one flat row.
Watch the Sewing Section
This project includes a sewing-up stage, so finishing deserves attention. Use that section to check the position of the legs and top patch before everything is fully secured. Follow the creator’s exact instructions for assembly rather than trying to infer placement from the finished toy alone.
Original Tutorial and Creator Credit
Creator: Crumbly Creations
Crochet Striped Skunk Amigurumi
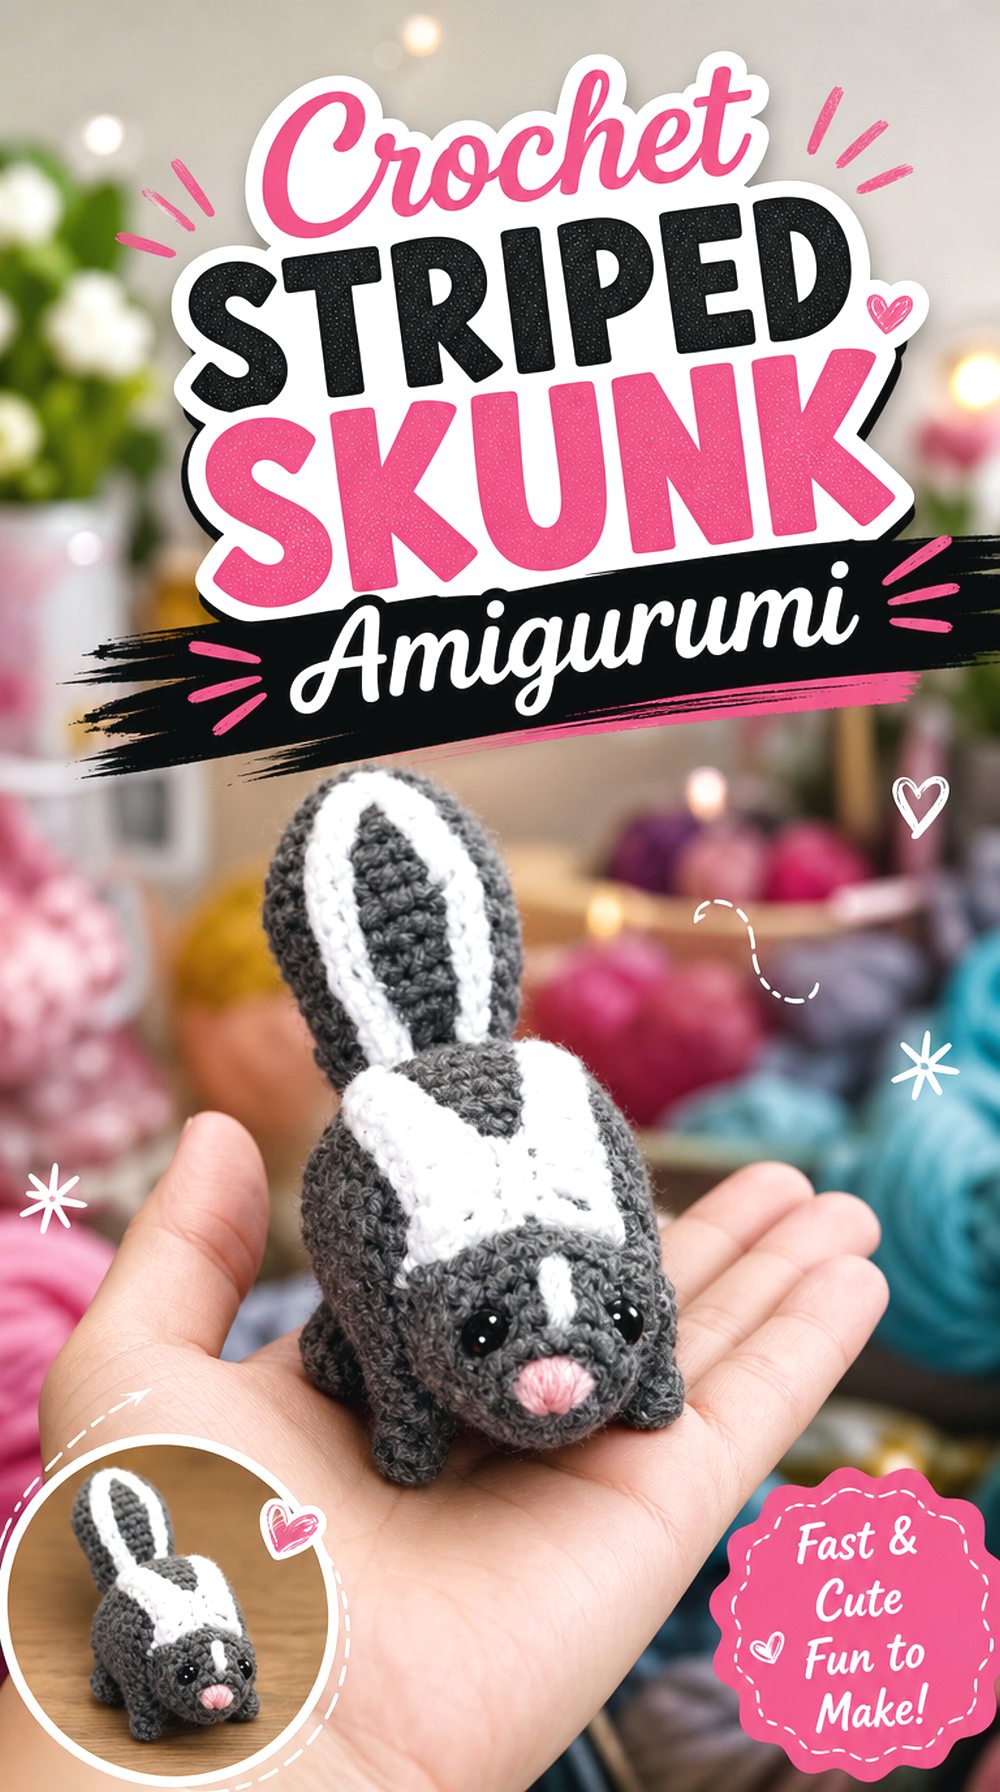
A skunk brings one of the strongest graphic shapes in the set. The dark body, pale stripe details, small paws, and raised tail create instant contrast beside warmer animals like the fox, squirrel, and bear. It also gives the display a playful woodland edge without needing a large finished size.
This project is especially useful when the collection needs a bold animal that still fits the forest theme. The stripe placement, tail height, and small body parts are the details that make the finished skunk work.
Make the Stripe the Main Feature
The stripe is the reason this animal reads as a skunk. Keep the contrast clear and check that the stripe placement remains visible from the front or side. If the skunk will sit behind other animals, the most important detail may be hidden.
Check the Paw and Tail Pieces
The paws and tail help shape the skunk’s stance. Before finishing, compare the balance of the front paws, back paws, and tail position. A raised or visible tail can make the animal more recognizable, while uneven paws may cause the display angle to feel awkward.
Use the Assembly View Carefully
The source includes separate sections for body parts, stripes, and assembly. Slow down during the joining stage and compare the skunk from several angles before securing details fully. Use the original tutorial for exact placement, especially where the stripes and tail meet the body.
Original Tutorial and Creator Credit
Creator: ComplicatedKnots
Crochet Woodland Snail Amigurumi
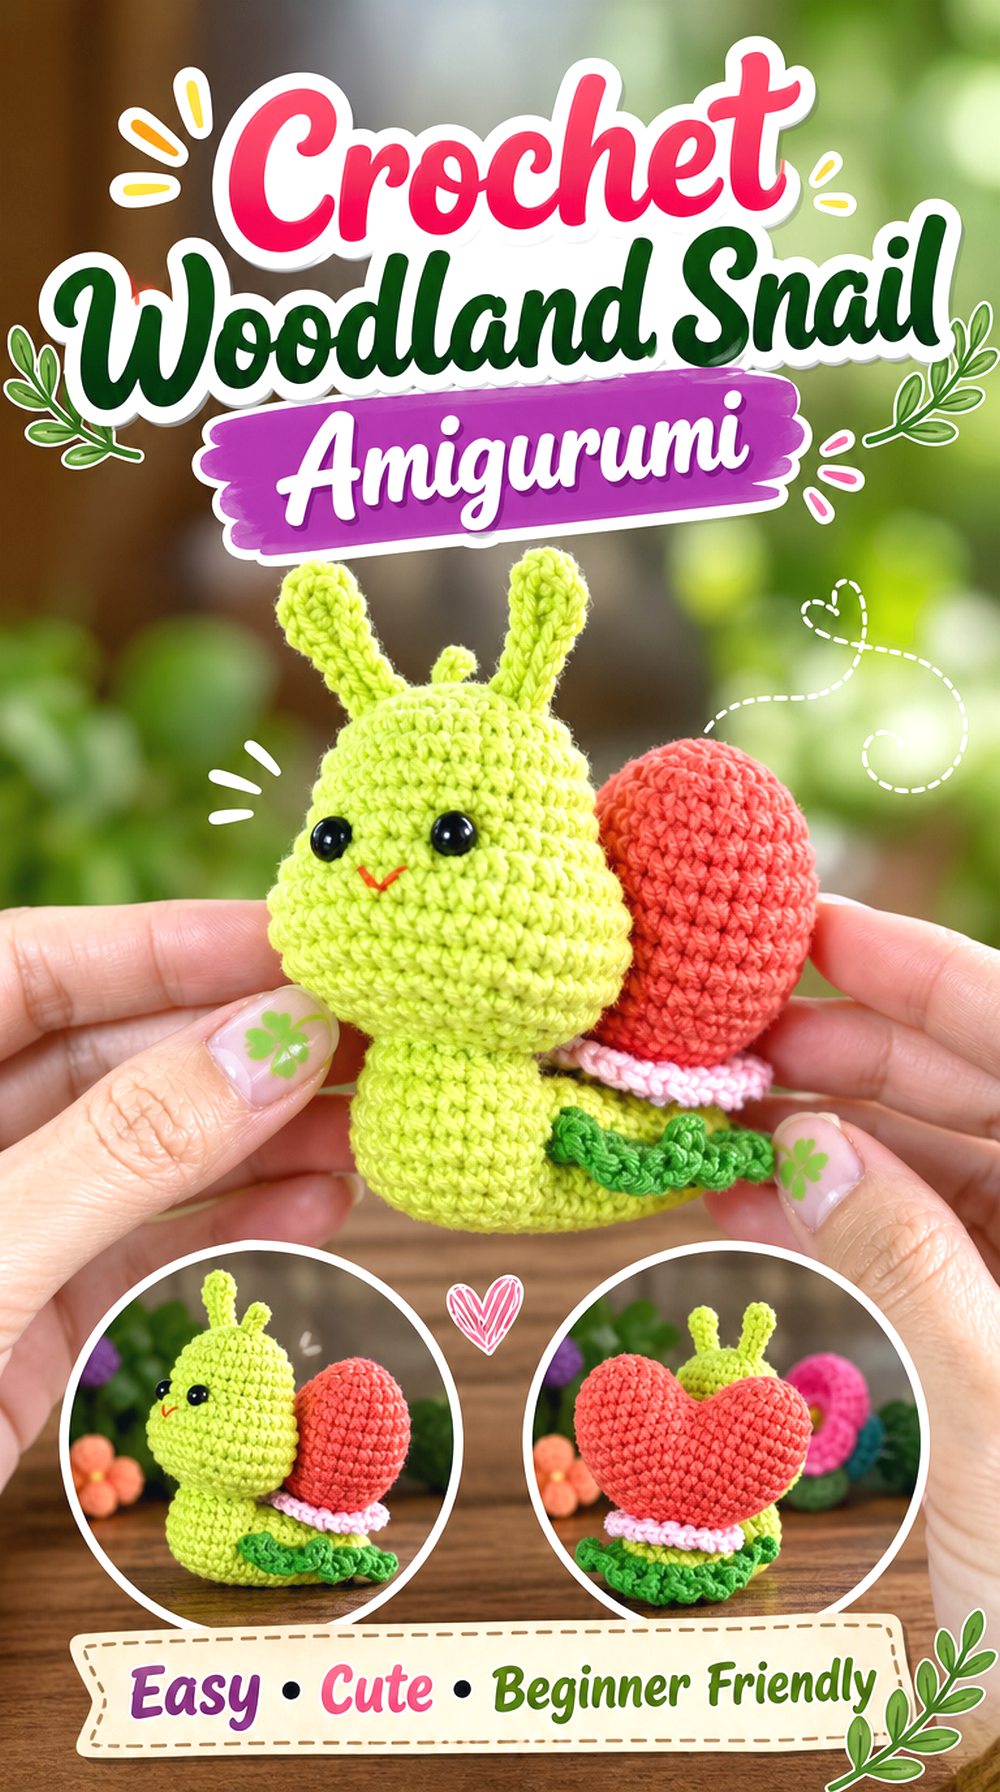
A snail adds a tiny forest-floor creature to the set and keeps the collection from being only plush mammals and birds. The rounded shell, small body, and low profile make it clearly different from the fox, deer, bear, and owl. It can sit at the front of a display, almost like a small detail that completes the woodland scene.
This project works well as the final animal in the group because it changes the scale. The snail can be made as a small accent while still feeling connected to the forest theme.
Show the Shell Clearly
The shell is the most important part of the snail’s silhouette. In a finished display, angle the snail so the shell is visible, not hidden behind the body or another animal. A clear shell shape makes the small project feel intentional rather than like filler.
Plan the Small-Scale Placement
Because the snail sits low, it may disappear behind larger animals. Place it near the front edge of a shelf, beside the hedgehog, or close to the beaver to create a layered forest-floor section. This helps the full set feel arranged rather than crowded.
Confirm Any Written Support
This source notes English subtitles, so readers who rely on written guidance should review the viewing format before starting. Small amigurumi details can be harder to follow if the teaching style does not match your preference. Use the original tutorial for exact shaping and finishing details.
Original Tutorial and Creator Credit
Creator: Amilove AnAn
Conclusion
A balanced crochet forest animal set works best when the animals differ in more than color. The fox and raccoon bring bold markings, the deer and bear add larger familiar shapes, the owl gives height and a front-facing bird form, and the hedgehog, squirrel, beaver, badger, skunk, and snail fill in texture, tails, stripes, and low woodland details. Start with the animal that best fits your display space, then build the group by size and silhouette. Use the original tutorials for exact construction details, especially face placement, assembly, shaping, and finishing.
FAQs
How do I choose which crochet forest animal to make first?
Start with the animal that will anchor your set. A bear, fox, deer, or owl can work well as a central piece because each has a strong shape. Smaller animals like the squirrel, snail, and hedgehog are helpful after that because they fill gaps and add scale changes.
Should all the forest animals use the same yarn?
They do not have to use the same yarn, but the finished set will look more connected if the texture and scale feel planned. Check each creator’s material list before buying supplies. Changing yarn may change size, structure, stitch visibility, and how well the animals sit together.
How can I make the set look cohesive?
Use a limited color palette and repeat a few soft woodland tones across the animals. Rust, cream, brown, gray, black, and muted green can connect the group without making every animal match. Also vary the heights so taller animals sit behind smaller forest-floor creatures.
Are these crochet forest animals safe for children?
Do not assume a crochet animal is child-safe unless the creator gives clear age and safety guidance. Small parts, safety eyes, buttons, stuffing, loose fibers, and attached pieces may matter. For young children, review the tutorial notes carefully and consider embroidered features where appropriate.
Can I sell finished animals made from these tutorials?
Selling finished items depends on each creator’s terms. Some creators allow limited handmade sales with credit, while others restrict use or ask viewers not to reproduce the pattern. Always check the video description, linked pattern page, and shop terms before selling finished crochet animals.