Moon and star motifs can change a crochet accessory in very different ways. Some of these projects make the celestial shape the entire structure, such as a five-point star bag or a curved half-moon crossbody. Others place stars directly onto wearable pieces, join individual stars into fabric, or use moon imagery inside granny-square construction. There are also two projects where “star” refers to the texture of star stitch rather than a literal celestial motif.
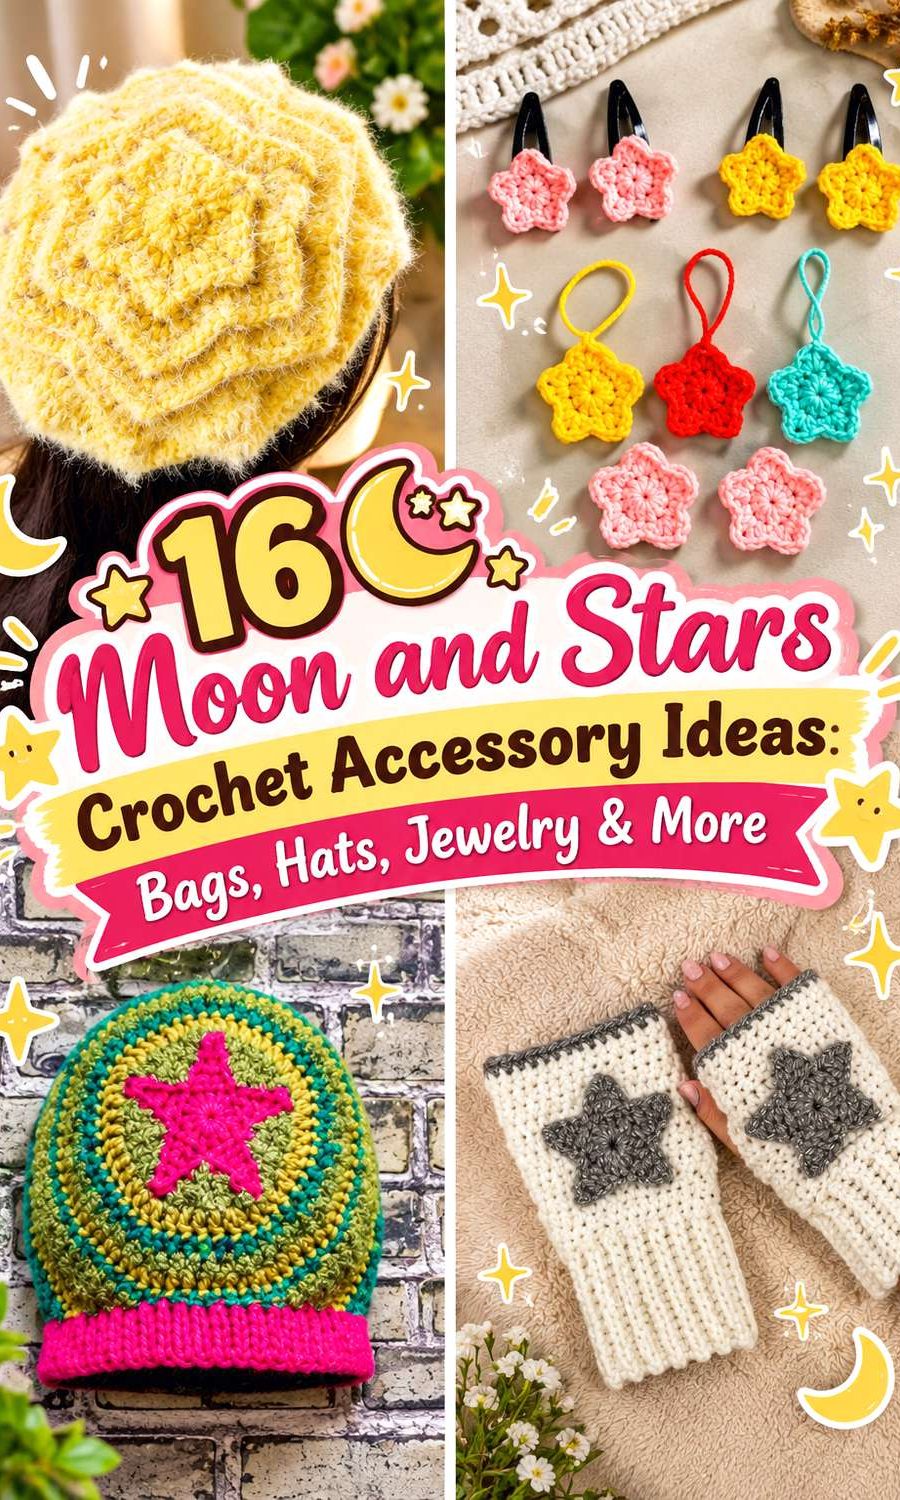
That range matters when choosing what to make. A shaped bag asks you to think about openings and carrying structure, while a headband, belt, or pair of wrist warmers puts more emphasis on placement and fit. Smaller accessories such as keychains, earrings, and hair clips make the motif itself the focal point. The ideas below use 16 different tutorial creators, so you can compare genuinely different constructions rather than variations of the same project.
Quick List
- Crochet Sculptural Star Bag
- Crochet Star Pattern Headband
- Crochet Moon and Star Keychain Set
- Crochet Joined-Star Bandana
- Crochet Joined-Star Shawl
- Crochet Sun-and-Moon Earrings
- Crochet Star-Detail Wrist Warmers
- Crochet Linked-Star Belt
- Crochet Dimensional Star Hat
- Crochet Star Granny-Square Bonnet
- Crochet Half-Moon Crossbody Bag
- Crochet Sun-and-Moon Granny Square Shoulder Bag
- Crochet Circular Star-Stitch Neck Warmer
- Crochet Mini Star Hair Clip
- Crochet Six-Point Star Beret
- Crochet Star-Stitch Wallet Purse
Choose Between a Celestial Shape, Motif, or Texture
A literal moon or star gives an accessory an immediately recognizable celestial look, but there is more than one way to get there. The star bag, half-moon bag, keychains, hair clip, and novelty star hat depend strongly on silhouette. The wrist warmers and some headwear use stars as decorative details, while joined-star projects turn repeated motifs into the fabric itself.
Star stitch is a different choice. It creates clustered texture rather than five-point motifs, so the effect is subtler and works well when you want the celestial theme to come from surface pattern instead of an obvious appliqué. Before choosing, consider how strongly you want the moon-and-stars idea to read from across a room. Silhouette usually makes the boldest statement; small motifs reward closer viewing; textured stitches can feel more understated.
Plan Fit and Hardware Before Changing the Design
Wearable accessories have less room for casual size changes than decorative motifs. For a headband, bonnet, beret, wrist warmer, or belt, compare the demonstrated proportions with an accessory you already like before changing yarn or hook size. Altering gauge can change several dimensions at once, including band width, star scale, and the amount of fabric around the head or hand.
Hardware deserves the same attention. Bag straps, earring findings, key rings, belt connectors, and hair clips each place stress on a relatively small area of crochet. If you substitute the demonstrated hardware, check where the load will fall rather than attaching it only where it looks convenient. Decorative color changes are usually simpler than structural changes. When you want to modify fit, strap length, closures, or carrying method, use the creator’s original construction as your reference point.
1. Crochet Sculptural Star Bag
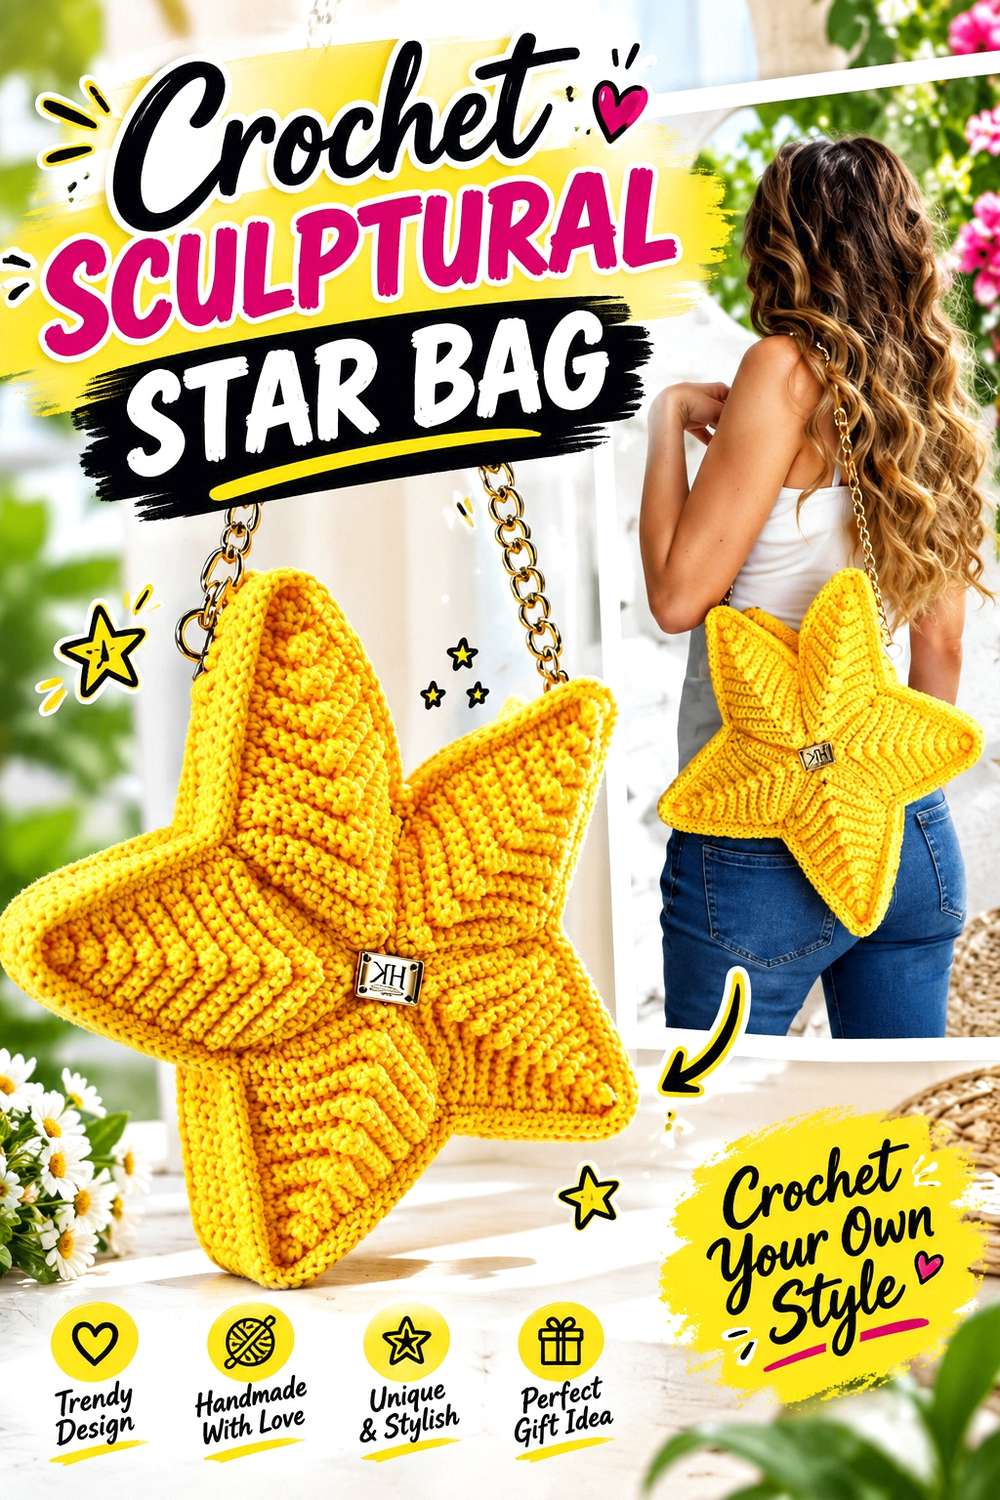
This project turns the star into the actual body of the accessory rather than sewing a celestial motif onto an ordinary tote. Katy Handmade’s tutorial separates the construction into wedge work, sewing the wedges into the star, finishing the panels, assembling the bag, and dealing with accessory components. The video also includes a section devoted to lining advice, so the construction goes beyond simply making a flat decorative star.
That sculptural outline is the main reason to choose this idea. The points remain visible around the perimeter, making the bag read as a star even from a distance. It also means the outline is less conventional than a rectangle or circle, so the relationship between the star points, opening, and strap deserves more attention than it would on a basic tote.
Let the Silhouette Do the Work
A strongly shaped bag does not need many additional motifs. Before adding tassels, appliqués, or contrasting embellishments, look at how much visual interest already comes from the five-point outline. Extra decoration near the tips can compete with the feature that makes this bag distinctive.
If you change colors, consider how the seams and individual wedges will read together. A single palette emphasizes the unified star, while contrasting sections can make the construction itself more visible.
Consider the Opening as Well as the Front View
A star looks dramatic when viewed flat, but a bag also needs to function from the top. Think about what you normally carry and how readily you want to reach inside. A visually striking outline is not automatically the same thing as a wide-access tote.
The tutorial’s own finishing and assembly sections are the best reference before changing the opening, lining, or hardware. Those are structural decisions rather than simple decorative substitutions.
Creator: Katy Handmade
2. Crochet Star Pattern Headband
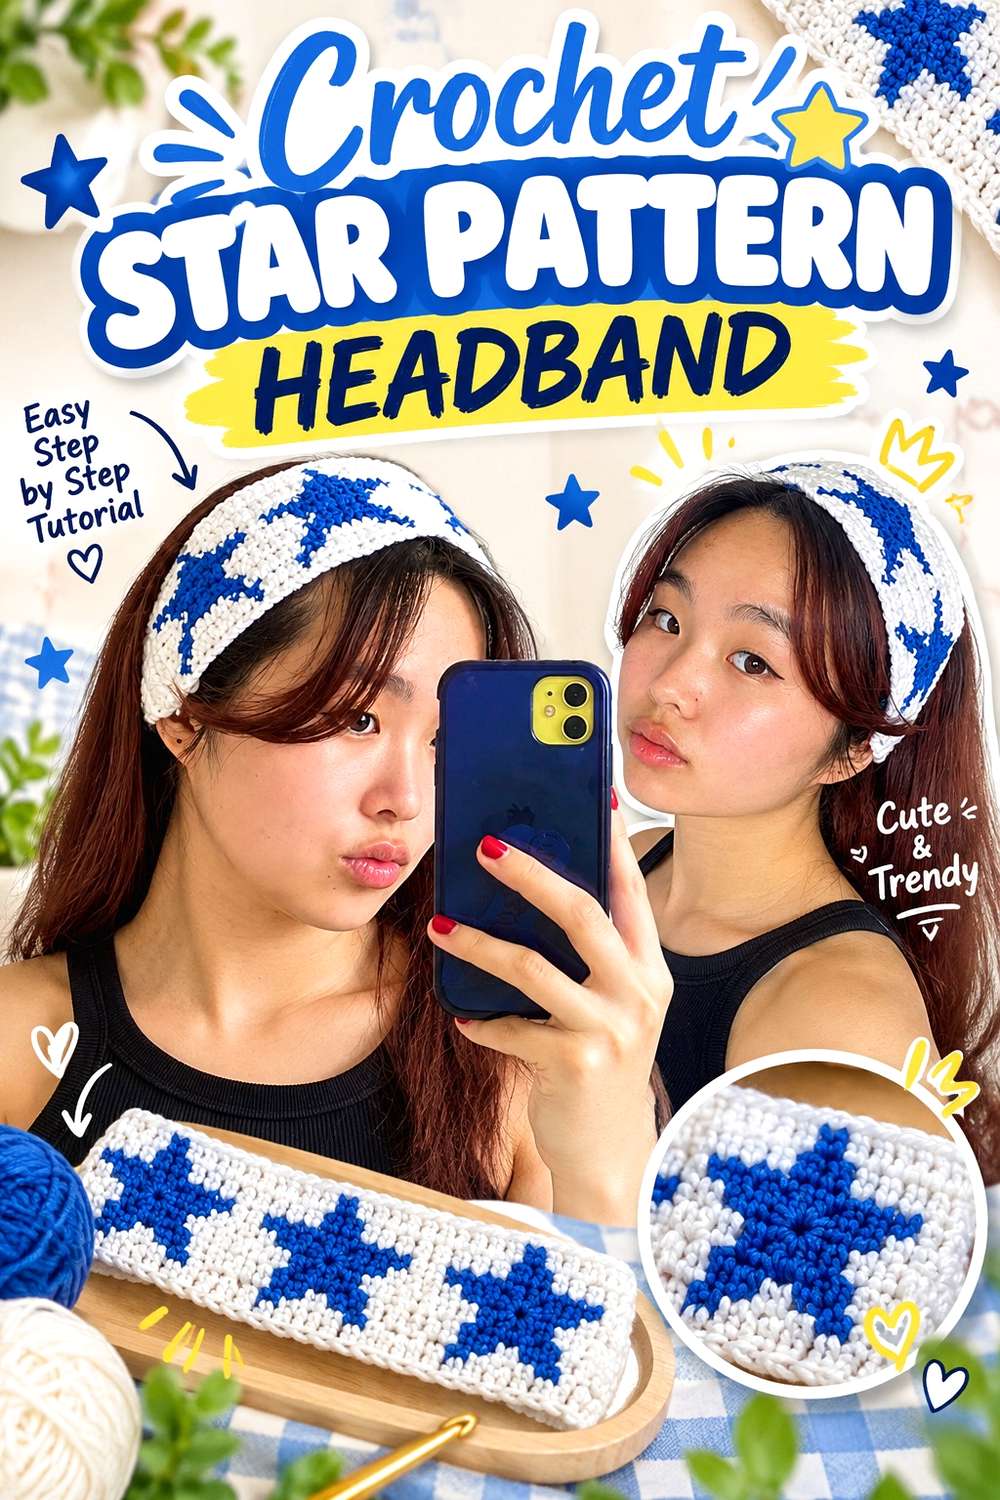
Ariel Tong’s headband places the star pattern directly across a wearable hair accessory. The tutorial covers the star-pattern section, tapering the ends, working the straps, and finishing, so the celestial detail is integrated into the headband rather than added as an unrelated ornament afterward.
This is a useful choice when you want stars to be recognizable without making an entire accessory star-shaped. The long horizontal format also changes how the motif is seen: instead of one oversized focal star, the pattern becomes part of the band itself. Because a headband sits close to the face, color contrast can have almost as much visual impact as motif size. A strongly contrasting star pattern reads graphically, while nearby shades can make the design more restrained.
Check the Taper Before Changing the Width
The center motif area and the narrower ends serve different purposes. Making the patterned section wider may look appealing when it is lying flat, but that does not automatically mean the tapered portions should grow by the same amount.
If you want more coverage, compare the complete shape with a headband you already wear comfortably. That gives you a practical reference for where the wider section should sit.
Decide How Much Contrast the Stars Need
A star pattern does not have to rely on metallic gold or bright yellow. The important visual decision is whether you want the stars to stand apart from the ground color.
High contrast emphasizes each motif and makes the accessory feel more graphic. Lower contrast lets the pattern emerge more gradually. Make that palette decision before crocheting a large portion of the band, because the overall effect depends on repeated color relationships rather than one isolated star.
Creator: Ariel Tong
3. Crochet Moon and Star Keychain Set

Betty’s.Crochi combines two complementary celestial shapes in one small-accessory tutorial: a five-point star and a crescent moon. The video’s chapter information separates the star and moon demonstrations, making it possible to make either motif alone or treat them as a coordinated pair.
The appeal here is the contrast between outlines. A star depends on evenly readable points, while the moon needs a clear outer curve and open crescent shape. Used together, those differences make the pair more interesting than duplicating one motif twice. Their compact format also keeps the crochet itself visually dominant instead of hiding it inside a larger garment. If you plan to use the pieces on keys or a bag, pay particular attention to the point where the ring or connector meets the crochet.
Compare Both Shapes Before Adding Hardware
Finish the crochet shapes before deciding exactly where each should hang. A star has several possible attachment points, while the crescent naturally has fewer positions that preserve its intended orientation.
Lay both pieces beside the intended ring or chain and check how they turn when hanging. The most symmetrical attachment point when a motif is flat is not always the position that looks best once gravity pulls it downward.
Keep the Pair Coordinated Without Making It Identical
Matching colors are one option, but they are not the only way to make the two pieces feel related. You might repeat one accent shade, reverse a two-color combination, or simply use yarns with a similar visual weight.
Because the silhouettes already differ substantially, the palette can be relatively simple. Avoid adding so many extra beads or charms that the moon and star stop being the clearest elements.
Creator: Betty’s.Crochi
4. Crochet Joined-Star Bandana

Matre Crochê approaches the star theme structurally: individual stars are made and joined to form a bandana. The tutorial covers making the stars, joining them into the accessory, shaping and adjustment, finishing, and blocking considerations.
That joined-motif construction produces a different effect from colorwork stars on solid fabric. Open areas around the points become part of the design, and the edges naturally follow the geometry of the motifs. This makes the bandana especially useful for someone who likes visible construction rather than a smooth triangular panel. It also means motif consistency matters. Small differences that barely show in one decorative star can become more noticeable when several pieces meet side by side.
Make One Star Your Comparison Piece
When repeated motifs determine the final layout, the first satisfactory star can serve as a practical reference. Compare later stars with it before joining them rather than discovering significant differences after the whole strip is connected.
This is not about forcing every piece mechanically flat. The goal is to notice substantial changes in diameter, point length, or tension early enough that you can decide whether they matter to the arrangement.
Check the Joined Edge Against Your Hairline
A bandana has both a decorative face and a wearable edge. Before finalizing adjustments, place the partially assembled shape where you expect to wear it and look at how the star points meet the forehead and sides of the head.
A dramatic jagged outline may be exactly what you want, but you should choose it deliberately. Placement can change whether the stars feel like a frame or an irregular edge.
Creator: Matre Crochê
5. Crochet Joined-Star Shawl
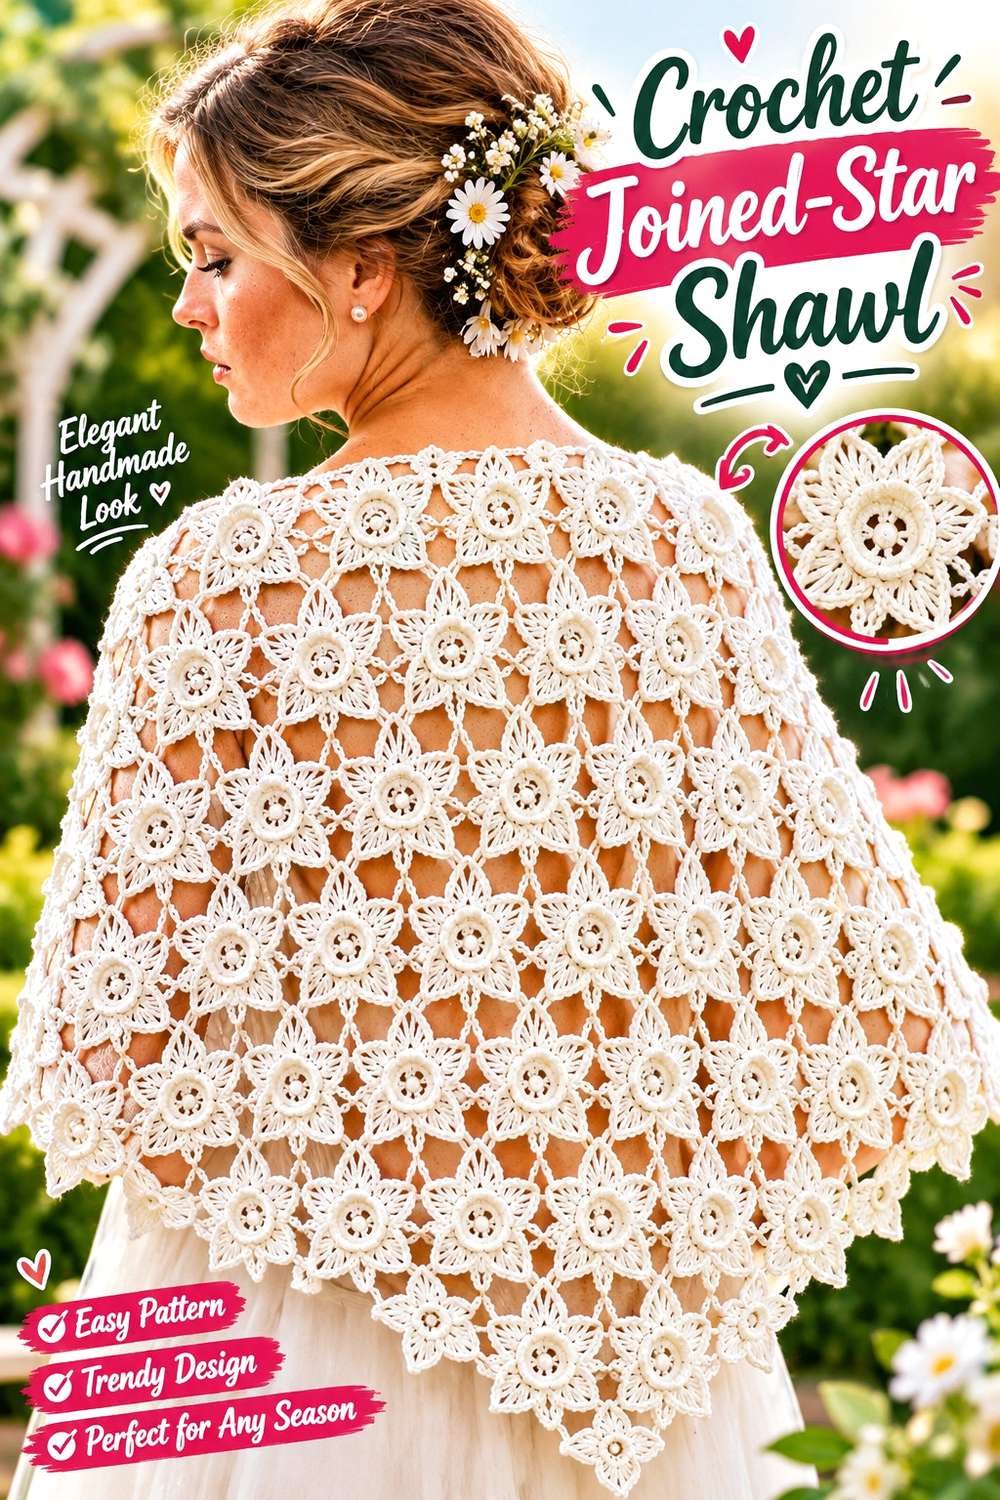
Knitting World’s shawl uses repeated star motifs with join-as-you-go construction, turning the celestial shape into a much larger wearable surface. The tutorial specifically presents a star-motif shawl and demonstrates the joining approach rather than treating the stars as separate decorations.
This option makes sense when you want the motif repetition itself to become the design. Compared with a single star accessory, a shawl gives the negative spaces and connections between motifs much more visual importance. The finished effect depends not only on how each star looks individually but also on the rhythm created when many are placed together. That makes it worth considering the whole layout before experimenting with different motif scales or contrasting colors.
Think in Rows of Motifs, Not Just Individual Stars
Before changing the star size, remember that every dimensional change multiplies across the shawl. A slightly larger motif can noticeably alter the overall span once several stars sit in a row.
If you want a different finished scale, first determine whether you would rather change the number of motifs or their individual dimensions. Those two approaches can produce very different proportions.
Use Color to Clarify—or Soften—the Join Structure
One-color construction can make the joined field read as one continuous lace-like surface. Alternating colors makes individual stars more obvious and draws attention to the modular layout.
Neither approach is automatically better. Decide whether your priority is a unified shawl silhouette or clearly separated celestial motifs, then choose the palette around that goal rather than adding colors one star at a time without a plan.
Creator: Knitting World
6. Crochet Sun-and-Moon Earrings
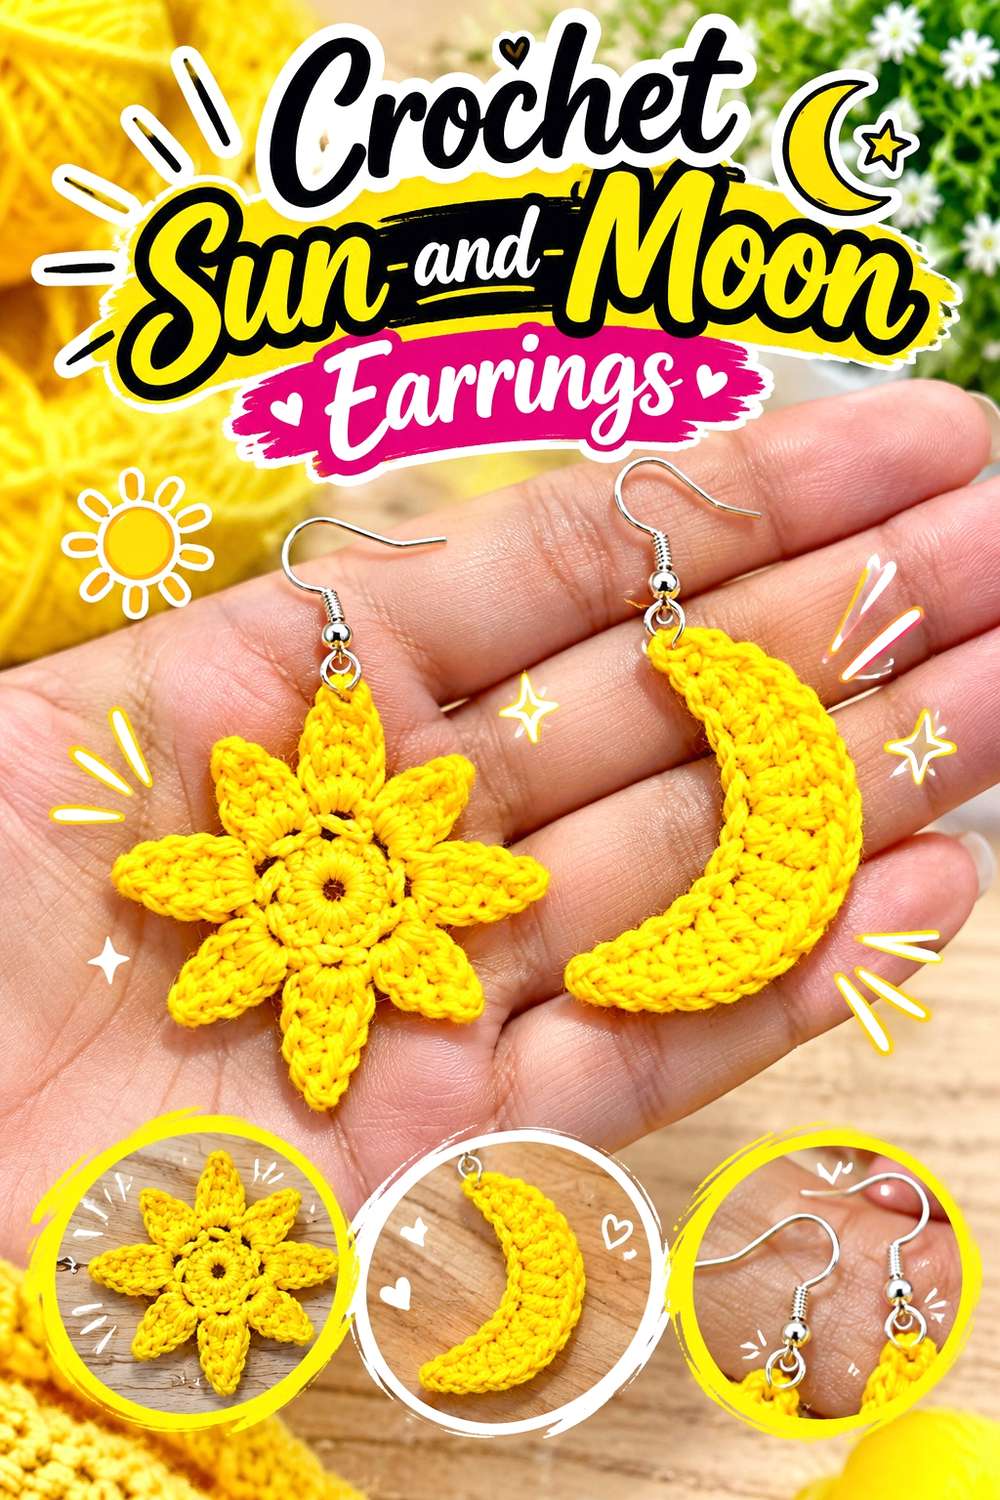
Creggy’s Crochet pairs two different celestial symbols rather than making a matching pair from one motif. The tutorial has separate sections for the sun and moon earrings, so the asymmetry is an intentional part of the concept.
For a moon-and-stars collection, the crescent earring is the most directly lunar element, while the sun creates a contrasting partner. This is a good option if you like coordinated jewelry that does not rely on two identical pieces. Because earrings are viewed at a much smaller scale than a shawl or bag, silhouette and clean edges become especially important. Too many extra surface details can quickly obscure the recognizable moon shape.
Decide Whether You Want an Intentional Mismatch
The sun-and-moon pairing works because the earrings belong to the same celestial theme even though the shapes differ. If you normally prefer symmetrical jewelry, consider making two of the same tutorial component instead of assuming the mismatched arrangement is your only option.
Conversely, if the contrasting pair is what attracts you, reinforce that difference rather than trying to make both pieces visually identical in every other respect.
Check the Hanging Direction Before Final Assembly
A crescent can face inward, outward, or downward depending on where its finding is attached. Hold the crocheted shape beside your ear before securing the final hardware and decide which orientation you prefer.
Do the same with the sun component so the pair feels deliberate when worn. Jewelry hardware is small, but its placement can noticeably change how a crocheted motif sits.
Creator: Creggy’s Crochet
7. Crochet Star-Detail Wrist Warmers

Kayti krochets builds these fingerless wrist warmers first and then adds their defining celestial feature. The tutorial covers the lower ribbing, main body, contrasting outline, crocheted star, and stitching the star onto the wrist warmer.
That sequence makes this project different from fabric constructed entirely from star motifs. The glove remains a practical wearable base, while the star becomes a positioned accent. This gives you more control over how strong the celestial theme feels. One star can remain the clear focal point, or color contrast can make the surrounding edging part of the composition. Because the star is attached to a flexible wearable surface, placement is as important as the motif itself.
Pin or Hold the Star in Place First
Before permanently attaching the star, put the wrist warmer on and check where the motif sits when your hand is in a natural position. A placement that looks centered when the fabric lies flat may rotate once it is worn.
Use a temporary placement check rather than relying only on the table view. This is especially useful if you change the star size or alter the wrist warmer proportions.
Coordinate the Outline With the Motif
The tutorial includes an accent outline as well as the star, giving you two decorative elements to balance. Using the same accent color can visually connect them, while separate colors give the star more independence.
Think about which feature you want noticed first. If the star is meant to dominate, an extremely high-contrast outline may compete with it instead of framing it.
Creator: kayti krochets
8. Crochet Linked-Star Belt

Leslie’s project treats stars as the actual links of a belt rather than decorating a conventional strip afterward. The tutorial is organized around making the stars, adding their border, and working with jump rings and chains to complete the accessory.
This construction gives each star room to remain visually separate. Instead of becoming a dense field, the motifs form a repeating line around the body. That makes spacing a major design element. A close arrangement reads more like continuous crochet, while more visible connectors emphasize the jewelry-like quality of the belt. It is also one of the projects in this collection where crochet and non-yarn components have to work together visually.
Test the Motif Sequence Before Connecting Everything
Arrange the finished stars in a line before installing all the connecting hardware. This gives you a chance to inspect their orientation and decide whether every point should face the same way.
It also helps you judge how the rhythm changes once spaces appear between motifs. A belt viewed flat is long, so even small inconsistencies in spacing can become noticeable across the full sequence.
Treat Hardware as Part of the Design
Jump rings and chains are not merely invisible assembly tools here; they sit between visible crochet stars. Their scale and finish therefore influence the overall look.
If you substitute the demonstrated components, check both appearance and attachment compatibility. A connector needs to pass through an appropriate part of the motif without stretching one small crochet loop simply because that point is convenient.
Creator: Leslie
9. Crochet Dimensional Star Hat

Alexandria Masse’s star hat is a full statement piece rather than a small motif applied to ordinary headwear. Her accompanying pattern shows five separate triangular points that are stuffed and assembled with a hood and strap structure; the project page also specifies fasteners for securing the finished piece.
The dimensional construction makes this the most sculptural headwear option in the collection. Its appeal comes from volume and silhouette rather than repeated surface decoration. That also makes material substitutions more consequential. A different fabric behavior can change how firmly the points hold their shape or how the structure sits around the head. Treat this as shaped headwear rather than assuming it will respond like a flat beanie.
Compare the Star With the Whole Headpiece
The five points draw attention first, but the supporting hood and strap are what turn the star into wearable headgear. If you modify the size of the points, consider their relationship to those supporting parts rather than enlarging only the most decorative element.
A paper outline or quick proportion sketch can help you visualize a dramatic size change before committing to additional crochet.
Keep Added Decorations Secondary
Because the silhouette is already unusually bold, this hat can carry a celestial theme without extra moons, beads, or dangling stars. Additional elements may work, but they will alter the balance of a design whose main feature is a large three-dimensional star.
If you want personalization, color placement may be the cleaner first option. It changes the visual mood without adding more weight or attachment points to the structure.
Creator: Alexandria Masse
10. Crochet Star Granny-Square Bonnet
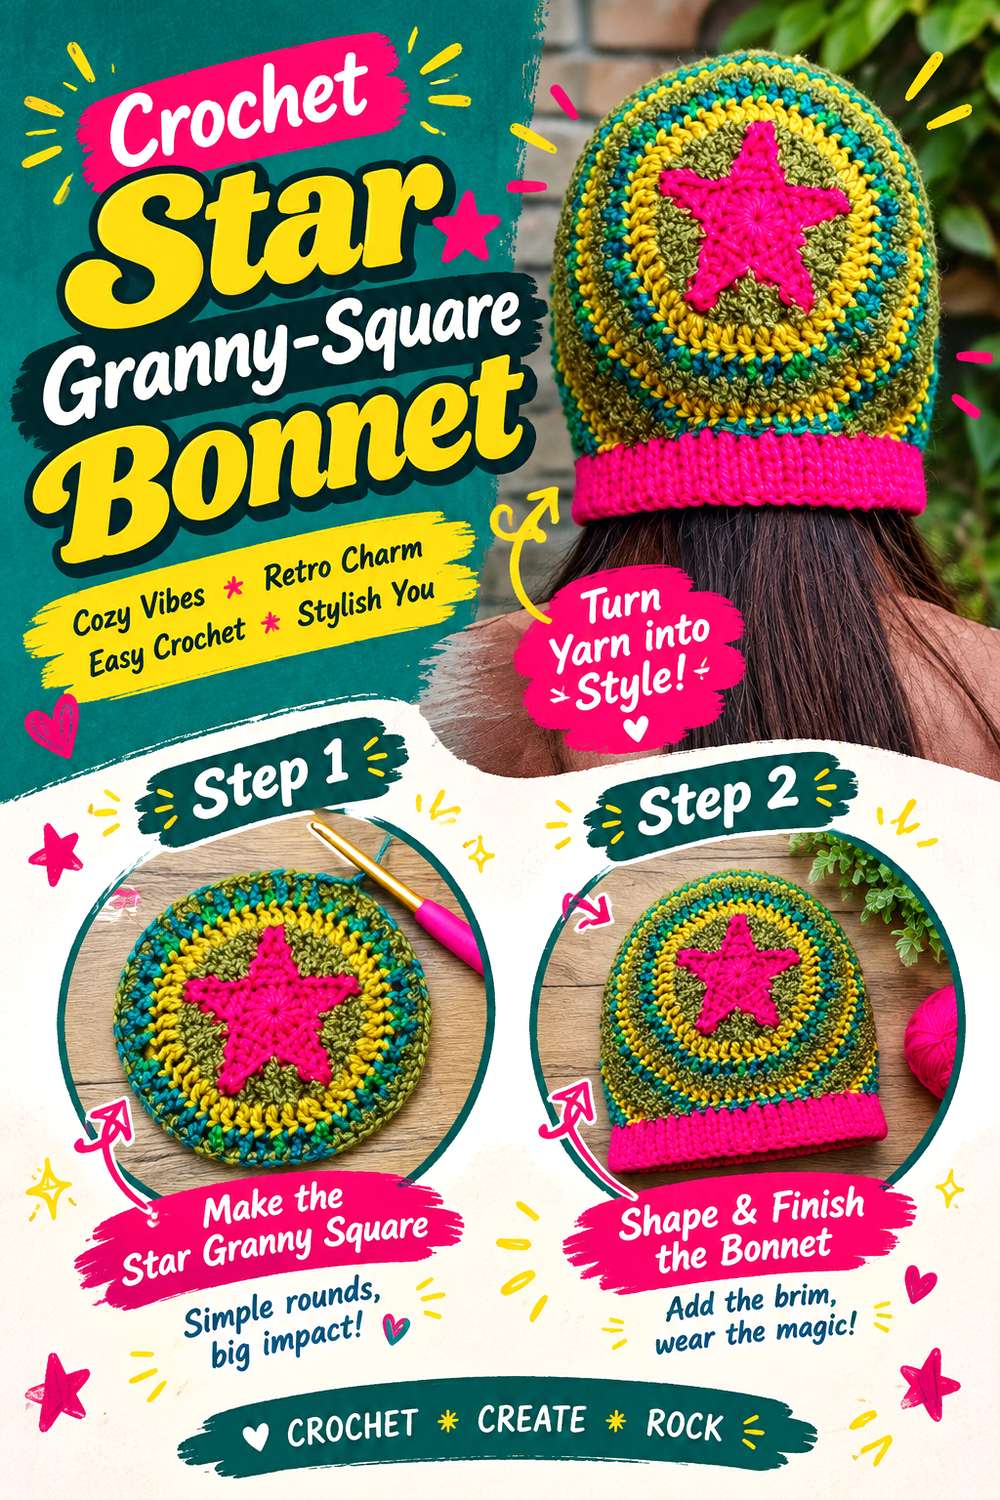
Jinspun’s bonnet brings the star theme into modular headwear. The main video teaches the bonnet and links a separate star granny-square tutorial from the same creator, so this is a project where you should open the companion motif lesson as part of the preparation rather than expecting the starting video alone to teach every star-square detail.
The square-based approach creates a more geometric celestial look than the sculptural star hat. Instead of changing the whole silhouette into a star, the motif is framed inside repeated panels and then arranged into bonnet form. That makes square consistency and orientation particularly important. A rotated or noticeably different square will be easier to see once several panels meet around the head.
Finish a Complete Square Before Committing
When fit depends on modular pieces, the finished dimensions of one square tell you more than an unfinished center motif. Complete one through its outer framing and compare it with the scale you expect for the bonnet.
If it differs substantially, resolve that before making the entire set. Changing every square later is more disruptive than correcting the choice at the sample stage.
Plan Which Direction the Stars Face
A star inside a square may look symmetrical at first glance, but color changes, joining edges, or surrounding details can still create a visual orientation. Lay the squares in the proposed bonnet arrangement before joining them.
This simple check helps you decide whether you want every star aligned consistently or intentionally rotated. Either approach can work when it looks planned rather than accidental.
Creator: jinspun
11. Crochet Half-Moon Crossbody Bag
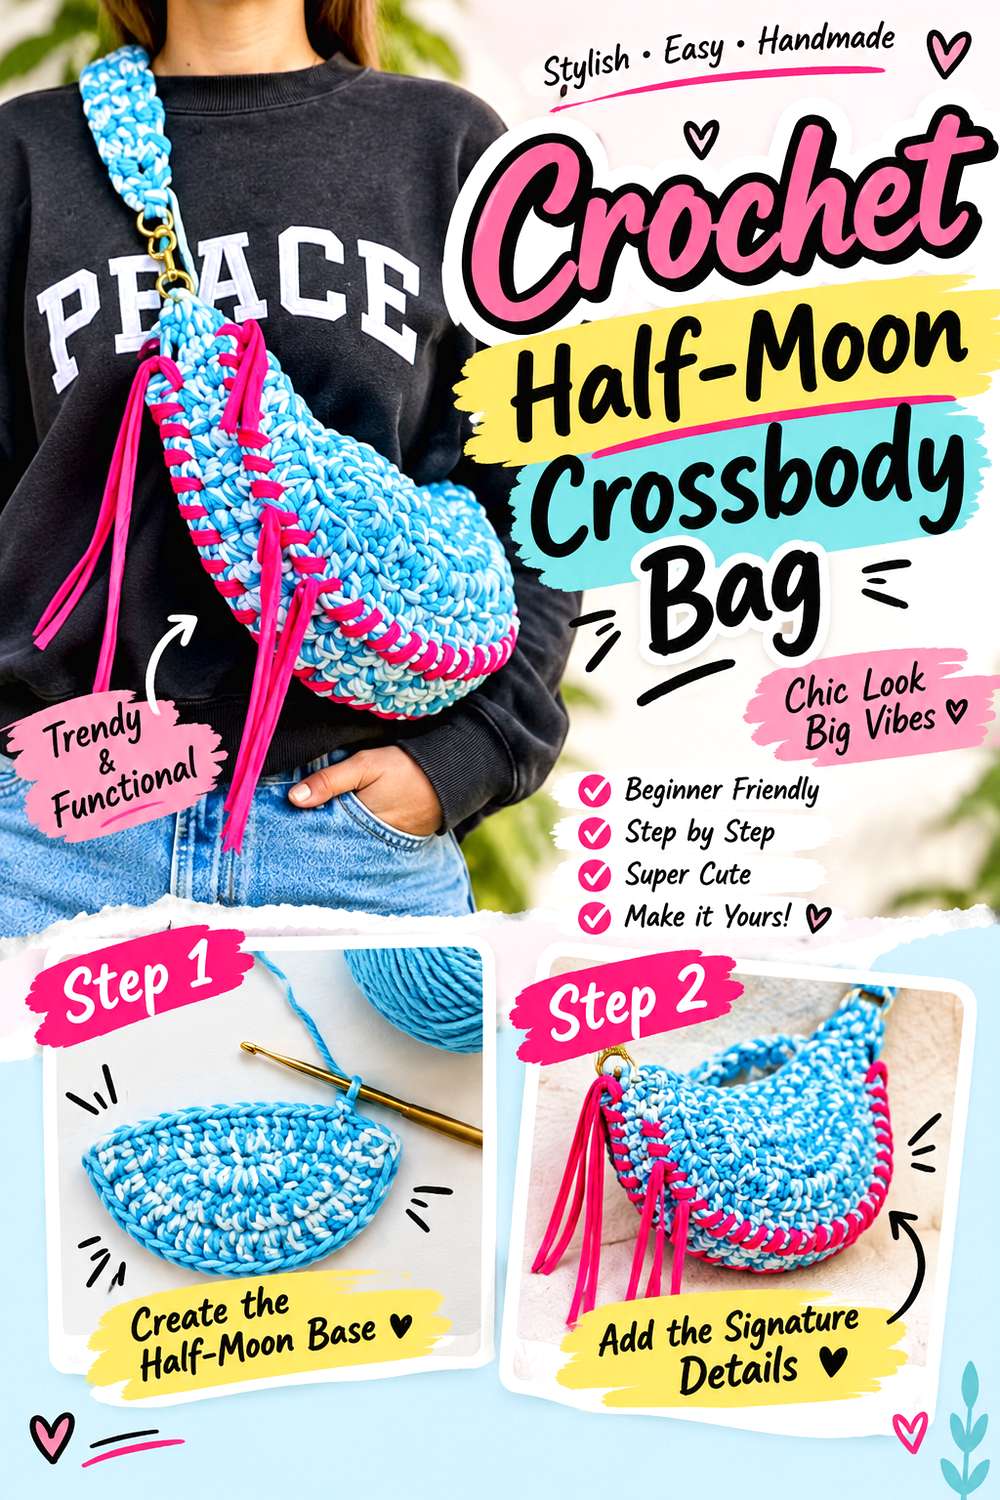
Lerugi crochets interprets the moon through the entire bag silhouette. The tutorial describes a half-circle construction that progresses into the strap and joining details, producing a shoulder or crossbody-style accessory rather than a bag decorated with a separate crescent.
This is a subtler lunar choice than a smiling moon appliqué or dangling charm. The curved lower edge suggests a half moon while the bag remains recognizably functional. That makes it particularly useful if you prefer celestial references that come through geometry rather than surface illustration. The broad curve also gives you a different practical question from the pointed star bag: how will the curved body relate to the objects you expect to carry?
Compare the Curve With What You Carry
A half-moon silhouette can create a visually generous body while still narrowing toward some areas of the bag. Before changing its scale, think about the largest everyday object you would want to place inside.
This is more useful than considering width alone. The opening, depth, and curved lower edge work together, so one measurement cannot describe how every object will fit.
Decide Whether the Strap Should Blend In
A strap matching the bag body keeps attention on the crescent-like silhouette. A contrasting strap makes the carrying structure more visually prominent and can divide the design into separate components.
Neither choice changes the celestial idea itself. Use color to decide whether you want viewers to notice the moon-like body first or see the strap and bag as a coordinated two-part accessory.
Creator: lerugi crochets
12. Crochet Sun-and-Moon Granny Square Shoulder Bag

Thisfairymade’s tutorial combines solid granny-square construction with separate sun and moon elements, then continues through attaching panels, shaping with decrease rows, and making the bag strap.
The celestial imagery is more graphic here than in the half-moon bag because the symbols appear on the surface of a recognizable square-based bag. That distinction makes the two useful alternatives: choose this version when you want the moon itself to be visible as an image rather than suggested by the outline. The square framework also creates clear areas where color choices can either reinforce the motifs or compete with them.
Give the Moon Enough Background Contrast
A celestial square depends on the relationship between motif and ground. Before making several panels, test whether the moon remains recognizable at ordinary viewing distance.
Strong contrast does not have to mean black and white. The practical question is whether neighboring values are different enough for the shape to survive once the square becomes part of a larger bag with seams, strap, and other details.
Look at the Bag as a Group of Panels
A successful granny square can still feel misplaced when several squares are assembled together. Arrange the completed panels before joining and inspect where the sun and moon will appear on the front, back, and sides.
This is the moment to adjust orientation. Once structural joining is finished, changing the visual order becomes considerably more involved than moving loose squares around on a table.
Creator: thisfairymade
13. Crochet Circular Star-Stitch Neck Warmer

This neck warmer interprets the “star” part of the theme through stitch texture rather than a literal five-point motif. Uncinetto D’Argento – Silvia Lampo’s tutorial specifically demonstrates a neck warmer worked with circular star stitch and includes the execution and closure in its project coverage.
That makes it a useful alternative if obvious star appliqués are not your style. From farther away it reads as a textured wearable; the repeated star-like clusters become apparent at closer range. The circular format also distinguishes it from a long scarf because there are no loose ends to position every time it is worn. If you are comparing celestial accessories for everyday use, this is one of the quieter interpretations.
Let Texture Replace Extra Motifs
A dense decorative stitch already gives the surface a lot of visual information. Adding large sewn-on stars could hide the structure that makes this neck warmer distinctive.
If you want more emphasis, consider a color choice that improves stitch definition rather than adding another motif layer. The aim is to make the repeated cluster pattern readable without turning a textured accessory into a completely different design.
Check the Finished Loop Rather Than Only the Flat Fabric
Circular neckwear has to work as a complete loop. When evaluating any planned modification, think about how the fabric folds and overlaps around the neck rather than judging only a small flat sample.
A texture that looks open and distinct on the table can appear denser when doubled. That may influence how much color contrast or additional decoration you actually want.
Creator: Uncinetto D’Argento – Silvia Lampo
14. Crochet Mini Star Hair Clip

Sarita crochet crafts turns a small crocheted star into a finished hair accessory. The tutorial explicitly covers making the mini star and converting it into a hair clip; the same motif is also presented as suitable for a charm.
The scale is what separates this idea from the star-pattern headband and the larger headwear projects. One small motif becomes the focus, with the clip itself acting mainly as support. Because the accessory is compact and seen close to the face, point definition can matter more than additional embellishment. It is also a practical option when you like a celestial accent but do not want an entire hat or band covered in stars.
Match the Star to the Clip Base
Before fastening the motif permanently, set the star on the clip and view it from the front and side. A star that overwhelms the base may tilt or hide how the clip is meant to open.
Conversely, a very small motif can leave much of the hardware visually exposed. The right balance depends on the particular clip you are using, so compare the two components together rather than choosing their sizes independently.
Choose the Point Direction Deliberately
A five-point star looks different when one point faces straight upward versus when the whole motif is slightly rotated. Neither arrangement is inherently correct for a hair accessory.
Put the clip in your hair temporarily and inspect the orientation before final attachment. This is especially useful if the clip will usually be worn on one particular side, where the angle may look different from its position on a work surface.
Creator: Sarita crochet crafts
15. Crochet Six-Point Star Beret
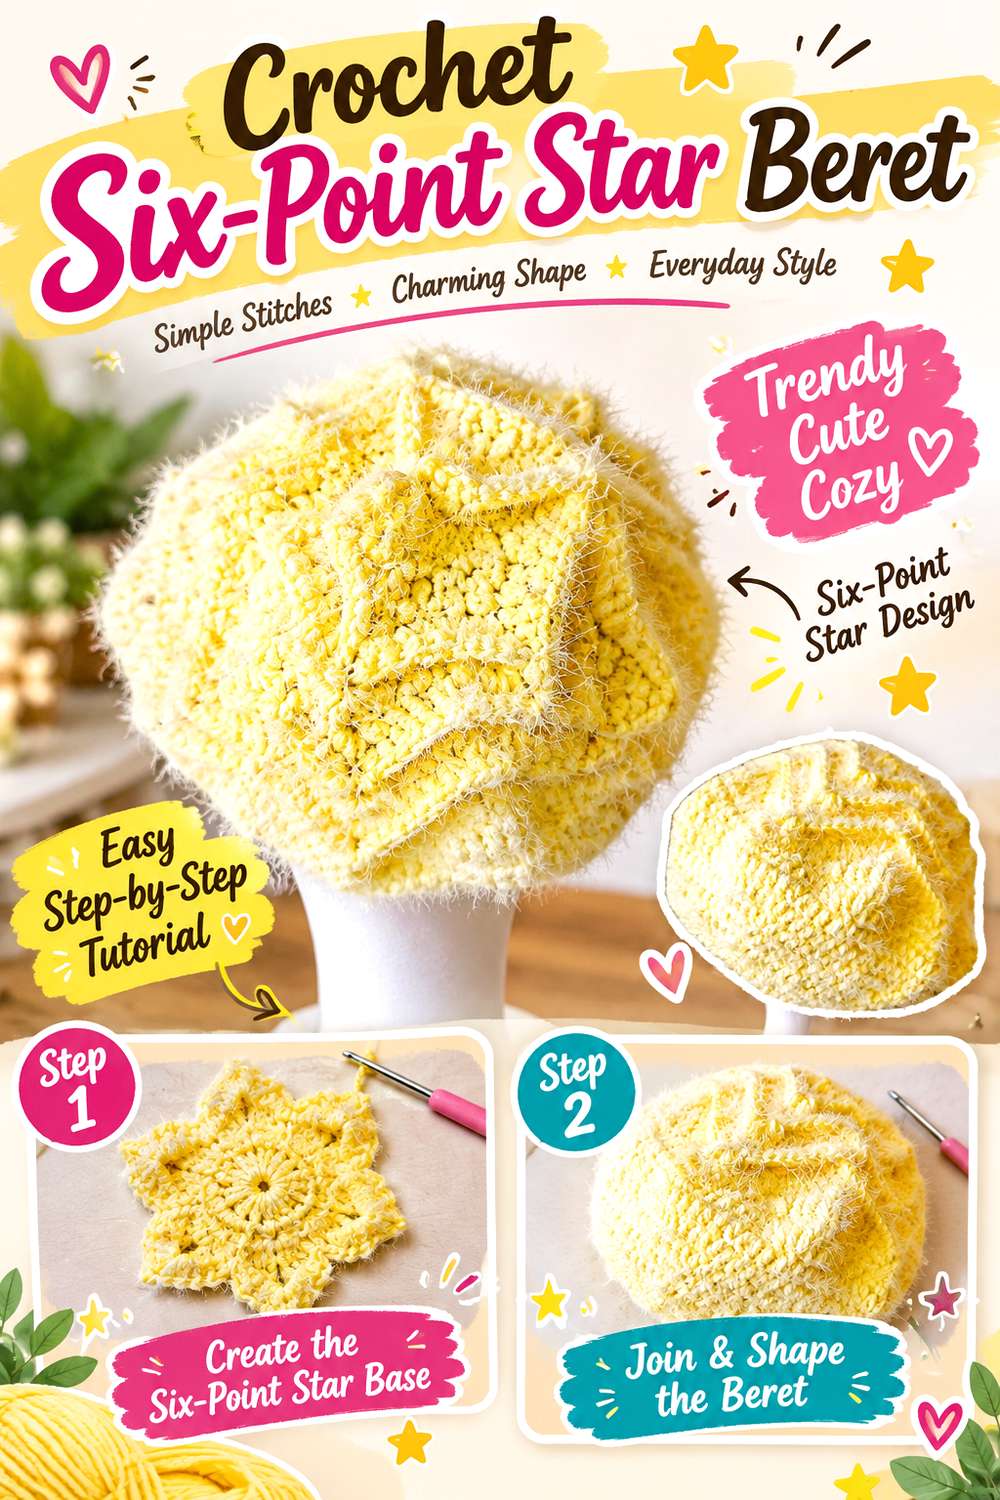
Anxin_crochet’s beret brings the celestial shape into the crown itself. The creator describes the finished hat as having a six-point star shape, so this is not simply a standard round beret with a small appliqué added afterward.
Compared with Alexandria Masse’s heavily dimensional star hat, this option stays closer to familiar fashion headwear while still giving the top a clearly geometric identity. That makes it a useful middle ground: more structural than a star decoration, but less object-like than a stuffed novelty headpiece. The six-point geometry also gives the outline a different rhythm from the five-point stars used elsewhere in the collection.
Keep the Six Points Visually Balanced
When the star shape forms part of the hat itself, irregular tension can affect more than one isolated motif. Lay the work out periodically and look at the relationship among all six sections.
If one area appears noticeably longer or tighter, check your work before relying on finishing to correct it. Blocking can refine appropriate crochet fabric, but it should not be treated as a substitute for resolving a major construction difference.
Judge the Shape Both Flat and Worn
Berets naturally change appearance once they are placed on the head. A six-point crown that looks strongly geometric when spread flat may soften when the fabric drapes.
Consider which appearance matters most to you. If you like the star primarily as a construction detail, subtle drape may be desirable. If you want the points to remain visually prominent, compare the demonstrated result carefully before changing materials or proportions.
Creator: anxin_crochet
16. Crochet Star-Stitch Wallet Purse
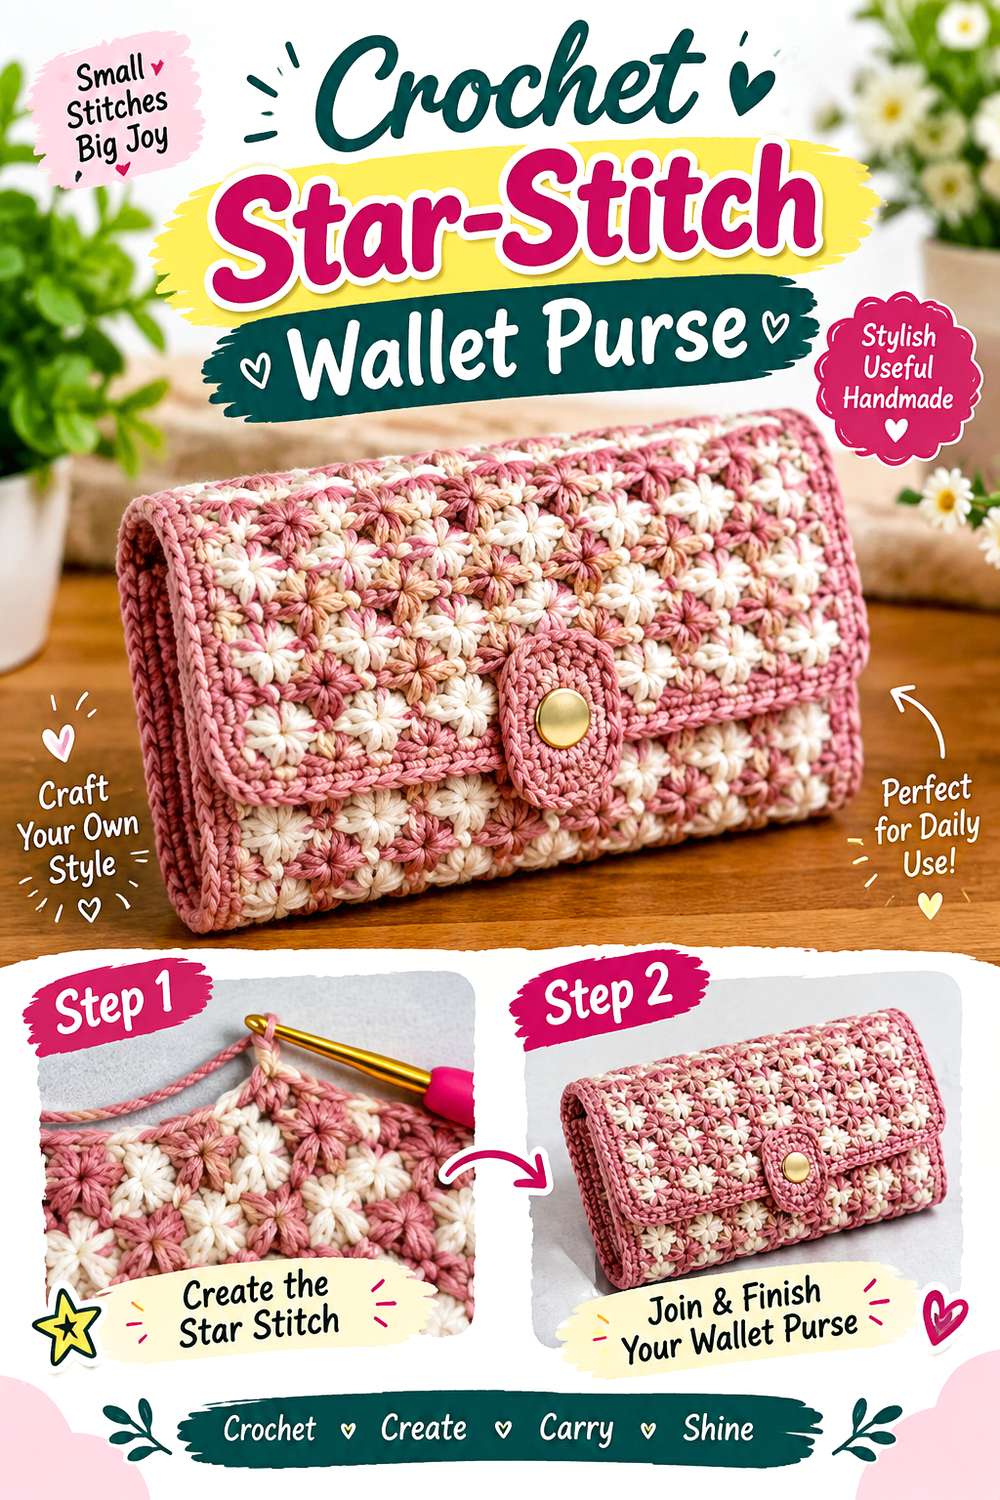
Lany Artes Crochê uses star stitch to create the textured body of a small wallet-style purse. The tutorial covers the star-stitch bag step by step, includes finishing guidance, and discusses making the project in other sizes; the creator also notes that the finished form can serve as a toiletry-style pouch.
Like the circular neck warmer, this is a star interpretation based on stitch structure rather than literal motifs. The difference is functional: here the textured fabric becomes a compact container with an opening and closure to consider. That makes stitch density more than a decorative question. You need enough visual definition for the stars to show while still thinking about what you intend to keep inside the pouch.
Match the Fabric to the Contents
Before resizing the wallet, decide what it is meant to contain. Coins, cards, cosmetics, and other small objects place different demands on the opening and internal space.
Do not assume that enlarging every dimension proportionally automatically produces the best container. Compare the intended contents with the demonstrated structure first, then decide which dimension actually needs to change.
Keep the Star Stitch Visible Around the Finish
Closures, borders, labels, and decorative buttons can all compete with a strongly textured surface. If the star stitch is the reason you chose the project, keep finishing details proportionate so they frame rather than cover it.
A simple palette can also help the clustered stitch pattern read clearly. More colors are possible, but consider where changes will fall within the repeated texture before introducing them randomly.
Creator: Lany Artes Crochê
Conclusion
These 16 moon and stars crochet accessory ideas offer several very different ways to use a celestial theme. For a bold silhouette, the sculptural star bag, half-moon crossbody, dimensional star hat, or six-point beret put shape first. The star headband, wrist warmers, belt, bonnet, hair clip, and keychains keep the motif recognizable while using it on smaller wearable or portable pieces. The joined-star shawl and bandana make repeated motifs part of the construction, while the neck warmer and wallet use star stitch for a subtler interpretation.
Choose according to where you want the celestial detail to appear: in the outline, across the surface, as an attached motif, or in the texture itself. For exact construction, sizing, joining, and finishing details, follow the original tutorial linked with each project.
Frequently Asked Questions
Can I use the same crochet star motif on several of these accessories?
Possibly, but matching subject matter does not make motifs automatically interchangeable. A star sized for a hair clip may be too small for a wrist warmer, while one used in a joined shawl may have edge structures specifically designed to connect with neighboring motifs. Compare finished dimensions, edge construction, number and placement of points, and the way the original accessory attaches the star before substituting one tutorial’s motif for another.
What is the difference between a crochet star motif and star stitch?
A star motif is a discrete crocheted shape that visibly resembles a star. It can be sewn onto another object, connected to other motifs, or used as the structure itself. Star stitch is a textured stitch pattern formed across fabric. The Circular Star-Stitch Neck Warmer and Star-Stitch Wallet Purse use the second approach, so they give a subtler celestial reference than the Star Hair Clip, Star Belt, or Sculptural Star Bag.
Which projects make the moon shape the most obvious?
The Crochet Half-Moon Crossbody Bag uses the bag’s broad curved silhouette to suggest a lunar form, while the Crochet Moon and Star Keychain Set presents a small recognizable crescent directly. The Sun-and-Moon Granny Square Shoulder Bag uses moon imagery within a panel, and the Sun-and-Moon Earrings turn the lunar shape into jewelry. Choose between them based on whether you prefer silhouette, graphic motif, or small-scale jewelry.
How should I plan color changes for celestial motifs?
First decide whether the motif needs to be recognizable from a distance. A star embedded in a granny square or headband generally benefits from enough contrast to remain distinct from its background, while a sculptural star bag can rely more heavily on outline. Test your chosen colors beside one another before committing to many motifs. Similar colors can create a subtle result, but very low contrast may make small stars harder to distinguish.
Can I resize these accessories just by changing the hook or yarn?
That approach can change the result, but it changes stitch scale and fabric behavior at the same time. On fitted accessories such as headbands, bonnets, wrist warmers, and berets, those changes can affect several measurements simultaneously. For modular pieces, a different motif size can multiply across an entire layout. When fit matters, use the creator’s demonstrated proportions as your starting point and compare your work with an accessory that already fits the intended wearer.
What should I check when adding different hardware?
Look at both the hardware size and the crochet area that will carry its movement or weight. This applies to the belt’s connectors, key rings, earring findings, bag straps, and hair clip base. Avoid choosing an attachment location only because it is visually convenient. Make sure the hardware can connect without distorting a narrow star point or other delicate edge, and compare the assembled accessory with the original tutorial before making structural substitutions.