Glamoratti takes its cues from maximalist ’80s dressing: assertive silhouettes, noticeable accessories, sculptural proportions, and jewelry that becomes part of the outfit rather than a quiet finishing detail. Pinterest’s 2026 trend guidance specifically connects the look with chunky belts, gold cuffs, high collars, and a broader return to ’80s luxury.
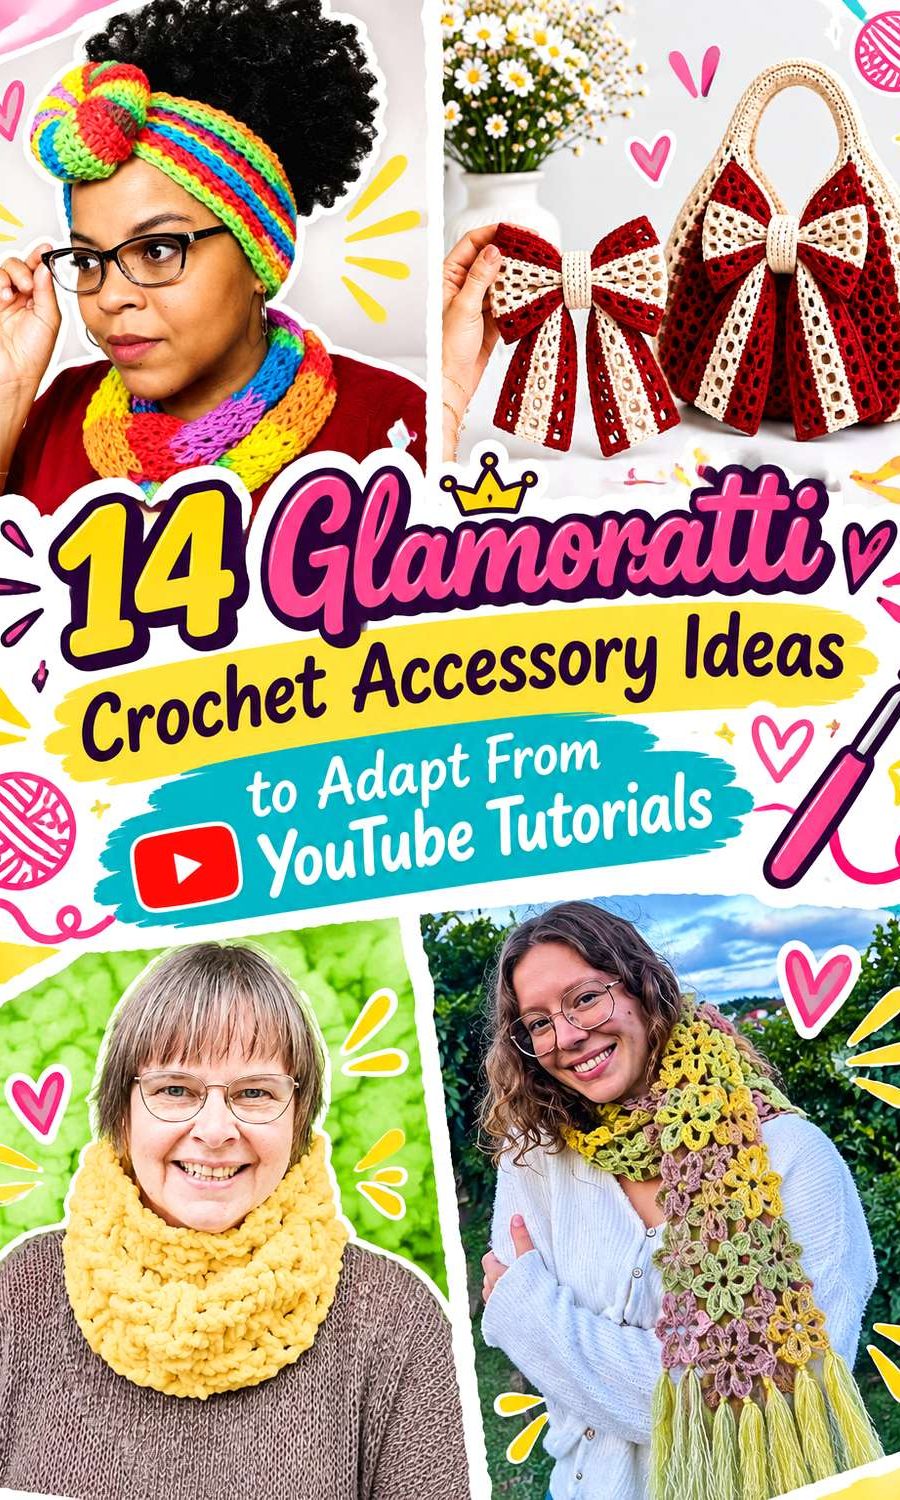
Crochet can interpret that direction without copying those materials literally. A firm clutch can supply structure, a ruffled scarf can create deliberate volume, and a pronounced headband or brooch can become the single focal point beside a sharply tailored jacket.
The tutorials below were not presented by their creators as Glamoratti patterns. They are construction sources that can be adapted through scale, placement, palette, and styling; those suggested changes are kept separate from what each tutorial actually teaches.
Quick List
- Crochet Structured Clutch Bag
- Crochet Flower Brooch
- Crochet Tie-On Bandana
- Crochet Buckled Belt
- Crochet Sculptural Beret
- Crochet Skinny Scarf
- Crochet Metal-Clasp Baguette Bag
- Crochet Joined-Flower Scarf
- Crochet Top-Knot Headband
- Crochet Ruffled Scrunchie
- Crochet Fingerless Gloves
- Crochet Chunky Cowl
- Crochet Bow Handbag
- Crochet Ruffle Scarf
How to Give Crochet a Glamoratti Direction
Start with silhouette rather than assuming everything needs metallic yarn. The trend works because accessories occupy visible space: a defined belt interrupts a suit, a bold collar changes the neckline, or a compact bag introduces a deliberate geometric shape. Crochet can do the same through width, relief, repeated motifs, ruffles, and contrasting hardware.
Choose one feature to carry most of the drama. If the bag already has a large bow, it may not need an equally emphatic scarf. If a wide belt is the outfit’s focal point, a narrower head accessory can support it instead of competing with it. This keeps maximalism controlled rather than simply crowded.
Color is the easiest adaptation because it normally changes appearance without rewriting construction. Changes to width, size, closures, lining, or structural reinforcement deserve more caution because they can alter how an accessory fits or functions.
Choose Structure According to Where the Accessory Sits
Waist accessories and bags usually benefit from clearer structure because their edges, openings, and proportions remain visible against clothing. A scarf or scrunchie can use movement as its main feature instead. That difference matters more than making every project equally thick.
Before changing yarn or hook size, consider which dimensions will change together. A broader belt has to pass through or work with its buckle. A larger flower brooch becomes heavier at the attachment point. A larger bag opening may require a different closure solution. Those are structural changes, not merely styling changes.
For Glamoratti outfits, also consider viewing distance. A brooch that seems substantial in your hand may read differently on an oversized blazer, while a highly textured scarf can become visually dominant around the face. Compare the unfinished accessory against the clothing you intend to wear before committing to major proportion changes.
1. Crochet Structured Clutch Bag
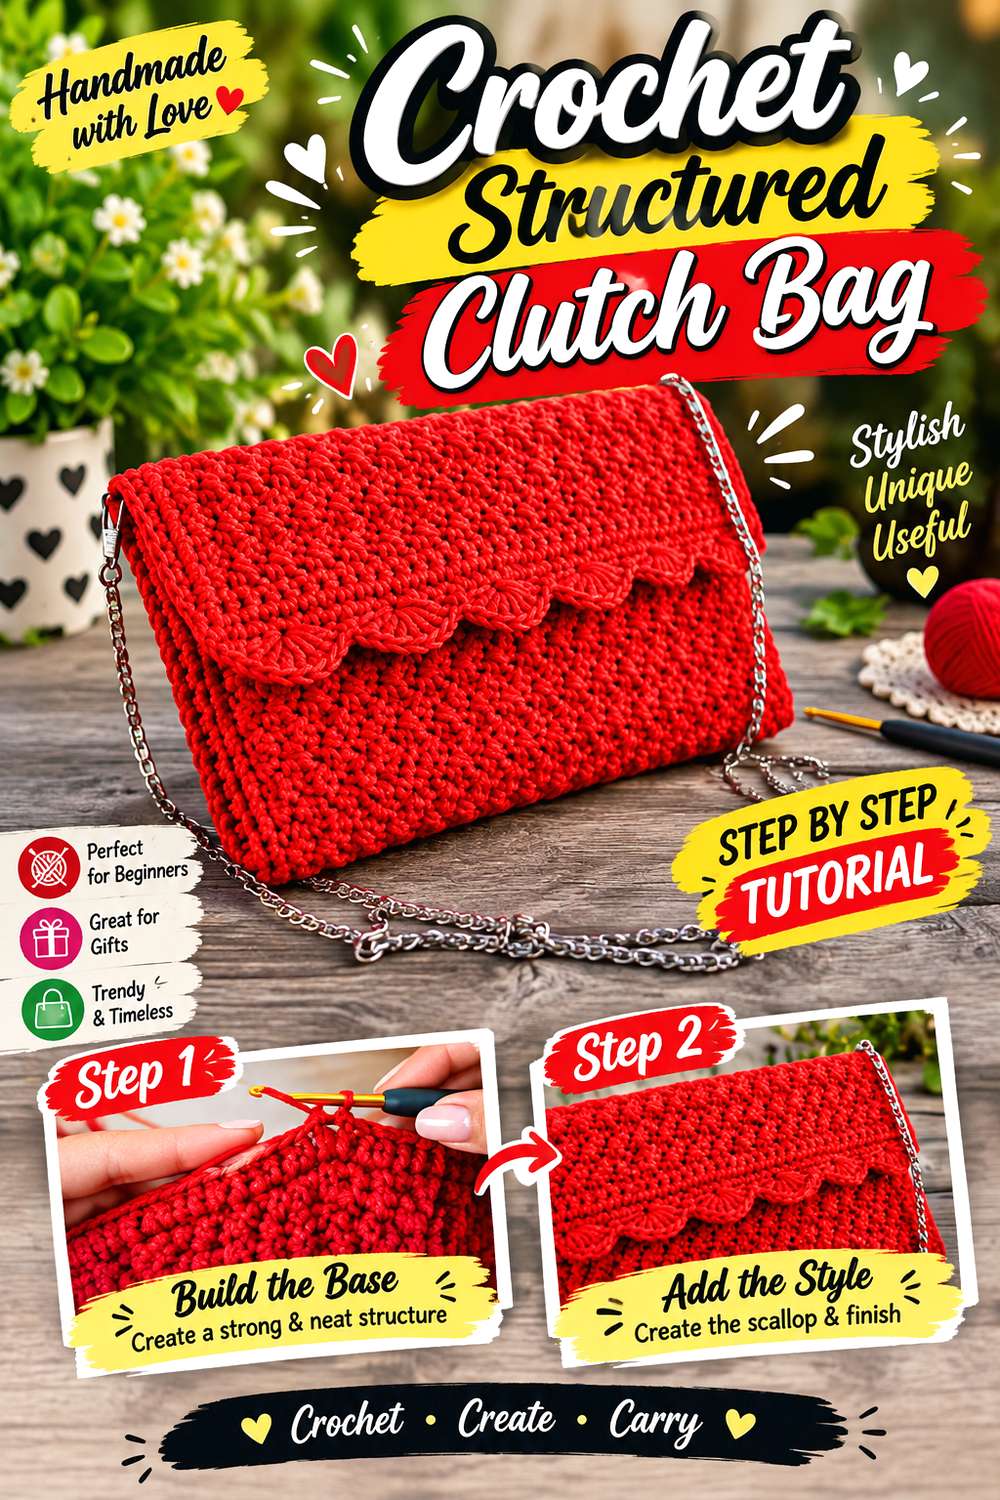
A compact clutch is one of the most direct ways to bring a strong accessory shape into a Glamoratti outfit. Instead of relying on a large tote silhouette, the interest sits in the defined rectangular body, its surface texture, and the contrast between handmade fabric and more polished evening or tailored clothing.
Momì’s Crochet teaches a clutch made from a crocheted panel and includes additional finishing that gives this source more structure than a purely soft pouch. The tutorial covers stiffening mesh, the bag body, lining, a magnetic button, and finishing, so it provides a particularly useful base when the goal is a crochet bag with deliberate edges rather than a relaxed sack.
For a Glamoratti adaptation, the strongest decision is how much visual competition the clutch should create. A single saturated color can make the silhouette prominent, while a quieter body can leave hardware or an accompanying belt to carry the outfit.
Let the Shape Do the Heavy Styling
A firm clutch already creates contrast beside soft knitwear, wide tailoring, or fluid evening pieces. That means extra embellishment is optional rather than automatic. If you want a louder version, consider concentrating the change around the closure area instead of distributing decorative elements over every surface.
The more additions you make, the more important it becomes to check whether the flap, opening, and grip still work comfortably.
Keep Structural Changes Separate From Color Changes
Changing color is comparatively simple. Replacing the source materials, omitting reinforcement, or altering the lining arrangement can change how the clutch behaves. Because the tutorial specifically includes mesh stiffening and lining, follow the demonstrated construction before deciding which structural components you want to modify.
Creator: Momì’s Crochet
2. Crochet Flower Brooch
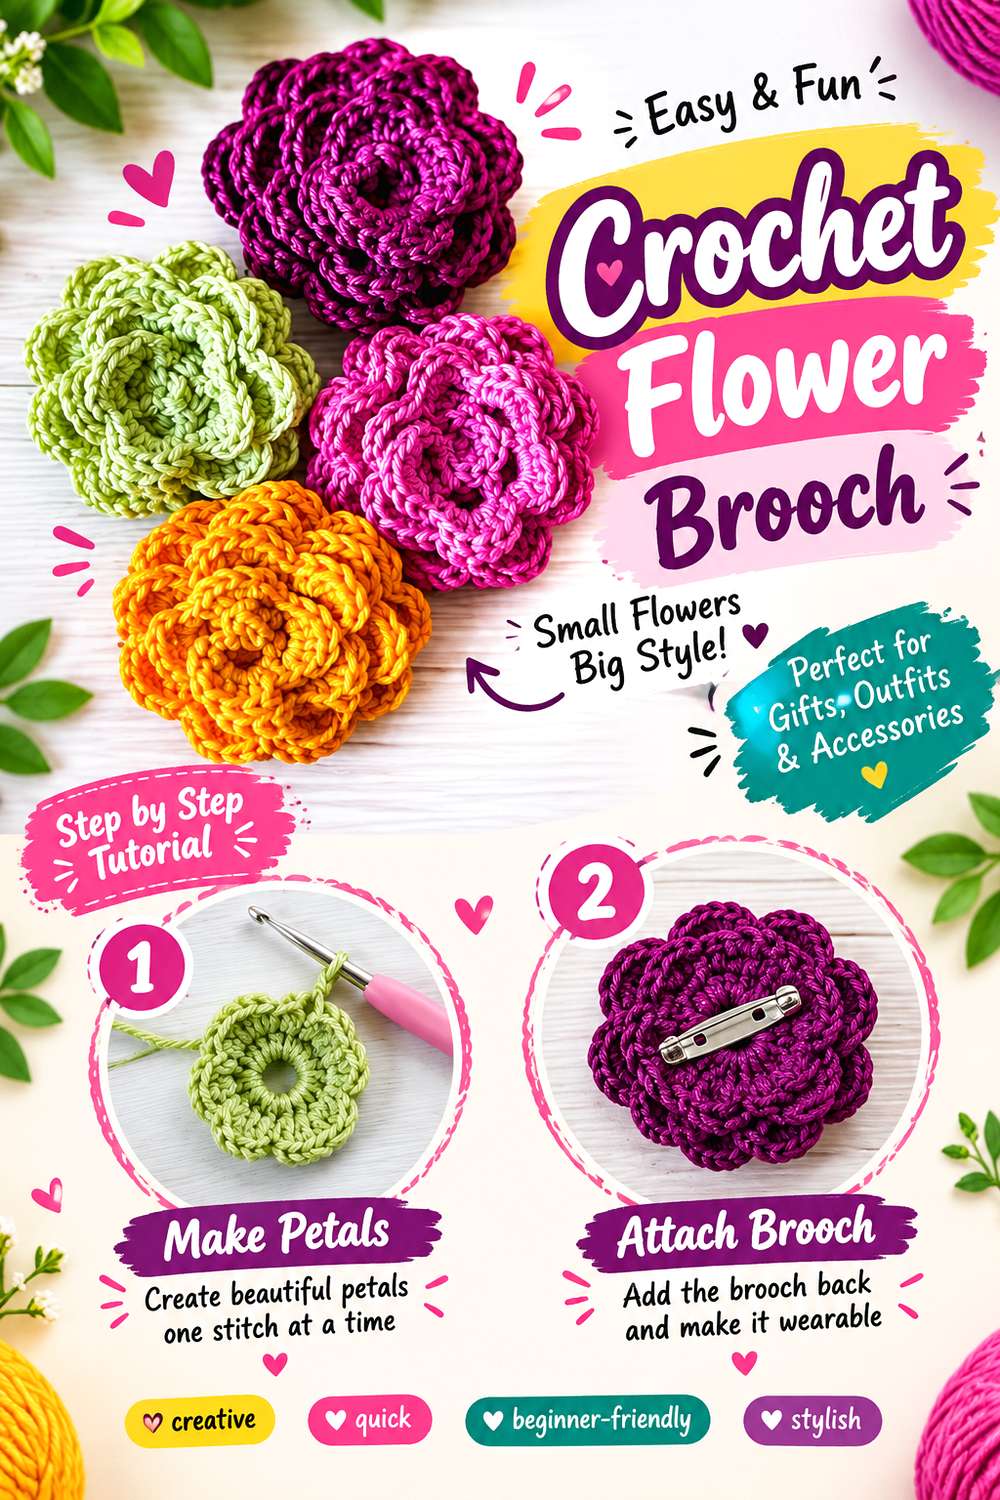
A crochet flower brooch gives the Glamoratti idea a smaller footprint while still putting decoration exactly where it will be noticed. It can sit high on a lapel, close a scarf visually, or create an asymmetrical accent on an otherwise plain jacket. Unlike an all-over textured garment, the motif is concentrated into one movable object.
Crochet con Lillo’s tutorial teaches a complete flower brooch rather than stopping at the flower motif. The source covers forming the flower and attaching the brooch clasp, which makes it a stronger accessory reference than a generic floral appliqué tutorial.
The Glamoratti treatment can come from placement as much as color. Against broad lapels or a sharply defined shoulder line, even a relatively compact motif can become intentional. If you want greater scale, remember that enlarging the crochet also changes the amount of fabric the clasp has to support.
Choose the Garment Before the Brooch Position
Pin placement changes the whole effect. High on a lapel, the flower becomes part of the face-framing area. Lower on a jacket, it reads more like conventional jewelry. On a scarf, it can become a temporary focal point rather than a permanent garment detail.
Test the position while wearing the garment so its folds and lapels are in their normal arrangement.
Treat a Larger Flower as a Structural Adaptation
Simply enlarging the motif is not identical to changing its color. More fabric means more weight and more leverage around the pin. If you want an exaggerated version, assess the finished flower and the intended garment before deciding whether the source brooch attachment remains appropriate.
The tutorial itself demonstrates the flower and clasp attachment; the oversized treatment is an adaptation rather than part of the credited project.
Creator: Crochet con Lillo
3. Crochet Tie-On Bandana
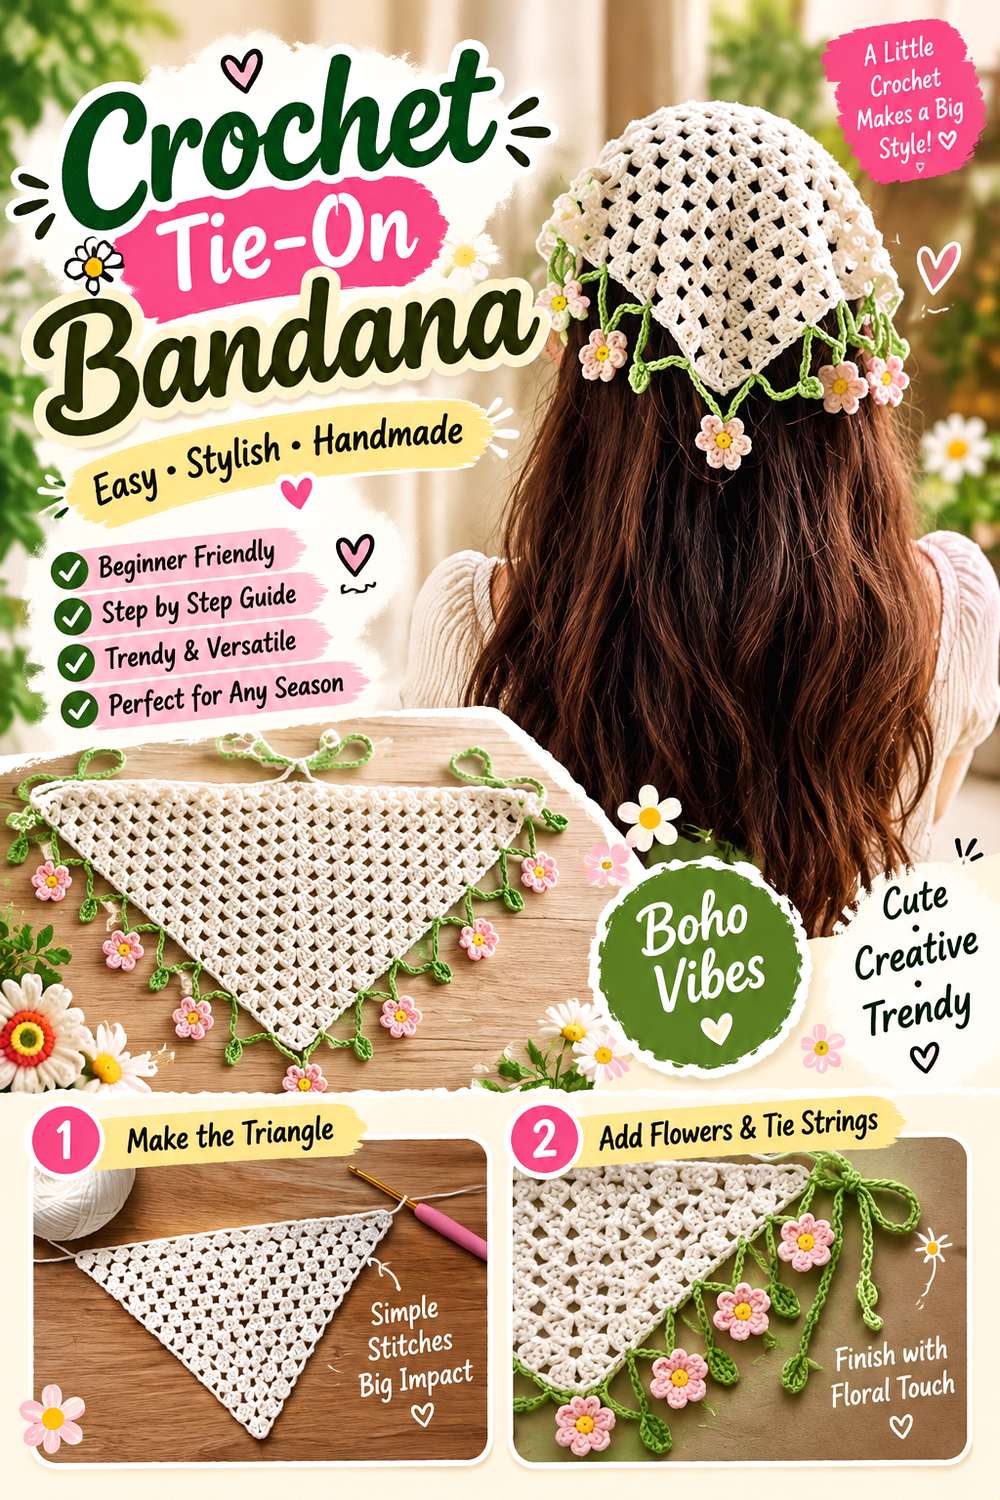
A bandana offers a different route into statement dressing because its shape spreads over the head rather than projecting outward. That broad visual field can introduce a strong block of color or surface texture while leaving earrings, a jacket collar, and the rest of the neckline visible.
Plakshi Jain’s tutorial teaches the bandana from start to finish and also covers the finishing and tying of the completed accessory. That makes it useful when the styling decision is not simply “make a triangle,” but how the finished crochet actually sits as a wearable head accessory.
For Glamoratti styling, think of the bandana as the graphic element above a structured outfit. It can soften a severe jacket silhouette without becoming delicate. A high-contrast palette can push it toward maximalism, while a single deep tone can let texture provide the interest.
Decide How Much Hair You Want Visible
Coverage changes the character of a crochet bandana. Worn farther back, it functions more like a broad head accessory and leaves more hair visible around the face. Brought forward, its crochet surface becomes much more prominent.
Before changing the source proportions, try the completed shape in several positions. The same bandana can produce noticeably different visual balance without altering the pattern.
Keep the Ties Functional
Longer or more decorative ties may sound like an easy Glamoratti addition, but anything added at the ends changes how the accessory fastens and hangs. Start with the tutorial’s demonstrated construction and treat tassels, beads, or other additions as separate experiments.
The source specifically includes guidance on tying and styling the finished bandana, so that is the useful reference point for the original fit.
Creator: Plakshi Jain | Crochet
4. Crochet Buckled Belt
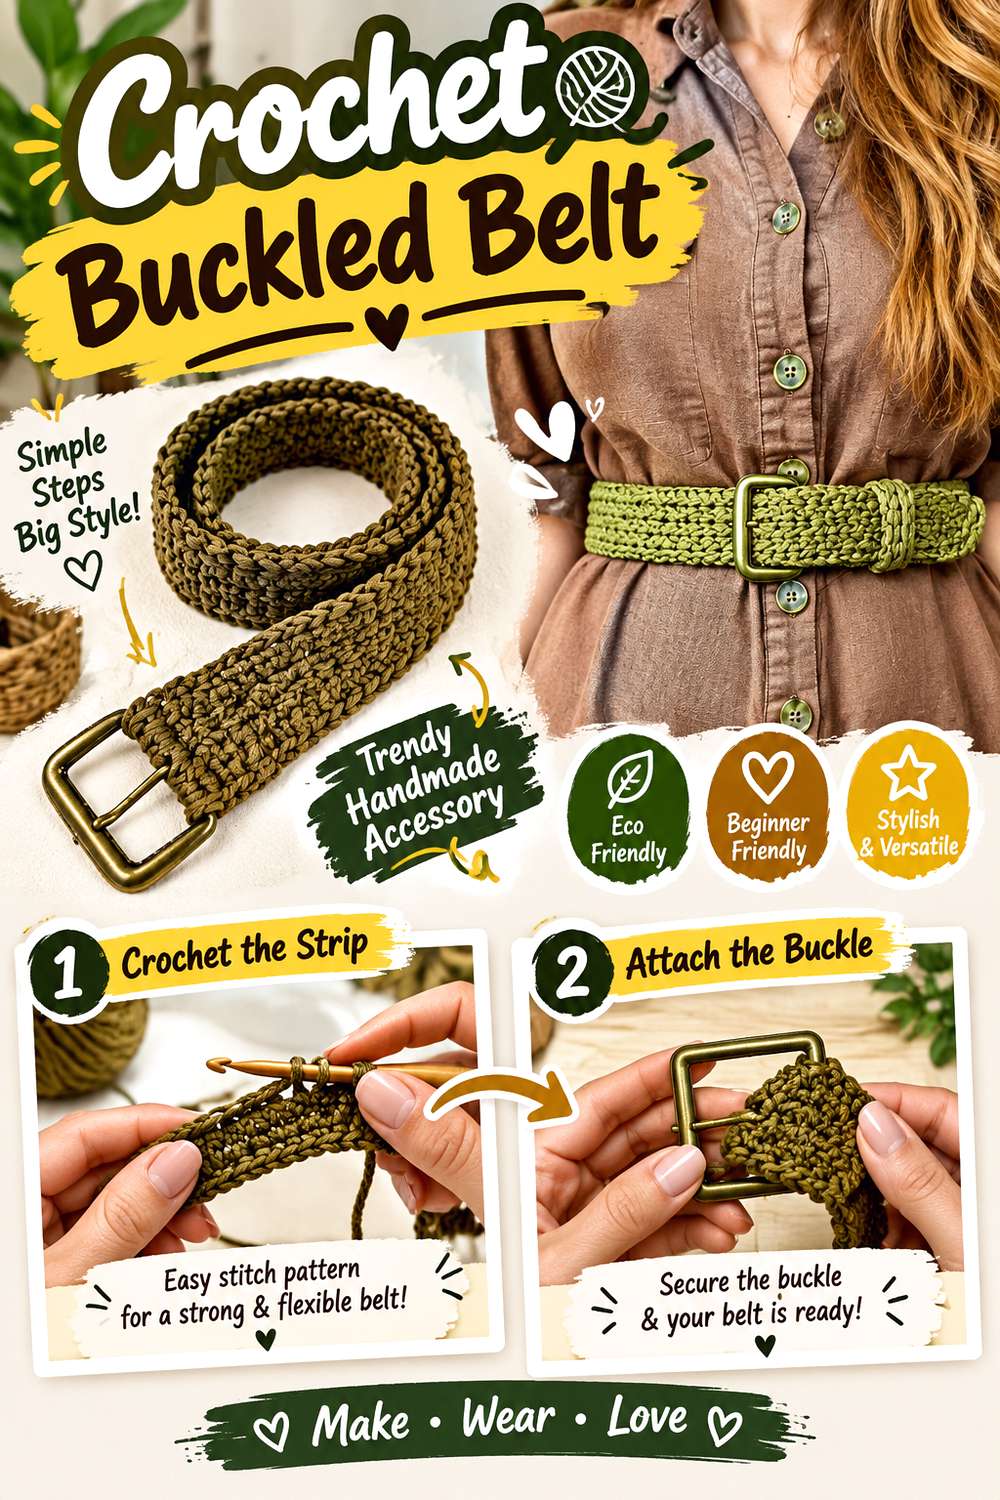
The belt is the clearest connection between this collection and Glamoratti’s documented fashion vocabulary. Pinterest lists “chunky belt” among the searches associated with the trend, making a waist-defining crochet accessory especially relevant to the aesthetic.
Brunaticality’s tutorial teaches a crochet belt made with a buckle and includes the belt loop as part of the project. The source describes the construction as Tunisian crochet and shows the material setup before moving through the belt itself.
Crochet gives the belt a different surface from leather or metal, but it can still play the same visual role: interrupting a long jacket, defining a dress, or creating a horizontal line across an oversized silhouette. The crucial choice is proportion. A belt intended to look substantial needs to work with the buckle rather than simply becoming wider around it.
Let the Buckle Set the Width Conversation
A belt and buckle function as one object. If you substantially alter the belt width, the buckle may no longer suit the fabric passing through it. Begin with hardware that works with the construction rather than designing the crochet independently and solving the closure afterward.
This matters particularly for a statement belt, where the fastening remains visible instead of being hidden beneath clothing.
Compare It Against the Jacket or Dress
The belt can create very different effects over a fitted dress and an oversized blazer. Lay the developing belt across the garment before finishing if you are making color or proportion decisions.
A strong contrast makes the waist line conspicuous; a closer color relationship lets crochet texture show more quietly. Neither requires changing the tutorial’s construction.
Creator: Brunaticality
5. Crochet Sculptural Beret
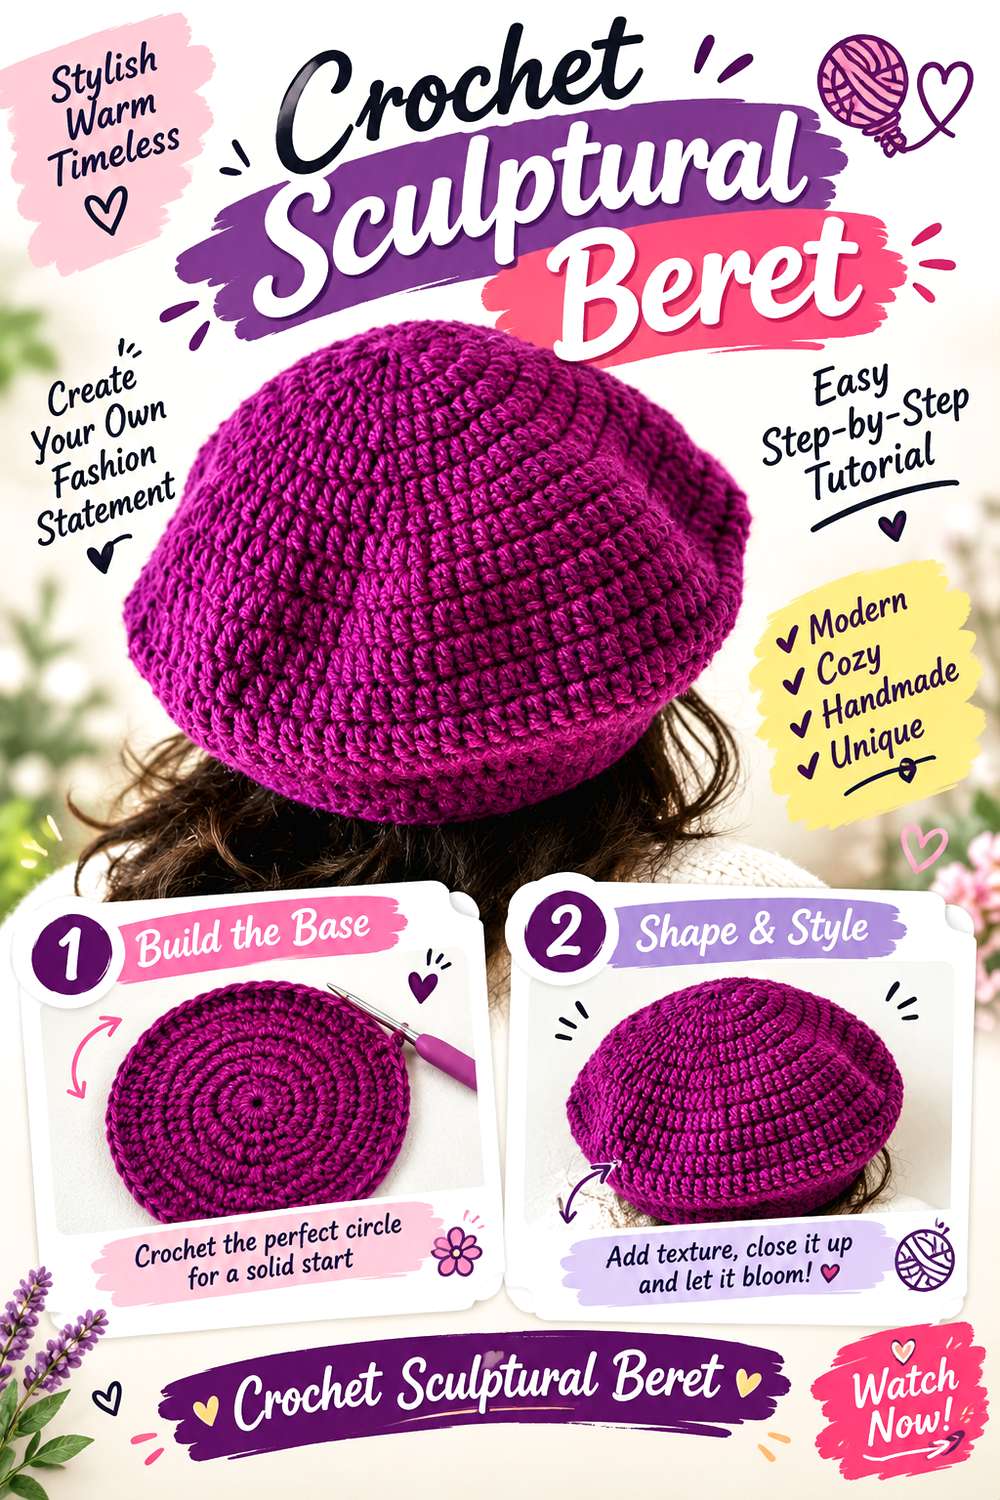
A beret introduces volume above the face without occupying the neckline, which is useful when the outfit already has a high collar, large lapels, or prominent jewelry. Its rounded crown also offers a softer counterpoint to the squared shoulders associated with Glamoratti dressing.
Crochet con Sole’s tutorial teaches a basic crochet beret and explicitly covers the stages that establish its shape, including the increasing, straight section, decreasing, and final finishing. The source also addresses adapting the project for different sizes.
The Glamoratti adaptation does not require rebuilding the beret into a novelty hat. A decisive angle, a saturated color, or a clean monochrome relationship with a jacket can make the familiar form feel more deliberate. Because fit affects how the crown falls, size changes deserve more attention than a simple palette swap.
Use Crown Volume to Balance the Outfit
A fuller-looking crown adds width around the head, while a flatter placement keeps the emphasis closer to the face. Try several angles in a mirror before deciding that the crochet itself needs alteration.
If your jacket already has strong shoulders, the beret can echo that visual confidence without matching the jacket’s geometry exactly.
Fit Comes Before Styling Angle
The tutorial discusses measurements and shaping rather than presenting the beret as one fixed-size object. That matters because a beret that is too loose or too tight will not respond to styling in the same way.
Use the creator’s sizing guidance for construction, then experiment with positioning once the finished hat sits securely.
Creator: Crochet con Sole
6. Crochet Skinny Scarf
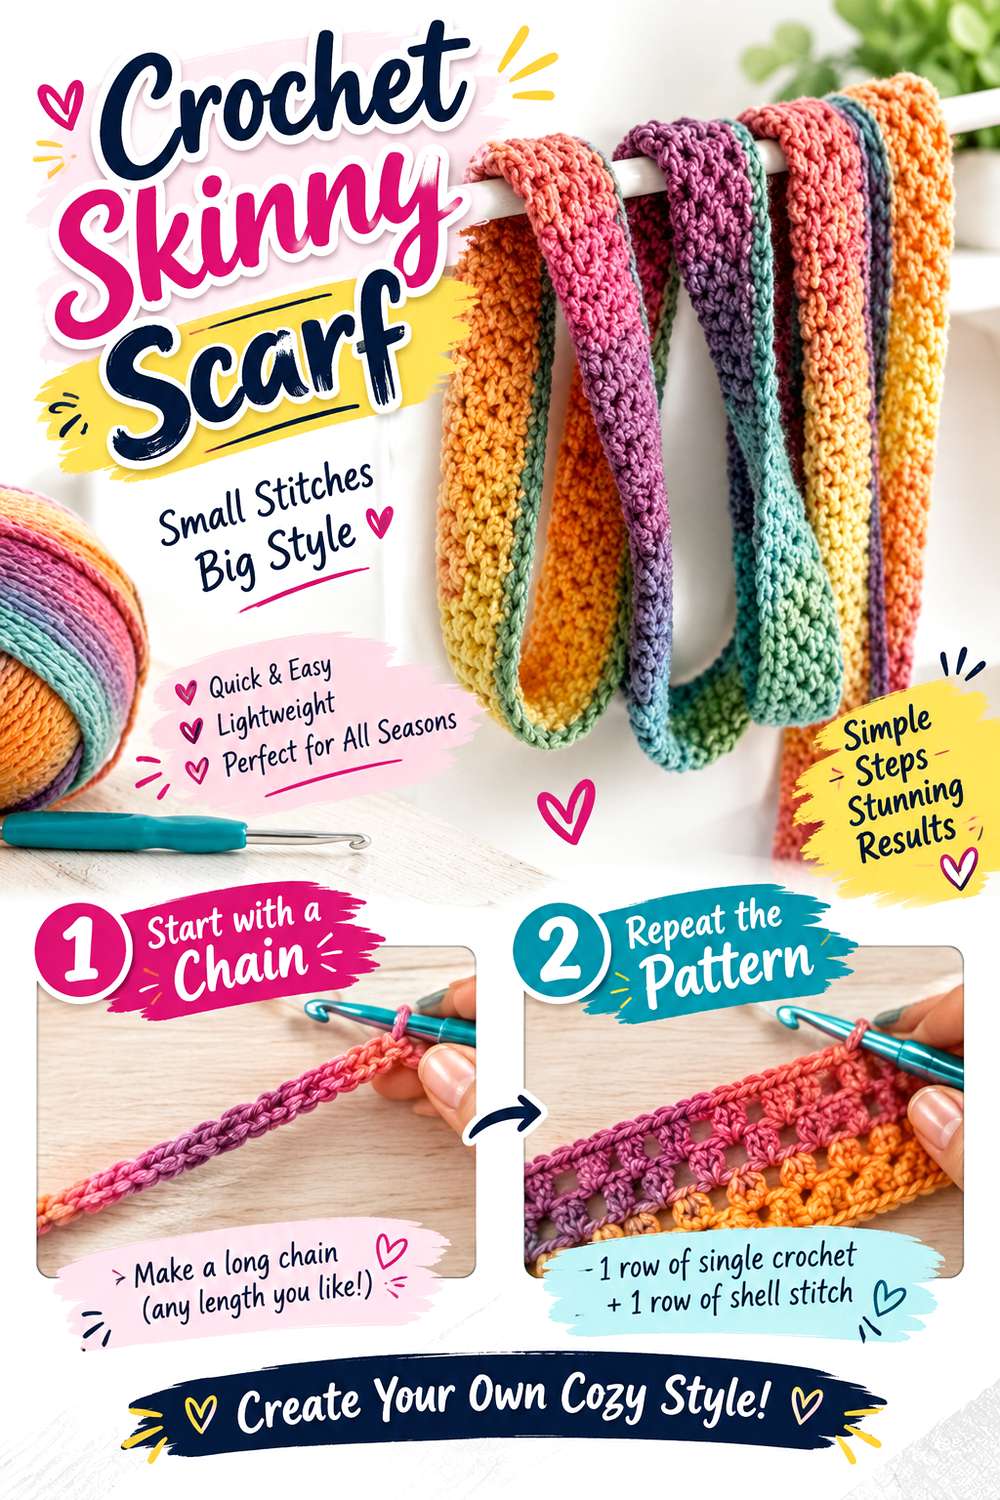
A skinny scarf may appear quieter than the chunkier accessories associated with maximalist fashion, but its value comes from line rather than volume. The long, narrow shape can create a vertical accent between blazer lapels, wrap closely at the throat, or introduce a contrasting strip of color without filling the entire neckline.
Krampolinka’s tutorial teaches a long narrow crochet scarf and demonstrates its construction and final joining. The creator also discusses several ways of wrapping or tying the finished piece.
For Glamoratti styling, this is useful when the jacket, belt, or bag is already the dominant element. Instead of adding another bulky item, the skinny scarf can direct the eye through the center of the outfit. It is also a good place for a strong color contrast because the narrow width limits how much visual area that contrast occupies.
Use Length as a Graphic Line
Letting the scarf ends hang produces a different effect from repeatedly wrapping them at the neck. The first emphasizes vertical movement; the second concentrates the accessory around the collar area.
Try the source styling options before changing the scarf dimensions. A different tie may solve the visual problem without requiring a different construction.
Avoid Competing With a Busy Neckline
Large earrings, a high collar, a brooch, and a wrapped scarf can quickly occupy the same small area. If the outfit already has substantial detail near the face, use the skinny scarf lower or let its ends hang more freely.
That makes its narrowness an advantage rather than something that needs to be enlarged.
Creator: Krampolinka Crochet Designer and Free Patterns
7. Crochet Metal-Clasp Baguette Bag
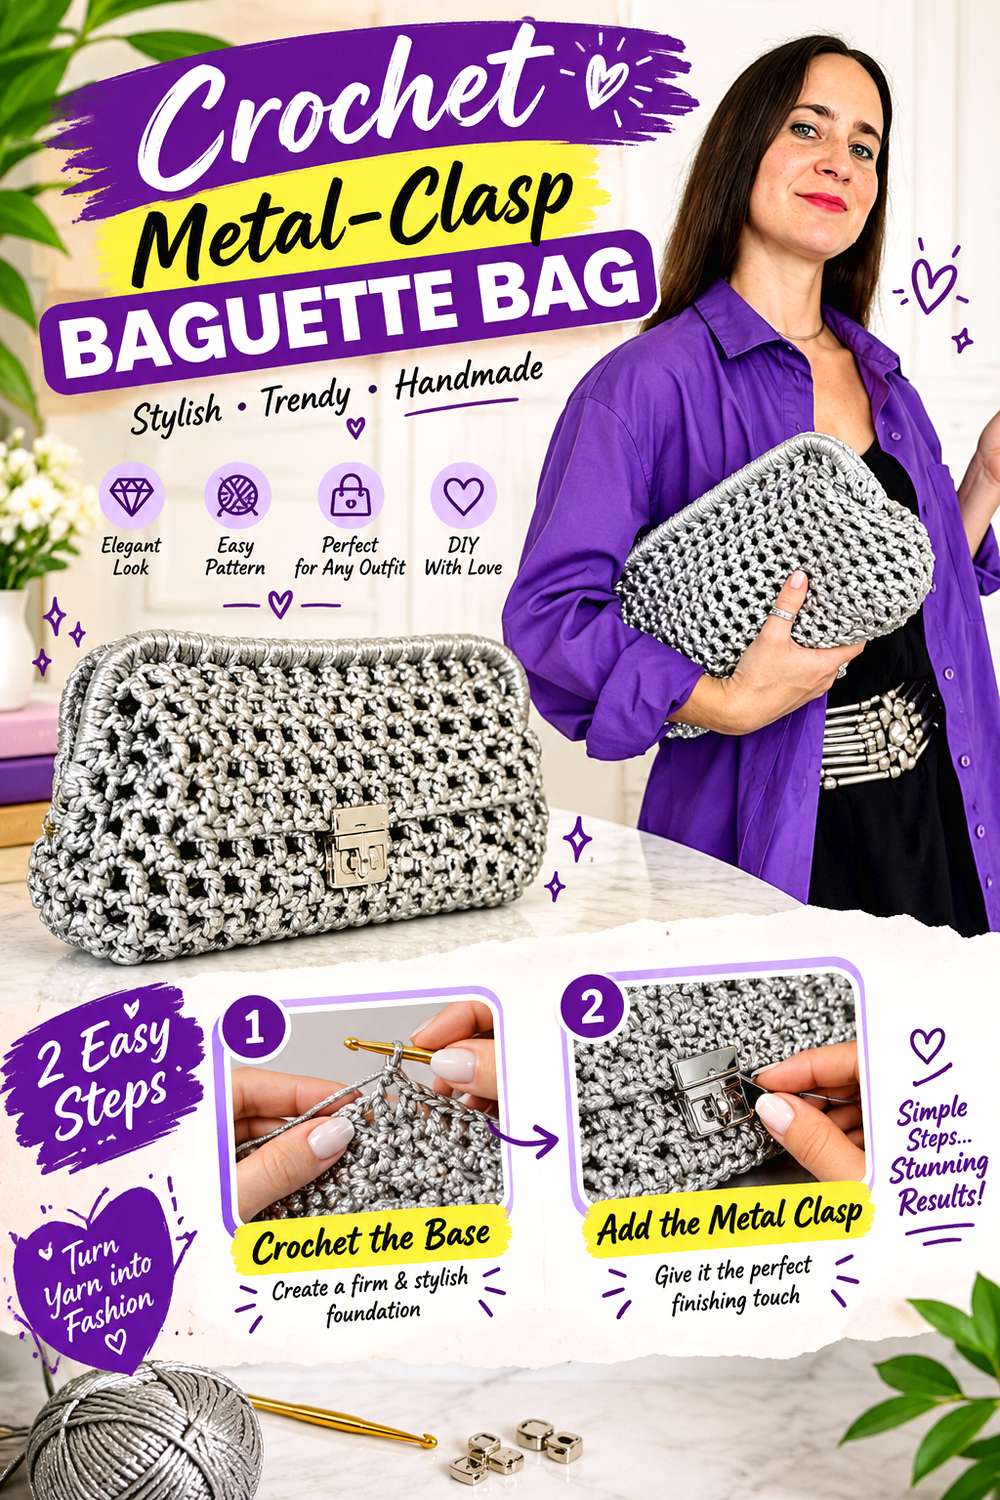
The baguette bag brings a compact horizontal silhouette that works naturally with tailored or evening-oriented outfits. Unlike a large soft tote, it remains close to the body, so the opening, clasp, strap, and proportions stay visually important.
Maison Saint Bonnet’s tutorial teaches a baguette bag from the base through final assembly. The project uses a metal clasp, and the creator demonstrates three approaches to attaching that clasp; the listed materials also include a chain. Those details make this a particularly useful construction base for a Glamoratti interpretation because visible hardware can share the spotlight with the crochet rather than being hidden.
A monochrome body can emphasize the bag’s outline and hardware, while a more dramatic color can make the entire bag the outfit’s focal point. Either approach keeps the recognizable baguette form intact.
Treat the Opening as Part of the Design
A metal clasp is not merely a practical closure when it sits along the visible top edge. Its proportion changes how polished or delicate the bag appears.
Because the tutorial gives several attachment methods, follow that part closely before considering a different frame or closure. A hardware substitution can change both the opening dimensions and finishing work.
Coordinate the Strap With Other Hardware
If the bag includes a visible chain, consider how it relates to buckles, jewelry, buttons, and other metallic details in the same outfit. Matching every metal perfectly is not mandatory, but introducing several unrelated finishes can distract from the crochet.
The easiest Glamoratti adaptation may therefore be styling the existing construction alongside one or two deliberate hardware accents elsewhere.
Creator: Maison Saint Bonnet
8. Crochet Joined-Flower Scarf
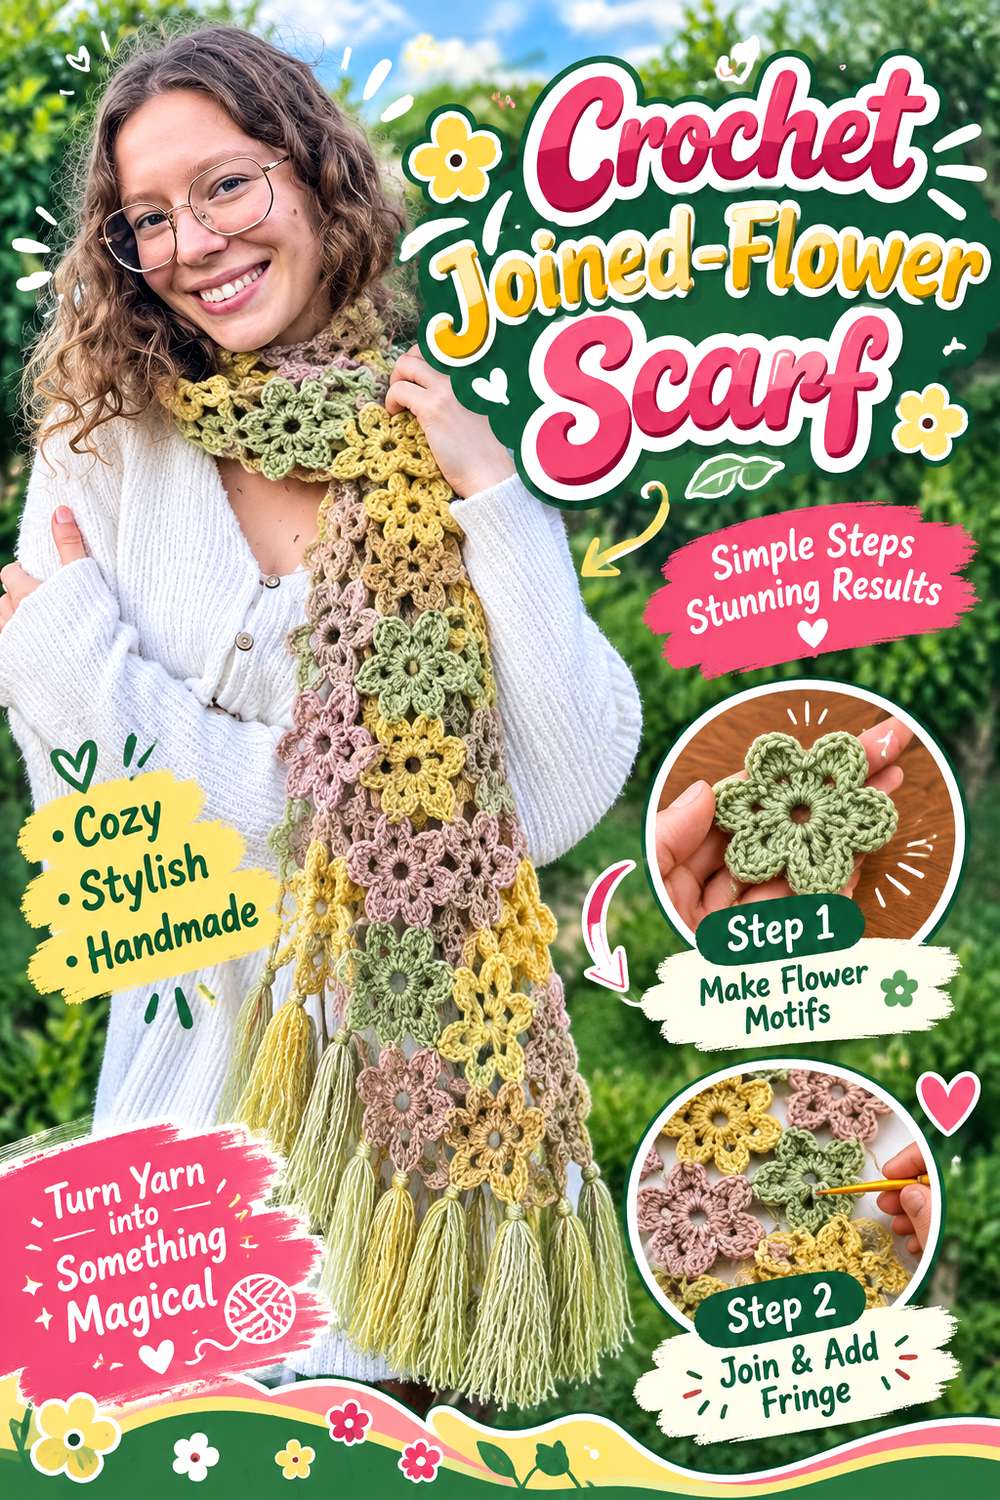
This scarf replaces one uninterrupted fabric surface with repeated dimensional-looking flower forms joined into a longer accessory. That repeated motif rhythm gives it a decorative presence quite different from either the skinny scarf or a conventional rectangular scarf.
Carlota Fiaño’s tutorial teaches the flower itself, shows the joining process used to build the scarf, and finishes the project with fringe. Because the flowers are the construction rather than appliqués added afterward, the accessory reads as a continuous floral statement.
For Glamoratti styling, that repetition can work especially well against a simple jacket or solid dress where the outline remains easy to see. A tightly controlled palette can keep the flowers graphic, while greater color contrast would make each motif more distinct. Those palette ideas are adaptations; the credited tutorial remains the source for the actual joined-flower construction.
Consider the Background Behind the Flowers
Open areas between motifs allow the clothing underneath to become part of the scarf’s appearance. A high-contrast garment will make individual flowers easier to distinguish, while a closer color relationship produces a more blended surface.
Test the scarf against its intended jacket or top before deciding that the crochet needs additional edging or embellishment.
Fringe Adds a Second Type of Movement
The tutorial includes fringe after the joined floral body is complete. That means the finished accessory combines motif repetition with moving ends.
If you are already using large earrings or elaborate lapels, consider whether the fringe should remain the final accent rather than adding beads or further hanging details. One moving feature is often enough.
Creator: Carlota Fiaño
9. Crochet Top-Knot Headband
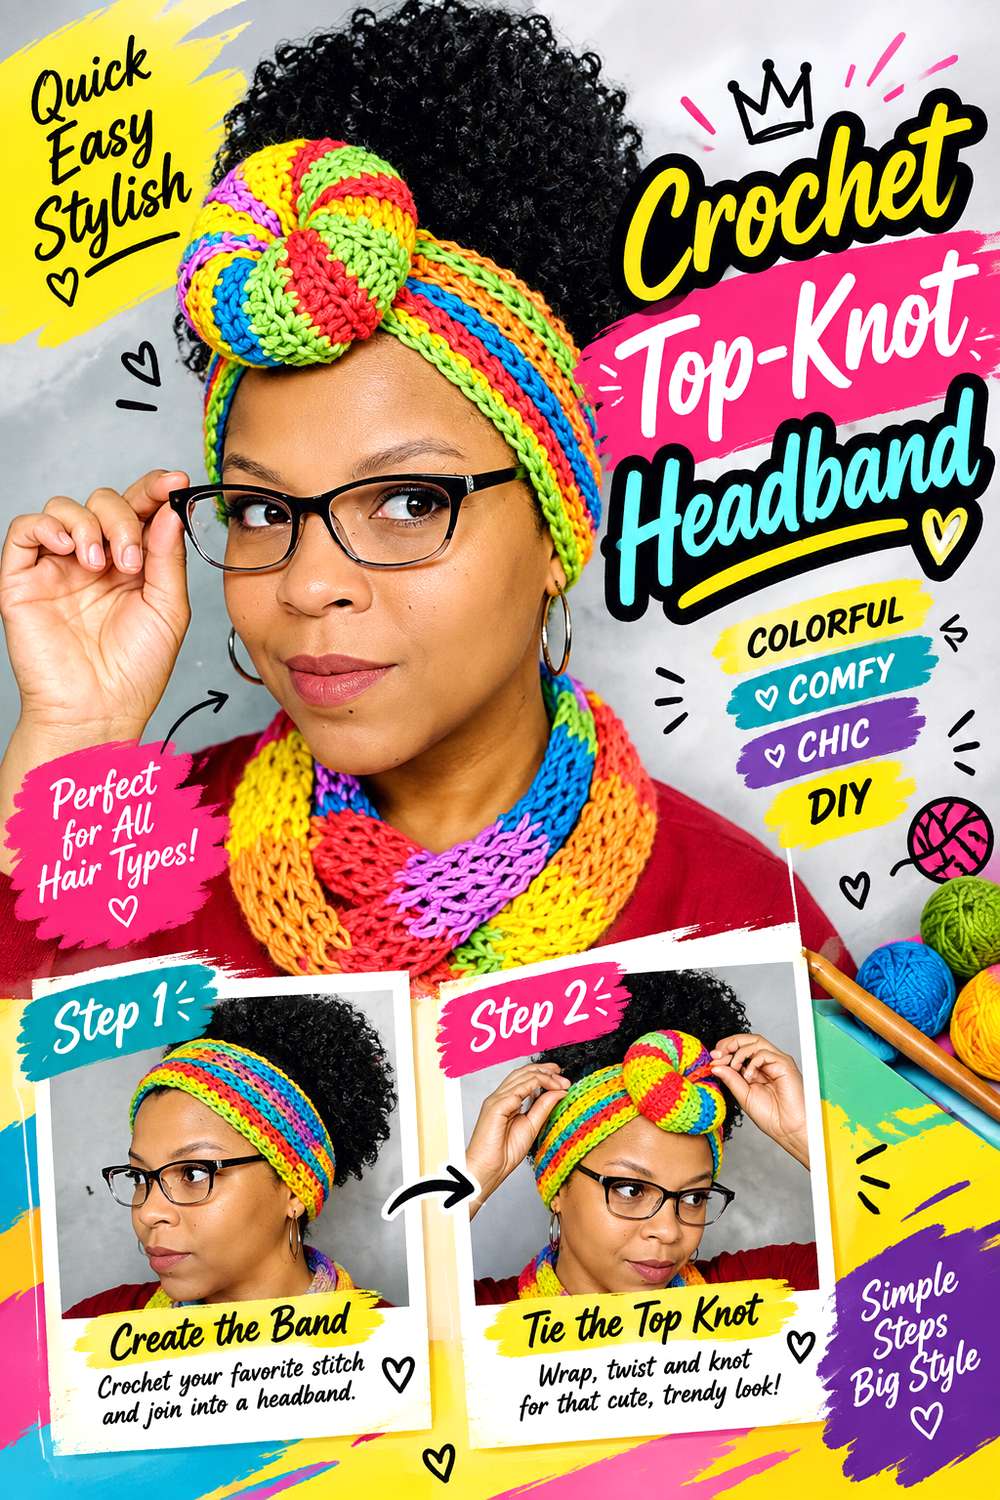
A raised top knot turns a headband from a narrow framing strip into something more sculptural. That extra height is precisely what makes this construction interesting for Glamoratti styling: it creates a concentrated shape above the forehead without covering the entire head like a hat.
Littlejohn’s Yarn teaches a crochet headband with a prominent knot element. The tutorial covers the crocheted band, assembly, and the bun or DIY form used to create that knot. This is therefore different from a simple twist-front headband; the dimensional center is fundamental to the design.
Placed beside bold earrings or a structured jacket, the knot can act as the uppermost point of the outfit. Because its volume is already built into the construction, the adaptation can remain largely cosmetic instead of trying to enlarge the entire headband.
Check the Knot Against Your Hairstyle
A pronounced knot occupies space that might otherwise be taken by a high bun, voluminous curls, or other hair accessories. Try the headband with the hairstyle you actually plan to wear.
A sleeker hairstyle can make the crochet knot more graphic, while a fuller hairstyle may visually absorb some of its height.
Keep Added Decoration Away From the Fit Area
If you want a dressier treatment, place embellishment where it will not interfere with the headband’s contact around the head. The dimensional knot already provides a natural focal area.
Because the tutorial’s assembly creates the raised center deliberately, it is safer to preserve that structure and make styling changes around it rather than rebuilding the fit.
Creator: Littlejohn’s Yarn
10. Crochet Ruffled Scrunchie
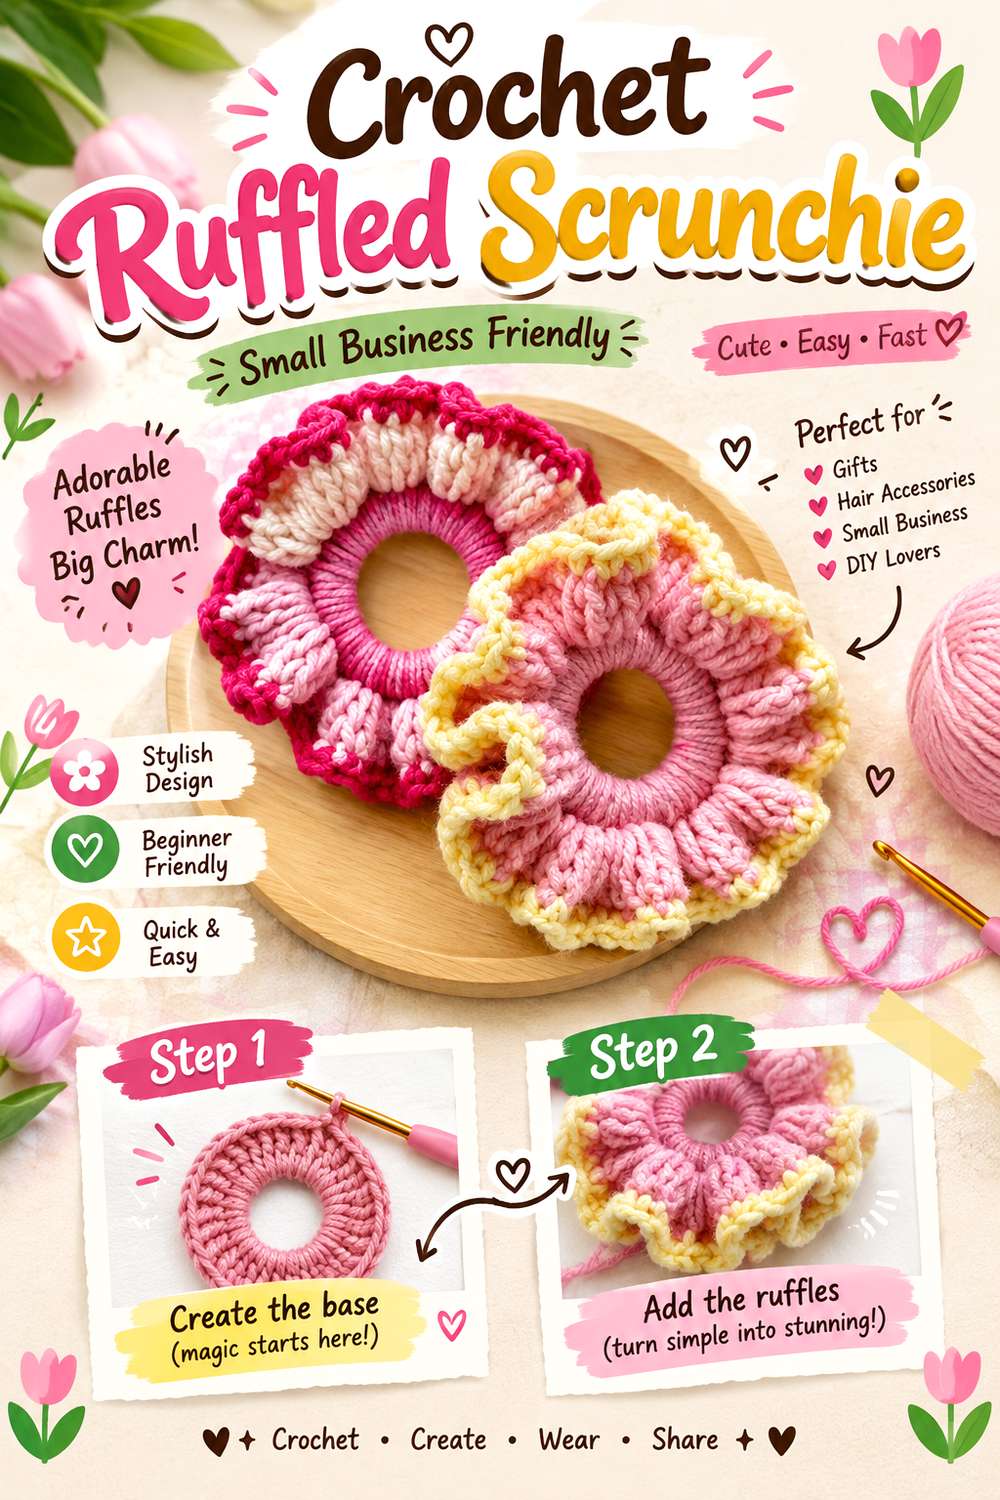
A scrunchie is physically small, but a full crochet ruffle can occupy considerably more visual space than an ordinary elastic. That makes it useful when you want a Glamoratti accent that does not compete with the neckline or waist.
Crochet Chronicles teaches a complete scrunchie built around a hair elastic. The tutorial moves through three rounds and finishes with a final reveal of the completed accessory. The repeated crochet around the elastic creates the volume, so the ruffled appearance is part of the actual project rather than an imagined embellishment.
For trend-oriented styling, consider the scrunchie in relation to the hairstyle. On a high ponytail or bun, it sits in a highly visible position; lower at the nape, it becomes a softer supporting detail. A bold color can therefore feel very different depending on placement.
Let Placement Determine How Loud It Feels
A ruffled scrunchie near the crown becomes part of the outfit silhouette. The same piece at the back of a low ponytail is less dominant from the front.
Before making a larger or more elaborate variation, experiment with placement. You may already have enough volume for the desired effect.
Preserve Stretch Around the Elastic
The accessory still has to work as a hair tie. Adding beads, heavy trims, or extra crochet can change how easily it stretches and wraps.
The source construction is worked around a hair elastic, so treat decorative additions as optional experiments and check that they do not impede the elastic’s movement.
Creator: Crochet Chronicles
11. Crochet Fingerless Gloves
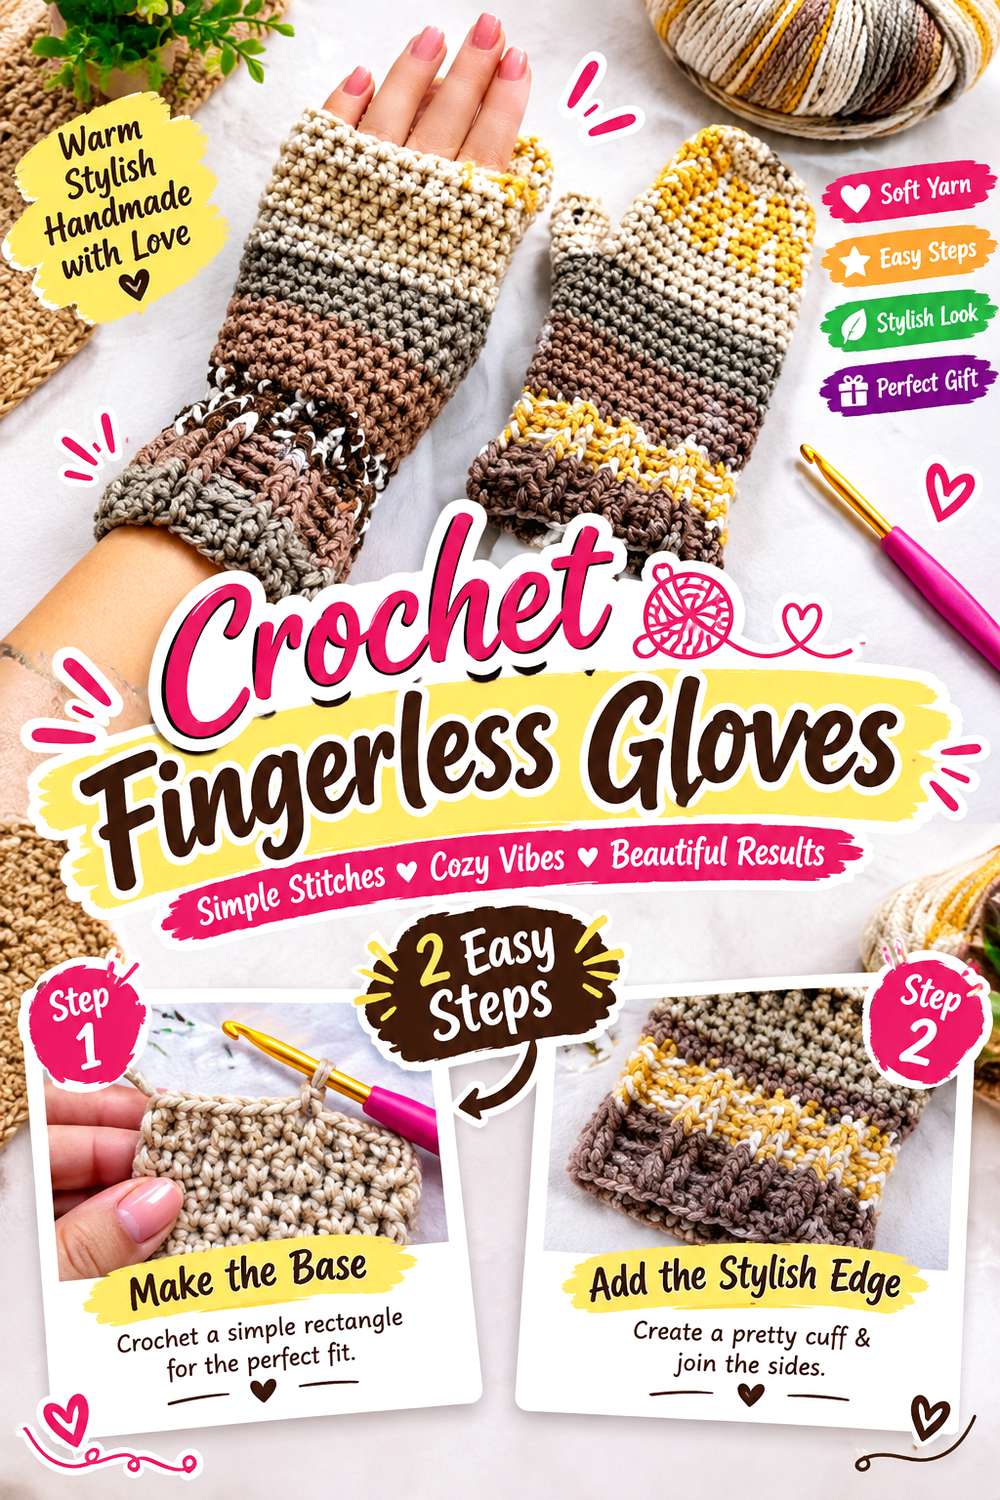
Fingerless gloves extend an outfit down the hand and wrist, making them a useful alternative to jewelry when you want texture rather than metal. They also leave the fingers visible, so rings or manicures can remain separate styling elements instead of being covered by a full glove.
Crochet MC’s tutorial teaches open-finger crochet gloves and discusses adapting them for different sizes and yarn weights. That sizing emphasis is important because a dramatic cuff still needs to fit the hand and wrist rather than functioning only as decoration.
For a Glamoratti interpretation, think about the gloves in relation to sleeve length. A shorter sleeve exposes more of the crochet, while a jacket cuff may leave only the hand section visible. The same project can therefore appear bold or relatively restrained without changing its construction at all.
Coordinate the Glove With the Sleeve
Long glove cuffs can disappear beneath sleeves or bunch against them, while very short sleeves expose the full accessory. Try the gloves with the actual jacket, coat, or dress you intend to wear.
This check helps you decide whether color contrast or textural contrast will be visible enough without altering the source pattern.
Fit Matters More Than Decorative Width
Adding extra bulk around the wrist may look appealing on a flat project, but the glove still has to move with the hand. Use the tutorial’s sizing guidance before considering attached bows, flowers, or other additions.
A styling change that remains outside the thumb and finger openings is generally less disruptive than one that alters those fitted areas.
Creator: Crochet MC
12. Crochet Chunky Cowl
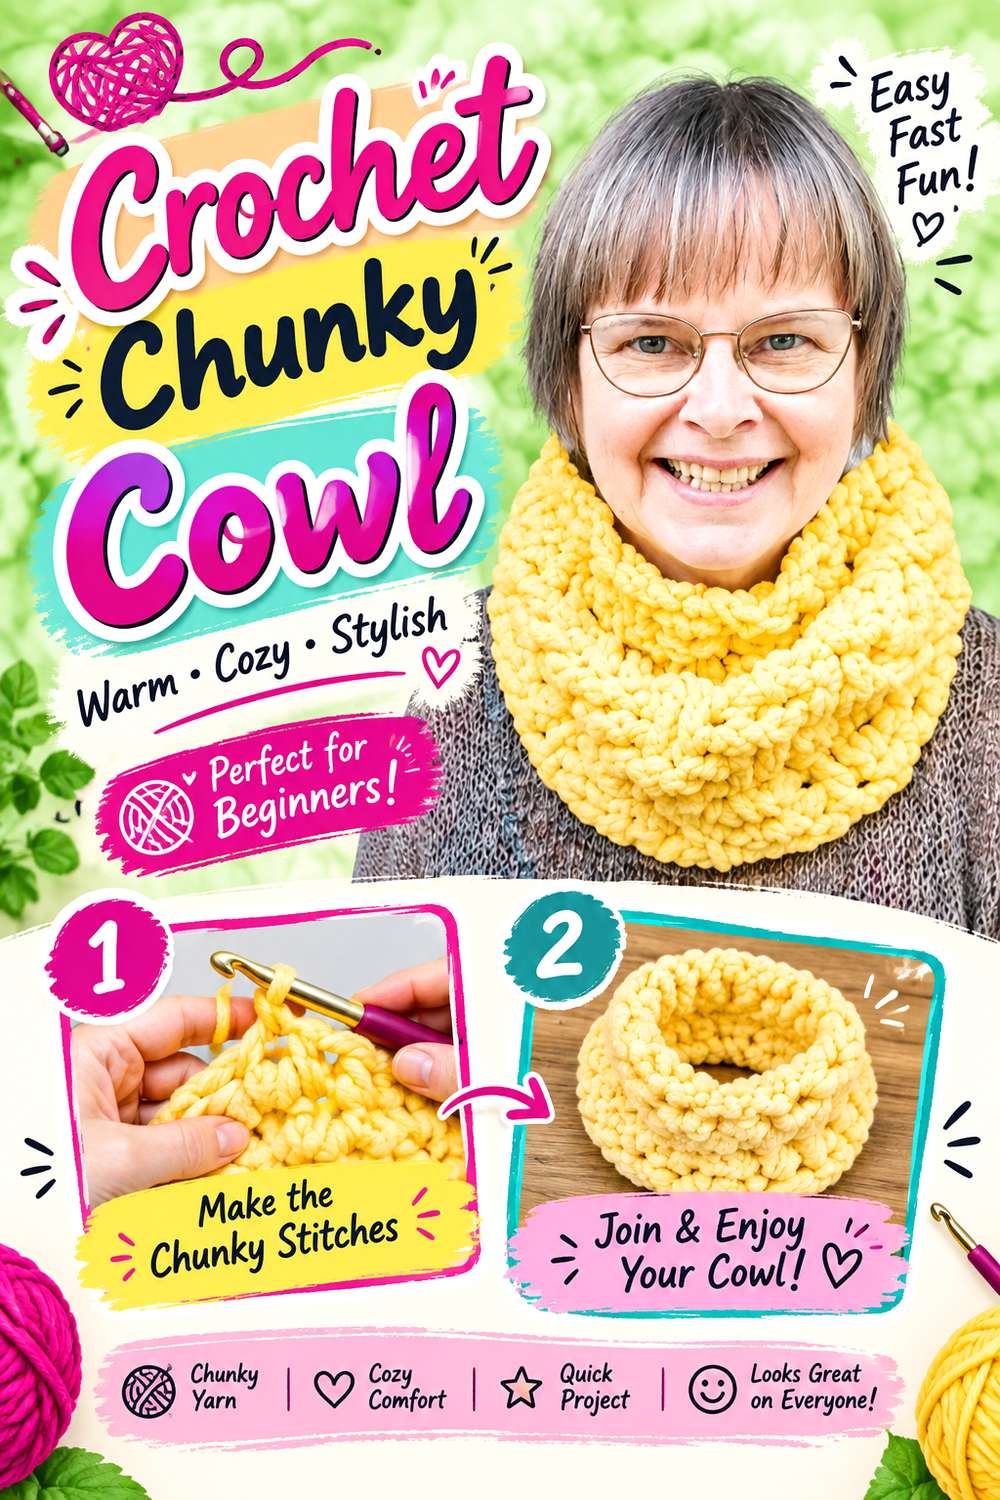
A chunky cowl concentrates volume around the neck, making it the closest accessory in this collection to Glamoratti’s high-collar emphasis. Instead of extending down the torso like a scarf, the closed loop keeps the crochet gathered into one strong area near the face.
Crochet with Tuula Maaria teaches a chunky cowl with a textured fabric created through front- and back-loop double crochet work, followed by joining the piece. The creator also discusses adjusting the size.
This makes the project useful beside simpler outerwear where the cowl can substitute for a visually strong collar. If the jacket already has a funnel neck or elaborate lapels, however, both shapes may fight for the same space. In that case, the better Glamoratti decision may be choosing either the cowl or the dramatic jacket neckline rather than forcing them together.
Check the Face-Framing Volume
Neck accessories are seen directly beside the face, so even modest changes in height or thickness become noticeable. Try the finished cowl with your coat or blazer before deciding that it needs additional rounds or embellishment.
A high-volume cowl may already provide all the neckline drama an outfit needs.
Leave Room for Outerwear to Close
A large cowl can interfere with a jacket front if both occupy the same space. This does not mean the combination cannot work; it means the intended styling should be tested.
If you plan to wear the jacket closed, compare the cowl and collar together. If the jacket stays open, the cowl has more room to become the central neck detail.
Creator: Crochet with Tuula Maaria
13. Crochet Bow Handbag
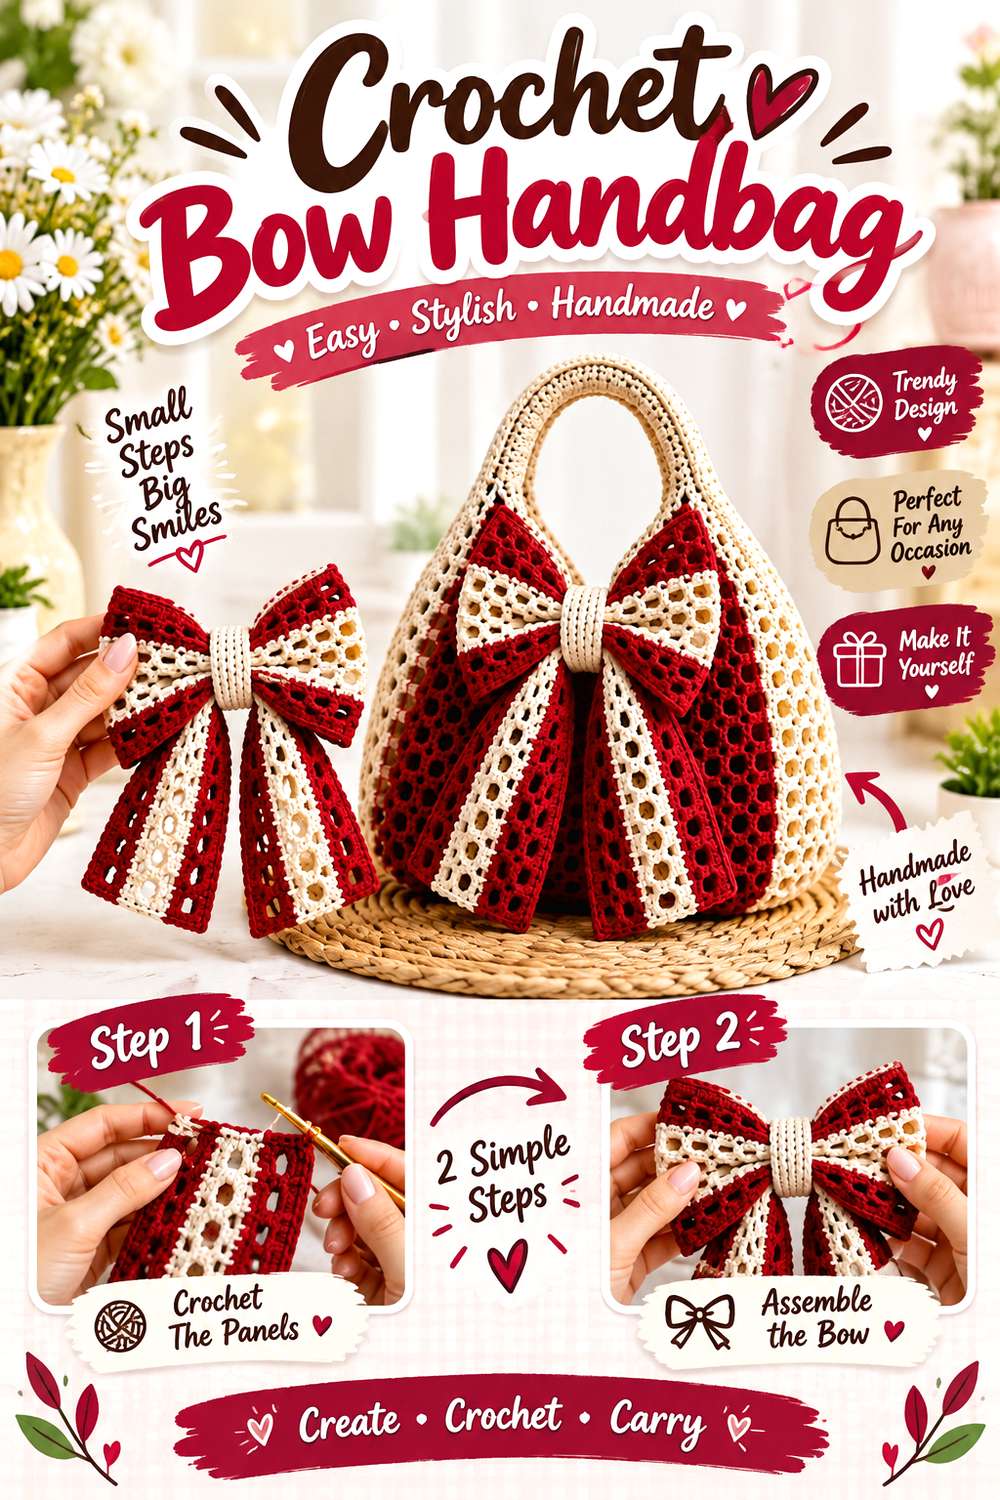
A bow immediately creates a focal point because the bag is no longer read as a plain container with decoration added somewhere else. The bow changes the front silhouette and gives the accessory a recognizable motif from a distance.
Knitting Home’s tutorial teaches a crochet handbag with a bow incorporated into the design and an openwork crochet surface. That combination makes it a useful Glamoratti base when you want the bag itself to supply the outfit’s decorative flourish rather than relying on multiple smaller accessories.
Because the source already has a prominent bow, the safest adaptation is often restraint elsewhere. A bold color or more formal styling can shift its mood without making the bow physically larger. If you substantially change the bow proportions, you would also need to consider how the extra crochet affects the front of the bag.
Make the Bow the Single Bag Focal Point
A front bow competes with appliqués, charms, fringe, and elaborate strap treatments if all are used together. Decide which detail should be noticed first.
For a cleaner maximalist result, let the bow dominate and use any additional decoration in smaller amounts. The goal is strong emphasis, not equal emphasis everywhere.
Inspect What the Openwork Means for Contents
The source describes an openwork crochet pattern. Visible gaps can matter if you plan to carry small loose items.
A lining could be considered as a separate adaptation, but do not assume the tutorial includes one. Adding a lining also introduces extra finishing around the opening and should be planned around the actual completed bag.
Creator: Knitting Home
14. Crochet Ruffle Scarf
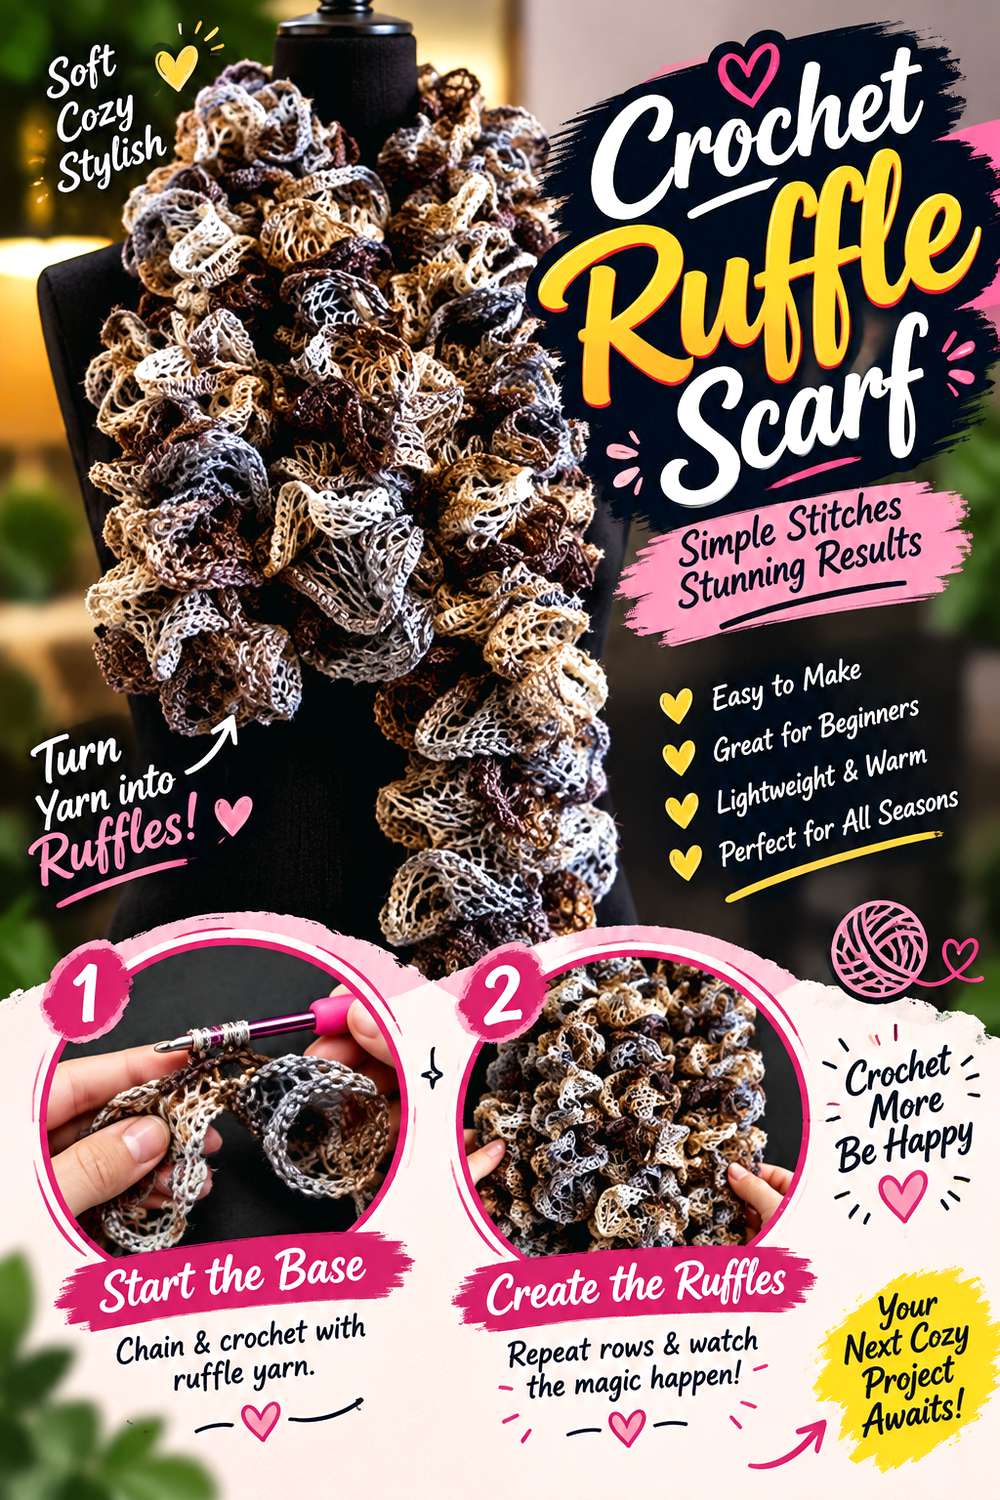
The ruffle scarf is the most movement-focused option in the collection. Instead of relying on a flat color field or a rigid outline, it creates repeated folds and waves that change as the scarf hangs. That makes it especially effective against the straight edges of a blazer or coat.
Crafts & Jewelry with Yvette teaches two ways to crochet a ruffle scarf, with one version presented as more beginner-oriented and another as more advanced. The tutorial covers how to start, work, and finish the scarf rather than showing only a completed example.
For Glamoratti styling, the ruffle itself can provide the maximalist element. There is little need to add several other textural treatments around the neck. The practical choice is how much of the scarf you expose: fully visible over a simple top, or partially contained within the lines of tailored outerwear.
Contrast Ruffles With Straight Tailoring
Ruffles become easier to read when placed next to a clean edge. A plain lapel, straight coat front, or simple dress neckline gives the scarf space to show its movement.
If the garment already has ruffles, fringe, or a busy print near the collar, the two surfaces can merge visually rather than supporting each other.
Choose Between the Two Tutorial Approaches First
Because the source presents two methods, compare them before deciding on additional styling changes. The more advanced option should not automatically be considered the better Glamoratti choice; what matters is the finished amount of texture you want.
Select the construction that suits the intended look, then make color or outfit changes around it.
Creator: Crafts & Jewelry with Yvette
Conclusion
For the strongest waist emphasis, start with the Crochet Buckled Belt. If you want a compact accessory that works beside tailoring, the Crochet Structured Clutch Bag and Crochet Metal-Clasp Baguette Bag put shape and hardware at the center. The Crochet Chunky Cowl, Crochet Top-Knot Headband, and Crochet Ruffle Scarf are better choices when volume around the face is the main goal, while the Crochet Flower Brooch and Crochet Ruffled Scrunchie offer smaller points of emphasis.
The key is to make one accessory visibly intentional rather than making every element compete. Use the original tutorials for exact construction details, then treat color, placement, scale, and outfit coordination as separate styling decisions.
Frequently Asked Questions
Does a Glamoratti crochet accessory have to use metallic or gold yarn?
No. Pinterest associates the trend with bold, gold-toned jewelry, but that does not mean crochet has to imitate metal literally. Shape can communicate the aesthetic just as effectively. A wide buckled belt, structured clutch, pronounced knot, or highly ruffled scarf can create the necessary visual emphasis in a nonmetallic fiber.
If you do substitute a specialty metallic yarn, swatch first. Its flexibility and surface behavior may differ from the material used in the tutorial.
Which projects work most naturally with an oversized blazer?
The Crochet Buckled Belt can change the blazer’s waist line, while the Crochet Flower Brooch adds one concentrated lapel accent. The Crochet Skinny Scarf works between open lapels without adding much bulk, and the two compact bags keep their silhouettes visible beside roomy tailoring.
For a blazer with an already dramatic collar or shoulders, the quieter accessories may be easier to balance than adding a large cowl and several other statement pieces simultaneously.
Can I simply make the crochet accessories larger for a more maximalist look?
Sometimes, but enlarging is not always cosmetic. A larger brooch puts more demand on its clasp, a wider belt has to remain compatible with its buckle, and changing a bag’s dimensions can affect the opening and closure.
Try increasing visual impact first through placement or color. If scale is still the feature you want to change, identify every structural part affected before altering the construction.
How can I keep the finished look bold without making it feel crowded?
Choose a hierarchy. Decide which accessory should be noticed first, then allow the others to support it. A bow handbag may need only simple earrings; a broad belt can carry the outfit while a narrow scarf supplies a smaller vertical accent.
Repeating one relationship—such as similar hardware, related colors, or a consistent amount of contrast—can also make several strong pieces feel connected rather than unrelated.
Which ideas are easiest to test against an outfit before making major changes?
The belt, brooch, scarves, cowl, and head accessories are especially easy to compare against the clothing they will accompany. Hold a developing piece against the jacket or dress, or use a paper outline to approximate a larger proposed scale.
That check helps answer a styling question before you alter the crochet itself: whether the outfit actually needs more width, length, or volume, or simply a different placement.