Vintage-inspired crochet can mean very different things depending on which decade or household tradition you want to reference. A close-fitting 1920s cloche has little in common with a colorful 1970s granny vest, while a lace collar, framed coin-purse shape, tea cozy, flower potholder, ripple blanket, and doily each evoke their own kind of nostalgia. The most convincing collection therefore comes from mixing recognizable forms rather than applying one “retro” palette to everything.
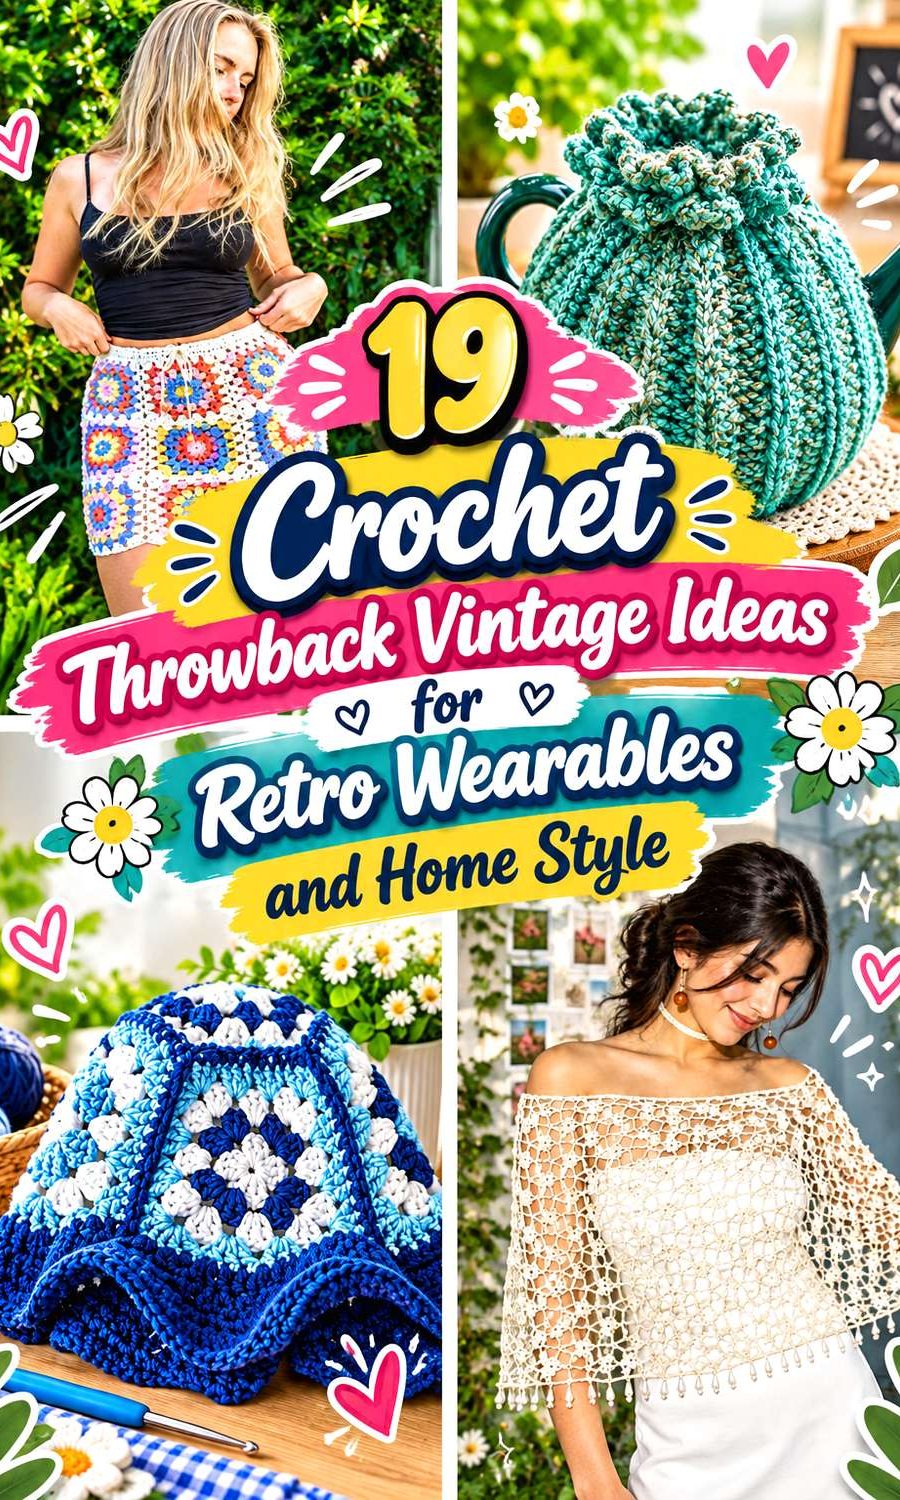
These 19 ideas range from clothing and accessories to soft furnishings and small household pieces. Some tutorials explicitly describe themselves as vintage or decade-inspired; others teach long-established crochet forms that work naturally within a throwback collection. The useful choice is whether you want vintage influence to come from silhouette, lace, granny-square construction, floral motifs, household tradition, or repeated colorwork. Choosing that first makes it much easier to build a collection that feels collected over time rather than copied from one decade.
Quick List
- Crochet 1920s-Inspired Cloche Hat
- Crochet 1970s Granny Square Vest
- Crochet 1950s Hair Scarf
- Crochet Peter Pan Collar
- Crochet Lace Fingerless Gloves
- Crochet Vintage Shawl
- Crochet Granny Square Skirt
- Crochet Retro Daisy Round Bag
- Crochet Granny Square Cardigan
- Crochet Classic Granny Blanket
- Crochet Ripple Throw Blanket
- Crochet Granny Square Pillow
- Crochet Tissue Box Cover
- Crochet Ribbed Tea Cozy
- Crochet Vintage Flower Potholder
- Crochet Lace Doily
- Crochet Granny Square Slippers
- Crochet Granny Square Bucket Hat
- Crochet Fringed Vintage-Style Poncho
Choose the Era Through Shape, Not Just Color
A mustard, rust, avocado, or cream palette can suggest a particular decade, but color cannot carry the entire vintage effect. The cloche works because of its fitted crown and decorative band. The hair scarf gets its throwback character from the narrow tied shape. Granny-square garments depend on modular crochet being plainly visible, while the flower potholder and doily reference an older household-crochet tradition through their construction and form.
This matters when you want several projects to coexist. A cloche, lace collar, and shawl can produce a much earlier-looking wardrobe than a bucket hat, granny skirt, and fringed poncho even if all six use similar colors.
Rather than committing to a strict historical recreation, decide whether you prefer polished early-century shapes, mid-century domestic pieces, or more relaxed 1960s–1970s crochet. You can then mix eras deliberately instead of accidentally making every object compete for the same retro signal.
Balance Granny Crochet With Lace and Household Pieces
Granny squares are one of the easiest ways to create an obvious throwback mood, but using them for every project can flatten the collection. The vest, skirt, cardigan, blanket, pillow, slippers, and bucket hat already provide plenty of modular texture. Breaking them up with a smooth cloche, delicate collar, lacy gloves, ripple blanket, tea cozy, and doily gives each technique a clearer role.
Scale also changes the effect. A granny-square cardigan makes the motif part of the entire outfit, while slippers restrict it to the feet. A granny pillow adds one retro accent to a room; a blanket spreads the motif across a much larger surface.
If you intend to make several pieces, start with one large statement project and add smaller contrasts. A granny cardigan paired with a hair scarf feels more varied than a cardigan, vest, skirt, and hat all built from nearly identical squares.
1. Crochet 1920s-Inspired Cloche Hat

A close-fitting cloche immediately changes the outline around the head, which is why it carries vintage character more strongly than a generic beanie. Stringsandthreads explicitly presents this tutorial as a 1920s-inspired cloche and demonstrates the crown shaping along with a decorative flower band. The finished concept keeps the brim relatively controlled instead of turning into a broad modern sunhat.
That makes this project useful when you want the throwback reference to come from silhouette rather than multicolor motifs. The hat sits close enough to the face that the relationship between crown, brim, and flower treatment becomes more important than adding extra decoration.
Consider what hairstyle and outerwear you expect to wear with it. A fitted cloche occupies a very different visual space from the relaxed bucket hat later in this collection, so the two communicate separate decades even before color enters the picture.
Let the Crown Shape Establish the Era
The cloche effect depends on the hat sitting in the way the tutorial intends. Follow the creator’s shaping rather than lengthening the crown casually for a slouchier fit, because that would move the silhouette away from the feature that makes this project distinctive.
Try the developing hat with the hairstyle you normally wear. Hair volume beneath the crown can change where the brim appears to sit, especially around the forehead and ears.
Keep the Flower Band Proportionate
The decorative flowers already provide a focal area around the hat. Adding a large brooch, ribbon, and several additional blooms may obscure the clean cloche outline.
Look at the completed crown first, then decide whether you want the flower detail to read as a small accent or the principal decoration. A restrained band can make the vintage silhouette easier to notice.
Creator: Stringsandthreads
2. Crochet 1970s Granny Square Vest
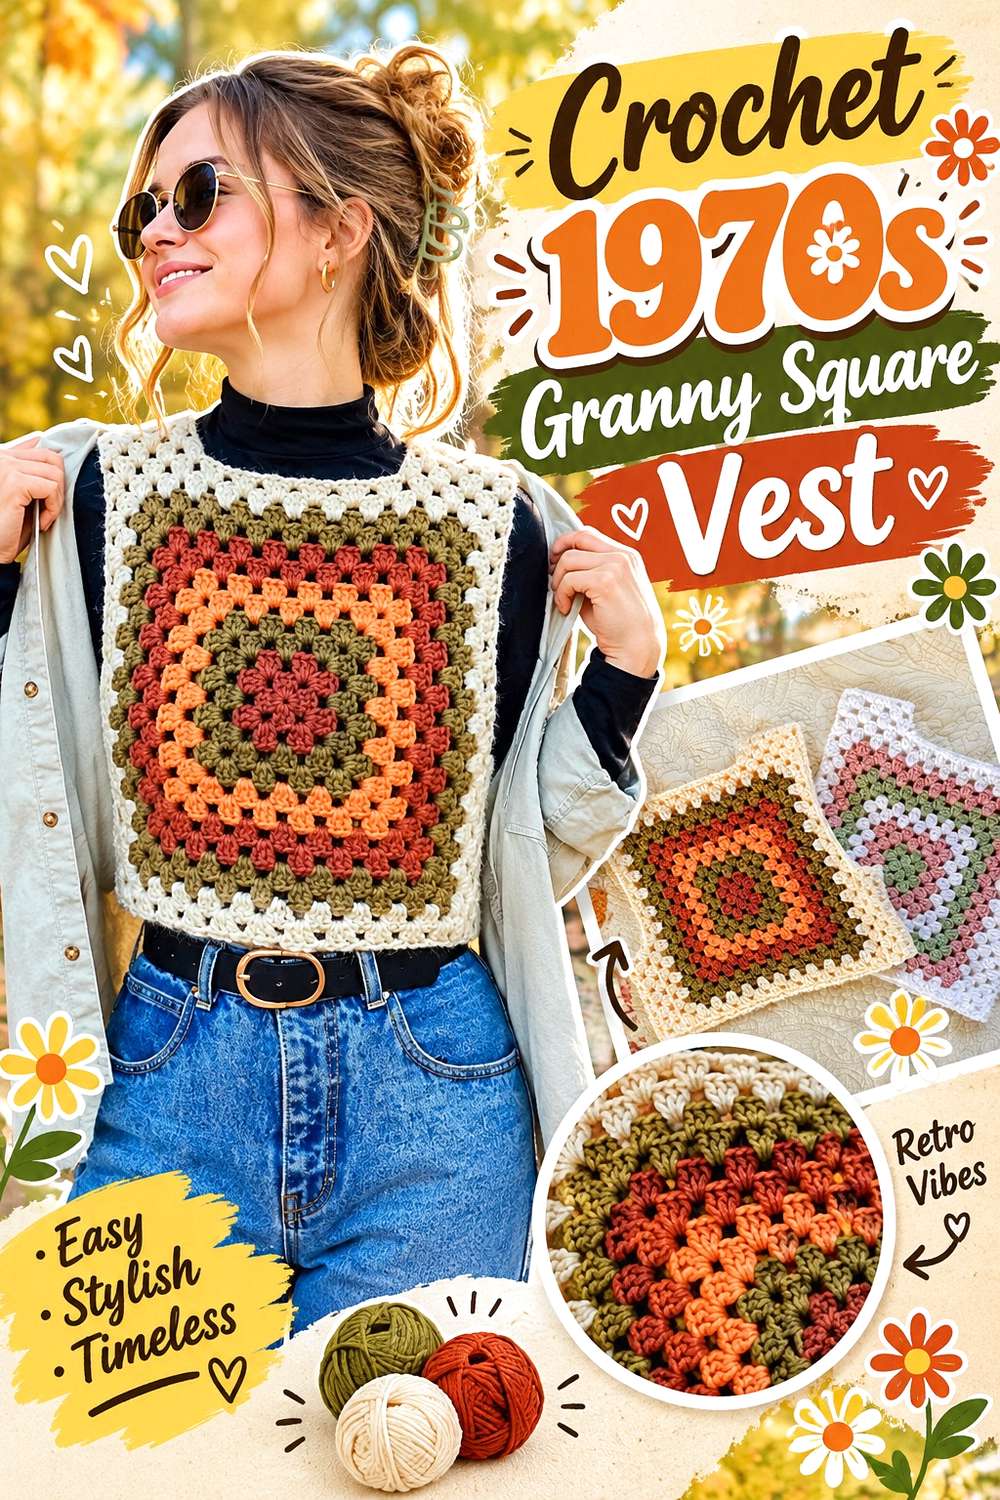
Hayhay Crochet specifically describes this design as a 70s granny-square vest. Rather than joining many small motifs, the project grows large granny-square panels that become the front and back, with additional crochet forming the straps and sides. The accompanying pattern provides guidance across sizes XS through 5XL and encourages checking the developing square against the wearer’s proportions.
That large-square construction makes the vest look different from a patchwork cardigan. The eye sees broad radiating bands rather than a grid of small motifs, which gives the piece a bold retro identity even when only a few colors are used.
This is an especially effective throwback project if you want crochet to be the main feature of an outfit. Because the square covers so much of the torso, consider how your color sequence will look at full scale before choosing several equally strong shades.
Judge the Main Square Against the Shoulders
The creator’s fit guidance uses the developing square itself as an important checkpoint. That matters because the square influences both vest width and the placement of the later side sections.
Do not rely only on a labeled clothing size. Holding the panel against the intended wearer gives you a clearer idea of whether its proportions produce the broad retro vest shape you want.
Let One Large Motif Do the Work
A giant granny square is already visually busy. If you pair the vest with a granny skirt, granny bag, and granny hat in similar colors, the individual construction can become harder to appreciate.
Try combining it with quieter pieces such as a solid hair scarf or lace gloves. The vest then becomes the obvious 1970s statement instead of one motif among many.
Creator: Hayhay Crochet
3. Crochet 1950s Hair Scarf

Selina Veronique Crochet explicitly describes this hair scarf as inspired by the 1950s. The narrow crocheted strip is designed as a hair ribbon-style accessory rather than a broad bandana, so much of the vintage effect comes from the way the ends tie and remain visible around the hairstyle.
This is one of the smaller projects in the collection, which makes it useful when you want a throwback detail without building an entire outfit around crochet. Worn with a plain blouse, cardigan, or dress, the scarf can establish the direction through shape alone.
Because the accessory is narrow, stitch texture remains noticeable at close range without creating much bulk around the head. Its styling also leaves most of the hair visible, unlike the cloche or bucket hat.
Decide Where the Bow or Tails Should Sit
The same scarf can look quite different tied at the top, side, or beneath the hair. Try several arrangements before deciding that the crocheted length needs changing.
If you want a clearer 1950s-style ribbon effect, keep enough of the ends visible for the tie to become part of the silhouette rather than disappearing entirely beneath loose hair.
Use It When the Outfit Is Already Detailed
A narrow hair scarf occupies little visual space, so it pairs more easily with a lace collar or patterned dress than a full crocheted hat might.
That makes it useful for balancing the collection. When another garment already provides strong texture, the hair scarf can repeat the handmade element without covering a second large area of the body.
Creator: Selina Veronique Crochet
4. Crochet Peter Pan Collar
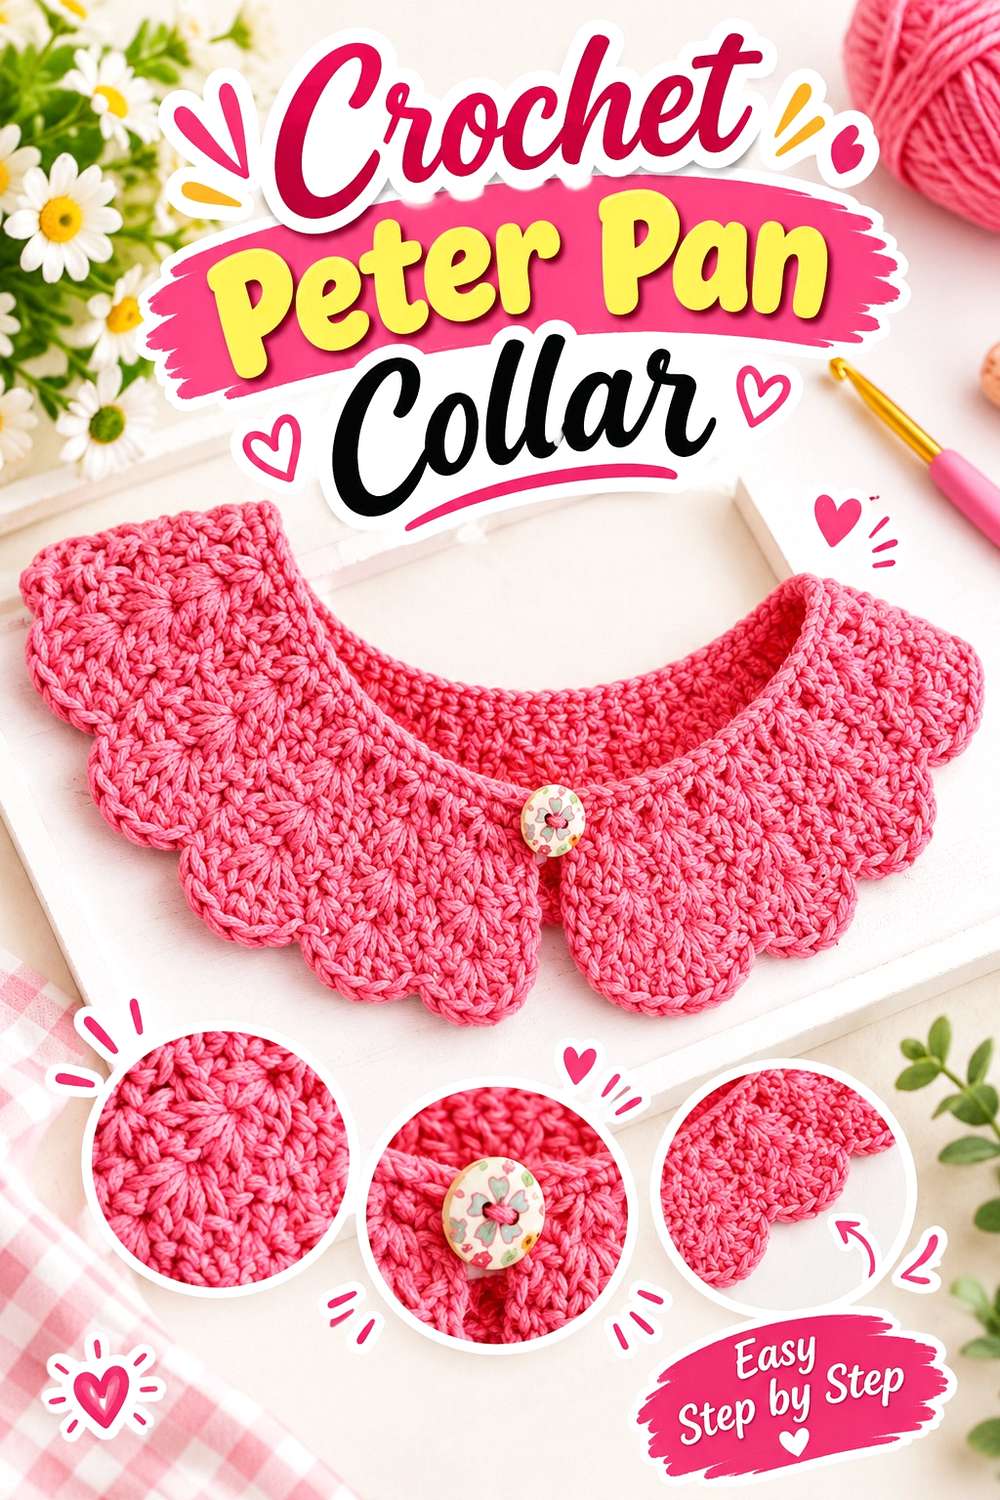
A detachable Peter Pan collar is a compact way to change an ordinary neckline. Ahuyama Crochet teaches a rounded crochet collar intended to be layered over sweaters, blouses, or T-shirts, with the tutorial presented for multiple sizes rather than one fixed neckline.
The rounded lobes give this project a distinctly different vintage language from granny squares. Instead of relying on strong color blocks, the collar creates its effect through a neat curved outline surrounding the neck.
That makes it particularly useful if you want throwback style that can move between garments. A single collar can visually transform a plain top without requiring a full crocheted blouse. The main choice is how clearly you want the collar to contrast with the garment underneath; low contrast emphasizes texture, while stronger contrast emphasizes the rounded shape.
Compare the Collar With the Actual Neckline
A collar cannot be judged in isolation because the garment opening remains visible beneath or inside it. Try the finished piece over the tops you expect to wear most often.
A high crew neck, cardigan, and wider blouse opening will each show the crochet differently. The best pairing is the one that preserves both rounded sides rather than hiding part of the collar.
Avoid Crowding the Neck Area
A Peter Pan collar already frames the face. Adding a large shawl, choker, brooch, and neck scarf immediately around it can obscure the distinctive shape.
If you want a second vintage accessory, move it elsewhere. Lace gloves or a framed purse can support the look without competing for the same few inches around the neckline.
Creator: Ahuyama Crochet
5. Crochet Lace Fingerless Gloves
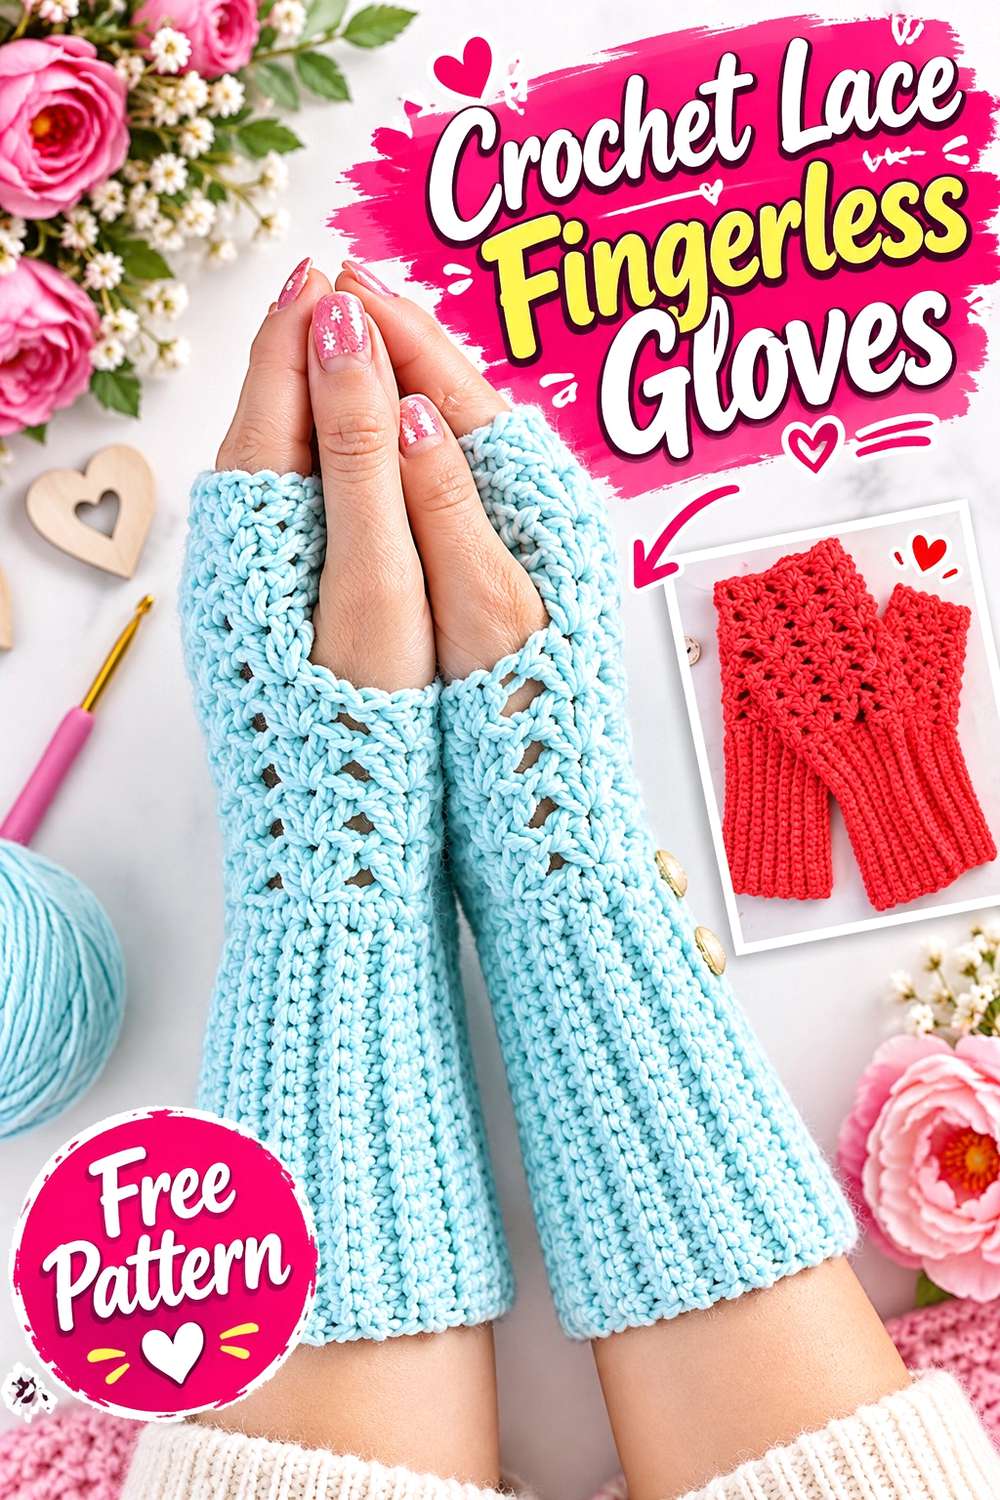
TREASURIE’s lace glove pattern combines open crochet with a ribbed wrist section, creating a pair of fingerless gloves that can support a softer, dressier vintage look. The written companion uses US terminology and documents the wrist ribbing and lacy hand construction shown in the video.
Compared with a broad shawl or vest, these gloves concentrate the vintage detail at the hands. That makes them especially useful with long sleeves, where only the wrist and hand section needs to be visible.
The fingerless format also keeps the silhouette lighter than a full glove. Instead of covering the entire hand, the crochet acts almost like extended lace cuffs. Consider that distinction when planning an outfit: they can complement a simple sleeve, but pairing them directly with another elaborate cuff may create too many competing edges.
Check Wrist Fit Before Extending the Hand
The ribbed wrist is the anchor of the piece. Establishing that fit first helps keep the glove from feeling visually loose even though the hand fabric is lacy.
If you change the wrist substantially, remember that the transition into the hand will also be affected. Follow the creator’s construction before making proportion changes based only on appearance.
Let Openwork Provide the Decoration
The lace surface already gives the gloves a delicate finish. Extra bows or flowers are not necessary to make them feel vintage.
If you want additional jewelry, compare it with the crochet first. A bracelet placed directly over the ribbing may hide the very feature that gives the gloves their structured lower edge.
Creator: TREASURIE
6. Crochet Vintage Shawl
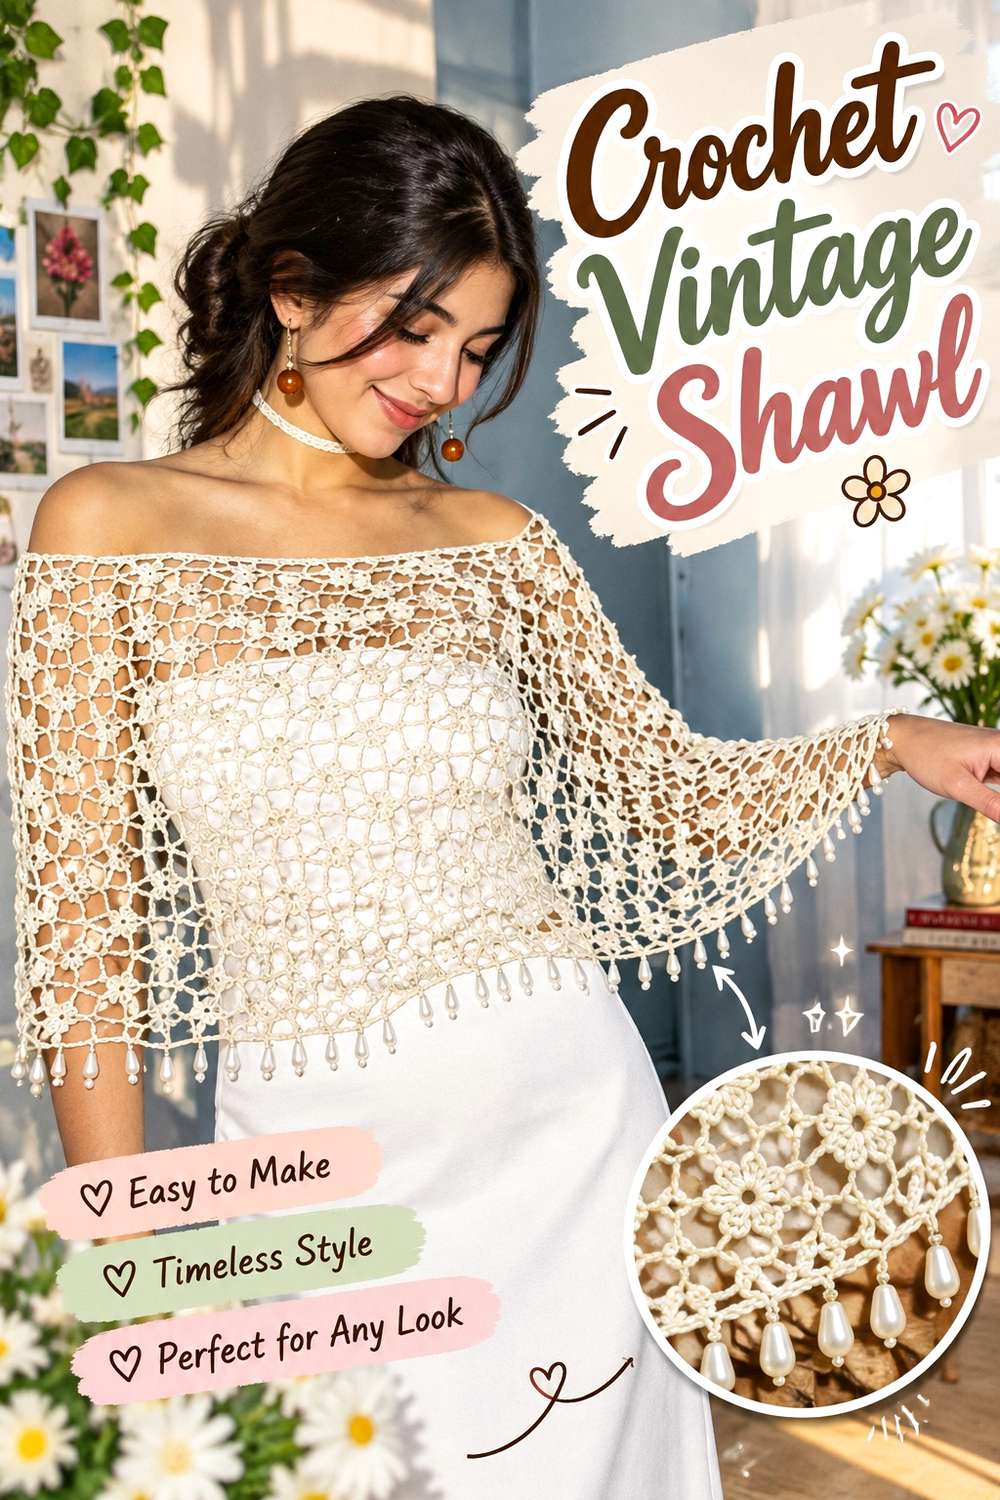
Matre Crochê presents this project specifically as a vintage crochet shawl and provides a step-by-step tutorial for the finished wrap. Unlike the collar and gloves, a shawl creates a much larger field of crochet across the shoulders and upper body, making it a stronger styling commitment.
That larger surface is precisely what gives a shawl its throwback appeal. It can soften a plain dress, blouse, or coat without requiring a full crocheted garment underneath. The draped outline also separates it from the later poncho, which is constructed and worn as a more fixed body layer.
When planning a vintage outfit, decide whether you want the shawl to frame the clothing or conceal much of it. A highly detailed dress may work better with a lighter arrangement, while simple garments leave more room for the crochet to become the central texture.
Think About Drape Before Adding Closures
A shawl gains much of its character from how the fabric falls. Pinning or tying it tightly can create a different shape from wearing it open across the shoulders.
Try the completed wrap in several positions before adding any optional brooch or closure of your own. A styling solution may give enough control without permanently changing the project.
Give the Shawl a Simpler Background
Because the crochet covers a broad area, a busy blouse or strongly patterned dress can compete with it.
A relatively plain neckline allows the shawl’s texture and edge to remain visible. If you prefer pattern mixing, keep one element quieter so the layered vintage effect remains readable rather than becoming a single dense surface.
Creator: Matre Crochê
7. Crochet Granny Square Skirt
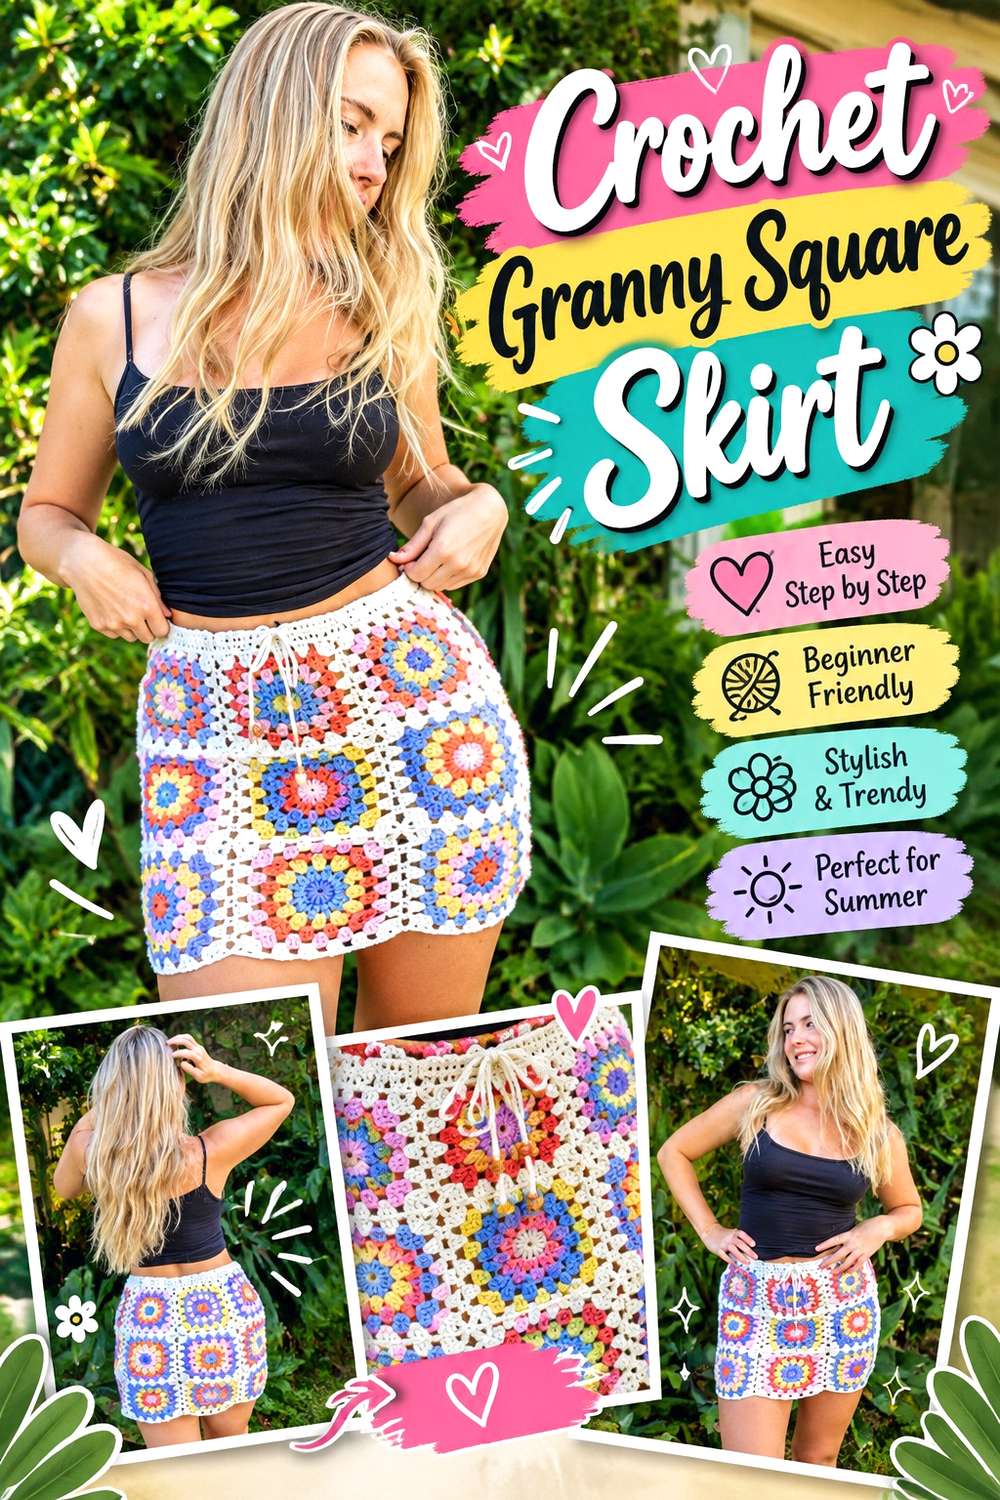
Bronte B’s tutorial provides a full step-by-step guide to constructing a granny-square skirt. This project takes a familiar retro motif and places it across the lower body, creating a very different effect from a vest or cardigan even though the underlying visual language is related.
The skirt is most useful when you want a strong 1960s–1970s influence without wearing crochet from shoulder to ankle. Each square contributes to the garment’s grid, so motif consistency and layout matter before assembly.
Because this is a fitted wearable rather than a blanket, finished square size has consequences beyond appearance. The arrangement has to relate to the wearer’s body rather than simply becoming larger whenever another motif is added. Follow the creator’s project construction and treat major sizing changes as garment decisions, not just color-layout changes.
Plan the Motif Layout Before Joining
Once several squares are available, arrange them in the intended sequence before sewing or crocheting them together. This lets you identify where repeated colors or dominant centers are collecting.
A balanced layout does not have to be perfectly symmetrical, but it should look deliberate around the front, sides, and back rather than only when viewed flat on a table.
Let the Skirt Carry the Retro Pattern
A full granny-square skirt provides a large amount of modular texture. Pairing it with a simpler top can make the construction easier to appreciate.
If you also want a crochet accessory, the narrow 1950s Hair Scarf or Lace Fingerless Gloves provides separation between motifs instead of extending the same square pattern from waist to head.
Creator: Bronte B
8. Crochet Retro Daisy Round Bag
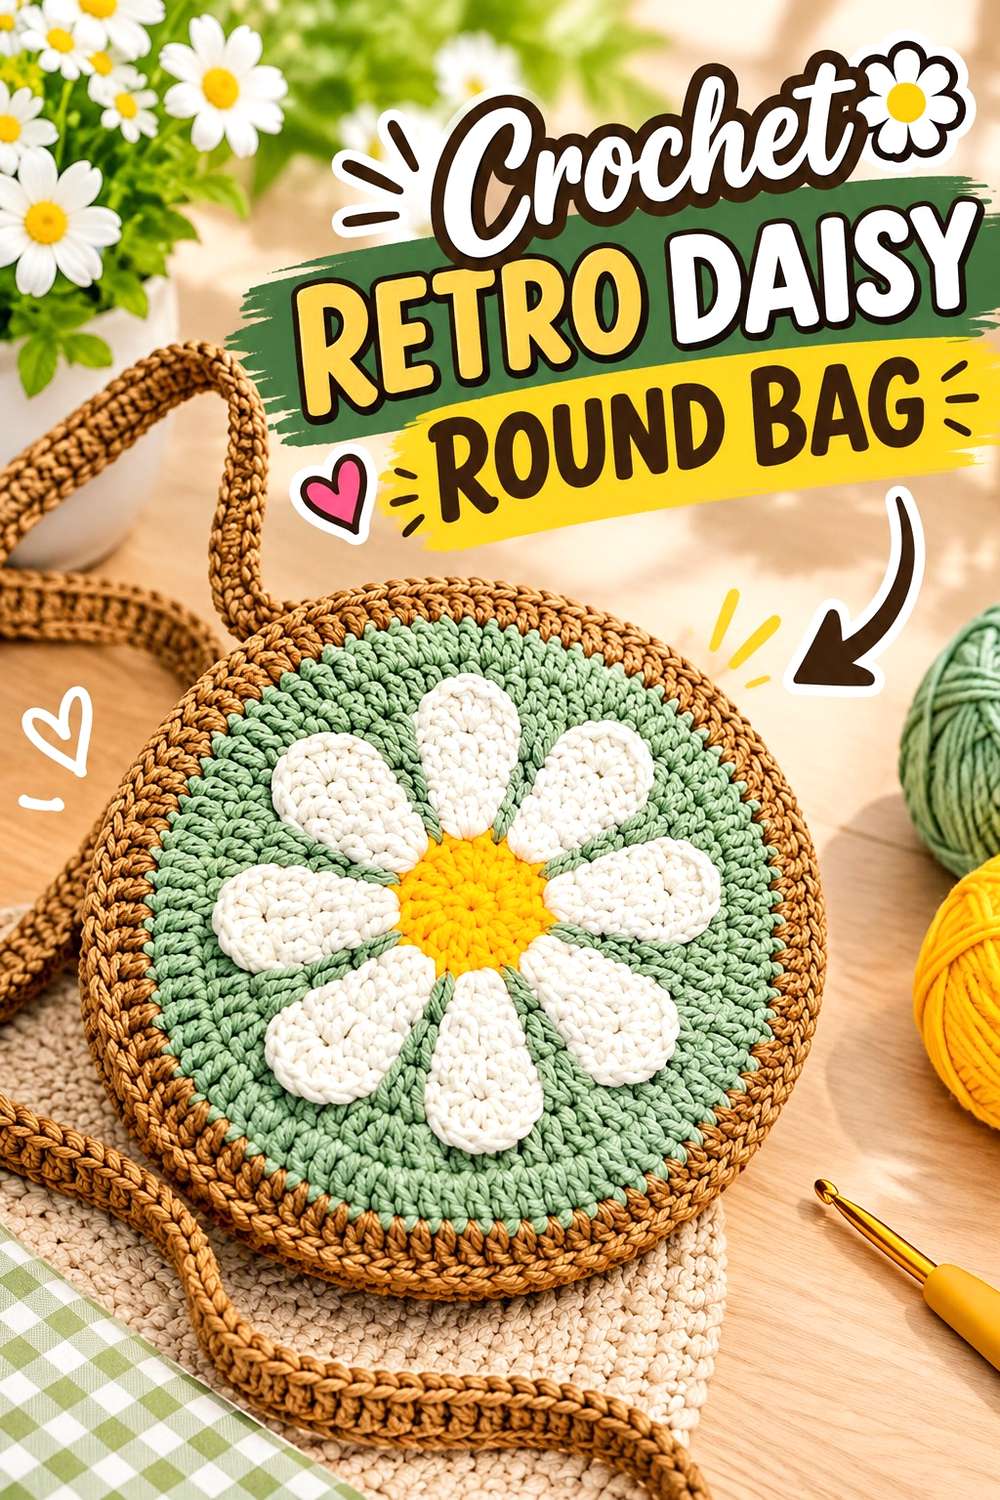
Crochet Musings explicitly presents this as a Retro Daisy Granny Square Round sling bag. The tutorial covers the bag assembly and points viewers to the creator’s linked daisy-square, non-stretch strap, and optional lining tutorials needed for those specific components. The design uses two circularized granny-style sides, a fastening, and a shoulder strap.
The floral motif makes this bag distinct from a conventional square granny purse. Its round body gives the repeated daisy construction a 1970s-style accessory shape without requiring a large garment.
The tutorial also makes lining a meaningful choice. If you intend to carry small objects, consider how open the crocheted fabric becomes when stretched and whether the separately demonstrated lining suits your use. The visible flower layout can remain the decorative focus either way.
Give the Round Shape Enough Room
A circular bag can look surprisingly different once worn against the hip because part of its outline is hidden by the body.
Check strap length with the finished bag rather than only measuring the strap separately. The location where the circle lands affects both comfort and how clearly the daisy motif can be seen.
Decide About Lining Before Final Use
A lining changes more than appearance. It adds another finishing stage and can help contain objects that might otherwise work through an open crocheted surface.
The creator provides separate lining guidance, so treat it as an intentional construction option rather than assuming every granny-style bag includes fabric inside automatically.
Creator: Crochet Musings
9. Crochet Granny Square Cardigan
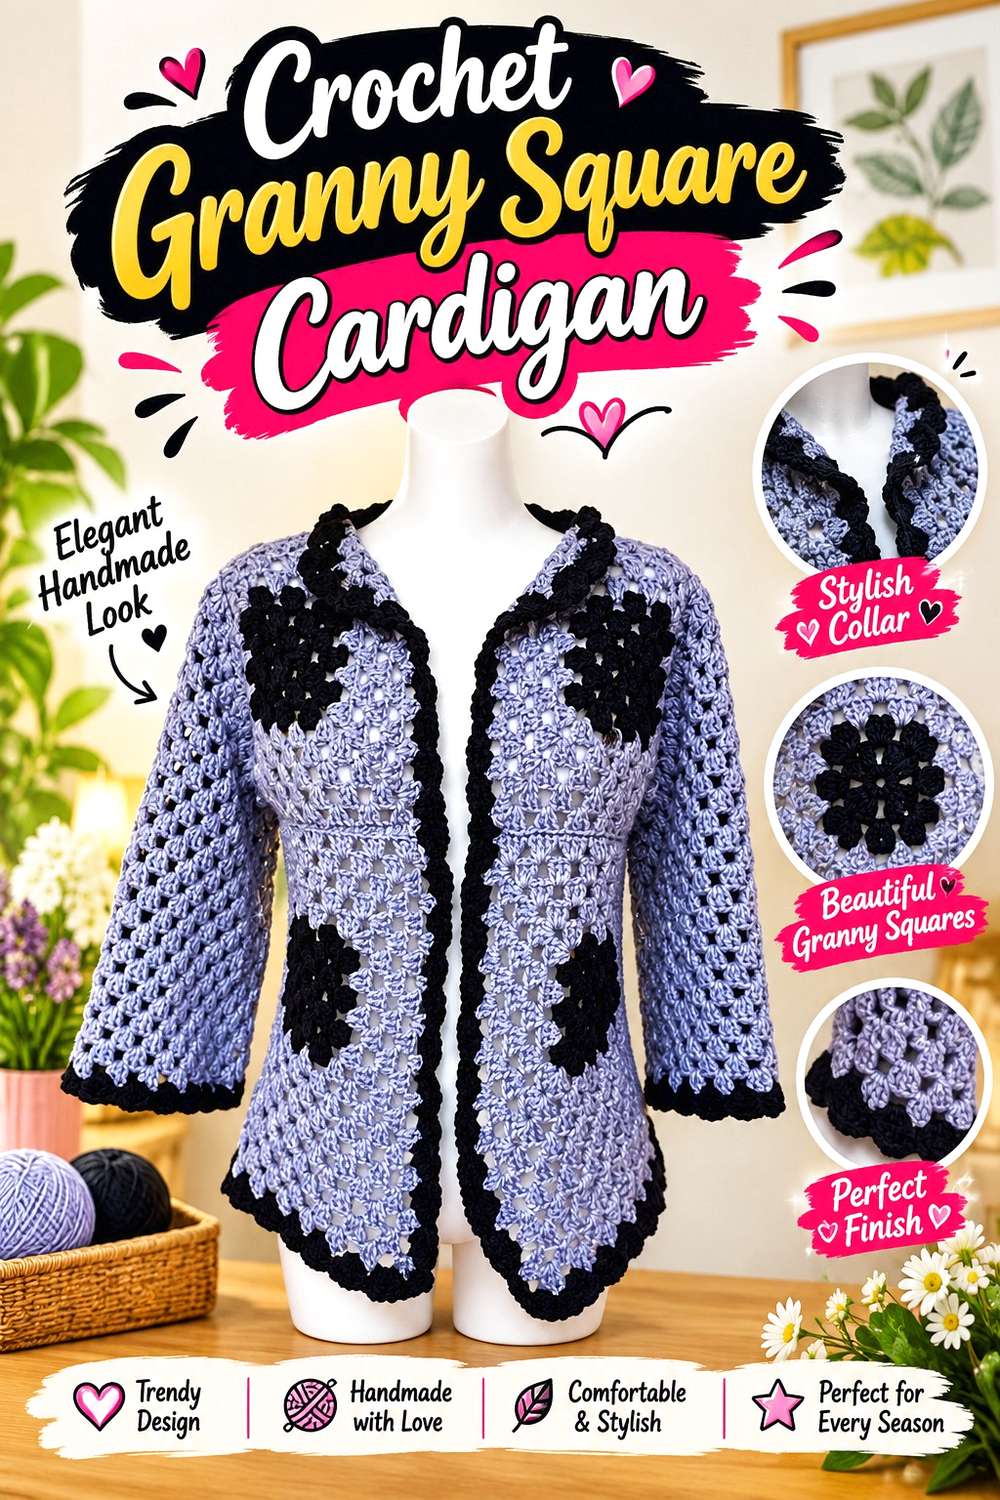
Nati Crochet’s tutorial teaches the construction of a cardigan from granny squares and assumes the viewer already knows how to make the individual square; the video focuses on turning those motifs into the garment. That prerequisite is important if you are choosing this as a first granny-square project.
Visually, a cardigan spreads the throwback motif across the torso and sleeves, creating a much larger patchwork effect than the vest. The open front also changes how the color arrangement is seen because the two sides frame whatever clothing you wear underneath.
This is a useful choice if you already feel comfortable producing consistent squares and want assembly to become the next decision. Before joining, compare finished motifs carefully. Small differences that seem unimportant individually can accumulate across a garment and affect panel alignment.
Check Motif Consistency Before Assembly
Lay several completed squares edge to edge and compare their dimensions. If some are noticeably larger, investigate tension or finishing before building whole cardigan panels.
A garment grid makes inconsistent motifs more visible than a loose stack of squares. Correcting the issue before joining is generally more straightforward than trying to force uneven edges into position later.
Use the Open Front as Part of the Design
The clothing underneath will remain visible, so choose a top that either contrasts clearly with the granny squares or blends quietly behind them.
This makes the cardigan more adaptable than a closed vest in some outfits. You can change the surrounding color story without altering the crochet simply by changing the layer beneath it.
Creator: Nati Crochet
10. Crochet Classic Granny Blanket
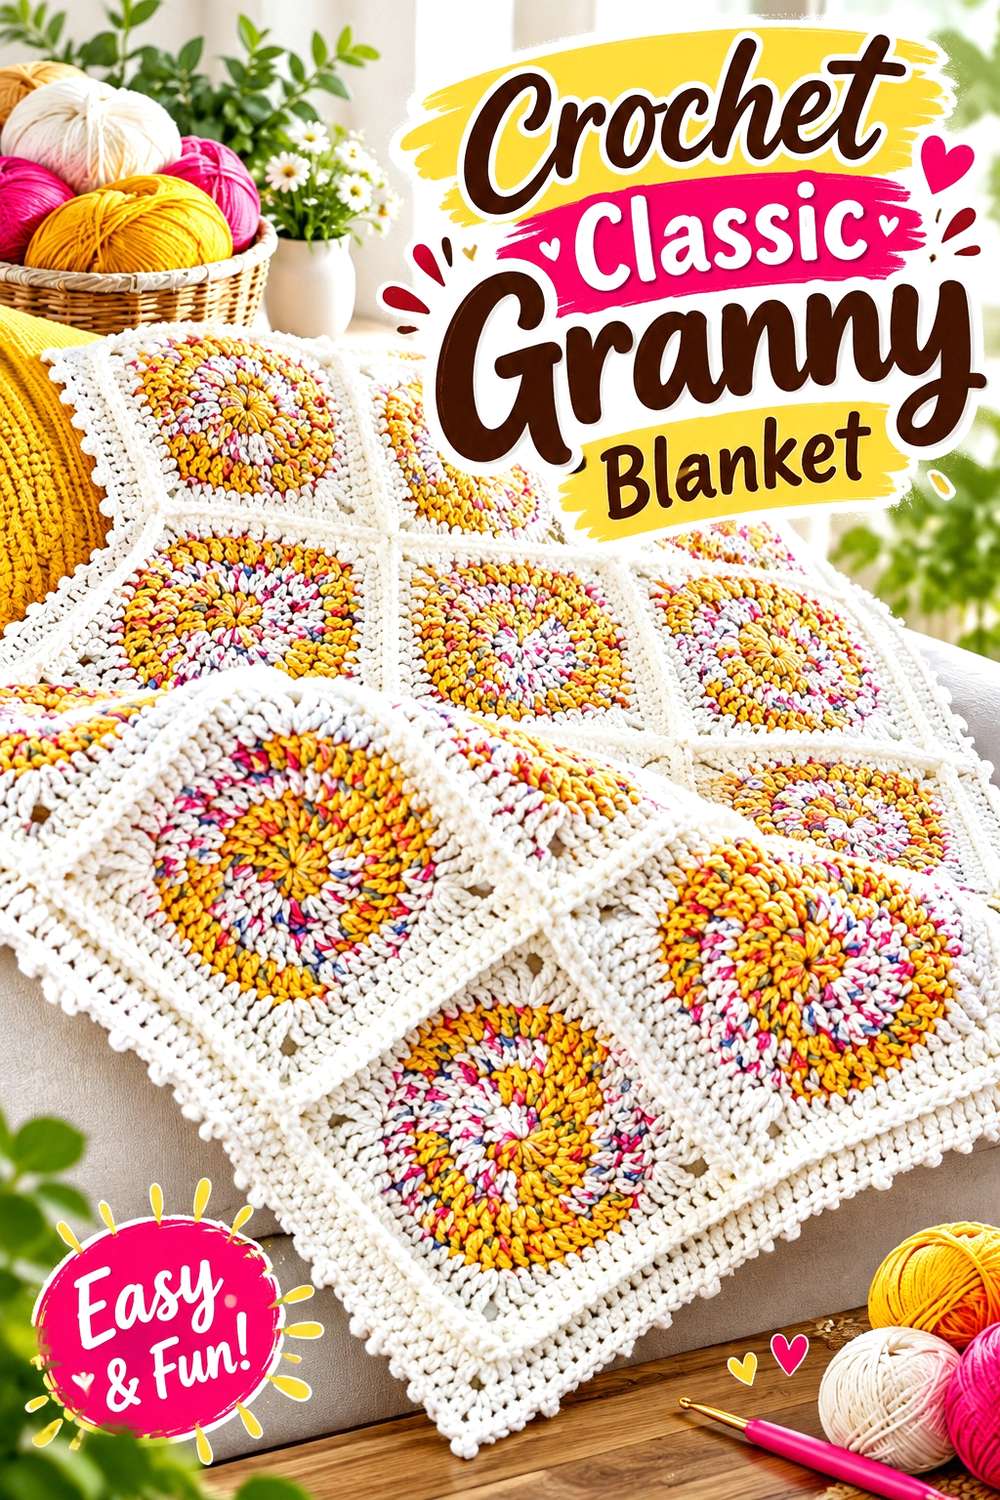
Sirin’s Crochet teaches a granny blanket built from a circular-style granny square motif and joining process. The public tutorial is dedicated to the finished blanket rather than merely demonstrating one isolated square.
A granny blanket is one of the clearest household expressions of throwback crochet because the motif repeats across a large, practical textile. Unlike a cardigan or skirt, there is no need to make the square grid follow body shaping, so layout can become the main aesthetic decision.
Consider whether you want strong multicolor repetition or a more limited palette. The construction itself supplies plenty of vintage character. Restricting the colors can make the blanket easier to use in a contemporary room, while a broader palette pushes it toward a more exuberant retro effect.
Arrange Squares Before Committing to the Join
Spread the finished motifs on a bed or floor and move them around before joining. This lets you see whether similar centers or dominant colors are clustering unintentionally.
Take a photo once you like the arrangement. A reference image makes it easier to preserve the layout as individual squares are picked up and joined.
Choose the Blanket’s Role in the Room
A full granny blanket can be the strongest patterned object in a seating or sleeping area. If you want it to serve that role, surrounding cushions and rugs can be quieter.
If another large patterned textile already dominates the room, folding the blanket so only part of the motif field shows can create a smaller vintage accent without altering the crochet.
Creator: Sirin’s Crochet
11. Crochet Ripple Throw Blanket
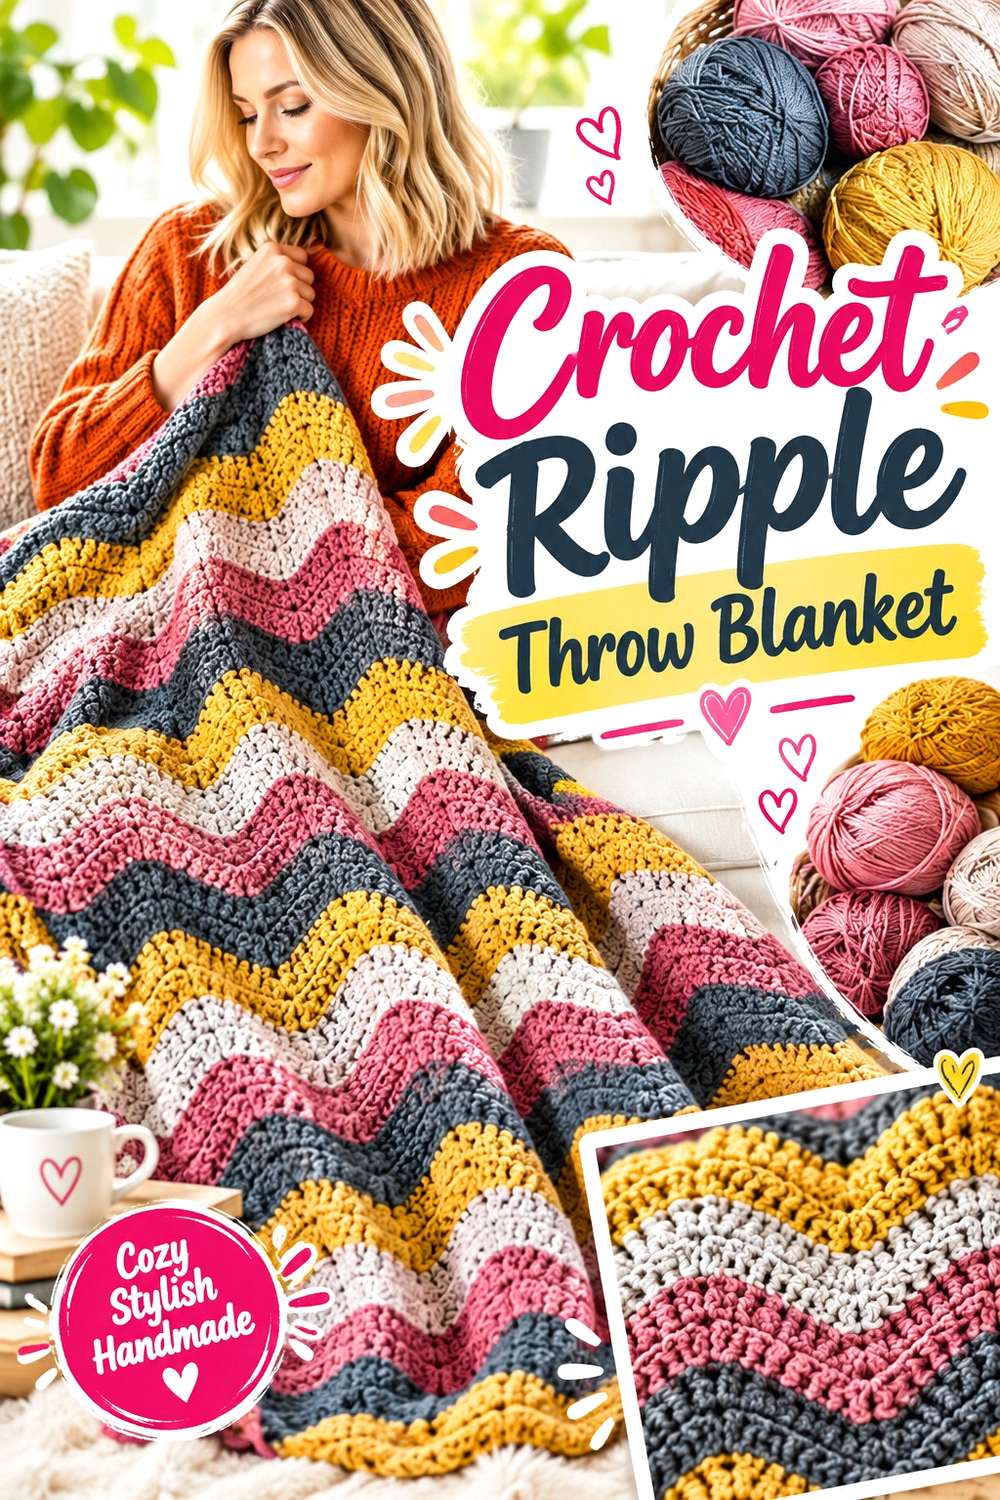
Melanie Ham’s tutorial teaches a complete ripple blanket built from repeated peaks and valleys. The accompanying pattern describes a 65-by-55-inch example and explains the repeat used to adjust blanket width.
The ripple gives a retro room a different kind of pattern from granny squares. Instead of a grid, the eye follows horizontal zigzag bands, making color changes appear more continuous across the blanket.
That distinction is useful if you already have granny-square pillows or other block motifs nearby. A ripple throw can still feel nostalgic while avoiding another patchwork surface. The width repeat also means that resizing should follow the creator’s construction logic rather than adding an arbitrary number of foundation stitches.
Use Color Bands to Control the Strength of the Zigzag
High-contrast stripes emphasize every peak and valley, making the ripple the obvious design feature. Closer colors soften that movement without removing it.
Decide which effect works with your furniture before buying a large quantity of yarn. A throw covering most of a sofa has more visual impact than a small swatch suggests.
Keep the Edges Part of the Plan
A ripple blanket does not produce the same straight upper and lower line as a conventional rectangular stripe blanket. The peaks and valleys are part of its identity.
Consider how that edge will look when the blanket is folded or draped. A loose arrangement often shows the ripple more clearly than folding the entire piece into a tight rectangle.
Creator: Melanie Ham
12. Crochet Granny Square Pillow
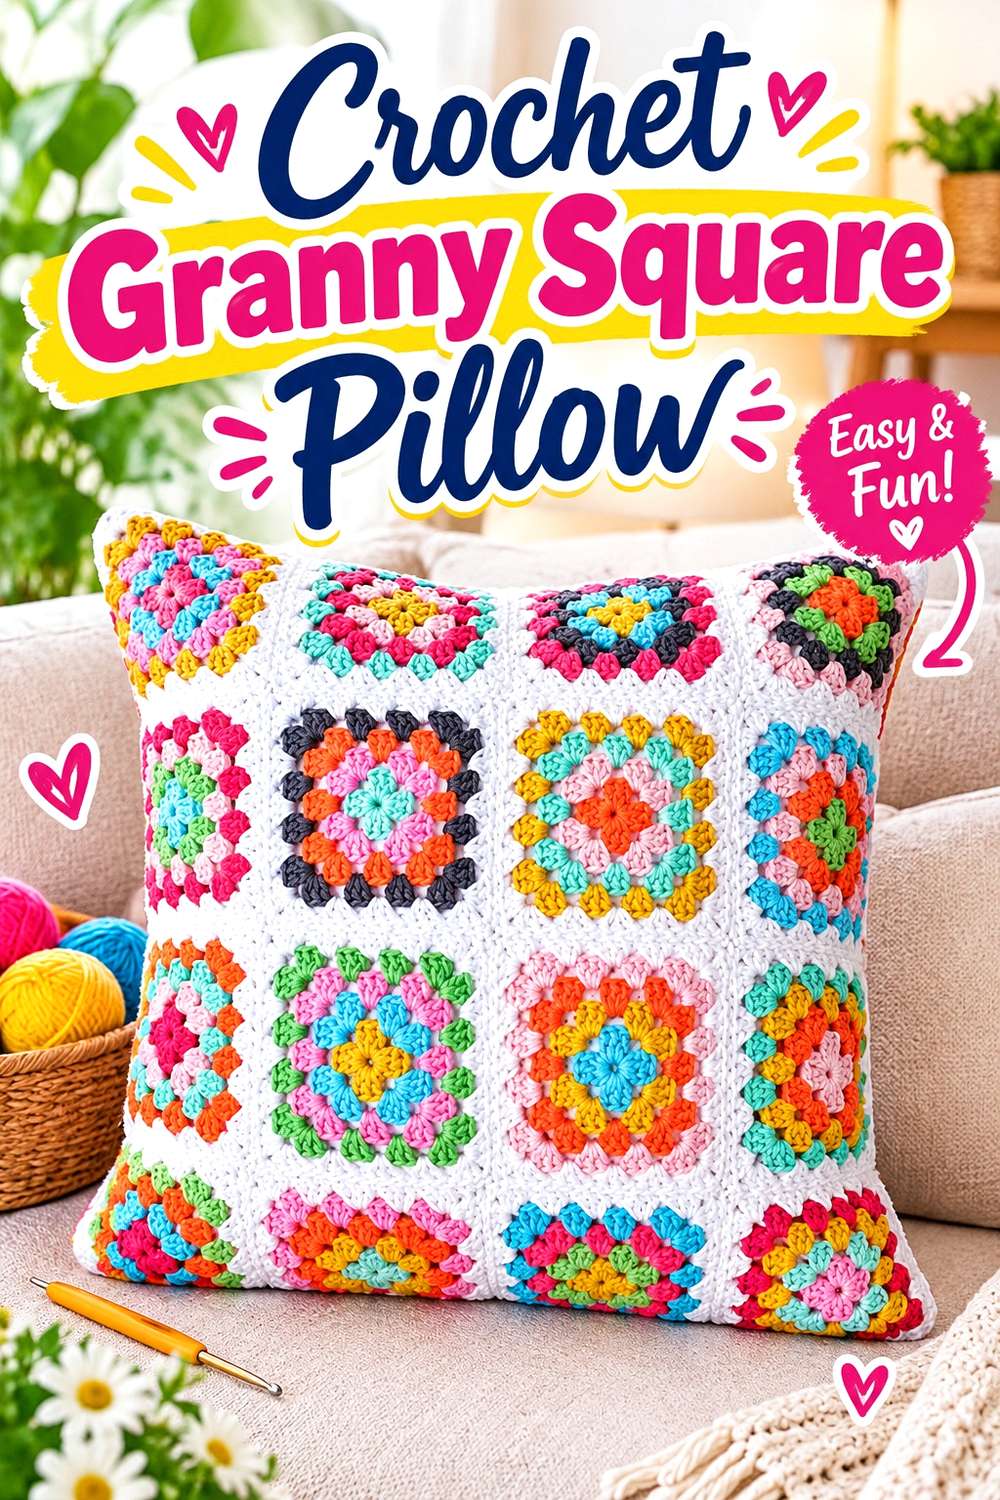
Erica Arndt’s tutorial goes beyond a loose granny-square panel by showing a fully lined pillow with a zipper. The video covers the granny-square pillow construction as well as the fabric finishing needed to turn the crochet into a removable-looking cushion cover.
This makes the project useful for someone who wants a polished retro accent rather than another full blanket. A pillow concentrates granny colorwork into a manageable surface, so it can sit beside quieter upholstery without taking over the room.
The lining and zipper are significant differences from a simple stuffed crochet square. They add sewing and finishing work, but they also change how the pillow functions and how neatly the crocheted surface is supported.
Decide Whether You Want Crochet-Only Finishing
If you specifically want a project made exclusively with yarn and a hook, this tutorial’s lined and zippered approach may involve more mixed-media finishing than you want.
If you appreciate a structured cushion cover, however, the fabric layer becomes part of the appeal. Choose the project knowing that the finishing method is a genuine part of the source construction.
Let One Pillow Carry the Granny Motif
A single bright granny cushion can add substantial retro color to a plain chair. You do not necessarily need a matching set across every seat.
Try one completed pillow in the room first. That gives you a clearer idea of whether another should repeat it or whether a solid cushion would provide better balance.
Creator: Erica Arndt
13. Crochet Tissue Box Cover
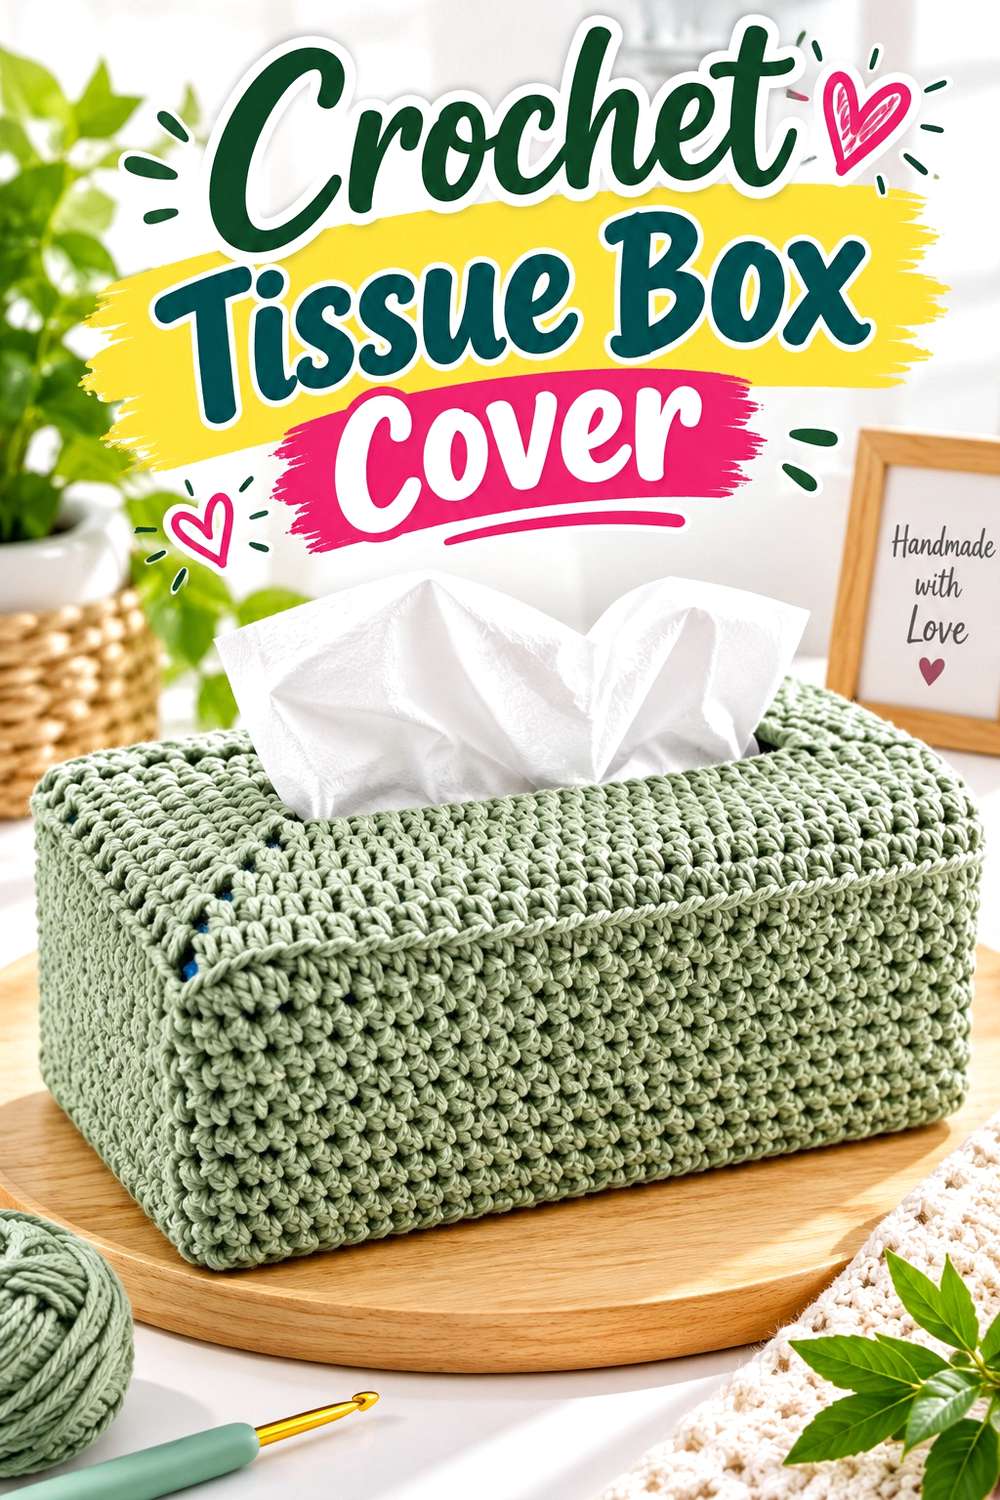
Ophelia Talks Crochet teaches a basic crocheted tissue-box cover built around the rectangular household object beneath it. The creator also points to a separate embellishment video, so the linked source here should be understood as the foundational cover tutorial rather than a fully decorated themed version.
Few objects communicate domestic throwback crochet as directly as a purpose-made cover for something normally left plain. That is precisely why this project can work in a vintage collection even without elaborate flowers or lace.
The useful question is whether you want the crochet to disappear into the room or intentionally look nostalgic. A single restrained color keeps attention on texture, while stripes or added embellishment make the cover a much more obvious decorative object.
Fit the Actual Tissue Box
Commercial tissue boxes do not all have identical proportions. Use the object you intend to cover as the practical reference rather than assuming another box will fit simply because the overall shape looks similar.
Check the top opening as well as the sides. A cover that shifts or partially obscures access will be less convenient regardless of how neat the crochet looks.
Decide How Far to Take the Decoration
The basic cover gives you a useful stopping point. You can leave it relatively plain or explore the creator’s separate embellishment material.
If the surrounding room already contains floral potholders, granny cushions, or patterned blankets, the simpler cover may provide more balance than turning another small object into a dense motif display.
Creator: Ophelia Talks Crochet
14. Crochet Ribbed Tea Cozy
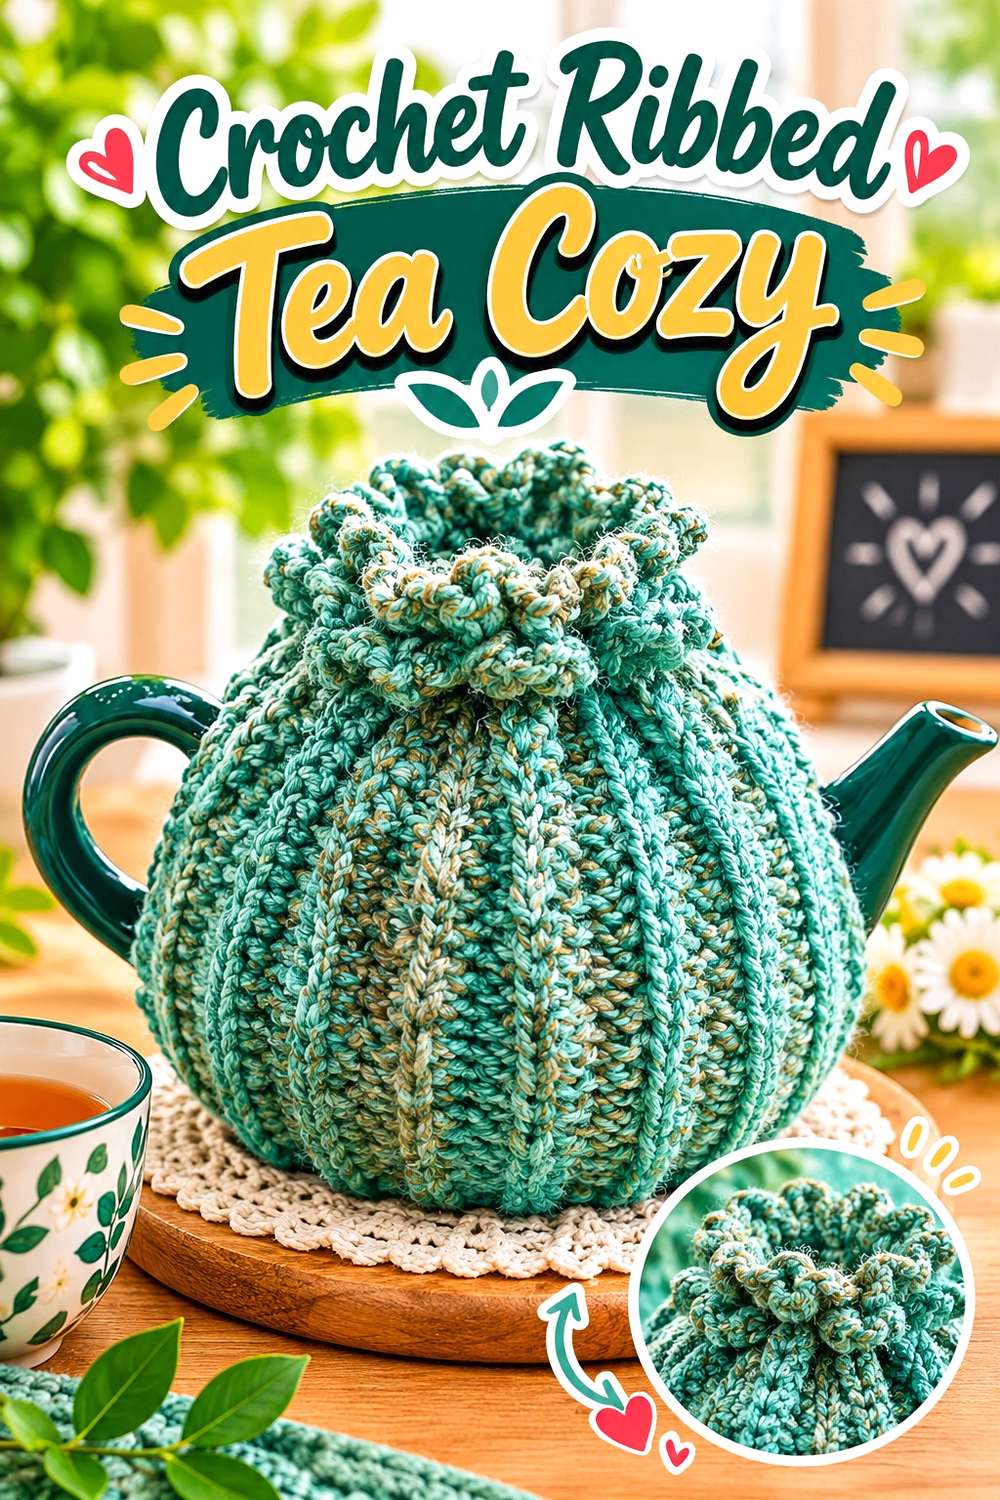
Carroway Crochet’s Rustic Tea Cozy is made from two ribbed panels and finished with a crocheted flower topper. The source provides both right- and left-handed video versions; the creator describes a finished circumference of roughly 18–20 inches for the demonstrated design.
A tea cozy gives the collection a particularly traditional household direction. Unlike a purely decorative doily, it has to relate to a specific three-dimensional object, so the teapot’s body, handle, spout, and lid all matter to the final fit.
The ribbing supplies texture without requiring complicated colorwork, while the flower topper creates a small focal point at the top. That combination works well if you want a vintage-looking kitchen or tea-table piece without using a granny square.
Measure the Teapot Before Beginning
The source provides dimensions for its own example, but teapots vary substantially. Compare your pot with the creator’s sizing information before assuming the same number of rows will produce the fit you want.
Pay particular attention to height and circumference. A cozy that is too short will expose more of the body, while one that is overly tight may not sit around the pot as intended.
Let the Flower Topper Be the Accent
The ribbed body is visually quiet enough that the top flower remains noticeable. Adding more appliqués across every panel could change that balance.
If your tea set is already patterned, consider keeping the crochet relatively restrained. The texture and small topper can supply enough vintage character without competing with the pottery.
Creator: Carroway Crochet
15. Crochet Vintage Flower Potholder

Jewels and Jones explicitly presents this project as a vintage-inspired flower potholder. The tutorial constructs two flower layers and joins them together, producing a thick petaled shape rather than a conventional square hot pad. The accompanying pattern notes a finished size of about nine inches from petal to petal.
The radial flower shape gives this piece a strong mid-century-household feel without using granny squares. It can also be hung when not in use, allowing the silhouette to act as part of the kitchen decor.
Because the source specifically discusses the materials in relation to potholder use, follow the creator’s material guidance if you intend the item for hot cookware rather than making assumptions based only on color or softness. Decorative use and heat-contact use are not the same decision.
Let the Petal Outline Remain Visible
A flower potholder loses much of its character when folded into a crowded drawer. If you want it to function as decor between uses, the optional hanging loop gives the full outline a chance to be seen.
Leave a little wall space around it instead of positioning it directly behind utensils or towels that cover several petals.
Separate Decorative and Heat-Use Decisions
Vintage styling can tempt you to choose yarn solely for color. For a functional potholder, material suitability matters independently from appearance.
Follow the source’s recommendations for the actual hot-pad construction. If you want to experiment with a material chosen mainly for looks, treat that version as decorative unless you have appropriate evidence for its performance.
Creator: Jewels and Jones
16. Crochet Lace Doily
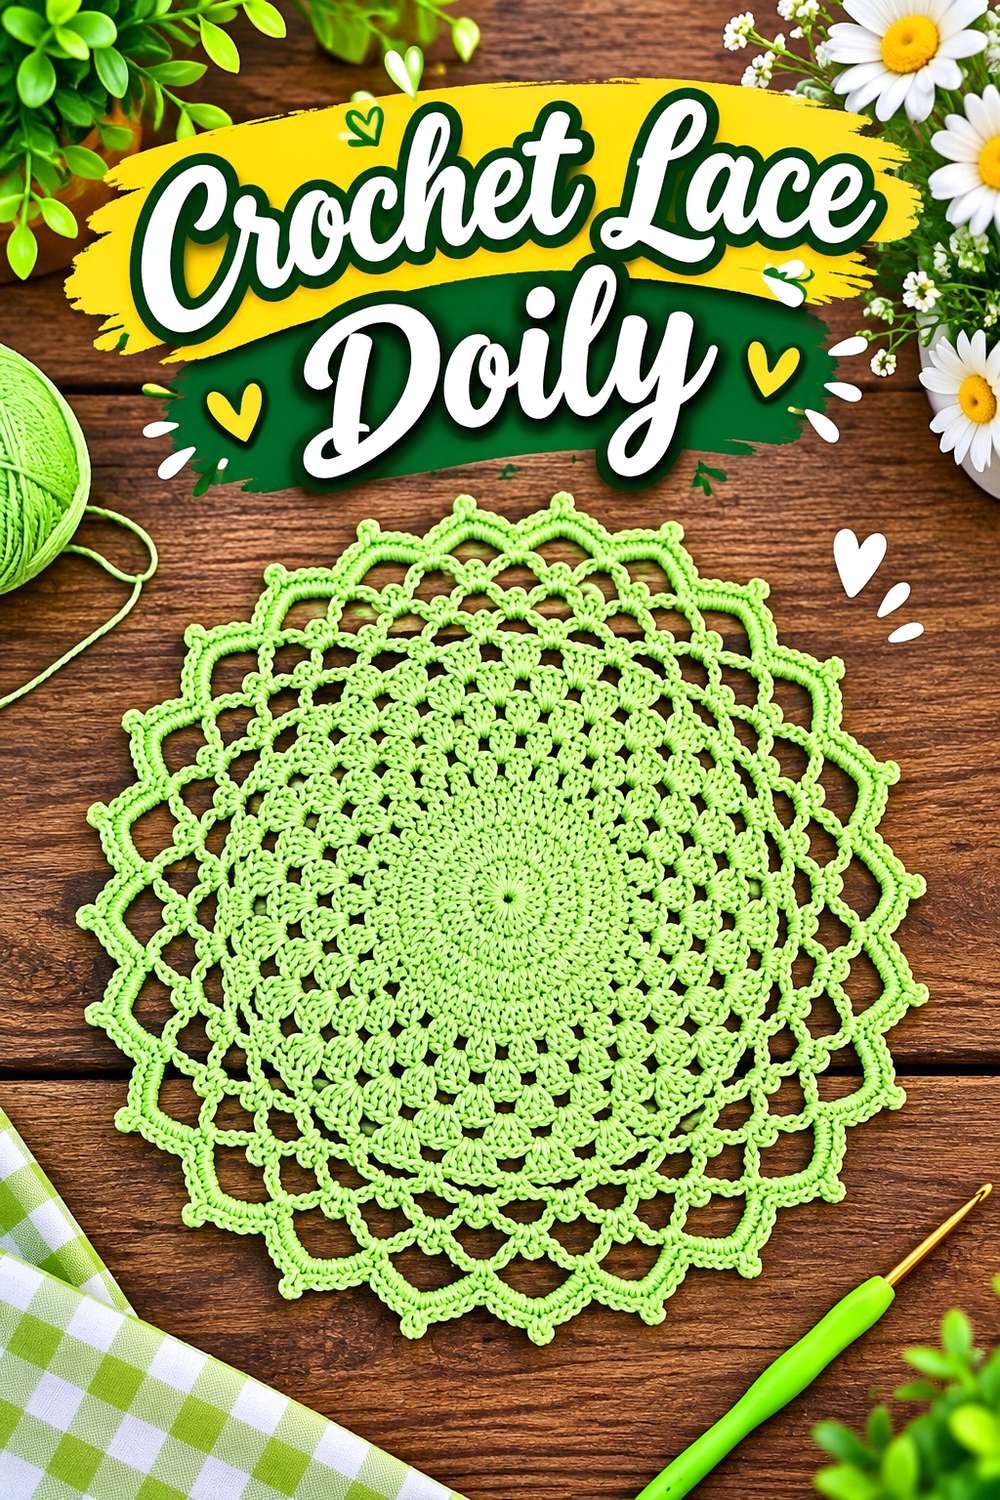
Kristines Crochets teaches a complete round doily measuring approximately 27 centimeters, or 10.6 inches, in the demonstrated version. The tutorial works through the open lace pattern step by step rather than presenting only a finished example.
A doily brings a finer, more formal type of vintage crochet into the collection. Unlike a thick potholder or granny pillow, its effect comes from small-scale openings, radiating repeats, and the contrast between thread-like crochet and the surface underneath.
Where you place it matters. A small table, dresser, or chest leaves enough exposed edge for the circular pattern to be appreciated. If most of the doily disappears beneath a wide lamp or bowl, much of the reason for choosing the design is lost.
Choose the Surface as Carefully as the Crochet
Open lace is partly defined by whatever shows through its holes. A surface very close in color may make the pattern less obvious, while moderate contrast reveals the repeated structure.
Test the doily in more than one location before deciding where it belongs. Changing the background can alter its visual impact without changing a single stitch.
Keep the Centerpiece Small Enough
A vase or decorative object can sit on a doily, but it does not need to cover most of the center.
Place the intended object on a paper circle of similar size first if necessary. That simple check shows how much crochet will remain visible before you devote time to making the entire piece.
Creator: Kristines Crochets
17. Crochet Granny Square Slippers
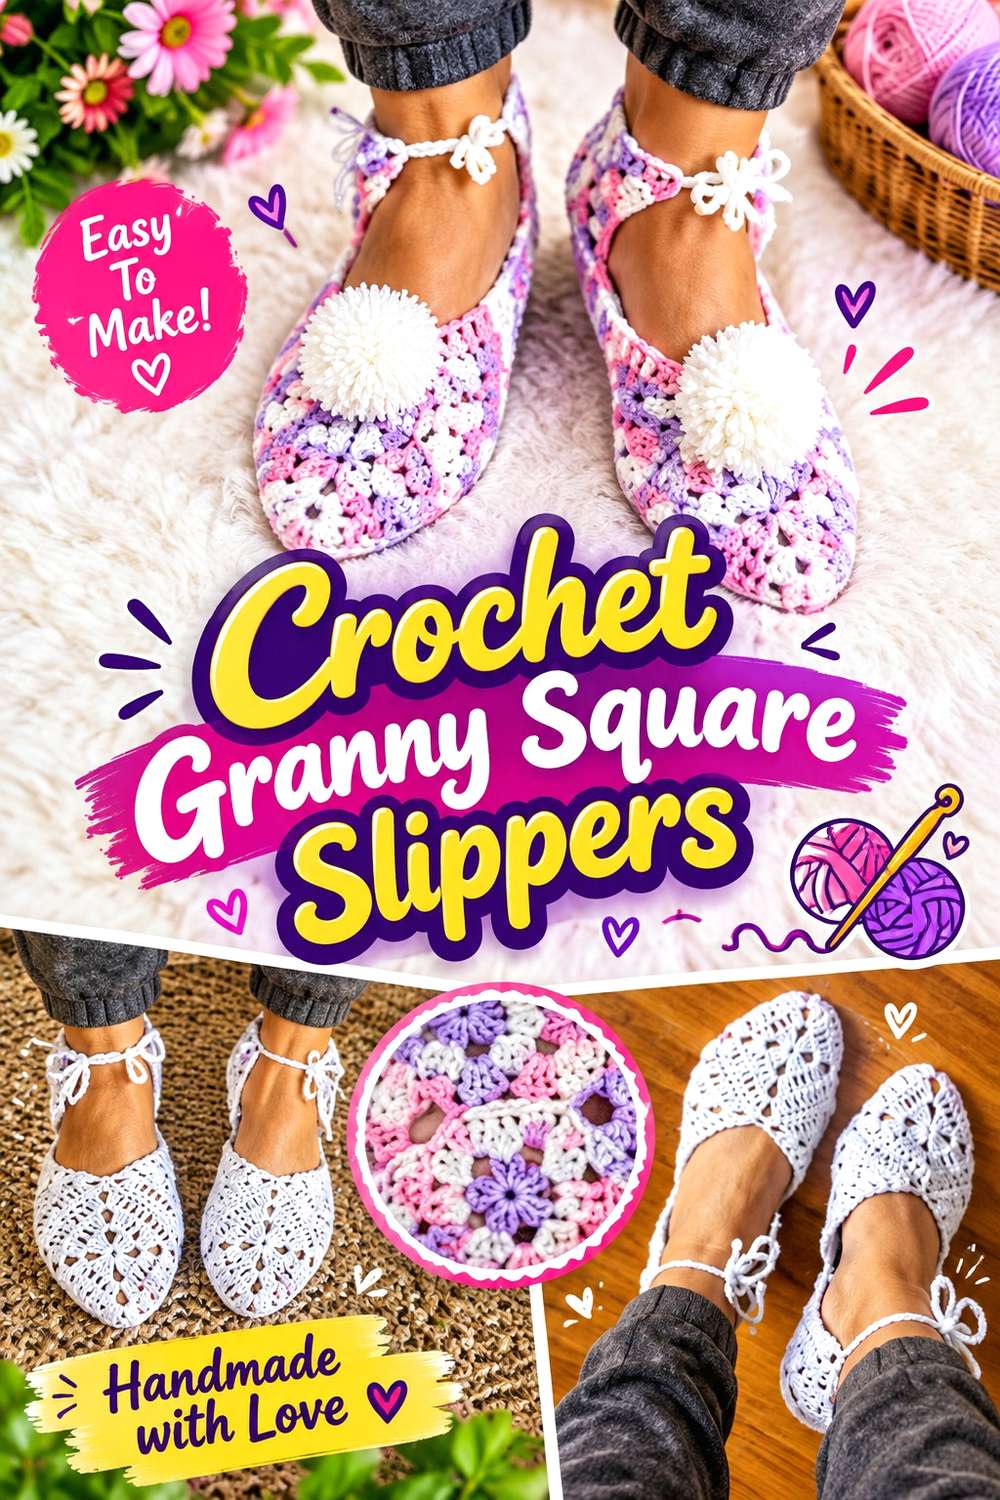
DIY Danni’s tutorial constructs granny-square slippers using seven small squares per slipper, fourteen for the pair. The source describes the motifs as three-round granny squares and demonstrates their assembly into wearable footwear.
This project gives the granny-square tradition a very different scale from blankets and cardigans. Instead of becoming a broad grid, the motifs fold around the foot, so the way their colors meet at seams becomes part of the finished appearance.
Because slippers have to relate to foot dimensions, do not assume that changing yarn or hook size is a harmless aesthetic substitution. A proportion shift that would merely enlarge a blanket square also changes the fit of a wearable object. Follow the tutorial’s construction and evaluate sizing before producing all fourteen motifs.
Make a Test Square Before Crocheting the Set
One motif gives you a practical preview of both stitch scale and fabric density. Compare it with the tutorial before committing to the complete batch.
If your square differs substantially, resolve the reason early. Making fourteen mismatched-size motifs leaves far fewer options once assembly begins.
Plan Color Across Both Feet
The slippers can look more intentional when corresponding squares relate across the pair, even if they are not perfectly mirrored.
Lay out the full set before joining and decide where your strongest colors should sit. The top of the foot will be seen more often than some side or sole-facing sections, so visual placement matters.
Creator: DIY Danni
18. Crochet Granny Square Bucket Hat
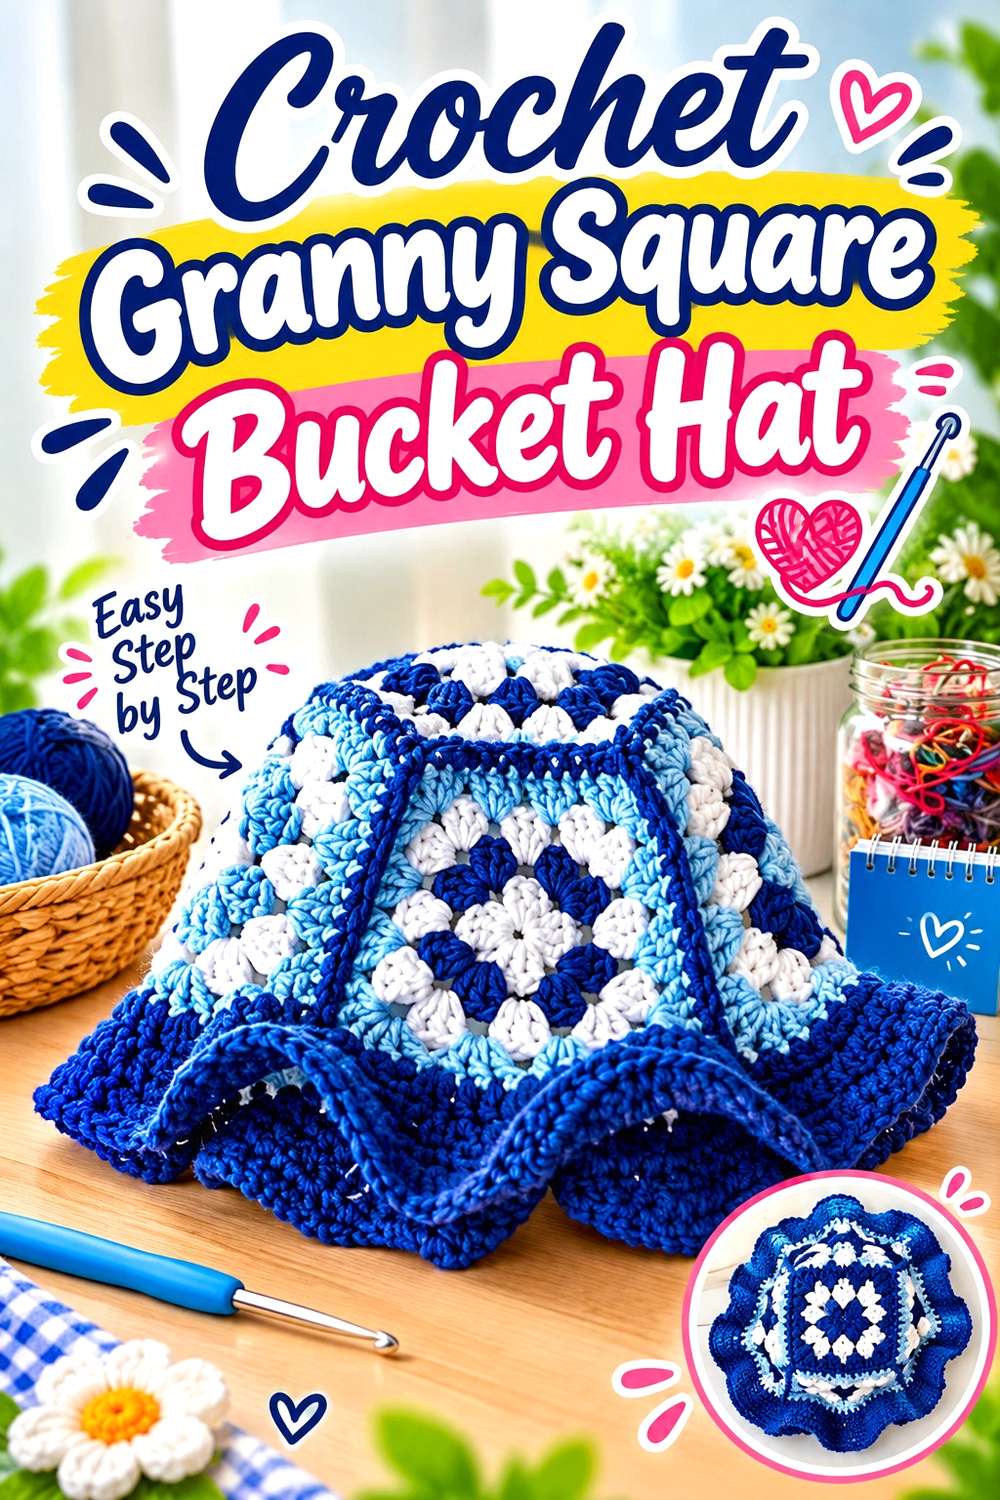
Stitch & Flick Crochet teaches the complete granny-square bucket hat from the color-changing motifs through joining and the final brim. The tutorial includes both square construction and hat assembly, making it a more self-contained starting point than projects that assume previous granny-square knowledge.
The hat combines two very recognizable throwback signals: traditional granny motifs and a bucket silhouette. That gives it a later-retro feeling than the close-fitting 1920s cloche even if you work both in similar colors.
Because the squares form the band around the head, their dimensions influence fit directly. The brim then extends that structure outward. This is therefore a project where changing motif size does more than change the pattern’s visual scale.
Treat the Granny Band as a Fit Component
A square that is slightly too large may seem harmless on its own but becomes significant when several are joined around the head.
Complete and measure the first motif before making the full group. Consistency is especially important because every square contributes directly to the hat circumference.
Compare It With the Cloche Before Choosing
Both projects cover the head, but their silhouettes communicate very different vintage directions. The cloche stays close and polished; the bucket hat has a more relaxed, later-retro shape with visible patchwork.
Choose based on the clothing you expect to wear rather than merely picking whichever colors appeal more on the tutorial thumbnail.
Creator: Stitch & Flick Crochet
19. Crochet Fringed Vintage-Style Poncho

Sewrella’s Ava Fringed Poncho is built from two large crocheted rectangles that are seamed into the wearable shape, then finished around the neckline and hem with tassel-style fringe. The creator’s pattern provides several adult size ranges and demonstrates the construction in the video tutorial.
The flowing body and fringe give the project a strong retro-bohemian direction without using granny squares. That makes it particularly useful as the final counterpoint to the vest, skirt, and cardigan. Instead of modular blocks, the eye sees long fabric planes and movement at the hem.
A poncho also occupies more visual area than a scarf or collar. If you want to wear it with other vintage crochet accessories, let those additions stay relatively small so the fringe and body construction remain visible.
Decide How Much Fringe You Want to Emphasize
The tassel edge is a defining part of the source design. It creates movement and increases the apparent length of the garment beyond the crocheted panels themselves.
When judging fit in a mirror, include that visual drop. The rectangle may seem one proportion before fringe is added and noticeably longer once the hem treatment is complete.
Pair the Flowing Shape With Simpler Accessories
A broad poncho already covers much of the torso and shoulders. A large shawl or dramatic lace collar underneath may simply disappear.
Smaller throwback pieces work more effectively around it. A hair scarf, cloche, or compact bag can extend the vintage direction while keeping the poncho’s openwork and fringe readable.
Creator: Sewrella
Conclusion
The easiest way to build a convincing throwback crochet collection is to choose the kind of nostalgia you actually want. For early-century influence, the 1920s-Inspired Cloche Hat, Peter Pan Collar, Lace Fingerless Gloves, Vintage Shawl, and Lace Doily emphasize curved silhouettes and finer detail. The 1950s Hair Scarf provides a smaller mid-century accessory, while the Granny Square Vest, Skirt, Cardigan, Bucket Hat, Retro Daisy Bag, and Fringed Poncho push much more strongly toward later retro dressing.
For the home, the Classic Granny Blanket, Ripple Throw, Granny Square Pillow, Tissue Box Cover, Ribbed Tea Cozy, and Vintage Flower Potholder provide equally distinct options.
You do not need to combine every vintage cue. One recognizable shape plus one contrasting handmade texture is often enough. Once you choose the era and scale you want, use the original tutorials for exact construction, fitting, materials, and finishing details.
Frequently Asked Questions
Do all of these tutorials claim to be historically vintage patterns?
No. Some sources explicitly use decade or vintage language, such as the 1920s-inspired cloche, 1950s hair scarf, 1970s granny vest, vintage shawl, retro daisy bag, and vintage-inspired flower potholder. Others teach classic crochet forms that fit a throwback collection editorially. The article therefore uses “Throwback Vintage” as a broad styling theme rather than claiming every project reproduces an archival design from a specific historical year.
Which projects give the strongest 1970s crochet look?
The 1970s Granny Square Vest is the clearest source-labeled example. The Granny Square Skirt, Cardigan, Bucket Hat, Retro Daisy Round Bag, and Fringed Poncho also work naturally in a later-retro wardrobe because they emphasize visible hand crochet, modular color, fringe, or relaxed silhouettes. You can strengthen that direction through color, but the form should still carry the idea even when the palette is more subdued.
Can I mix several granny-square projects in one outfit?
You can, but compare their motif scale and color intensity first. A granny vest and granny skirt both occupy large areas, so wearing them together creates a much stronger pattern field than pairing one of them with the 1950s Hair Scarf or Lace Fingerless Gloves. If you enjoy maximal styling, repetition may be intentional. For a quieter result, let one granny-square garment be the dominant patterned piece and use smaller non-square accessories around it.
Which vintage projects work best as small additions rather than full statements?
The 1950s Hair Scarf, Peter Pan Collar, Lace Fingerless Gloves, Flower Potholder, Lace Doily, Tissue Box Cover, and Granny Square Slippers all introduce a recognizable crochet detail without covering a large part of an outfit or room. They are useful if you are experimenting with a vintage direction before committing to a cardigan, blanket, shawl, skirt, or poncho.
Should I use vintage yarn for a more authentic result?
Not necessarily. Old yarn can have uncertain storage history, condition, fiber behavior, or quantity, and a historic-looking color does not guarantee suitability for a particular project. Follow the tutorial’s material guidance where construction or function depends on it. You can create a vintage visual direction through palette and form while using current yarn that provides the weight, structure, and care characteristics the project requires.
How can I keep vintage crochet from making a room feel overly themed?
Distribute the pieces by scale and function. A Ripple Throw on the sofa, one Granny Square Pillow, and a Flower Potholder in the kitchen create separate moments rather than one dense wall of nostalgia. You can also pair decorative crochet with simpler furniture and textiles. The vintage reference remains clear through the crochet itself, so every surrounding object does not need to repeat the same colors, florals, fringe, or granny motifs.