Crochet celestial decor can range from one small star on a tabletop to a full moon-phase installation across a wall. That variety makes the theme much more interesting than simply repeating crescent moons in different colors. This collection includes garlands, wall hangings, pillows, coasters, a rug, a doily, soft celestial figures, and flat motifs that can become part of a larger display.

The strongest choice depends on where the finished crochet will live. Large shapes such as a sun wall hanging, shooting star, or star rug need room for their outline to read clearly. Smaller pieces such as coasters and amigurumi work better when you want celestial details on shelves, desks, and tables. Three entries—the moon-and-star appliqués and the two granny squares—are component tutorials rather than complete room displays, so their suggested decorative uses are clearly separated from what the creators actually teach.
Quick List
- Crochet Sun Wall Hanging
- Crochet Moon Phases Garland
- Crochet Star Garland
- Crochet Crescent Moon Pillow
- Crochet Star Pillow
- Crochet Cloud Pillow
- Crochet Star Ornament
- Crochet Star Rug
- Crochet Star Doily
- Crochet Star Coaster
- Crochet Sun Coaster
- Crochet Crescent Moon Coaster
- Crochet Planet Earth Amigurumi
- Crochet Sun Amigurumi
- Crochet Saturn Amigurumi
- Crochet Stuffed Moon Amigurumi
- Crochet Moon-and-Star Wall Hanging
- Crochet Moon-and-Star Garland
- Crochet Moon-and-Star Appliqué Set
- Crochet Moon Granny Square
- Crochet Shooting Star Wall Hanging
- Crochet Star Granny Square
Choose Celestial Shapes by Viewing Distance
A project that will hang over a bed or sofa needs a stronger outline than something viewed from arm’s length. The Sun Wall Hanging, Moon Phases Garland, Shooting Star Wall Hanging, and Moon-and-Star Wall Hanging all communicate their celestial theme through large shapes or repeated forms. Their surrounding wall space therefore becomes part of the composition.
Tabletop pieces can rely on finer details. A star doily, sun coaster, moon coaster, or small Saturn can be appreciated at close range without needing to dominate the room. Pillows sit somewhere between the two: their silhouettes remain noticeable from a distance, but stitch texture still contributes when viewed nearby.
If you are making several projects, vary both scale and position. A room with a moon garland on one wall, a star pillow on a chair, and a small planet on a shelf generally gives each idea more room than five similar hanging pieces competing in one place.
Plan Structure Before Adding Celestial Styling
Shape matters particularly strongly with moons, stars, and planets. Star points can curl or become obscured, a crescent opening needs to remain visible, and Saturn’s ring is more than a decorative afterthought. Follow each creator’s construction and finishing directions before deciding that an extra border, fringe treatment, or embellishment is necessary.
Hanging projects introduce another consideration: orientation. Check the finished crochet against the actual wall before permanently arranging strings, dowels, or neighboring motifs. A design that looks centered on a table can feel visually uneven once gravity pulls on it.
For motif tutorials in this collection, mounting is deliberately left open. A crocheted moon square could be framed, joined with other squares, or incorporated into a textile panel, but those are suggested uses rather than instructions demonstrated by the credited creator. Keeping that distinction clear lets you customize the decor without turning an adaptation into a claimed tutorial feature.
1. Crochet Sun Wall Hanging
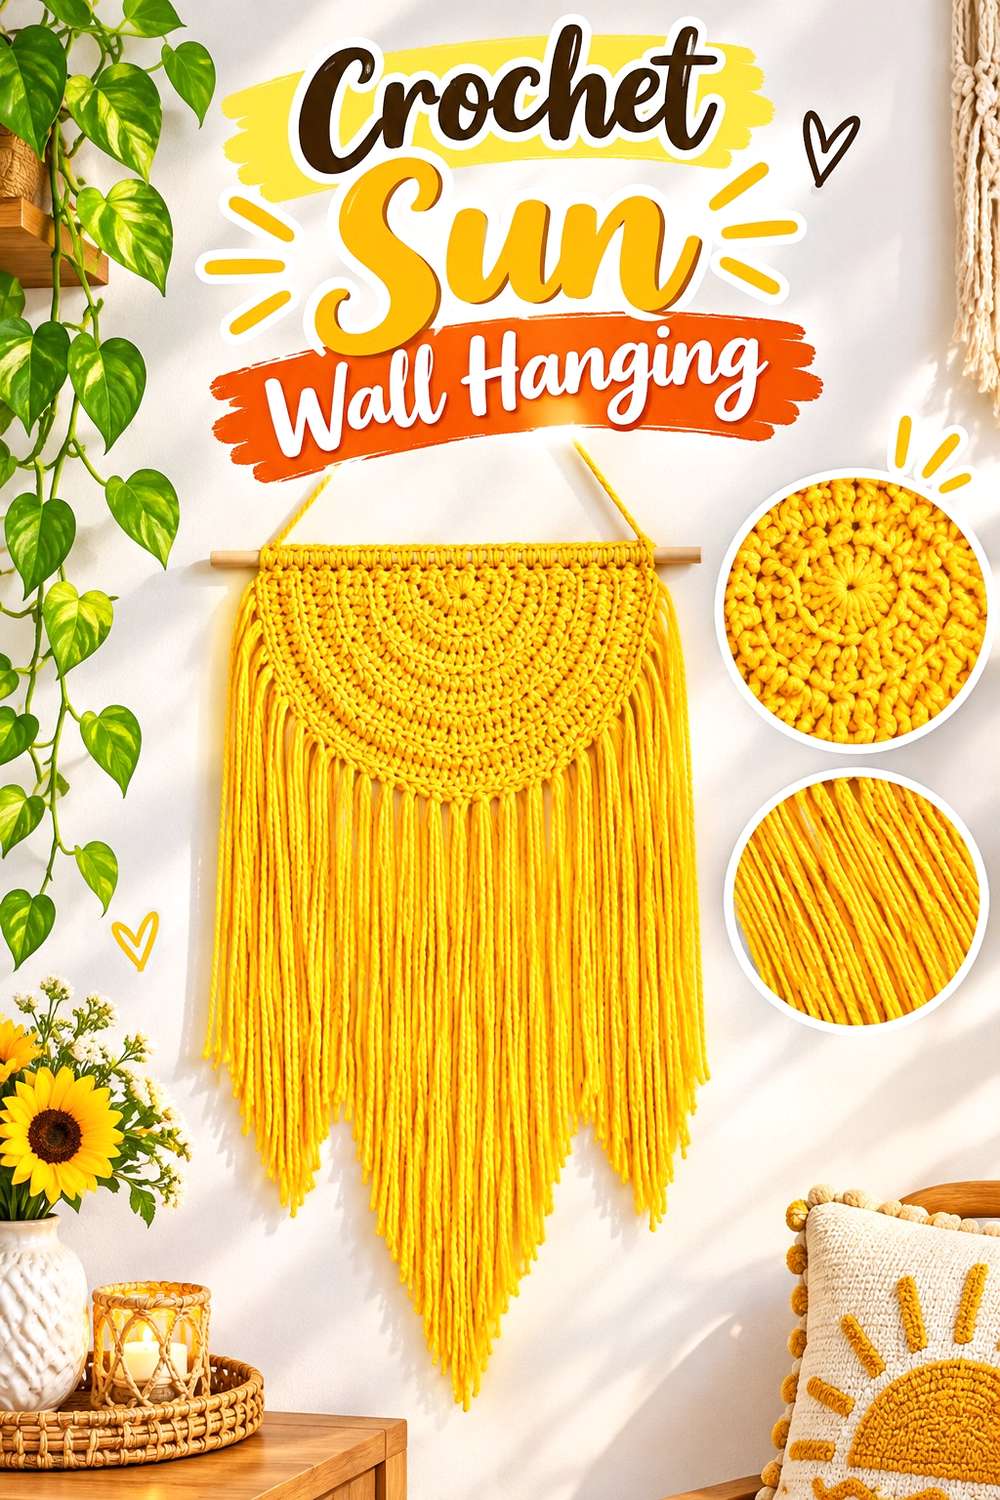
A large crocheted sun can establish a celestial room without requiring several separate motifs. The Turtle Trunk’s tutorial creates a sun-shaped wall hanging with pronounced rays, fringe, and a dowel-supported arrangement. The creator’s project information identifies the finished example at roughly 12 inches wide by 16 inches long, including its hanging treatment.
The combination of a circular center and outward rays gives the piece a strong silhouette, while the hanging strands extend the design vertically. That makes it particularly useful on a narrow wall section where a conventional round motif might appear too compact.
Unlike the small Sun Coaster later in this collection, this project is meant to be noticed from across a room. Before choosing its position, compare the full outline—including fringe—with the available wall rather than measuring only the crocheted center.
Give the Rays Empty Space
The sun shape works because its outer points remain individually visible. Hanging the piece too close to shelving, picture frames, or another textile can make one side appear visually compressed. Test it against the wall before deciding on neighboring decorations.
A relatively simple surrounding area also allows the contrast between circular center, rays, and hanging strands to do the decorative work without another celestial item immediately competing with it.
Consider the Vertical Fringe Separately
The lower strands change the proportions from a simple sun motif into a longer wall piece. If you are planning furniture underneath, judge where those strands end rather than centering the project according to the sun alone.
This is especially useful above a narrow console, reading chair, or bedside area where the vertical drop can visually connect the wall decor with furniture below.
Creator: The Turtle Trunk
2. Crochet Moon Phases Garland
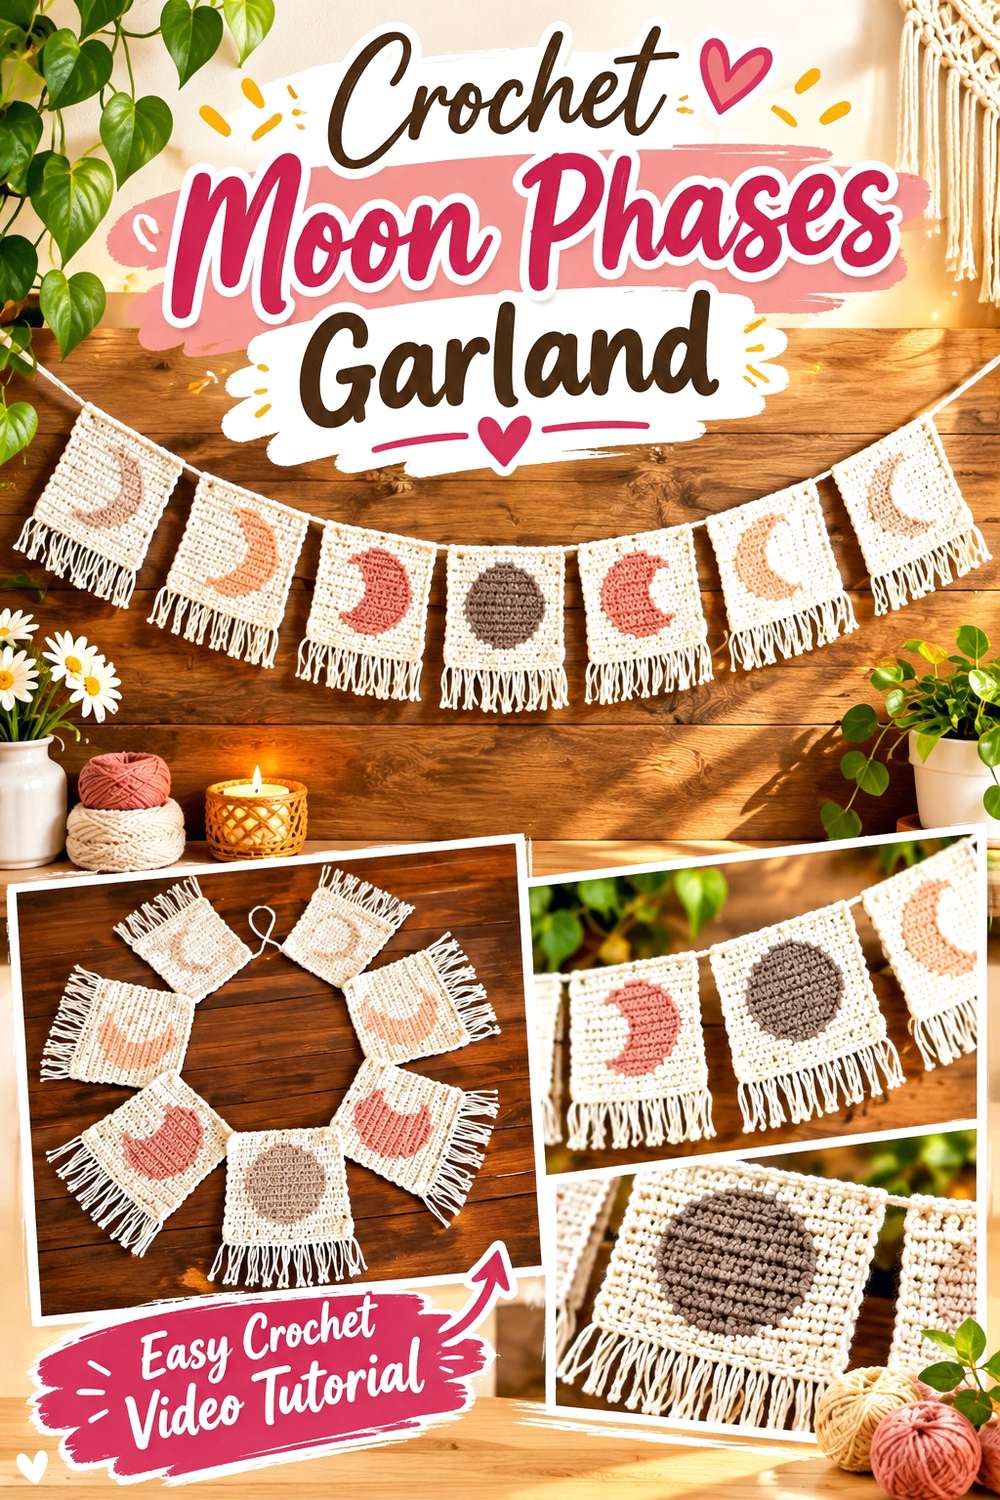
Instead of representing the moon with one crescent, Happy Heartsy’s project builds a sequence showing multiple phases. The creator uses rectangular crocheted panels with colorwork forming one full moon, pairs of three-quarter and half phases, and smaller quarter phases, then joins them along a hanging string and adds fringe. The accompanying video specifically demonstrates the color-carrying and joining techniques used for the pattern.
This gives the garland a very different character from free-standing moon shapes. The phases remain contained inside repeated textile panels, creating a more graphic wall arrangement and a consistent lower fringe line.
Because repetition is central to the design, spacing matters almost as much as any single panel. Give the full sequence enough horizontal room so viewers can see the progression instead of reading it as one crowded block of colorwork.
Let the Sequence Stay Legible
The full moon naturally becomes a visual anchor within the arrangement. When positioning the garland, stand far enough away to see whether the phase progression remains easy to follow.
Avoid placing busy framed artwork directly behind or between the panels. The color changes inside each rectangle already provide the primary graphic information.
Choose This When You Want Repetition
A single crescent creates one strong silhouette. A phase garland creates rhythm through related shapes. That makes this option particularly suitable for a longer wall where one small moon might feel isolated.
If your available wall is narrow, the standalone Moon-and-Star Wall Hanging or Stuffed Moon Amigurumi may make better use of the space without compressing a sequence intended to extend horizontally.
Creator: Happy Heartsy
3. Crochet Star Garland
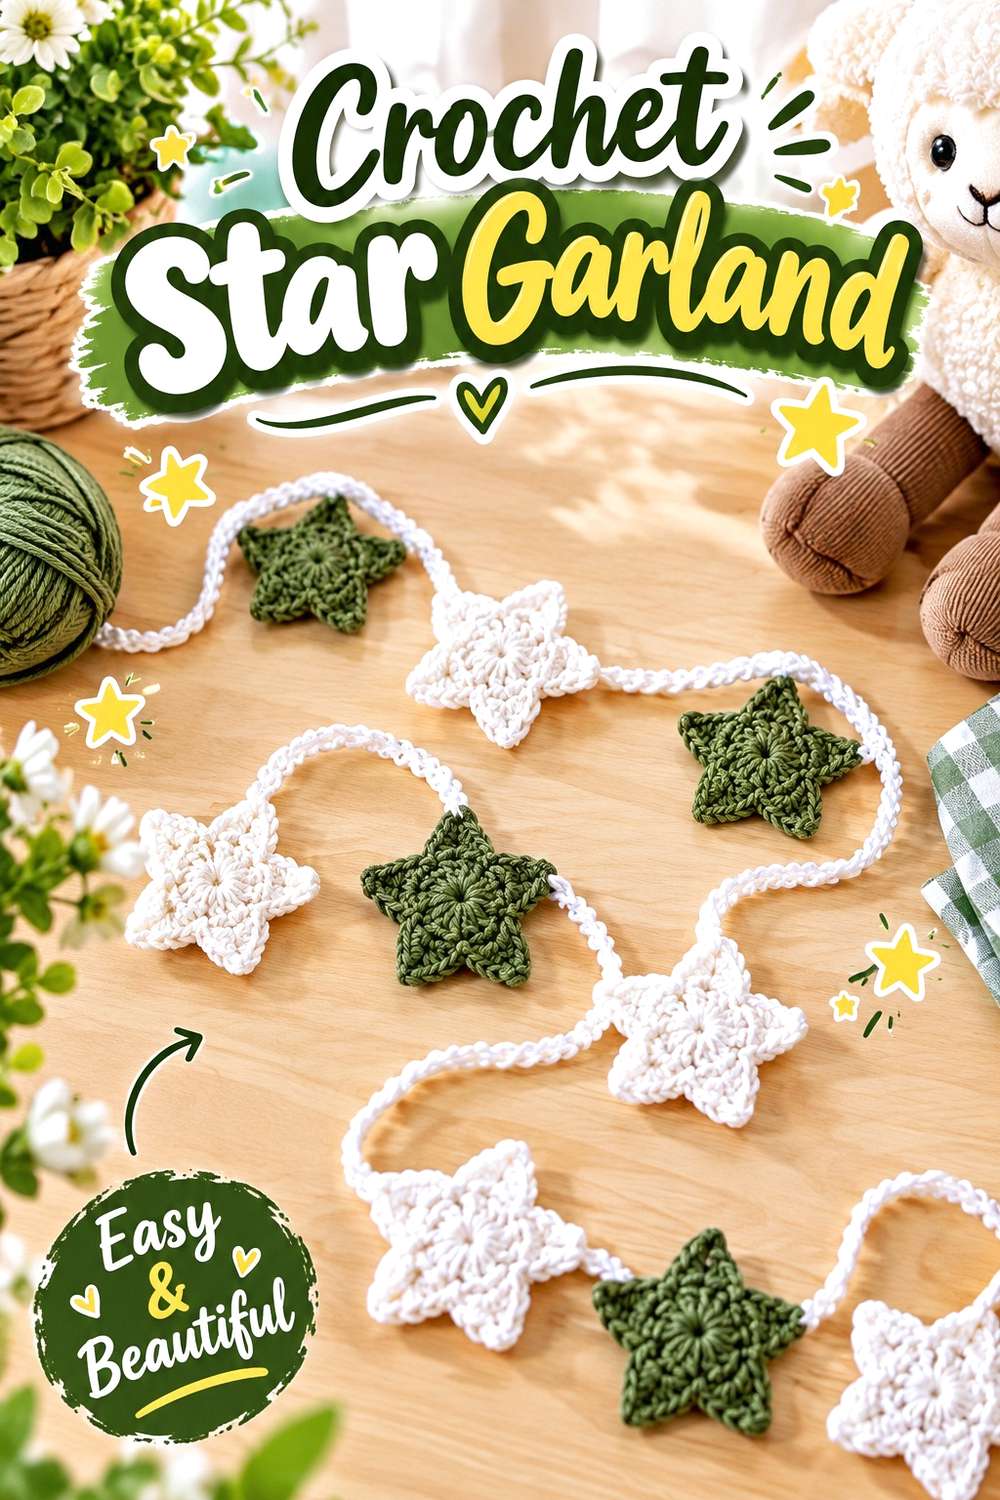
The star garland from cosy kates 🪴 turns repeated individual stars into a light horizontal decoration. The tutorial covers making the stars, finishing them, preparing the hanging strand, and attaching the motifs rather than stopping after one star.
That complete assembly is what distinguishes this project from the separate Star Granny Square and Star Ornament later in the article. Here, repetition and spacing are designed into the final piece. Individual stars remain small enough to create a gentle sequence instead of one dominant centerpiece.
A garland also gives you flexibility in placement. It can follow a shelf edge, occupy a section of open wall, or sit above another piece of decor without covering a large area. Before adding more stars than the source demonstrates, consider how a longer strand would change both weight distribution and the spacing that gives each motif its definition.
Use Spacing to Control the Mood
Closely grouped stars form a busier decorative line, while more open spacing makes individual silhouettes easier to notice. Follow the creator’s assembly first, then evaluate the finished proportion against your intended display area.
More motifs are not automatically an improvement. The useful length is the one that fits the actual wall or shelf without requiring the ends to bunch together.
Check the Garland From Across the Room
Small stars can look perfectly separated while you are assembling them yet merge visually at a distance. Temporarily position the garland and view it from where you normally enter or sit in the room.
That check helps you decide whether the repeated points are distinct enough without altering the stars themselves.
Creator: cosy kates 🪴
4. Crochet Crescent Moon Pillow
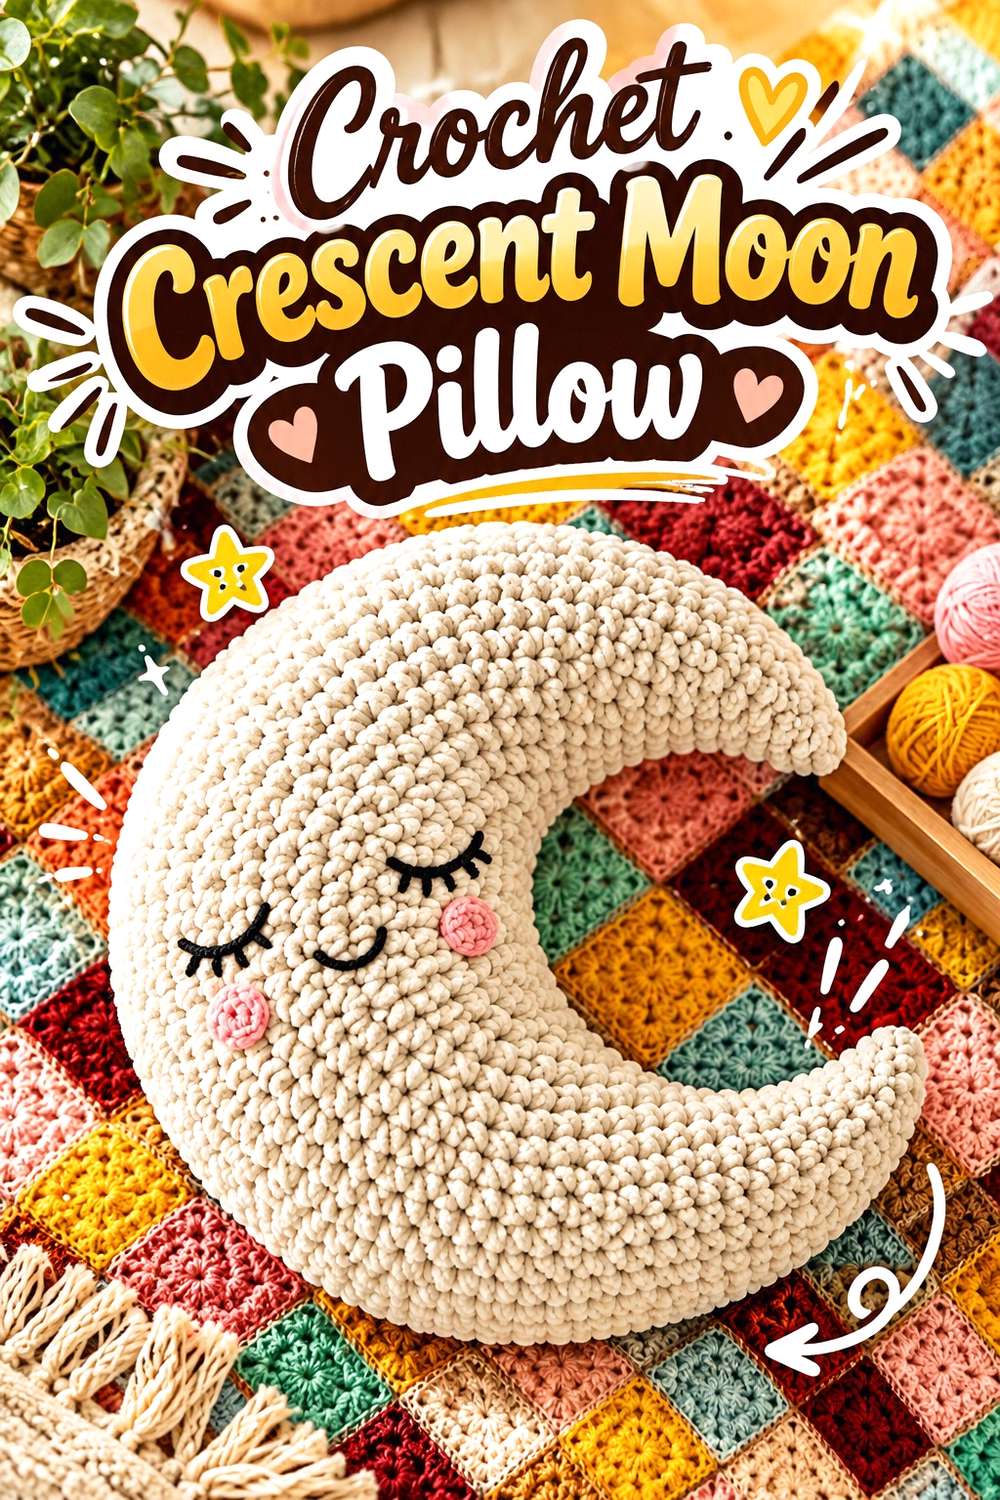
A crescent pillow changes the moon motif from flat wall decoration into a three-dimensional soft furnishing. Julia’s Knitting teaches the project from the initial crochet through joining, filling, and finishing, so the tutorial covers the complete pillow rather than just a crescent appliqué.
The negative space inside the crescent is the defining feature. On a bed or chair, that opening needs to remain visible if the object is to read immediately as a moon rather than simply a curved cushion. Placement therefore matters more than it would with a rectangular pillow.
This is also a useful choice when your celestial theme already includes wall decor. Instead of adding another hanging moon beside an existing garland, the pillow moves the repeated symbol onto a different plane in the room and gives the collection more depth.
Protect the Crescent Silhouette
A shaped pillow can lose some visual definition when compressed between larger cushions. Give the inner curve enough space that it is visible from the usual viewing angle.
If you are arranging several pillows, try the crescent nearer the front instead of forcing it upright between two broad square cushions that conceal its points.
Let Shape Replace Printed Motifs
This project does not need stars, embroidered constellations, or extra appliqués to establish the theme. Its outline already does that.
Keeping the surface comparatively restrained can be especially effective when surrounding blankets or bedding contain other patterns. The moon then contributes a distinct shape rather than another layer of small-scale imagery.
Creator: Julia’s Knitting
5. Crochet Star Pillow
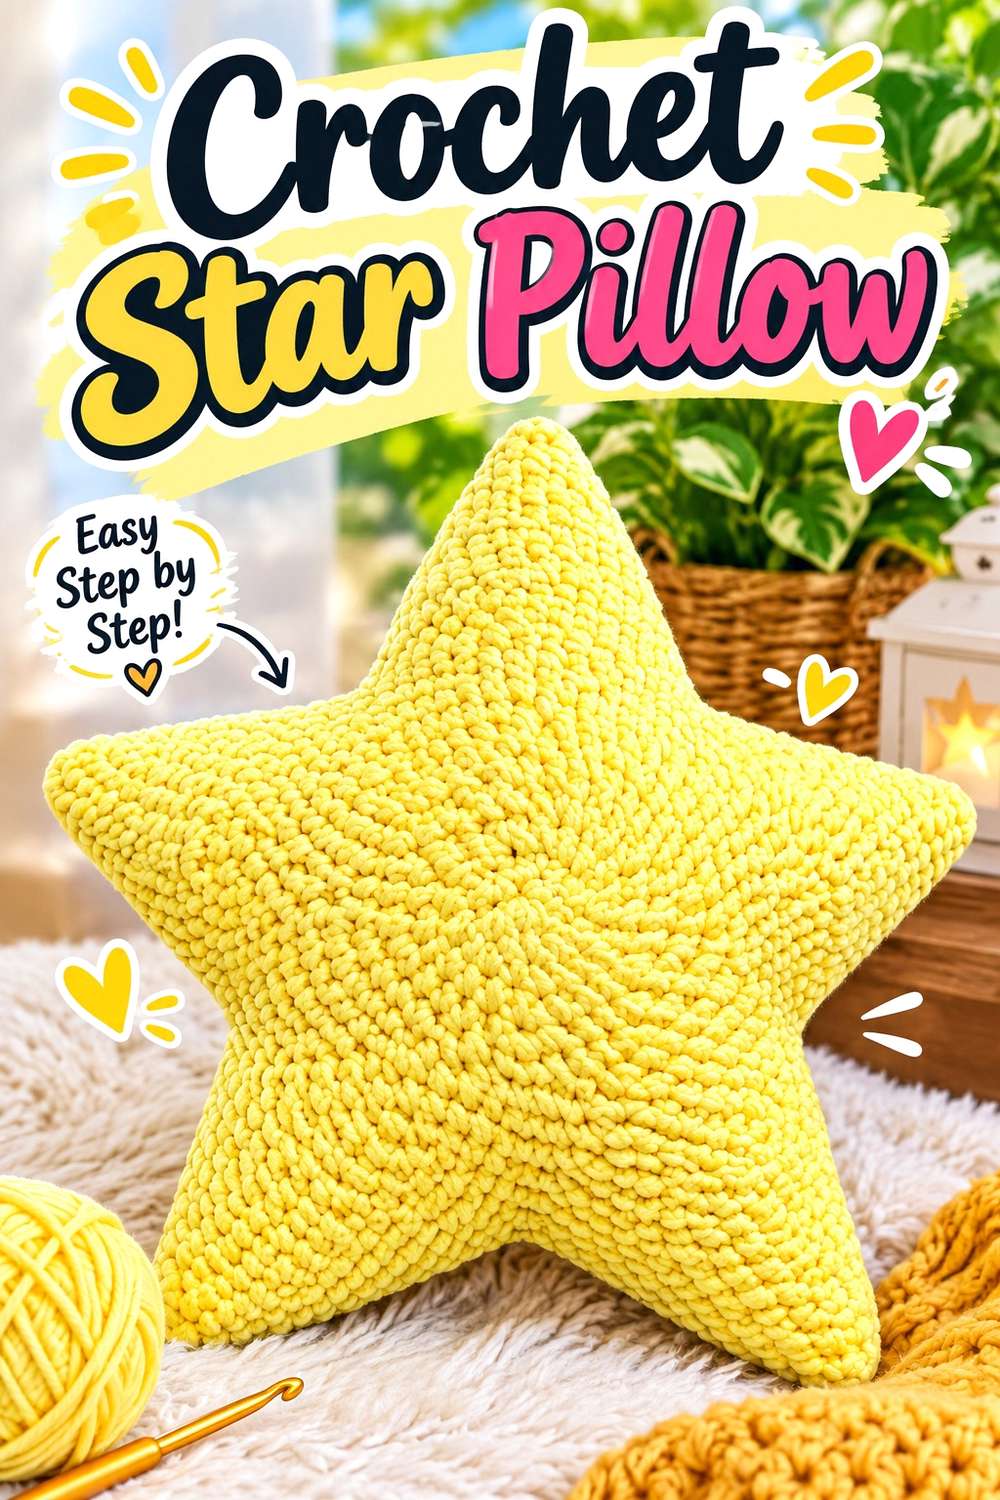
Chantelle’s tutorial expands a crocheted star into a stuffed pillow, giving the familiar five-point form enough volume to function as a soft decor piece. The creator explains that the pillow is developed from a regular crochet star construction and demonstrates the amigurumi-style finishing needed for the larger stuffed version.
Compared with the Crescent Moon Pillow, the star spreads its visual weight in several directions. That makes the points important when choosing where it will sit. A deep chair or pile of bedding can hide several points and turn the recognizable outline into a less distinct cushion.
The project is particularly useful when you want a celestial object that reads clearly without colorwork. The outer shape carries the theme, so you can coordinate the pillow with existing room colors without needing to reproduce a night-sky palette.
Keep the Points Visible
Before settling the pillow permanently, rotate it through several positions. One orientation may keep all five points clearer against the furniture than another.
This matters especially on patterned upholstery, where a point that overlaps a similarly colored area can visually disappear. A little contrast behind the star often does more than additional embellishment on top.
Use It as a Shape Accent
A conventional square pillow adds color and textile texture but little change in silhouette. The star can break up a row of rectangles immediately.
That makes it useful as one shaped accent among simpler cushions rather than one of several competing novelty pillows. The contrast in form is already enough to make it distinctive.
Creator: chantelle
6. Crochet Cloud Pillow

A cloud is technically sky-themed rather than astronomical, but it creates a useful transition within celestial decor, particularly when moons and stars already appear elsewhere in the room. MummaJ Crochet’s tutorial teaches a complete cloud pillow step by step, including the shaping and assembly needed for the stuffed finished form.
Its rounded lobes create a softer outline than pointed stars or crescent moons. That makes the cloud particularly useful when a collection is beginning to feel dominated by sharp star points and hanging lines.
Rather than surrounding it with more cloud motifs, consider using a single cloud beside one celestial shape. A moon pillow and cloud pillow, for example, create contrast through their silhouettes without requiring a literal scene. The project can therefore soften the theme rather than expand it with another highly graphic symbol.
Use the Cloud as Visual Relief
Repeated stars and moons can make a celestial room feel very motif-heavy. The cloud contributes to the sky theme while offering a less geometric shape.
Place it where its rounded edge can contrast with sharper pieces. Beside a Star Pillow, that difference becomes immediately visible even when both projects use related colors.
Avoid Hiding the Lower Outline
A cloud’s lobed edge is the feature that gives the pillow its identity. Deep seating or a thick blanket can conceal that contour when the pillow sinks too far backward.
Test it in the exact chair or bed arrangement you intend to use so the recognizable outline remains visible without needing constant repositioning.
Creator: MummaJ Crochet
7. Crochet Star Ornament
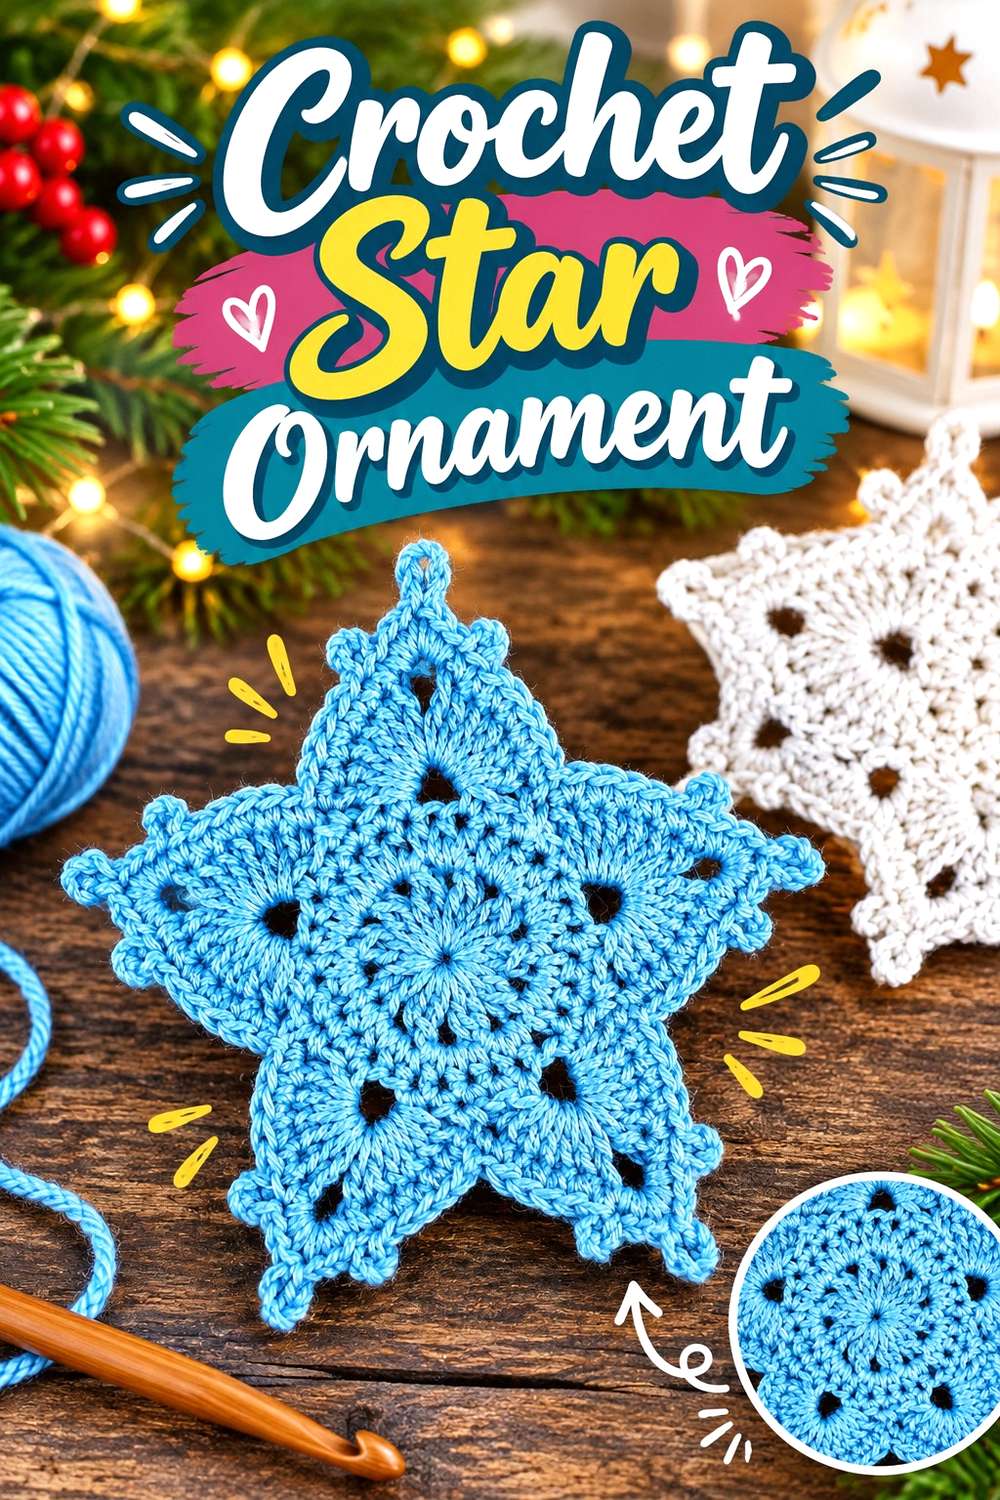
Kristines Crochets teaches a defined star ornament worked through a sequence of rounds, producing a standalone star that can be hung rather than joined into a long garland. The creator’s tutorial identifies the example at approximately 12 centimeters across from point to point.
Its value in a celestial collection is flexibility. One ornament can occupy a small hook, branch display, cabinet handle, or other decorative hanging point without requiring the horizontal wall length of a garland. Multiple ornaments could also be used together, but the source teaches the star itself rather than prescribing a full room installation.
Because the object is viewed from its perimeter, the shape of all the points deserves attention. A crowded hanging location can obscure that outline, so think of the empty space around the ornament as part of the display.
Choose a Viewing Angle First
A freely hanging ornament may turn, while one placed flat against a wall is seen mostly from the front. Decide which behavior you want before choosing the location.
If the star’s stitch definition is important to your display, a position where it remains reasonably front-facing may show the crochet more consistently than a freely rotating placement.
Keep Neighboring Objects Smaller
The ornament’s strength is its compact, complete silhouette. Large ribbons, tassels, or neighboring ornaments can make its points harder to distinguish.
If you display several objects together, vary their hanging heights instead of clustering all of their edges into the same narrow band.
Creator: Kristines Crochets
8. Crochet Star Rug
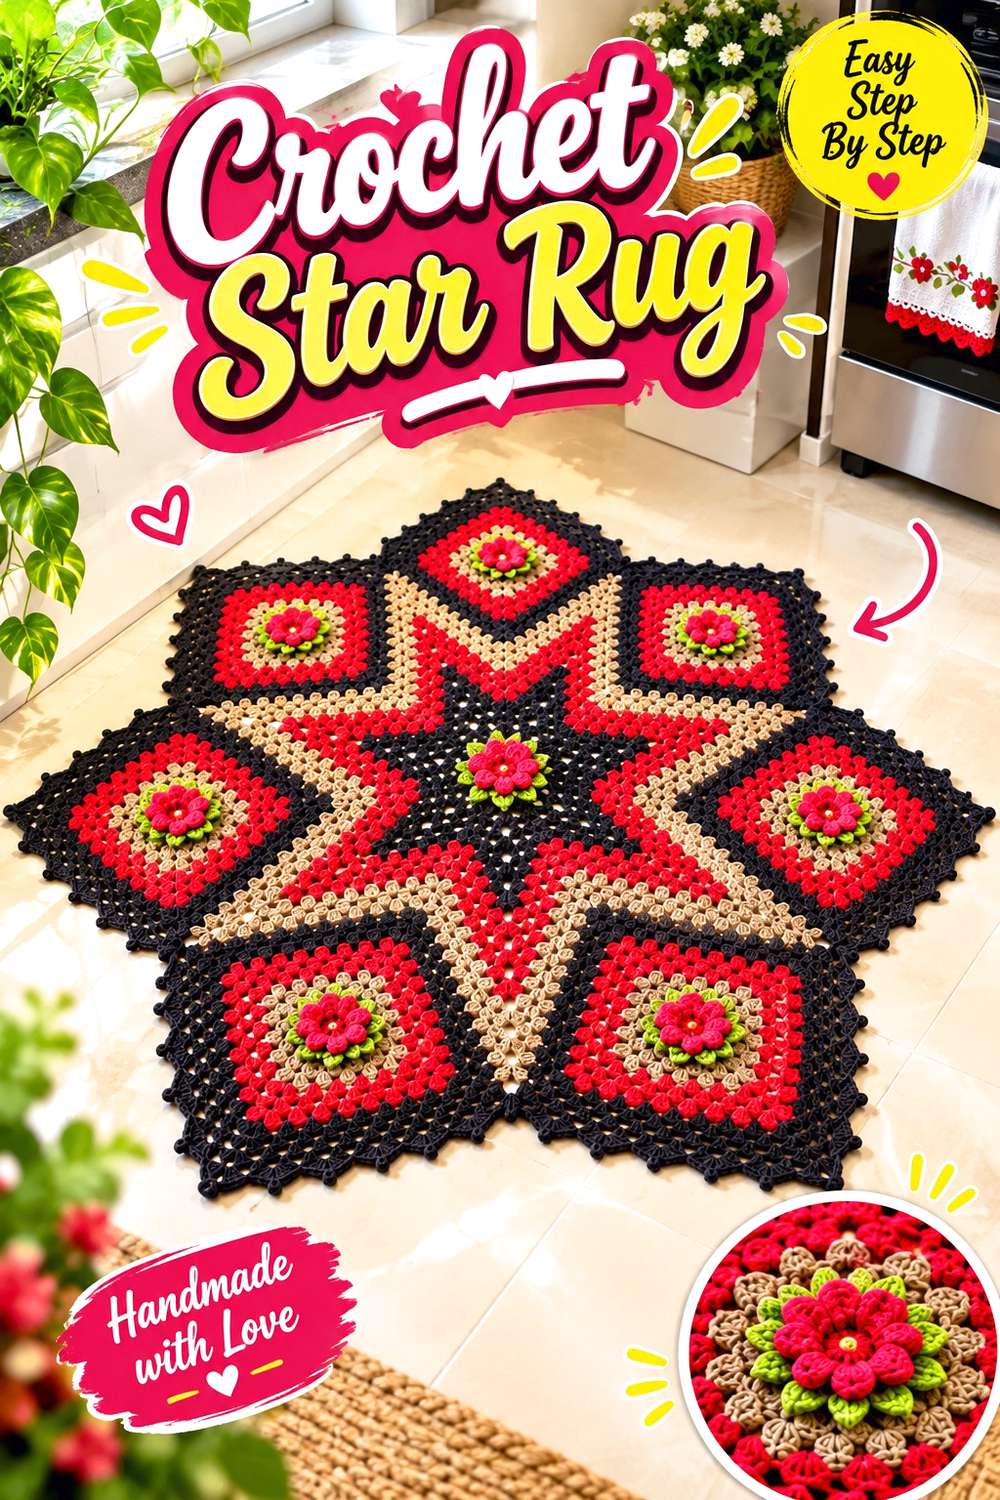
Crochet by Glau’s tutorial scales the star motif up into a floor piece, giving celestial crochet a role far beyond walls and shelves. The tutorial is specifically presented as a star rug and demonstrates the project step by step rather than adapting a small star motif after the fact.
That larger footprint changes the decisions that matter. Furniture placement can obscure points, and a star set partly beneath a table may lose the silhouette that makes the design distinctive. Measure the intended floor area and think about what will remain visible after the room is furnished.
A handmade crocheted rug should also be evaluated for its actual floor setting rather than assumed to have particular anti-slip properties. The tutorial establishes the crocheted rug; any separate backing or floor treatment you might consider should be chosen for your own surface and use rather than inferred from the star shape.
Give the Star a Clear Floor Outline
A rug works differently from a round mat because each point extends into the surrounding floor. Allow enough clearance that chair legs or storage baskets do not permanently hide two or three of them.
If space is limited, positioning the rug beside rather than underneath furniture can preserve the geometry more effectively.
Consider Traffic Before Placement
The most visually dramatic location is not necessarily the most practical. A star used primarily as decorative floor crochet can be placed where its points are easy to see rather than in a heavily traveled passage.
Evaluate the room, floor surface, and your own use before deciding whether additional non-slip treatment or another placement is appropriate.
Creator: Crochet by Glau
9. Crochet Star Doily
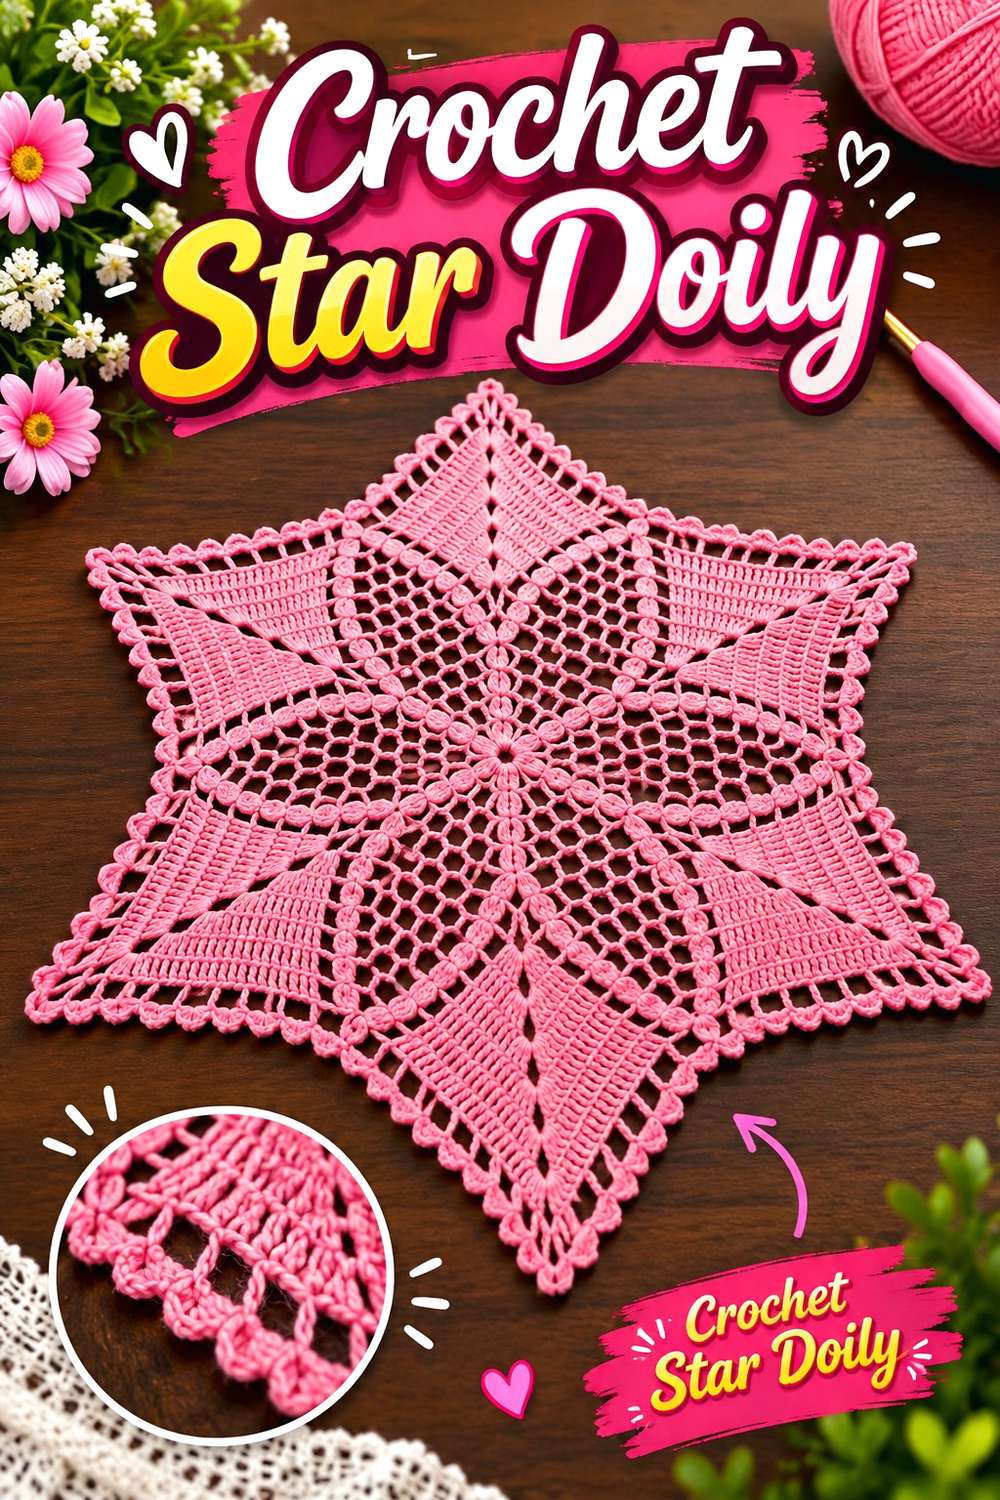
Fresiitah17’s tutorial takes the star in a completely different direction: a fine, radiating doily rather than a stuffed or bulky object. The tutorial identifies a 14-row star-shaped design measuring roughly 55 centimeters, or 21.6 inches, from point to point in the demonstrated version.
A doily is useful when you want celestial decoration to stay close to the surface underneath it. On a table or chest, the points spread horizontally while the openwork remains visible at close range. That makes this project less about volume and more about negative space and repeated stitch detail.
It could also be displayed where the full star outline remains visible, but any alternative mounting is your own decor decision rather than part of the credited construction. Whichever setting you choose, avoid covering the center with an object so large that most of the radiating pattern disappears.
Decide How Much of the Center to Cover
A centerpiece placed over a doily can create useful layering, but a large object may hide the very stitch structure you spent time making.
Test plates, vases, or other intended objects on a paper circle of similar scale first. That gives you an idea of how much of the star will remain visible around the edges.
Use Openwork Where Contrast Helps
Fine lace-like crochet can disappear against a similarly colored or visually busy surface. A quieter contrasting background can make both the star points and interior openings easier to read.
That does not require a dramatic color difference; the goal is simply to prevent the stitch pattern from blending into whatever sits beneath it.
Creator: Fresiitah17
10. Crochet Star Coaster
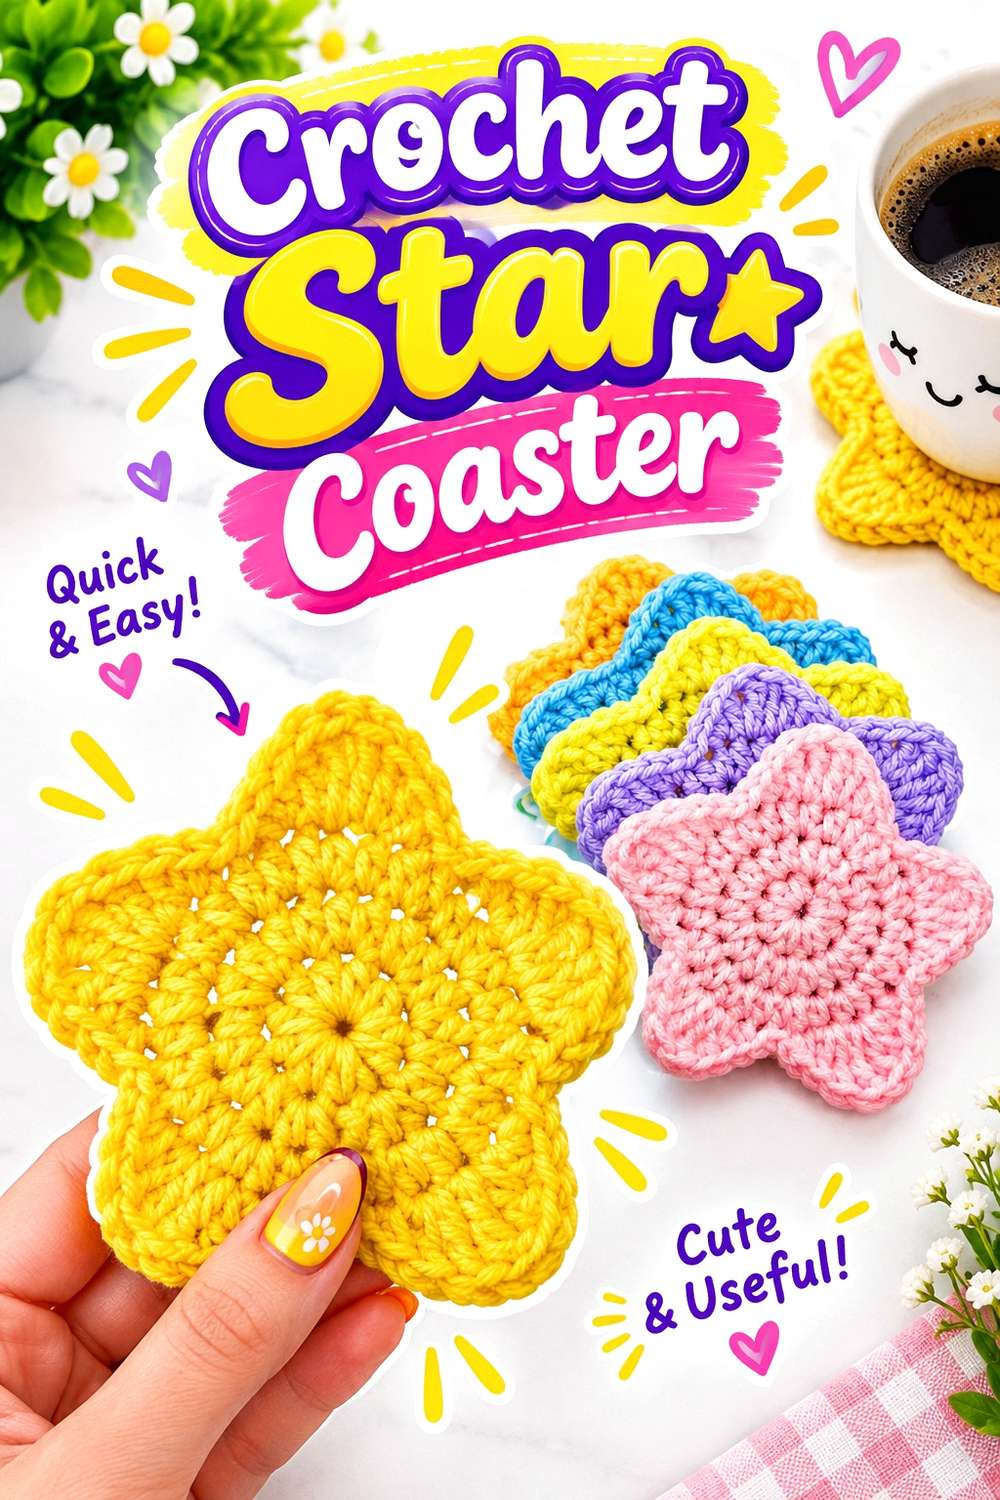
ElyseCrochets 💌 teaches a compact star coaster with a complete video sequence covering the shape and finishing. The tutorial specifically presents the project as a coaster and demonstrates a construction that does not require a magic ring.
This is one of the smallest ways to introduce celestial crochet into a room. Unlike a star ornament, it remains horizontal and functional, so the relationship between cup or glass size and visible points becomes part of the visual effect. When the coaster is in use, some of the star will naturally disappear beneath the object.
That partial coverage can work well because the points still reveal the motif around the edges. If you want the star to serve mainly as tabletop decoration when not in use, keep the surrounding surface relatively clear so the five-point outline remains easy to see.
Compare It With Your Everyday Cup
A coaster’s visible shape changes once something is sitting on it. Put one of your usual mugs over the completed piece and see how much of each point remains visible.
This is more informative than judging the star empty because it reflects how the project will actually look during use.
Make a Set Only When You Need One
Repeating the same small star across a table can create a coordinated celestial effect, but a set is not automatically better than one or two pieces.
Consider how many seats or drink spots you actually use. A smaller deliberate set avoids turning a clearly shaped motif into visual clutter across the entire tabletop.
Creator: ElyseCrochets 💌
11. Crochet Sun Coaster
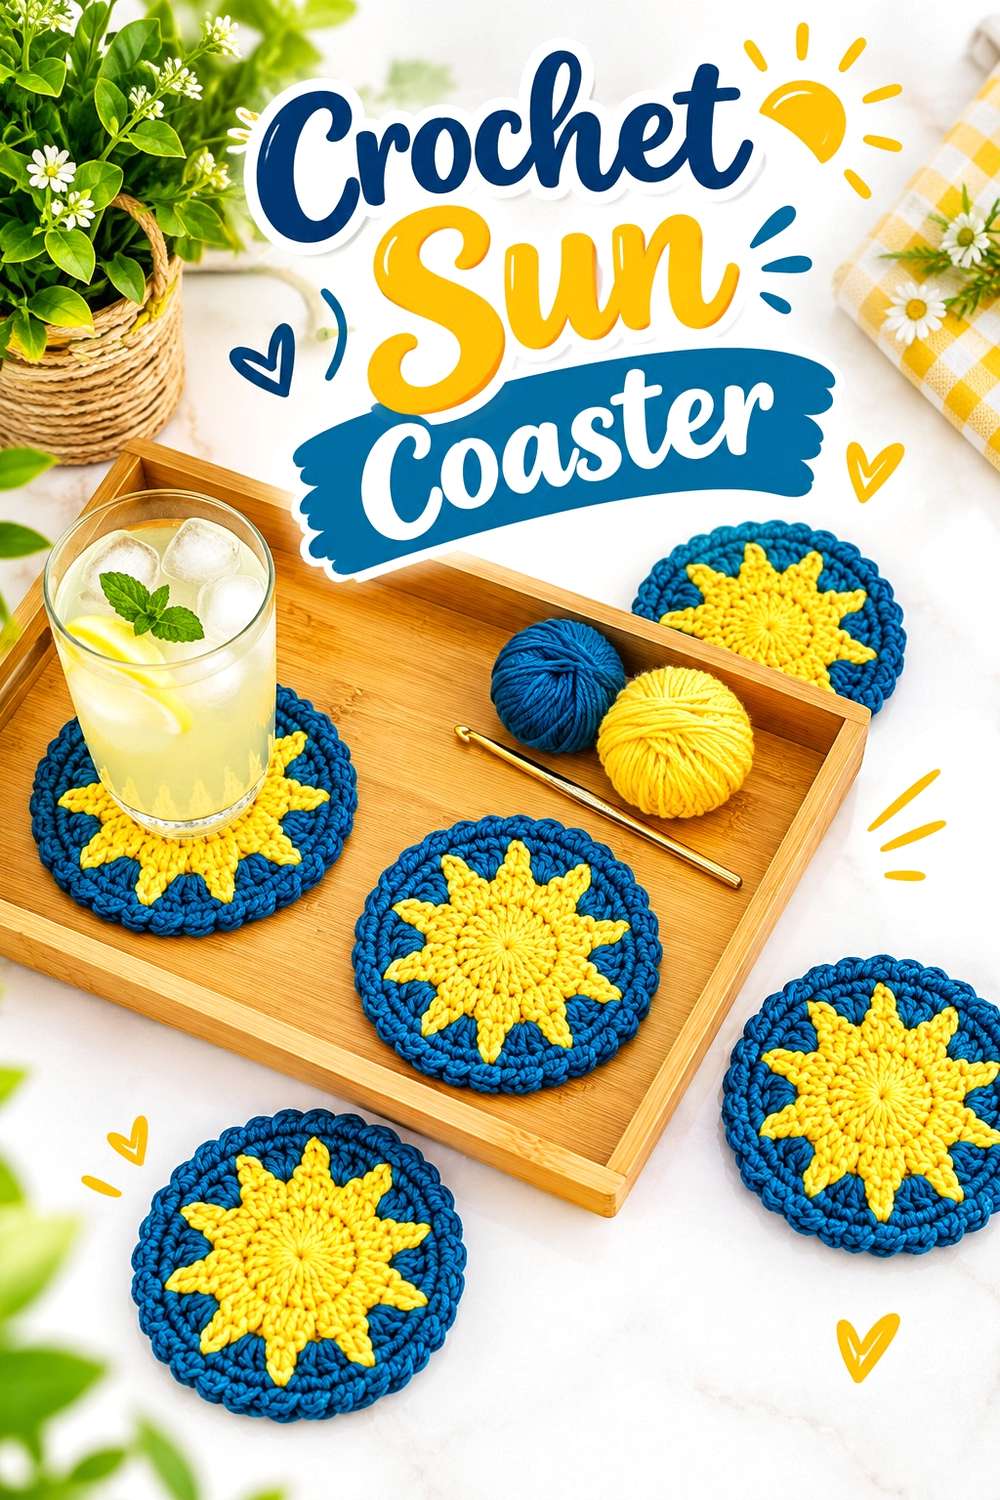
Jo to the World Creations teaches a round sun coaster with radiating outer details, giving the tabletop a celestial motif that contrasts naturally with pointed star coasters. The tutorial progresses through the complete project round by round, and the creator also provides a corresponding written pattern.
The difference between a sun and an ordinary circular coaster comes from the edge. That means the outer rays should remain visible beneath the cup for the motif to read clearly. Before deciding to enlarge or simplify them, look at the relationship between the central circle and the drinkware you intend to use.
As decor, the sun is especially useful in a mixed coaster set. One sun beside a star or moon creates a celestial grouping through different silhouettes rather than relying on the same shape in multiple colors.
Keep the Rays Clear of Nearby Pieces
If several coasters overlap in a stack or display arrangement, the sun’s outer edge can quickly disappear. Spread them slightly when you want the motif to be visible between uses.
This matters more for a decorative presentation than for ordinary storage, so you can choose whichever arrangement suits how often the pieces stay on display.
Contrast It With Cooler Celestial Shapes
The sun does not require yellow yarn to be recognizable. Its radial outline carries much of the identity.
That gives you room to coordinate it with your existing room palette while still using the shape itself to contrast with crescents, planets, and stars elsewhere in the collection.
Creator: Jo to the World Creations
12. Crochet Crescent Moon Coaster
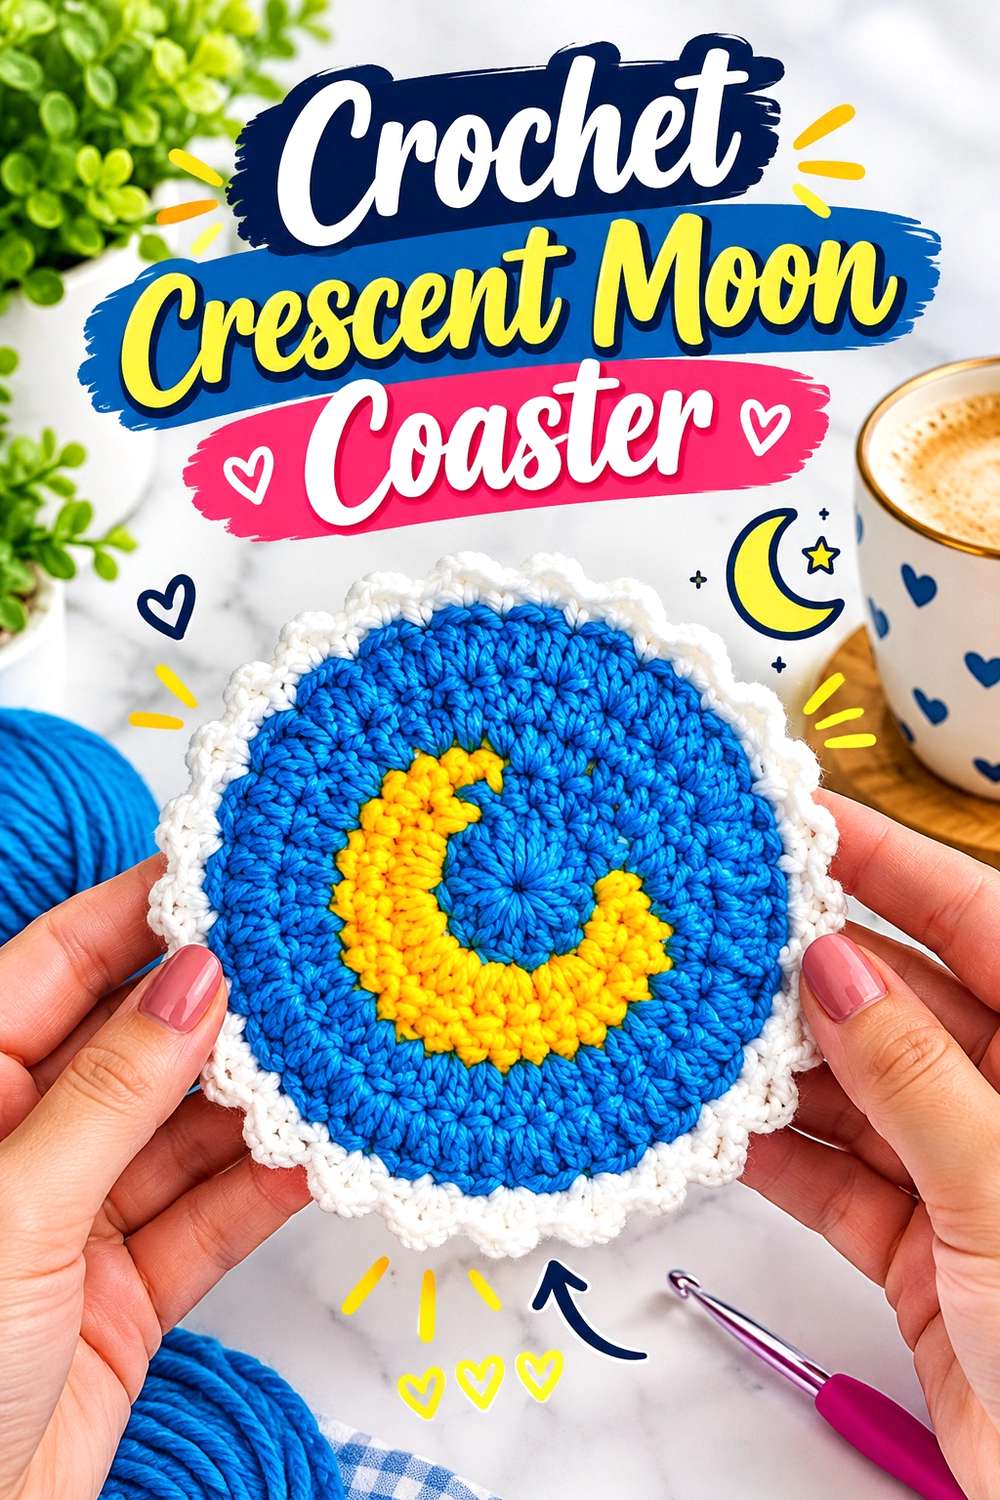
Create by K teaches a standalone crescent moon coaster, turning a shape more often seen hanging on walls into a small tabletop piece. The source is specifically a crochet moon coaster tutorial rather than a general circular coaster renamed for a celestial collection.
The open inner curve makes this project visually different from a round moon graphic. That crescent shape is also what needs protection when the coaster is in use: a very large mug could conceal so much of the piece that only an irregular edge remains visible.
For a celestial table arrangement, pair it with shapes rather than trying to match every detail. A crescent, sun, and star can make a more interesting set than several moons differentiated only by color.
Judge It With an Object on Top
A crescent coaster can look beautifully proportioned on its own but change once a cup covers the center. Test the completed shape with the drinkware you use most often.
If too little of the curve remains visible, consider reserving it for smaller cups or using it primarily as a decorative mat rather than altering the creator’s construction without a plan.
Let the Negative Space Stay Visible
The inner cutaway is what immediately identifies a crescent. Avoid overlapping another coaster or decorative object across that opening when the piece is displayed.
A little empty tabletop within and around the curve gives the silhouette more impact than filling every nearby space with additional celestial motifs.
Creator: Create by K
13. Crochet Planet Earth Amigurumi
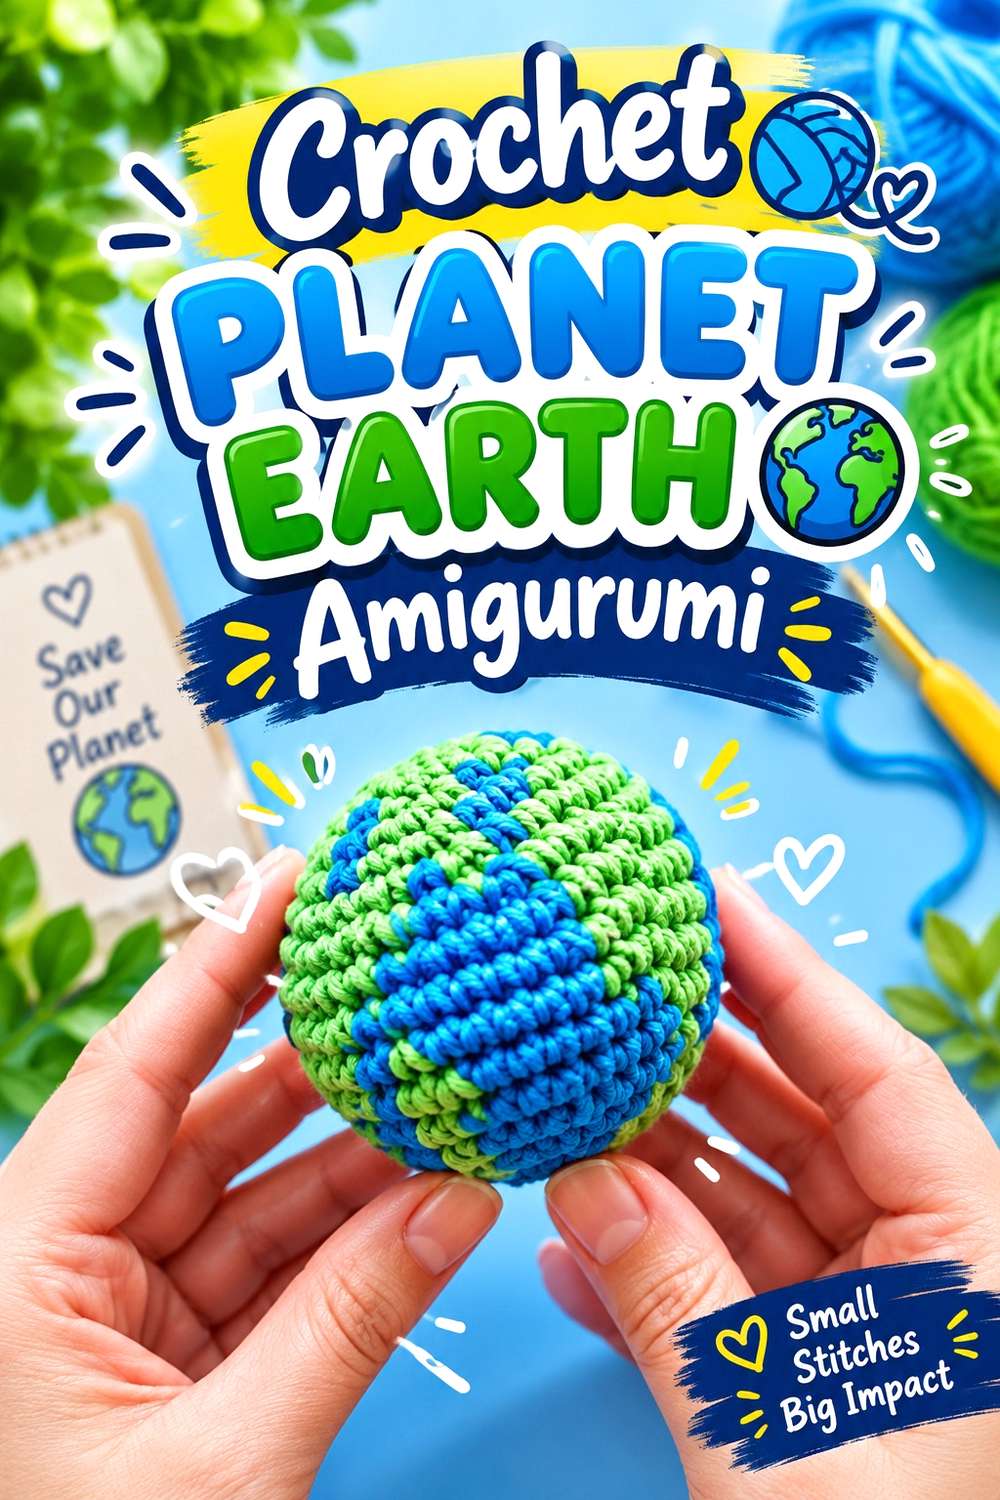
Garnknuten’s tutorial creates a small crocheted planet Earth as a stuffed three-dimensional object. The public tutorial is dedicated specifically to making the Earth amigurumi rather than presenting it merely as one component in a larger paid project.
That spherical form gives this collection an important break from flat crescents and five-point stars. It can sit on a shelf, desk, or grouped surface and still communicate the celestial theme from several angles. The changing surface colors also make orientation relevant: rotate the finished planet until the arrangement you like faces the normal viewing direction.
If you combine it with Saturn or the Sun Amigurumi below, avoid implying that the relative sizes form an astronomical scale model. They are decorative crochet projects from different creators, not a coordinated proportional solar-system set.
Display the Sphere From More Than One Angle
A three-dimensional planet does not have a single obvious front in the same way a pillow or wall hanging does. Before settling on a shelf position, rotate it and notice which surface arrangement is most recognizable from the room.
If the piece will be visible from several sides, leaving some open space around it takes advantage of that three-dimensional construction.
Avoid Forcing a Scale Relationship
Earth, Saturn, and the Sun in this article come from separate tutorials with independent proportions. Grouping them can create a fun celestial vignette, but their relative dimensions should be treated as decorative rather than scientifically scaled.
That frees you to arrange them according to the shelf rather than trying to reproduce orbital or planetary proportions they were not designed to represent.
Creator: Garnknuten
14. Crochet Sun Amigurumi
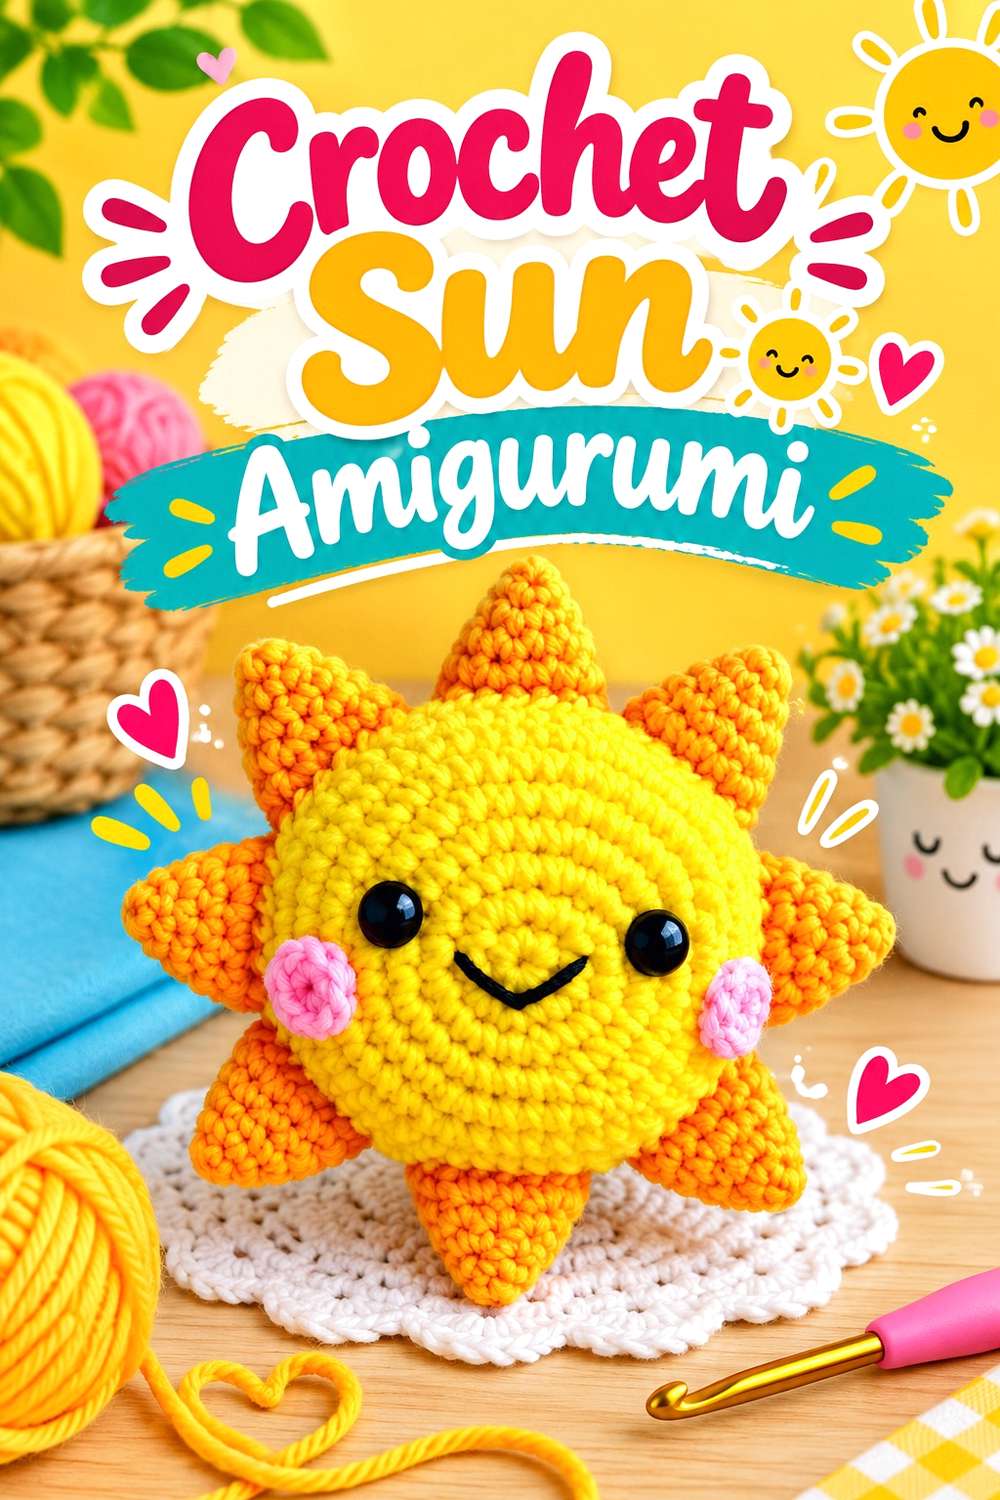
Cute Crochet’s tutorial gives the sun a soft, character-style interpretation: two crocheted faces form the stuffed center, with eight rays arranged around it and facial details added to the front.
This is quite different from the geometric Sun Wall Hanging. Instead of functioning as a large radial graphic, the amigurumi becomes a compact shelf or soft-decor object with an obvious front. That face creates a more whimsical tone, which can be useful in a playful celestial room but may stand apart from minimal moon-phase pieces.
Decide whether you want that contrast before adding several character-faced objects. One expressive sun can act as the friendly focal point among more abstract planets and stars without requiring every celestial piece to receive the same treatment.
Decide Whether You Want Character or Symbol
A plain sun motif reads as a symbol; an embroidered or constructed face turns it into a character. That difference influences how it pairs with the rest of the room.
If your other projects are graphic and minimal, the amigurumi can provide a deliberate playful exception. If you prefer a more abstract theme, the larger Sun Wall Hanging may fit more naturally.
Keep the Rays Visible From the Front
The rays frame the stuffed center and help keep the object recognizably sun-like. Avoid pushing the piece tightly between books or cushions where several rays disappear.
A small stand-alone spot on a shelf allows the circular face and radial outline to work together as intended.
Creator: Cute Crochet
15. Crochet Saturn Amigurumi

ToyGurumi’s Saturn is part of the creator’s solar-system crochet series and is specifically identified as a Planet Saturn Amigurumi video tutorial. Pattern documentation on Ravelry likewise attributes the design to Ankita Palit and the ToyGurumi YouTube channel.
The ring makes Saturn one of the most immediately distinctive planets to translate into crochet. It also creates a wider footprint than a simple sphere, so the project deserves more surrounding shelf space than its central planet alone suggests.
This is a good project when you want celestial decor to move beyond moons and generic stars. Pairing one Saturn with Earth can suggest a broader solar-system collection without making every object identical. Just remember that the projects in this article are not intended as a coordinated scale model.
Plan Space for the Ring
Saturn’s defining feature projects beyond the planet body. When choosing a shelf, measure visually according to the entire outline rather than the sphere alone.
Placing the ring immediately beside a tall object can hide part of it from the normal viewing angle, which removes much of what distinguishes Saturn from another crocheted ball.
Make Saturn the Planetary Focal Point
If you display several round celestial objects together, the ring naturally attracts attention. Use that to your advantage rather than adding extra embellishments to compete with it.
A little separation between Saturn and smaller spherical pieces can make the different planetary forms easier to appreciate.
Creator: ToyGurumi
16. Crochet Stuffed Moon Amigurumi

Gratia Project teaches a three-dimensional moon worked in the round, then sewn into its curved form and filled with stuffing. The creator’s accompanying pattern page confirms that the step-by-step video covers the moon amigurumi construction and identifies the project as a stuffed finished object.
This version is useful when you like the crescent silhouette but do not want another pillow-scale piece. Its smaller stuffed form can occupy a shelf or tabletop while preserving the curve that distinguishes it from the spherical planets.
Because the shape is created through both crochet and final assembly, follow the source closely before judging the crescent while it is still flat. The form that matters is the finished stuffed object, not simply the appearance of the fabric during construction.
Choose It for a Smaller Crescent Accent
The Crescent Moon Pillow needs enough furniture space for its broad curve. This amigurumi can bring the same basic celestial symbol into a much smaller display area.
That makes it particularly useful on a bookshelf where a full pillow would be impractical but a flat appliqué might disappear among other objects.
Leave the Inner Curve Open
The negative space within the crescent is essential to the silhouette. Position the piece so another ornament, bookend, or plant does not visually fill that gap.
A simple backing area makes the outer and inner curves easier to see and helps the moon remain recognizable even at a relatively small scale.
Creator: Gratia Project
17. Crochet Moon-and-Star Wall Hanging
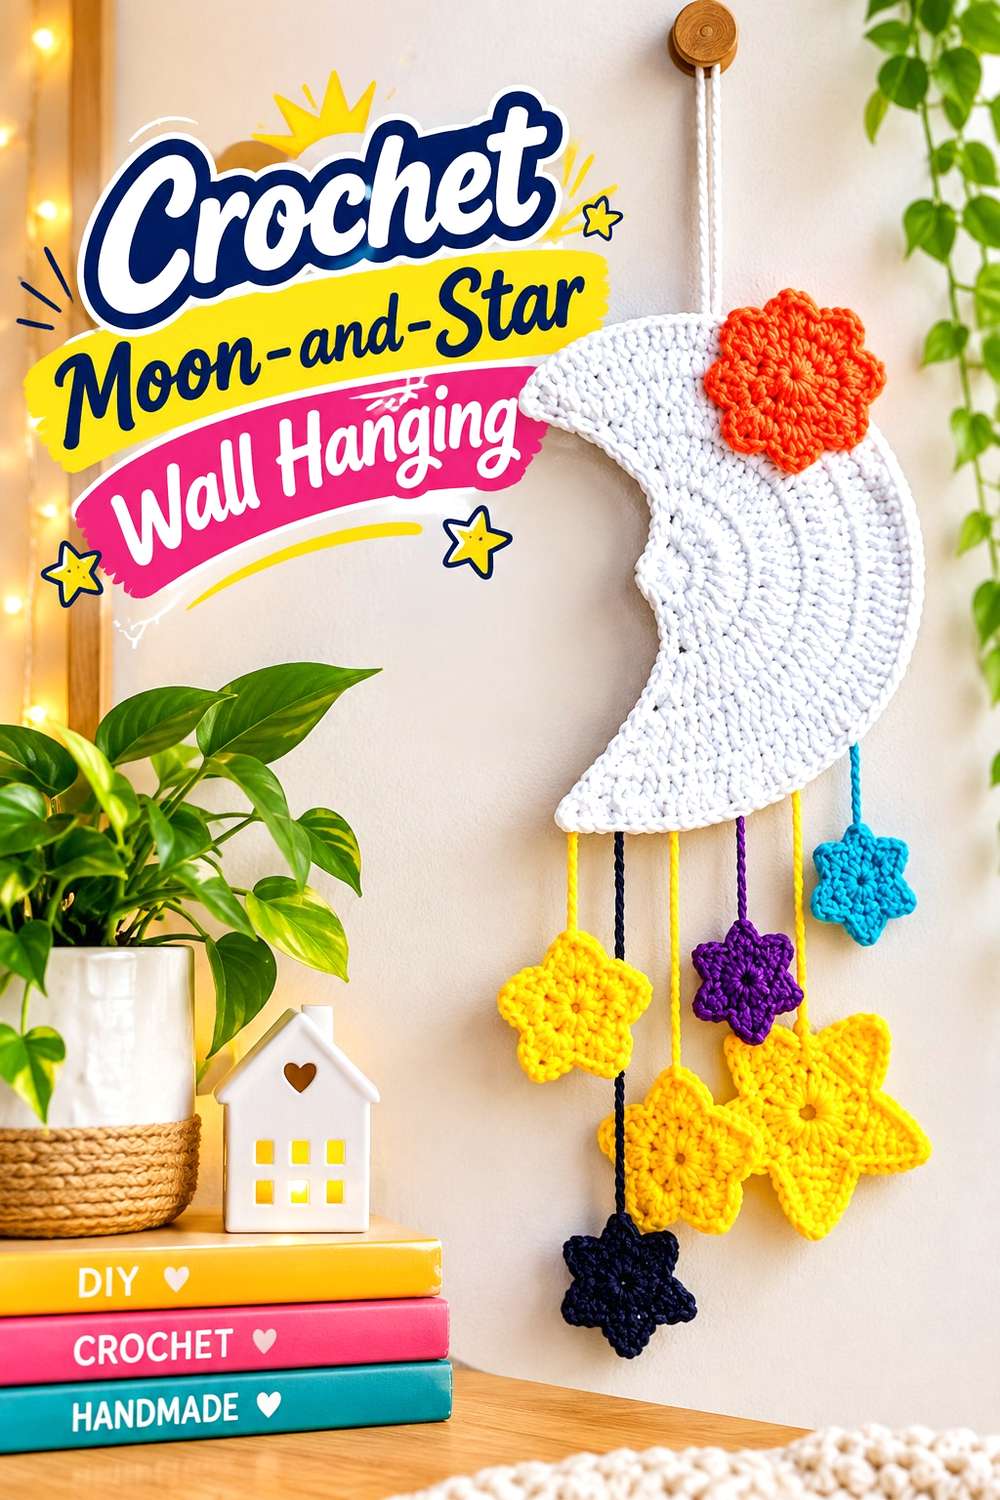
Habijabi Ideas teaches a wall hanging that brings a moon and star together as one room-decor project rather than asking you to assemble unrelated motifs after following the tutorial. The source is explicitly presented as a crochet moon-and-star wall hanging tutorial.
That combined composition can be useful when you have one narrow wall location and do not want a long garland stretching across it. The moon provides the larger curved anchor while the star adds a second recognizable celestial shape.
Because both motifs already share one hanging arrangement, extra surrounding celestial decorations may be unnecessary. Give the complete piece enough open space to read as one composition rather than placing another garland immediately beside it and splitting attention between two systems of hanging lines.
Choose It for a Concentrated Display
A moon-phase garland needs horizontal spread, while this wall hanging keeps the celestial elements more compact. That makes it useful beside a desk, between narrow pieces of furniture, or on a wall section where width is limited.
Check the complete hanging length as well as its width so the lower elements do not collide visually with whatever sits beneath it.
Treat the Moon and Star as One Unit
The strength of the project comes from the relationship between both shapes. When positioning it, center the complete composition rather than centering only the largest moon.
Standing several steps away can help you see where the visual midpoint actually falls once all hanging elements are included.
Creator: Habijabi Ideas
18. Crochet Moon-and-Star Garland
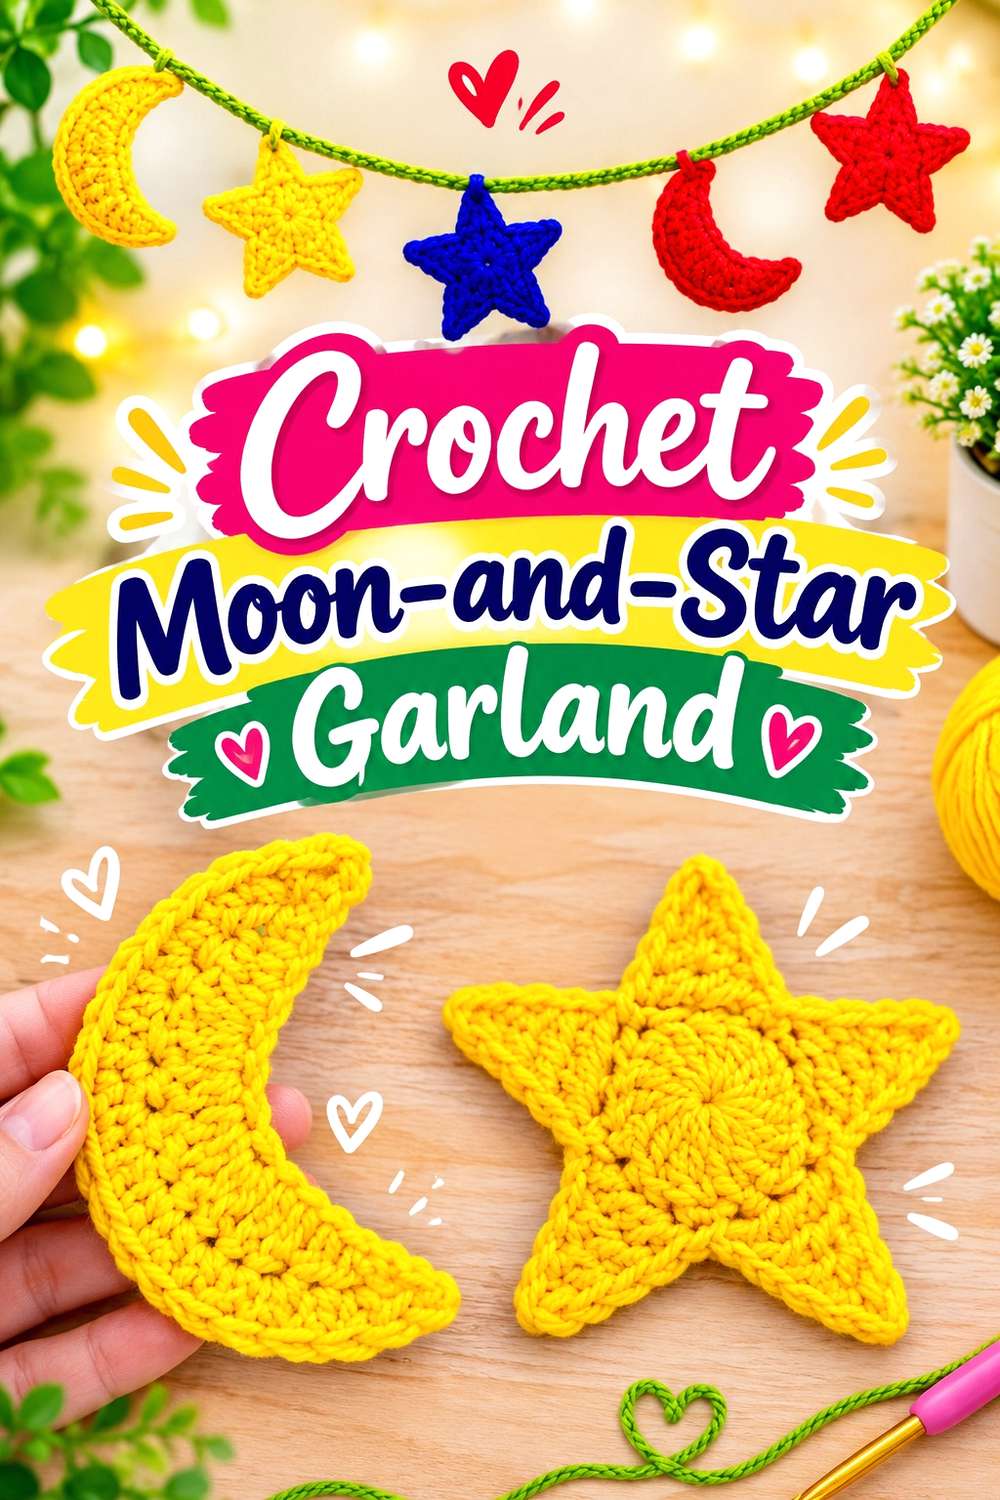
sonia’s wool world teaches moon and star shapes specifically in the context of a crochet garland, providing a second combined celestial design with a different format from the vertical wall hanging above. The public tutorial describes the process as step-by-step and shows the motifs arranged as hanging decor.
This format works particularly well when you want recognizable individual shapes rather than the rectangular colorwork panels of the Moon Phases Garland. Alternating crescents and stars creates contrast along the strand, so the eye does not encounter the same silhouette repeatedly.
As with any garland, the wall width should guide your decision. Stretching it too tightly can make the motifs feel isolated, while allowing too much slack may change how they face. Follow the creator’s assembly first, then judge the finished strand in its actual location.
Use Alternation to Create Rhythm
The visual interest comes partly from moving between curved moons and pointed stars. If you extend the garland beyond the demonstrated arrangement, preserve a deliberate sequence rather than adding motifs randomly.
A repeated order can make even varied colors feel organized because the shapes provide a predictable rhythm.
Check the Lowest Point of the Strand
A garland that looks short while lying flat can hang lower once draped. Temporarily attach both ends where you intend to display it and check the center drop.
This matters above mirrors, headboards, shelving, or artwork where the lowest motifs could otherwise overlap another element.
Creator: sonia’s wool world
19. Crochet Moon-and-Star Appliqué Set
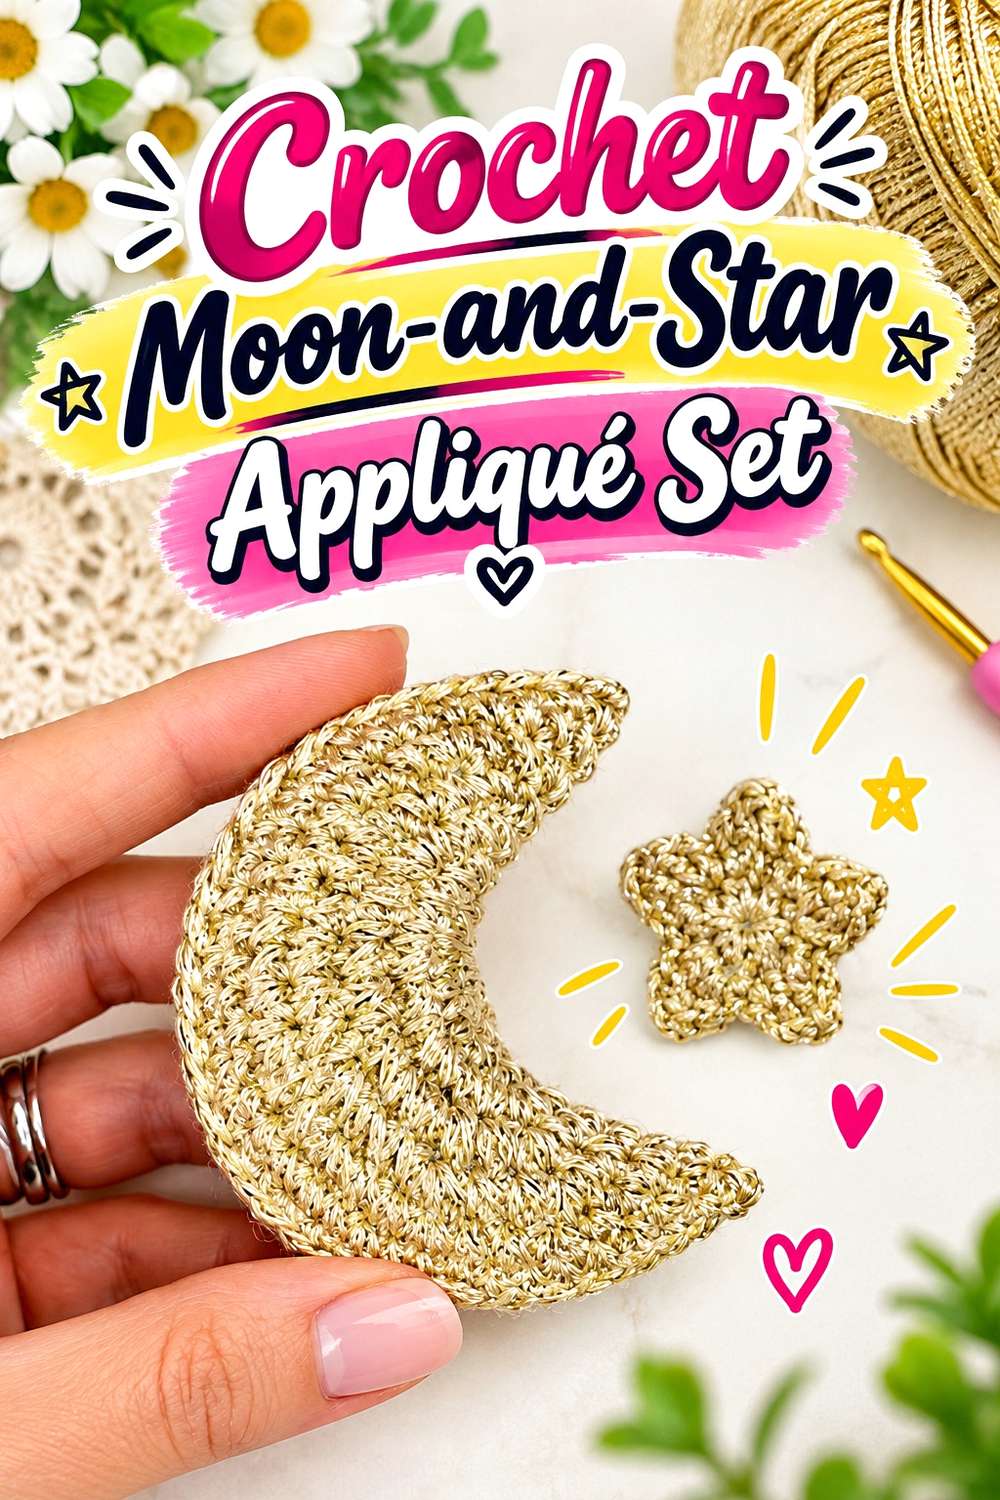
Blossom Crochet teaches separate moon and star shapes that can be used as appliqués or small hanging pieces. The creator specifically demonstrates the motifs rather than a complete wall installation and mentions possible uses including keychains and mobile-style arrangements.
For this decor collection, that makes the project a flexible component rather than a finished room piece. One option is to arrange several completed motifs on a textile panel or within a decorative frame, but that mounting stage would be your own design decision. Follow the tutorial for the moon and star themselves, then plan the background independently.
This approach can be useful when a predesigned garland does not fit the dimensions you have. You control spacing and composition, but that flexibility also means you need to make more display decisions than with an already assembled wall hanging.
Test a Layout Before Attaching Anything
Make paper shapes approximately matching your finished motifs and move them around the intended background first. This lets you compare a symmetrical arrangement with a looser scattered one without committing the crochet.
The exercise is particularly useful when the display area has an unusual proportion, such as a narrow frame or tall wall panel.
Keep the Source Boundary Clear
The tutorial teaches the moon and star components. Framing them, stitching them onto another textile, or creating a custom hanging system is an adaptation for decor.
That freedom is useful, but any structural mounting method should be planned according to your chosen backing rather than assumed to be included in the original instructions.
Creator: Blossom Crochet
20. Crochet Moon Granny Square
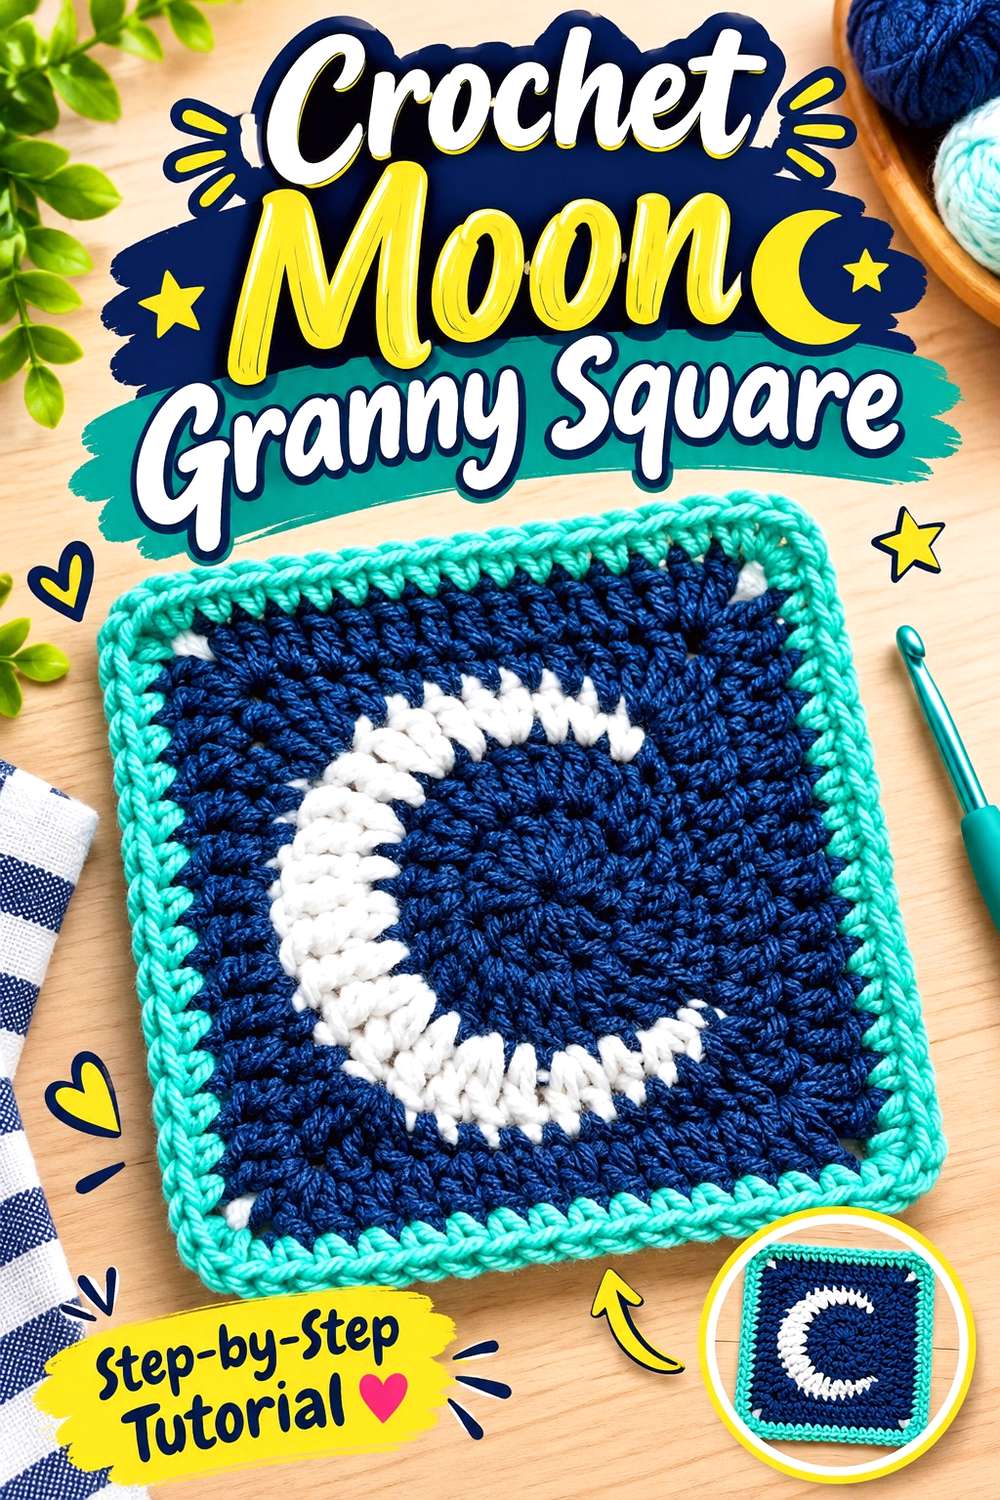
The Caffeinated Snail’s updated tutorial creates a granny square containing a moon motif and includes the square’s rounds and an optional border treatment. It is a complete tutorial for the square itself, not for a finished wall hanging, blanket, or pillow.
That limitation is also what makes it flexible for decor planning. A single square can be treated as a small textile artwork, while several could become part of a larger joined project if their finished dimensions and edge construction work for the intended layout. Framing one square or attaching it to a separate display backing would be your adaptation rather than something credited to the tutorial.
Compared with free-form crescent motifs, the square format gives the moon a built-in boundary. This can make it easier to combine celestial imagery with more geometric room decor.
Decide Between One Square and a Repeat
One moon square can act almost like a small textile tile. Multiple squares introduce repetition and require additional planning around alignment, joins, and overall dimensions.
Do not assume that simply adding more motifs preserves the same visual balance. Lay completed or measured squares out first and judge the total footprint before committing to a larger panel.
Use the Border to Define the Image
A square border can visually separate the moon from whatever surface surrounds it. That is particularly useful if you want to frame or display the piece against a patterned wall.
Consider how much contrast you need between motif, square background, and the actual room so the moon remains the first element the eye notices.
Creator: The Caffeinated Snail
21. Crochet Shooting Star Wall Hanging

Noor’s Knits teaches a star fringe wall hanging originally presented as a Ramadan craft. The project combines a crocheted star, long fringe, and a dowel-based hanging arrangement, and the creator provides a complete video tutorial for the decor piece.
For a general celestial collection, the star and trailing fringe can be styled as a shooting-star form, but that broader room interpretation is separate from the tutorial’s original Ramadan context. Nothing about changing its surroundings should be presented as changing what the creator actually teaches.
The project is especially effective where you want movement downward rather than a compact star centered on a wall. Fringe produces much of that visual length, so measure the complete hanging zone before choosing its position.
Respect the Original Project Context
The credited project is presented by Noor’s Knits as Ramadan decor and a kids’ craft. Using the same crocheted construction in a broader celestial room is a styling choice made for this collection.
Keeping that distinction visible respects the source while still showing how a star form can work beyond one seasonal or cultural display setting.
Give the Fringe a Clear Drop
Trailing strands create the impression of movement and are important to the shooting-star interpretation. Avoid positioning the piece directly above tall objects that visually cut through those strands.
A clear vertical section of wall allows the star at the top and the fringe beneath it to read as one continuous composition.
Creator: Noor’s Knits
22. Crochet Star Granny Square
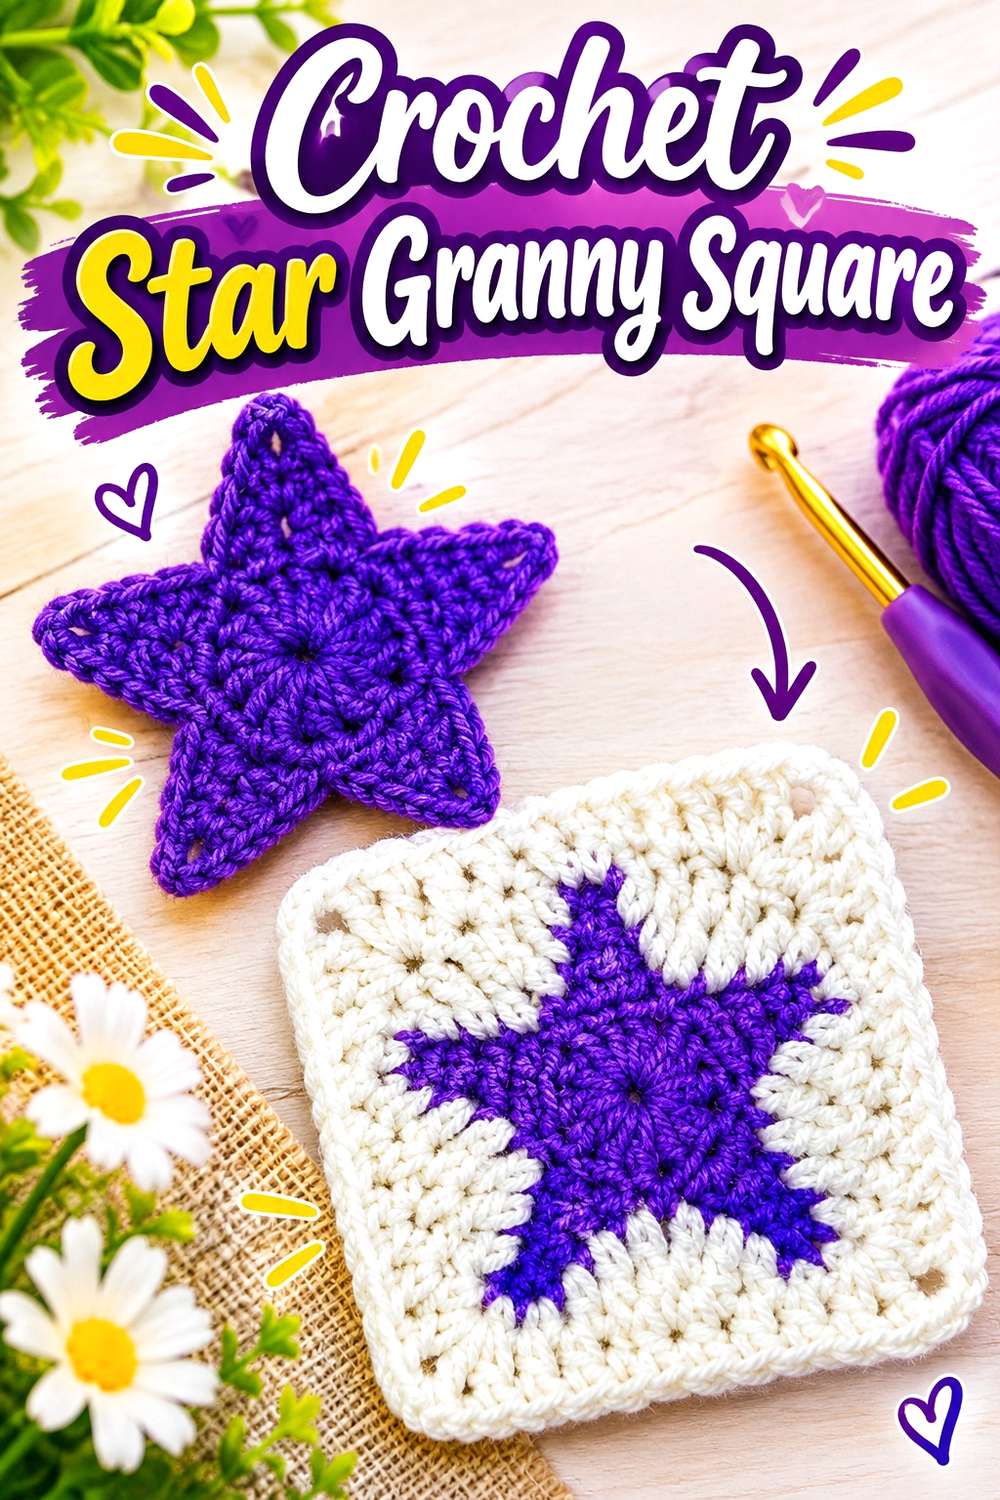
VivCrochets teaches a square built around a clear star motif and also discusses possible uses for the finished square. The source covers the star granny square itself rather than a completed celestial wall panel, so it belongs here as a decor component rather than a ready-made hanging.
That makes it a useful counterpart to the Moon Granny Square. You could display one star square alone, alternate stars and moons in a larger textile, or use the square as the starting point for another home-decor construction. Any such larger assembly should be planned separately, particularly because joins and finished dimensions influence the final proportions.
The square format works well when you like celestial imagery but prefer straight outer edges to free-form stars. The star remains contained within a repeatable unit, which can make it easier to integrate with cushions, framed textile art, or a larger geometric composition.
Compare a Single Motif With a Grid
One square keeps all attention on one star. A grid shifts the effect toward a repeating field of celestial symbols.
Before making a large quantity, complete one square and place paper copies beside it at the planned scale. That simple mockup can tell you whether repetition strengthens the idea or makes the individual stars feel too small.
Check Compatibility Before Mixing Squares
A Moon Granny Square and Star Granny Square may both have four sides, but that alone does not guarantee one-for-one compatibility. Finished dimensions, edge stitch structure, tension, and blocking can all affect how neatly different designs join.
If you want a mixed celestial panel, make and measure test squares first rather than assuming two independent tutorials will produce interchangeable units.
Creator: VivCrochets
Conclusion
For a strong focal wall, start with the Crochet Sun Wall Hanging, Moon Phases Garland, Moon-and-Star Wall Hanging, or Shooting Star Wall Hanging. The Star Rug, Star Doily, and coaster designs move celestial crochet onto floors and tables, while the Crescent Moon, Star, and Cloud Pillows add shape without using wall space. Earth, Saturn, the Sun, and the Stuffed Moon work especially well when you prefer small three-dimensional shelf decor.
If you want to design your own arrangement, the Moon-and-Star Appliqué Set and two granny squares provide the most flexibility, but they also leave the display construction to you. Whichever direction you choose, use the original tutorials for exact crochet construction and treat additional mounting, joining, or room styling as a separate planning step.
Frequently Asked Questions
Which crochet celestial decor ideas work best for a small room?
Choose projects that use vertical or tabletop space rather than wide walls. The Stuffed Moon Amigurumi, Earth, Sun, or Saturn can sit on relatively small surfaces, while individual Star and Sun Coasters add the theme without permanent installation. For wall decor, the Moon-and-Star Wall Hanging concentrates several celestial elements into one composition. A long Moon Phases Garland needs more horizontal room, so it may be less convenient where wall sections are narrow or interrupted by shelving.
Can I combine the moon and star granny squares into one decor project?
Possibly, but do not assume compatibility solely because both tutorials create squares. Make one sample of each first and compare finished dimensions, edge stitch counts, tension, and how the fabrics behave after any recommended finishing. If they differ, forcing them together can distort the larger panel. You could instead display them separately in matching frames or use one design repeatedly. The tutorials establish their individual squares; the mixed assembly would be your own project planning.
How can I make celestial crochet look cohesive without using the same color everywhere?
Repeat one or two design relationships instead of forcing identical yarn colors. You might use several different shapes with similarly restrained contrast, repeat the same background color around different motifs, or distribute stars, moons, and planets across separate parts of the room. Scale also creates cohesion: one large wall piece accompanied by two or three smaller tabletop accents can feel more deliberate than many similarly sized objects scattered throughout the space.
Which projects are best when I do not want stuffed decor?
Look at the Sun Wall Hanging, both garlands, Star Ornament, Star Rug, Star Doily, three coaster ideas, Moon-and-Star Wall Hanging, Shooting Star Wall Hanging, appliqué set, and granny squares. Those projects rely primarily on flat or hanging crochet rather than filled three-dimensional forms. The Crescent Moon, Star, and Cloud Pillows plus the four amigurumi ideas are the main stuffed choices. This distinction can help if storage space or the number of soft furnishings in the room is already a concern.
Can I turn the appliqués into a nursery mobile?
The Blossom Crochet source teaches moon and star motifs and mentions mobile-style use, but it does not establish every detail of a complete suspended nursery installation. Treat the motifs as the verified crochet component and plan the hanging structure separately. Placement, cords, attachment methods, and intended access all need their own consideration. If the decor will be used around infants or young children, do not infer safety from the crochet tutorial itself; follow current authoritative guidance for the actual placement and construction of nursery items.
Do celestial projects need dark blue, black, silver, or gold yarn?
No. Celestial recognition in many of these projects comes primarily from shape: the crescent opening, star points, solar rays, Saturn’s ring, or repeated phases. Color can reinforce the theme, but it does not have to imitate a night sky. Choosing colors already present in the room can make the crochet feel more integrated. Where a tutorial uses colorwork to define a specific image, however, preserve enough contrast for that image to remain readable even if you change the original palette.