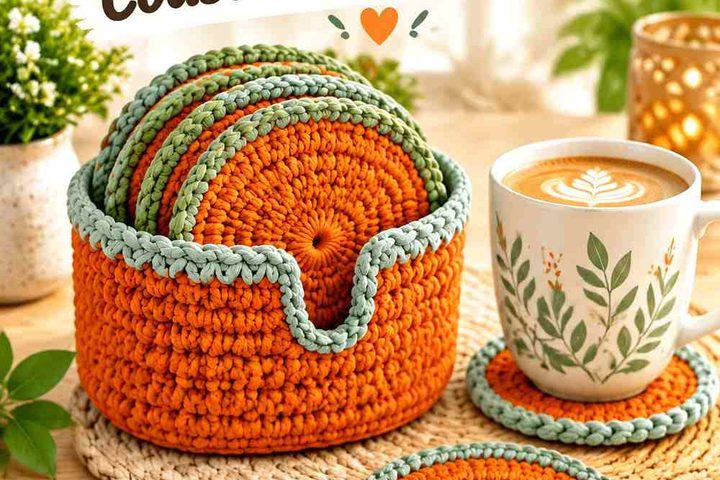
A tiered tray gives small crochet projects a place to stand out without requiring enough pieces to decorate an entire mantel or table. For fall, that can mean a plump pumpkin on one level, a flat maple leaf tucked behind it, a tiny mug near the front, and a woodland figure adding height without taking over the display.

The useful differences are not just color. Some of these projects stand independently, some lean against a riser, some can hang from the tray structure, and others work as compact fillers between taller pieces. You will also find harvest foods, woodland animals, florals, and October or Thanksgiving-specific accents. The notes below focus on choosing proportions, maintaining visible shapes, and deciding which combinations make sense for the actual tray you have.
Quick List
Crochet Mini Ribbed Pumpkin Accent
Crochet Mini Acorn Harvest Accent
Crochet Maple Leaf Leaning Accent
Crochet Apple Harvest Amigurumi
Crochet Small Sunflower Tray Accent
Crochet Mini Mushroom Woodland Accent
Crochet Pumpkin Pie Slice Display Piece
Crochet Mini Coffee Mug Accent
Crochet Pumpkin-Holding Fall Gnome
Crochet Scarecrow Peg Doll Accent
Crochet Owl Woodland Mini
Crochet Thanksgiving Turkey Figure
Crochet Corn Cob Harvest Accent
Crochet Mini Basket for Fall Fillers
Crochet Candy Corn October Accent
Crochet Pine Cone Woodland Accent
Crochet Hedgehog Fall Shelf Figure
Crochet Squirrel Woodland Accent
Crochet Stacked Pumpkin Focal Piece
Crochet Flat Pumpkin Coaster Accent
Crochet Pumpkin Hanging Tray Charm
Crochet Chrysanthemum Fall Flower Accent
Plan Around the Tray’s Usable Space, Not Its Overall Diameter
A tiered tray can look spacious until the center support, upper shelf, handles, or decorative rim reduce the usable area. Measure the flat footprint and vertical clearance of each level before choosing the larger crochet pieces. A character that fits comfortably on the top tier may be too tall beneath the second shelf, while a broad pumpkin can block several smaller accents.
It helps to think in display roles. Choose one or two focal pieces, then surround them with lower fillers and flat accents rather than filling every opening with another stuffed figure. Also consider viewing angle. If your tray normally sits against a wall, a decorative piece only needs its strongest side facing forward. A tray on an island benefits more from projects that remain recognizable from several directions.
Match Crochet Structure to the Job Each Piece Has to Do
Stuffed pumpkins, food pieces, and amigurumi need enough shape retention to remain recognizable among neighboring decorations. Flat leaves and coasters have the opposite problem: if they curl heavily, they may disappear behind other objects instead of creating a clean backdrop. Blocking can help where the yarn and project construction allow it.
Yarn substitution also changes more than color. A thicker yarn can enlarge a project and consume valuable shelf space, while a fuzzier fiber can soften details that make tiny shapes readable. If size is critical, compare the tutorial’s yarn, hook information, and stated finished measurements before substituting. For tray decorating, the most useful piece is not automatically the cutest one by itself—it is the one whose footprint and height fit the opening you need to fill.
Build a Fall Palette That Can Last Beyond October
A tray made entirely from bright orange pumpkins quickly reads as Halloween or pumpkin-season decor. For a longer autumn display, distribute the seasonal cues. Rust, cream, wheat, muted green, brown, gold, and deep red can support pumpkins while apples, acorns, corn, mushrooms, leaves, pine cones, flowers, and woodland animals broaden the theme.
Then use the more date-specific projects deliberately. Candy corn pushes the arrangement toward October, while a turkey and pumpkin pie make Thanksgiving more obvious. Keeping those pieces removable lets the core tray stay in place while a few accents change through the season. This is especially useful when storage space is limited and you would rather refresh one arrangement than build separate trays for every fall holiday.
Crochet Mini Ribbed Pumpkin Accent
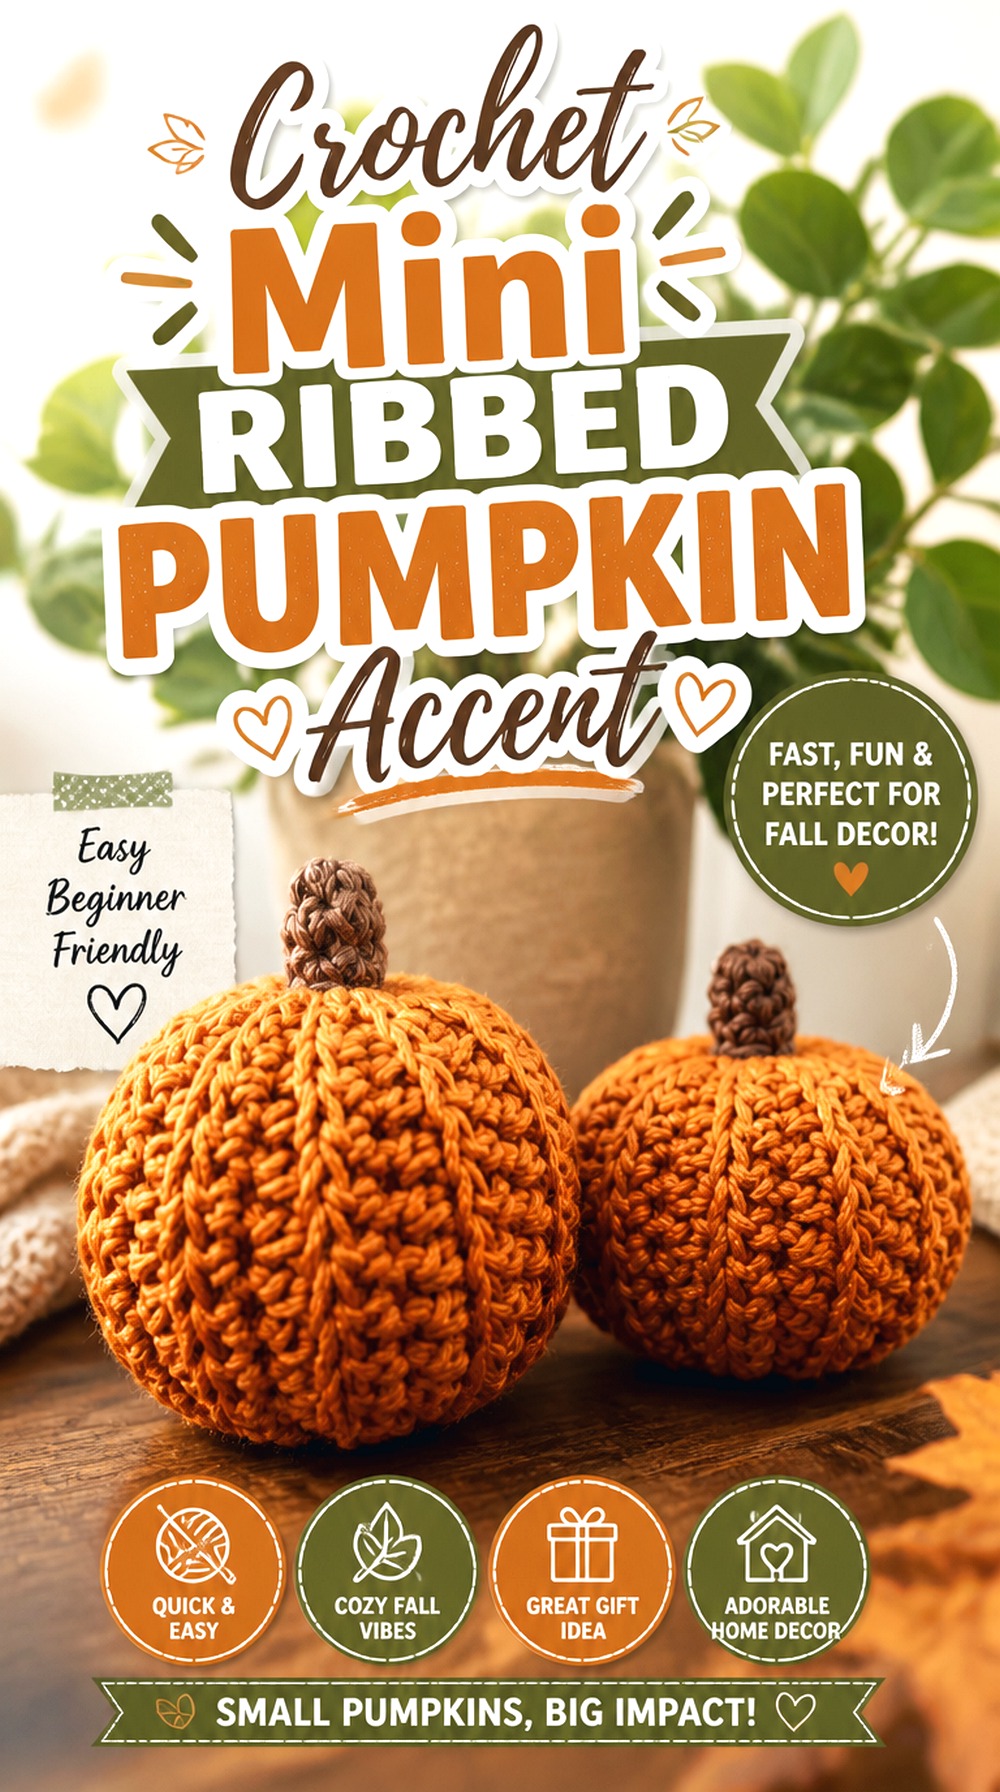
A small ribbed pumpkin is one of the easiest forms to integrate into a crowded tiered display because its rounded silhouette reads clearly from the front without needing extra accessories. The VivCrochets tutorial is specifically presented as a mini pumpkin and fall decor project, making it a much closer scale match than tutorials designed for large mantel pumpkins.
Use one as a low front-of-tray accent or pair it with something narrow and taller, such as a flower or leaf. The ribbed surface adds texture even when the color palette stays neutral, so this option works well when you want autumn character without relying on saturated orange.
Let the Ribbing Supply the Visual Detail
A ribbed pumpkin already creates alternating highlights and shadows, so it does not need many additional embellishments to stay visible. That matters on a tray where too many tiny bows, tags, stems, and signs can become visual clutter. If you are using a low-contrast neutral palette, place the pumpkin against a background with enough tonal difference for those ridges to remain visible.
Check the Finished Footprint Before Making a Matching Set
Repeating several pumpkins can create a miniature pumpkin patch, but multiplying the same width may consume a whole tier faster than expected. Make or measure one finished example before committing to multiples. If you substitute yarn, remember that the resulting size may change, so do not assume every “mini” version will fit your available shelf space identically.
Crochet Mini Acorn Harvest Accent
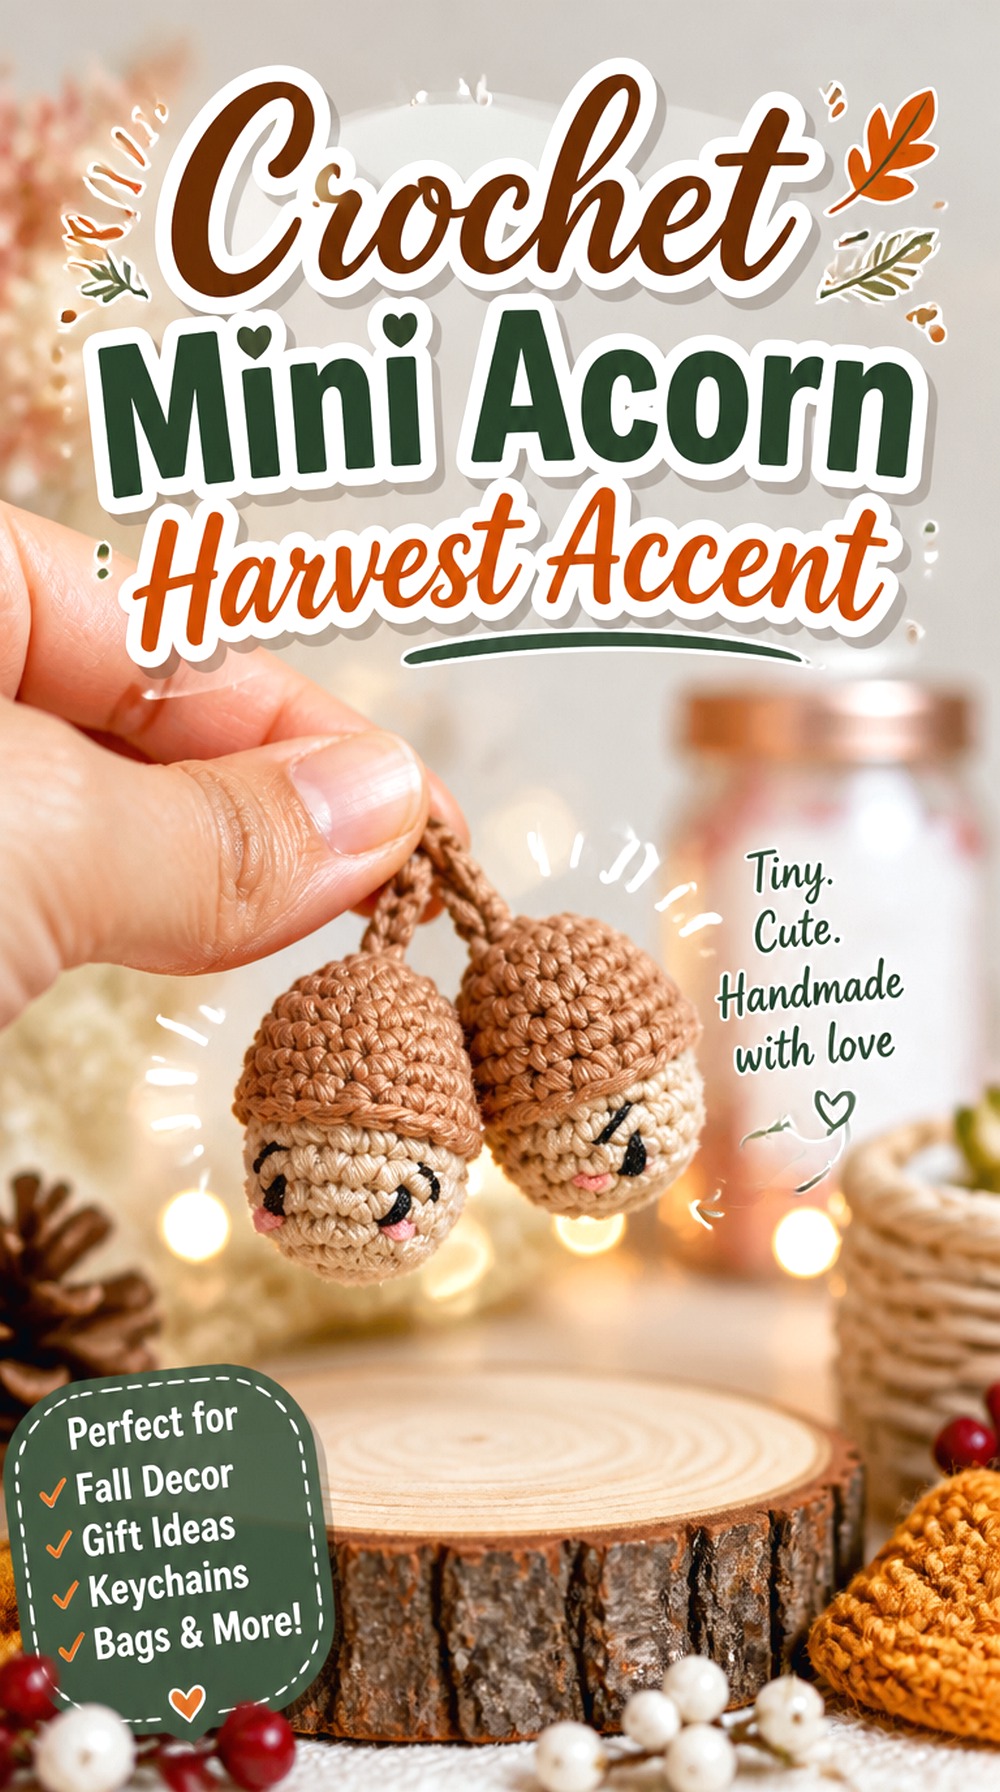
An acorn is considerably narrower than most stuffed pumpkins, which makes it useful for filling one of those awkward spaces beside a tray post or between two larger figures. O Recuncho de Jei’s tutorial is specifically for a mini acorn amigurumi, giving this project the compact starting point that tiered-tray decorating needs.
The contrasting cap and nut body also make the form easy to recognize without relying on facial features or extra decorations. One acorn can serve as a tiny woodland detail, while several can form a scattered harvest cluster. Because the shape is small, color contrast between the cap and lower section becomes more important than it would on a large plush.
Give the Cap Enough Contrast to Stay Recognizable
On a miniature object, similar brown shades may merge visually from several feet away. You do not need extreme contrast, but separating the cap and body with distinct values or textures helps preserve the acorn silhouette. Test your yarn colors together in the lighting where the tray will actually sit, especially if the display uses many warm neutral shades.
Use Acorns Where a Pumpkin Would Feel Too Wide
The acorn’s more compact profile makes it particularly useful beside broad pieces such as a stacked pumpkin or gnome. Instead of squeezing two substantial decorations onto one shelf, use the acorn as a scale transition between the focal object and smaller flat fillers. This keeps the tier from looking uniformly bulky.
Original Tutorial and Creator Credit
Creator: O Recuncho de Jei
Crochet Maple Leaf Leaning Accent
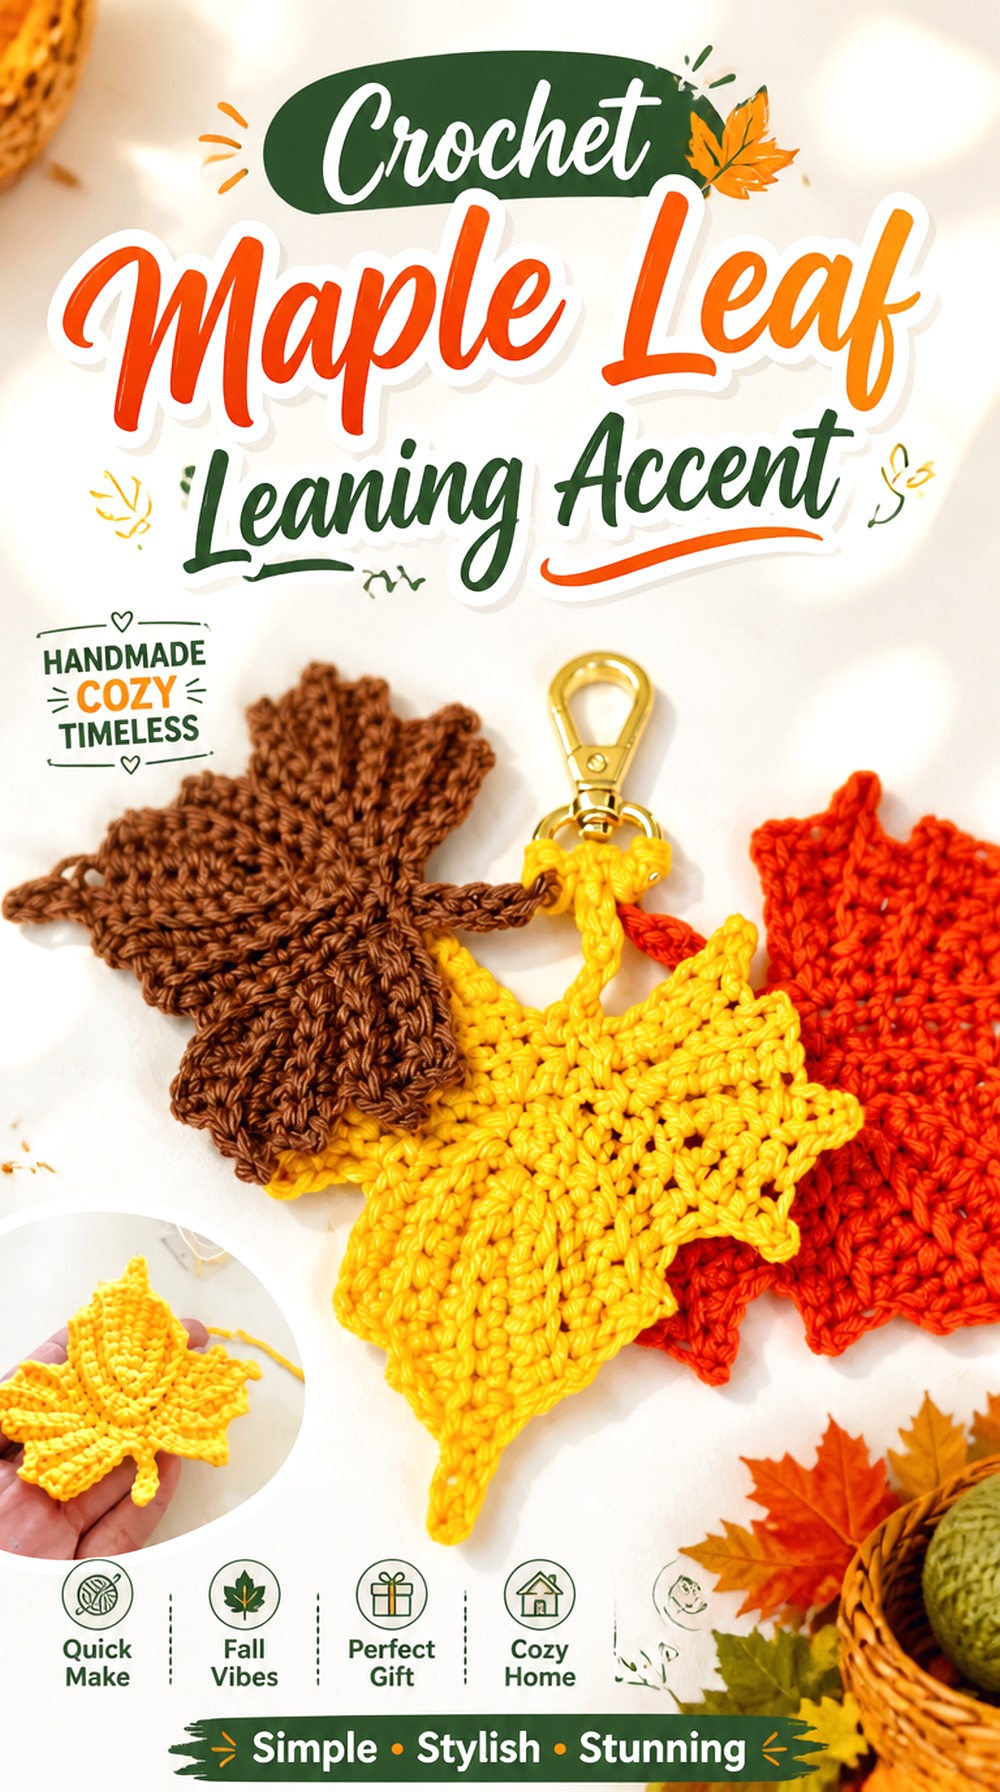
A maple leaf gives the tray something most stuffed amigurumi cannot: a flat shape that can occupy visual space without requiring much shelf depth. ANDREI Crafts Show demonstrates a crochet autumn maple leaf, making it suitable for leaning against a riser, placing beneath a small figure, or positioning toward the back of a tier as a warm-colored backdrop.
This is also a useful choice when the tray already contains several rounded forms. The pointed leaf edges interrupt a lineup of pumpkins, mugs, and animals and create a different silhouette. Use a single leaf as an accent, or compare the usable shelf width before creating several for a layered fallen-leaf effect.
Flat Does Not Mean It Should Disappear
If you lay the leaf completely underneath another decoration, most of the work may be hidden. Let part of the outline extend into view or lean it slightly so the lobed shape can be read from the front. A flat project is most useful on a tiered tray when it functions as a deliberate background or edge detail rather than a concealed mat.
Decide Whether Crisp or Relaxed Edges Suit the Display
The finished look of a leaf changes if its points curl or relax. If you want a graphic, sign-like background accent, investigate whether appropriate blocking for your yarn can help the shape lie more predictably. If you prefer a natural fallen-leaf appearance, slight dimensional movement may actually support the theme. The display goal should determine how much finishing you pursue.
Original Tutorial and Creator Credit
Creator: ANDREI Crafts Show
Crochet Apple Harvest Amigurumi

Pumpkins do not have to carry the entire harvest theme. A crochet apple adds a round fruit shape that still feels seasonal while introducing a different stem-and-leaf silhouette. Creative Zdenka’s tutorial focuses specifically on an amigurumi apple, providing a recognizable produce accent that can sit beside baskets, corn, or woodland pieces.
Red creates an immediate break from an orange-heavy tray, while other apple-inspired shades can work within a quieter palette. Since a dimensional apple occupies more space than a flat leaf or coaster, check its finished footprint against the exact tier where you plan to display it before making several.
Use the Apple to Break Up Pumpkin Repetition
Place an apple near a pumpkin and the similarity in overall volume creates cohesion, while the different top detail keeps the grouping from becoming repetitive. This works especially well in a harvest-focused tray where food and produce make more sense than a collection based entirely on character amigurumi.
Protect the Shape From Overcrowding
A rounded apple needs a visible side contour to read instantly. If it is wedged tightly between a mug and a gnome, the surrounding pieces can obscure that outline. Give it enough breathing room for the curved body and top detail to remain visible from the tray’s normal viewing position.
Original Tutorial and Creator Credit
Creator: Creative Zdenka
Crochet Small Sunflower Tray Accent
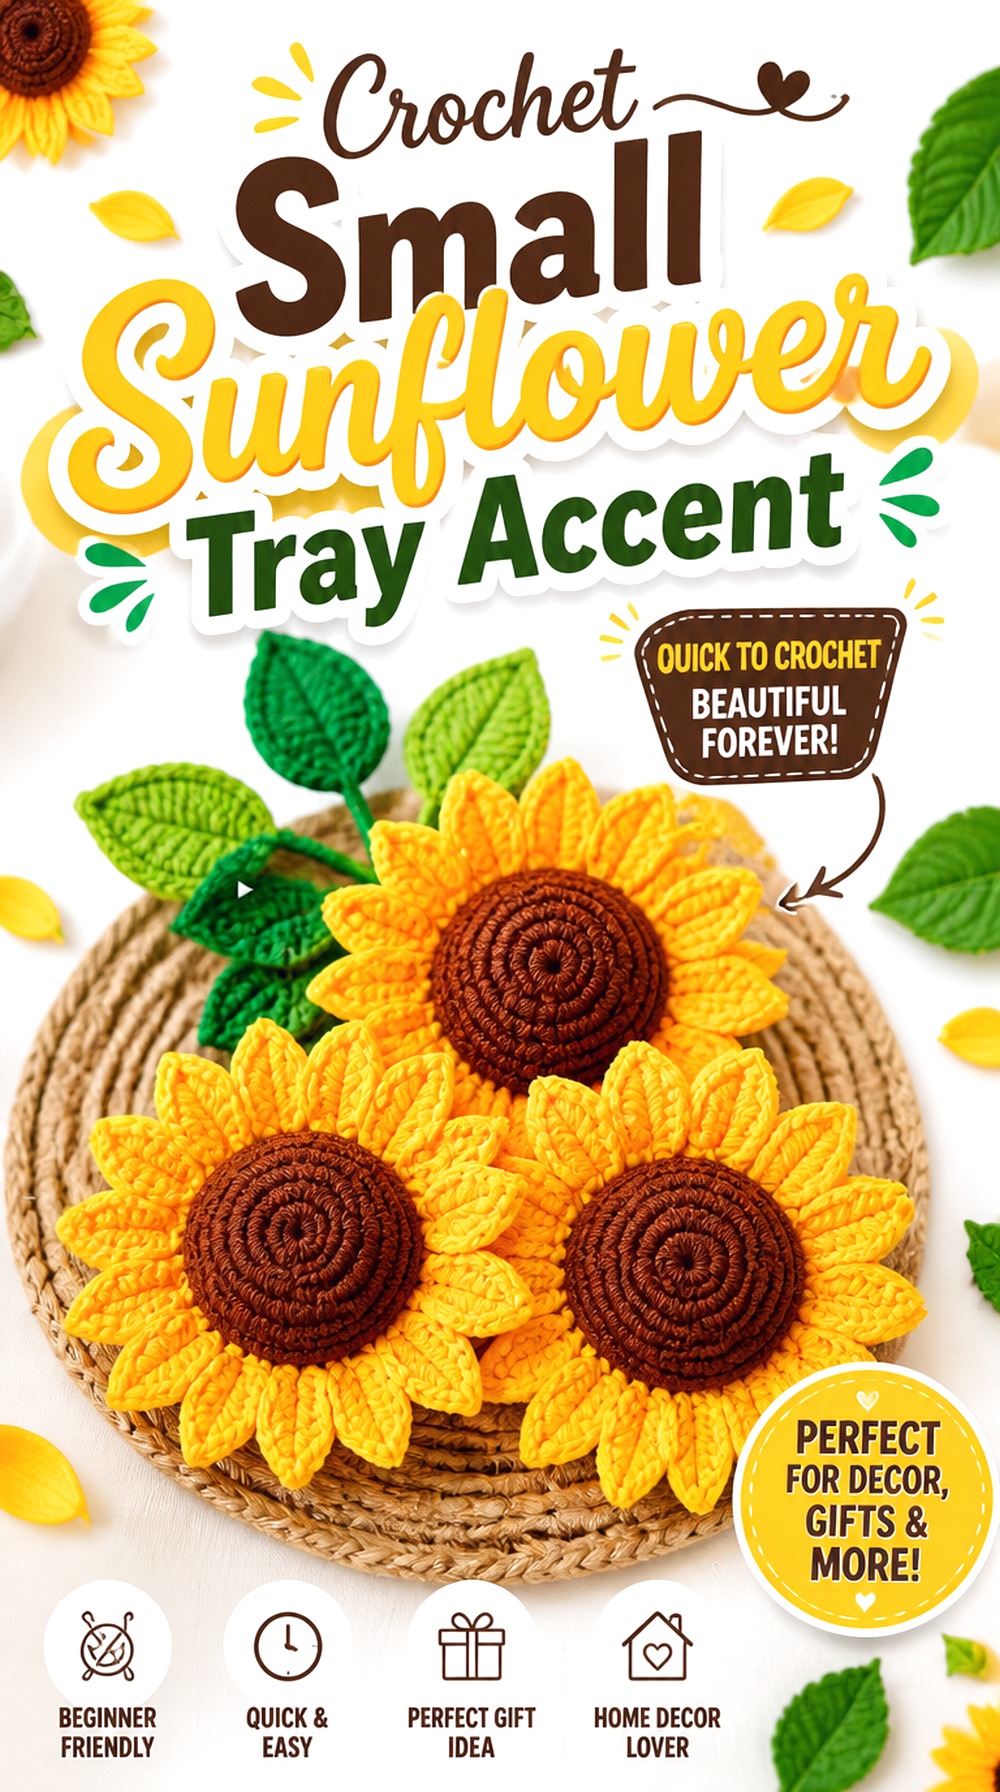
A small sunflower brings height and a strong circular focal point without adding another stuffed character. KAQNIN KASIKAY’s video specifically demonstrates a small crochet sunflower, which makes the flower easier to incorporate into compact seasonal arrangements than a large bouquet project.
Use the bloom near a mini basket, tuck it against the tray post, or place it behind a low pumpkin so the petals rise above the foreground. Its golden tones can connect orange, cream, and brown pieces without making everything identical. If you alter the yarn or presentation, consider both the diameter of the flower head and how the flower will be supported upright.
Give the Flower a Defined Background
Fine petal outlines can get lost against other heavily textured crochet. Position the sunflower where it has a calmer background—such as the tray post, wall, or light-colored riser—rather than directly behind another detailed amigurumi. That separation helps the floral shape remain visible even though the piece itself is small.
Decide How the Flower Will Stand Before Styling It
A flower that looks attractive held in the hand may need a different presentation on an open tray. Before making several blooms, decide whether yours will lean, sit in a miniature container, or become part of another supported arrangement. That decision affects how much clear vertical room the flower needs.
Original Tutorial and Creator Credit
Creator: KAQNIN KASIKAY
Crochet Mini Mushroom Woodland Accent
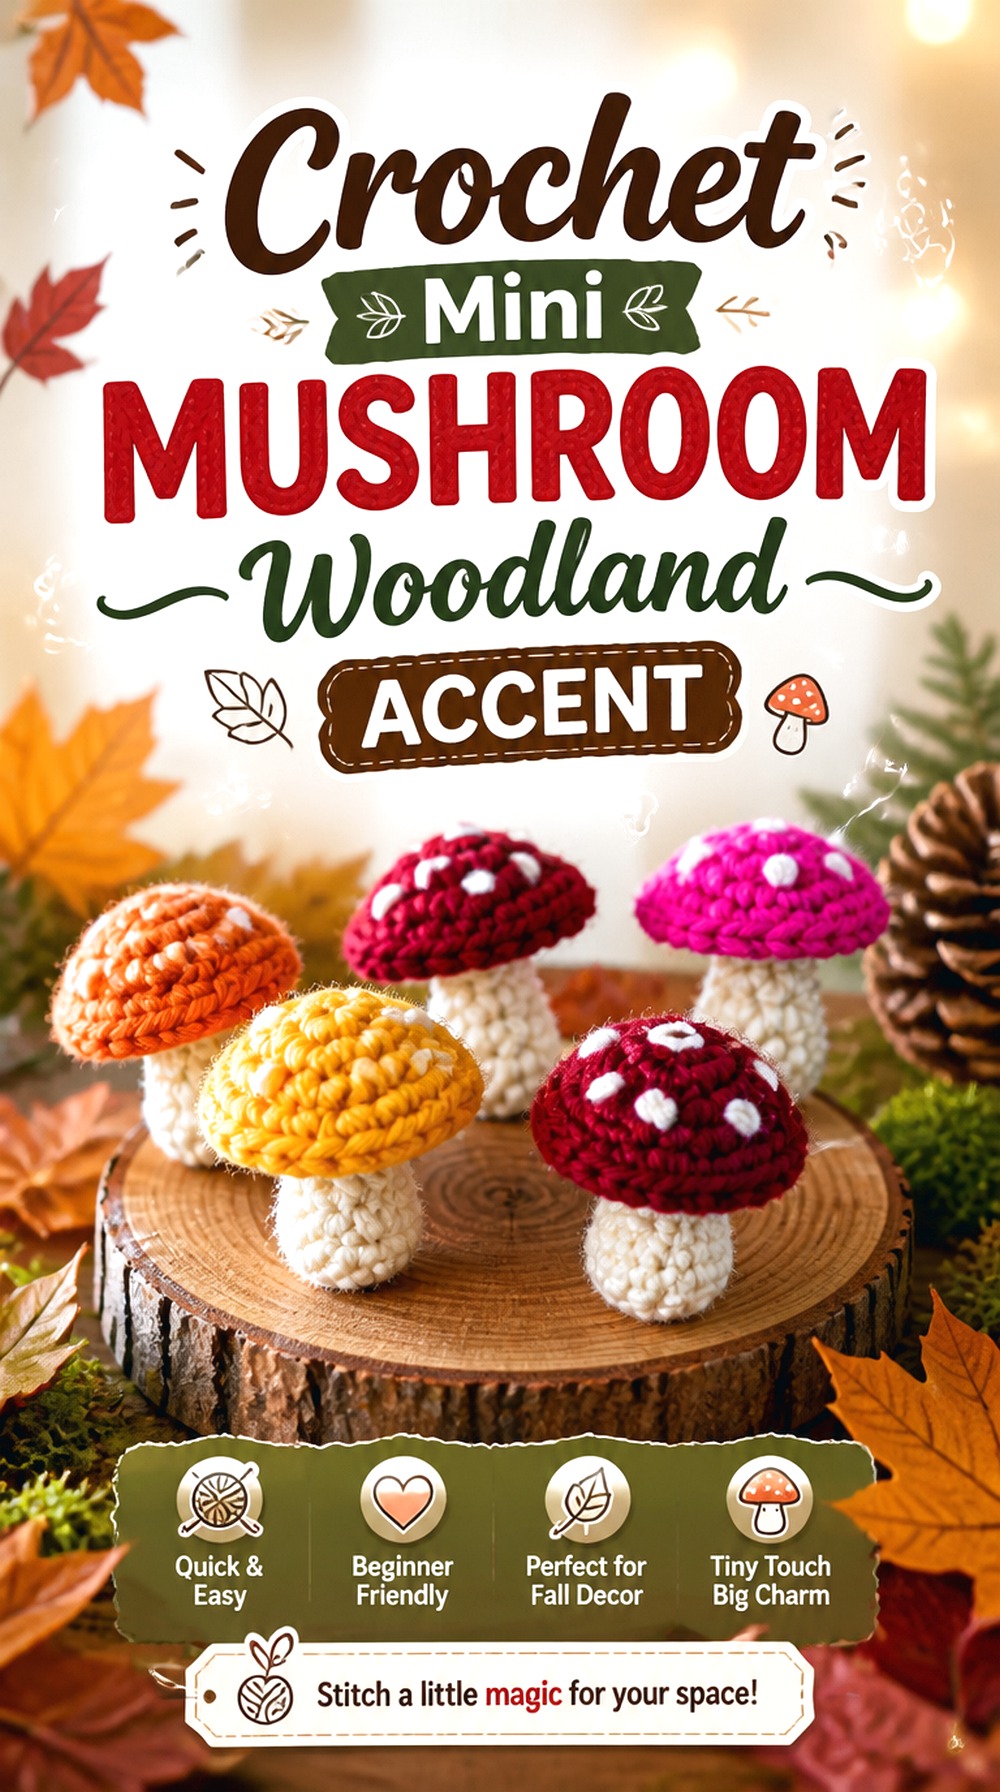
A squat mushroom is almost purpose-built for filling the front edge of a tier because it combines a small footprint with a clear cap-and-stem silhouette. Winding Road Crochet presents this specifically as a mini mushroom and autumn crochet decor project, making the match particularly strong.
Mushrooms also shift the theme from farmhouse harvest toward woodland fall without requiring you to rebuild the entire arrangement. A cream stem with a warm brown, rust, red, or muted cap can bridge neighboring colors. Because the cap is the dominant feature, make sure it remains visible rather than disappearing behind a larger object placed directly in front.
The Cap Needs Enough Space to Read From Above
Tiered trays are often viewed from a slightly elevated angle. That works in the mushroom’s favor, provided another object is not covering the cap. Put it near a front or side opening where the top surface contributes to the overall color composition instead of hiding it between tall pieces.
Repeat the Shape Only When the Shelf Can Handle the Width
A mushroom cluster can look natural, but even mini caps add lateral width. Check how several finished pieces sit together before making a large group. One mushroom beside an acorn or pine cone usually creates more visual variety than three nearly identical mushrooms packed into the same opening.
Original Tutorial and Creator Credit
Creator: Winding Road Crochet
Crochet Pumpkin Pie Slice Display Piece

A slice of pumpkin pie immediately shifts the display toward late fall and Thanksgiving without requiring another pumpkin-shaped object. Heather Corinne Crochets’ tutorial produces an amigurumi pumpkin pie slice, giving you a low, horizontal form that contrasts nicely with upright gnomes, flowers, and animals.
The layered look also creates useful color blocking: crust, filling, and topping can each remain visible when the slice is positioned at a slight angle. Because the shape has a distinct front and side, test its orientation on the tray instead of automatically lining it up square with the shelf edge.
Angle the Slice So the Layers Stay Visible
A pie slice viewed only from the narrow front can lose much of its character. Turn it slightly so both the filling and crust profile can be seen from the room. This simple styling decision lets a relatively low project contribute more visual information without increasing its footprint.
Save This Accent for the Thanksgiving Transition
Pumpkin pie is more holiday-specific than an acorn or mushroom. If you want one tray to last from September into November, store this piece separately at first and bring it into the arrangement closer to Thanksgiving. It can replace an October-specific accent such as candy corn without changing the tray’s overall structure.
Original Tutorial and Creator Credit
Creator: Heather Corinne Crochets
Crochet Mini Coffee Mug Accent
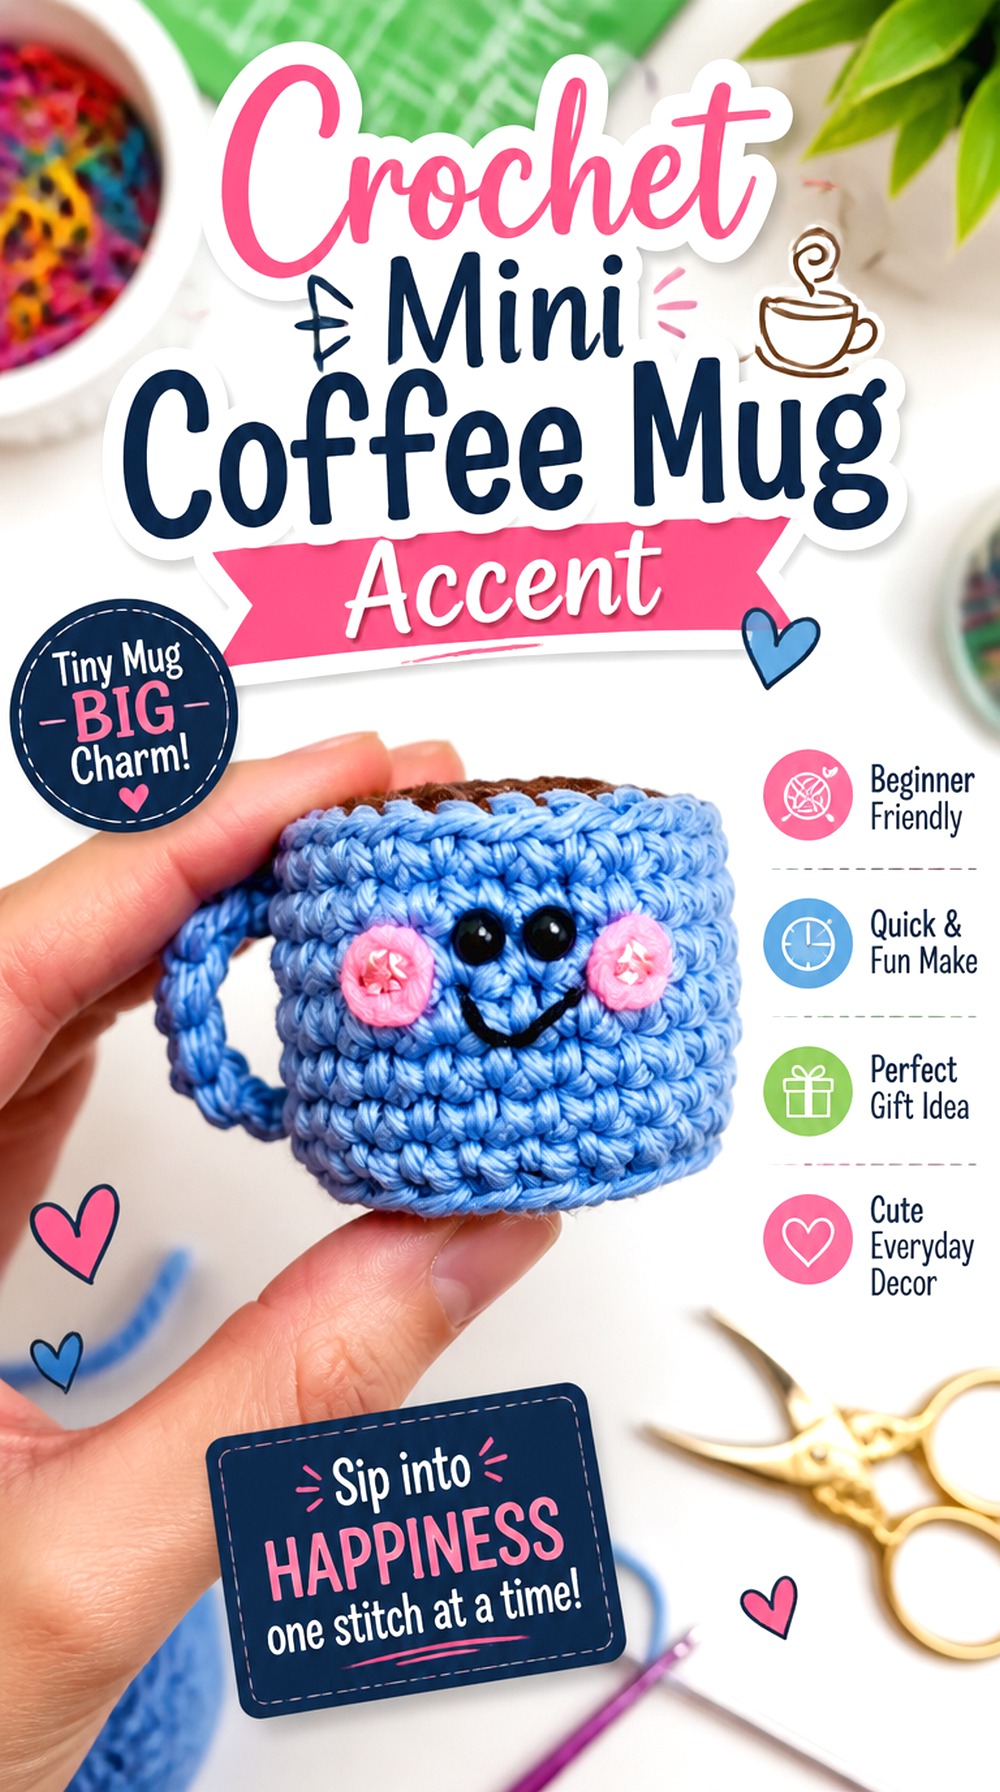
A tiny mug introduces the cozy-drink side of autumn without requiring a large novelty latte plush. The Pudgy Rabbit’s tutorial is specifically for a mini coffee mug, so the concept starts at a scale more compatible with shelf and tray displays.
A mug works particularly well beside a pumpkin pie slice, small flower, or flat leaf because it looks like a miniature tabletop vignette rather than a random collection of stuffed shapes. The handle is also a useful visual detail, but it can disappear if pushed against another object, so choose the viewing direction before positioning it.
Keep the Handle Out of the Visual Blind Spot
Turn the mug until at least part of the handle is visible from the main viewing angle. Without that cue, a very small cup can read as a simple cylinder. Leaving a little negative space around the handle also reduces the chance that neighboring crochet pieces visually merge with it.
Treat the Mug as a Scene-Builder
Instead of displaying it by itself, use the mug to create a miniature narrative—a leaf behind it, a pie slice nearby, or a sunflower rising in the background. That approach makes a tiny neutral-colored piece feel intentional and can help connect several unrelated motifs on the same tier.
Original Tutorial and Creator Credit
Creator: The Pudgy Rabbit
Crochet Pumpkin Holding Fall Gnome
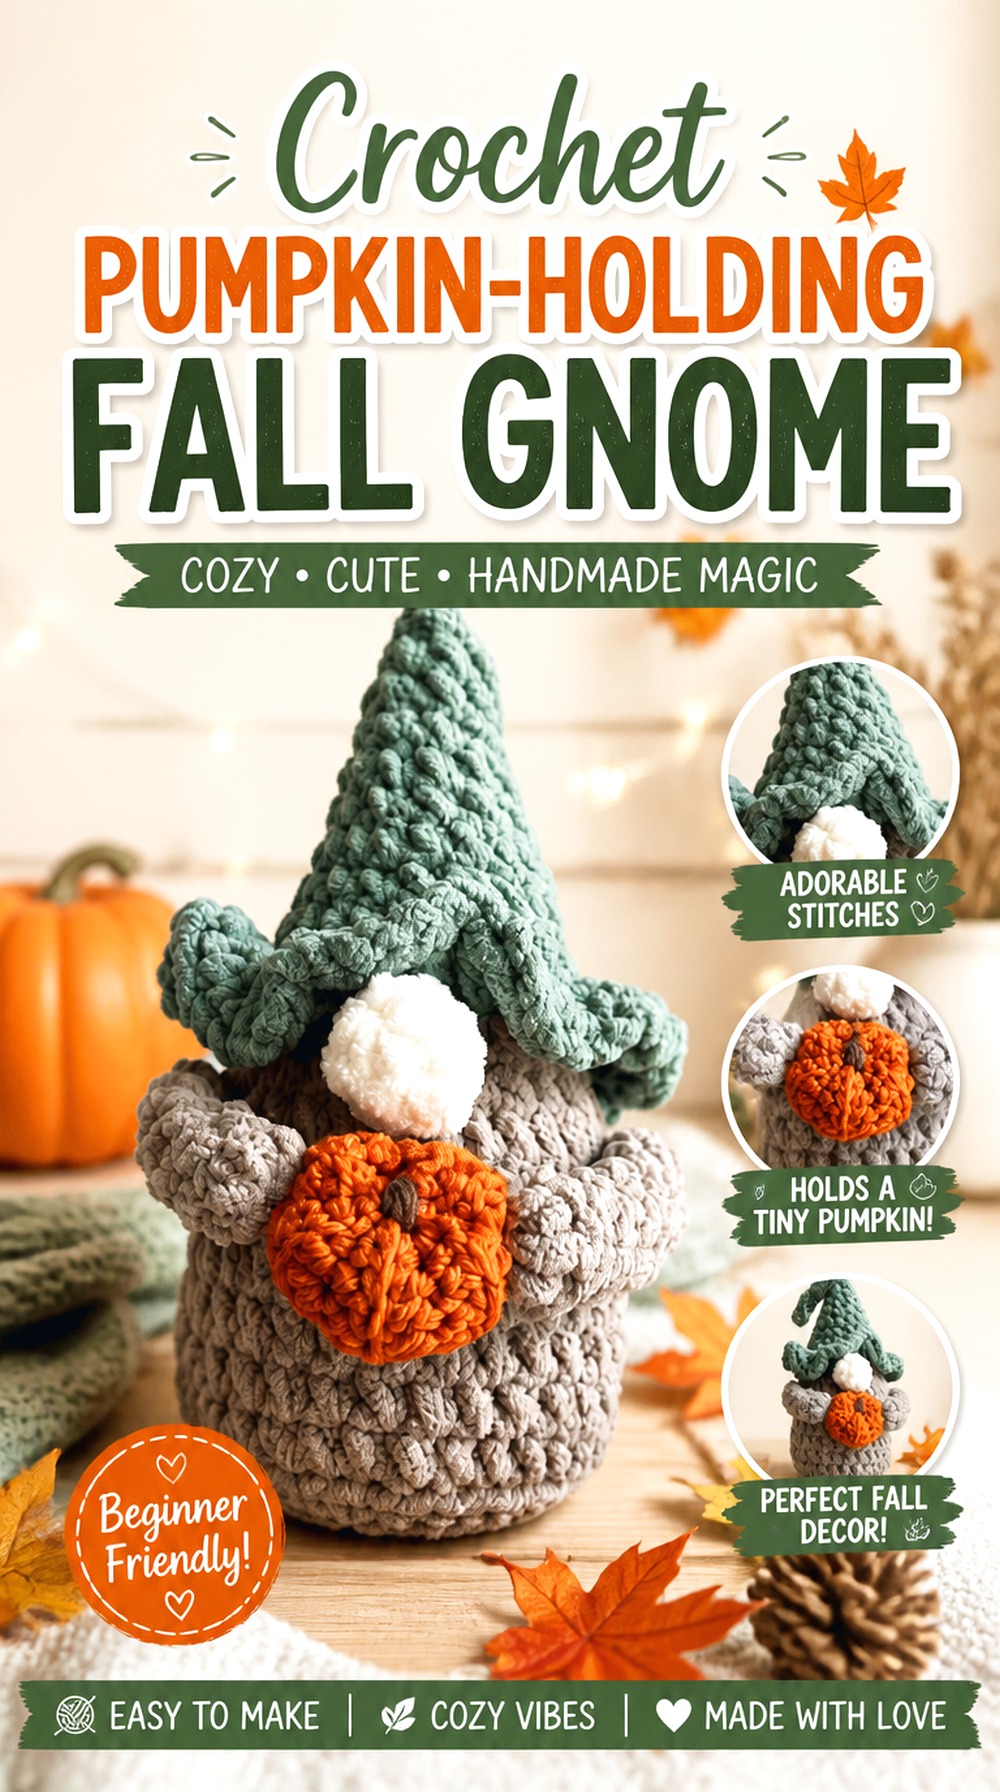
A gnome works differently from the tiny fillers in this list: it can become the character focal point around which the rest of the tray is arranged. Back to Eden Crochet’s fall gnome tutorial includes the seasonal pumpkin theme, creating a direct link with the surrounding harvest pieces.
Because a gnome has more vertical presence and several visual details competing for attention, give it a less crowded shelf position. It can anchor the top tier while lower pieces carry the smaller leaves, foods, and woodland motifs. Confirm the finished dimensions from the creator’s information against your actual tray before relying on it as an inside-tier piece.
Give a Character Focal Piece Breathing Room
A detailed gnome loses impact if its hat, beard, and pumpkin overlap three other crochet items. Place flatter elements behind or below it and move bulky fillers toward the opposite side. One clear character silhouette usually creates a stronger focal point than several medium-sized plush pieces fighting for the same space.
Check Height Before Assigning It to a Lower Tier
Tiered stands often have substantially less clearance on the lower shelf because of the level above. A gnome that fits the overall tray width can still be too tall for that opening. Measure the vertical gap at the intended position, not simply the full height of the display stand.
Let the Pumpkin Tie the Character Into the Harvest Theme
The pumpkin detail is useful because it connects the whimsical figure to more natural fall objects such as leaves, apples, and corn. Repeating just one nearby pumpkin color can create cohesion without surrounding the gnome with additional character pieces.
Original Tutorial and Creator Credit
Creator: Back to Eden Crochet
Crochet Scarecrow Peg Doll Accent
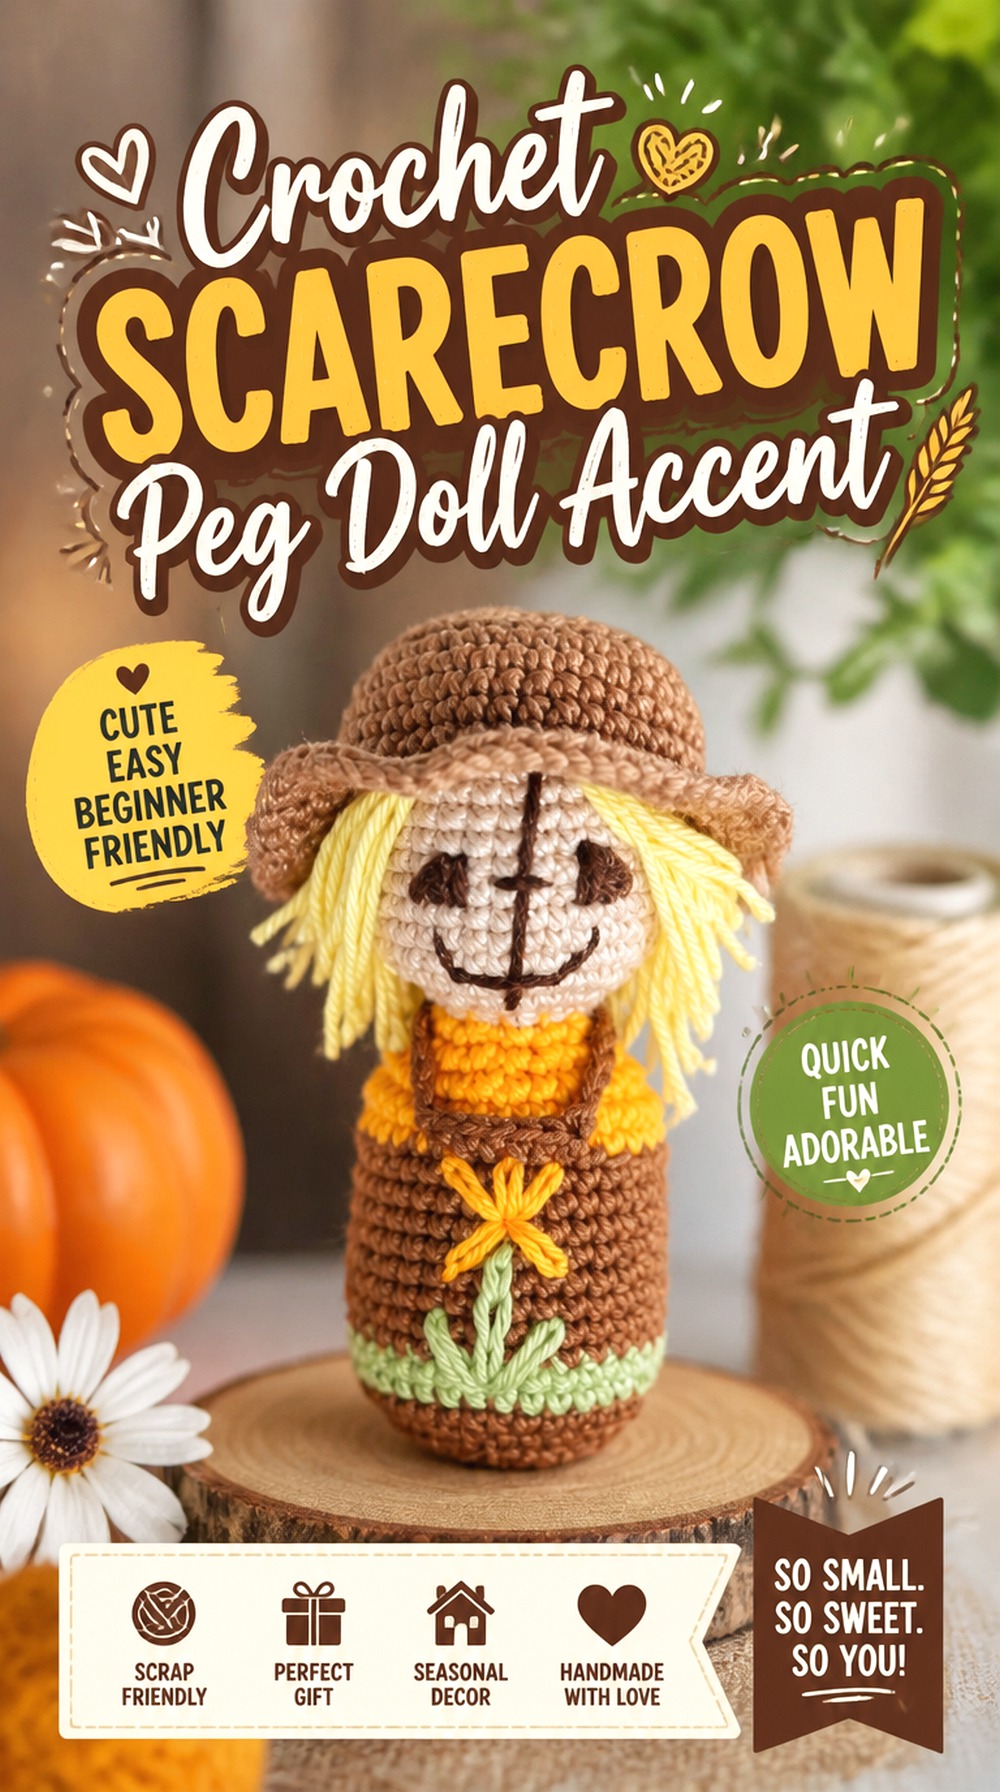
A peg-doll scarecrow brings a tall, narrow profile that can fit spaces where a broad pumpkin or animal would crowd the shelf. Yarnacadabra’s scarecrow peg-doll project is specifically harvest themed, so the character makes sense beside corn, apples, sunflowers, and pumpkins rather than feeling like a generic toy placed on the tray.
The upright format is its biggest display advantage. Use it to establish height at the back of a tier, then step down toward smaller acorns, leaves, or mushrooms in front. As with any standing amigurumi, check how stable the finished base is on your particular tray before depending on it in a high-traffic location.
Use the Narrow Profile Beside the Tray Post
The center support of a tiered stand often creates slim vertical gaps that are difficult to fill. A peg-style figure can make better use of this space than another spherical object. Position it where the body remains visible rather than letting the support hide half of the character.
Build a Harvest Group Around the Scarecrow
Corn, sunflower, apple, and pumpkin motifs naturally reinforce the agricultural theme. You do not need all of them at once; even two neighboring harvest pieces are enough to make the scarecrow look intentional. Woodland animals, by contrast, can be concentrated on the opposite tier if you want distinct mini-scenes.
Original Tutorial and Creator Credit
Creator: yarnacadabra
Crochet Owl Woodland Mini
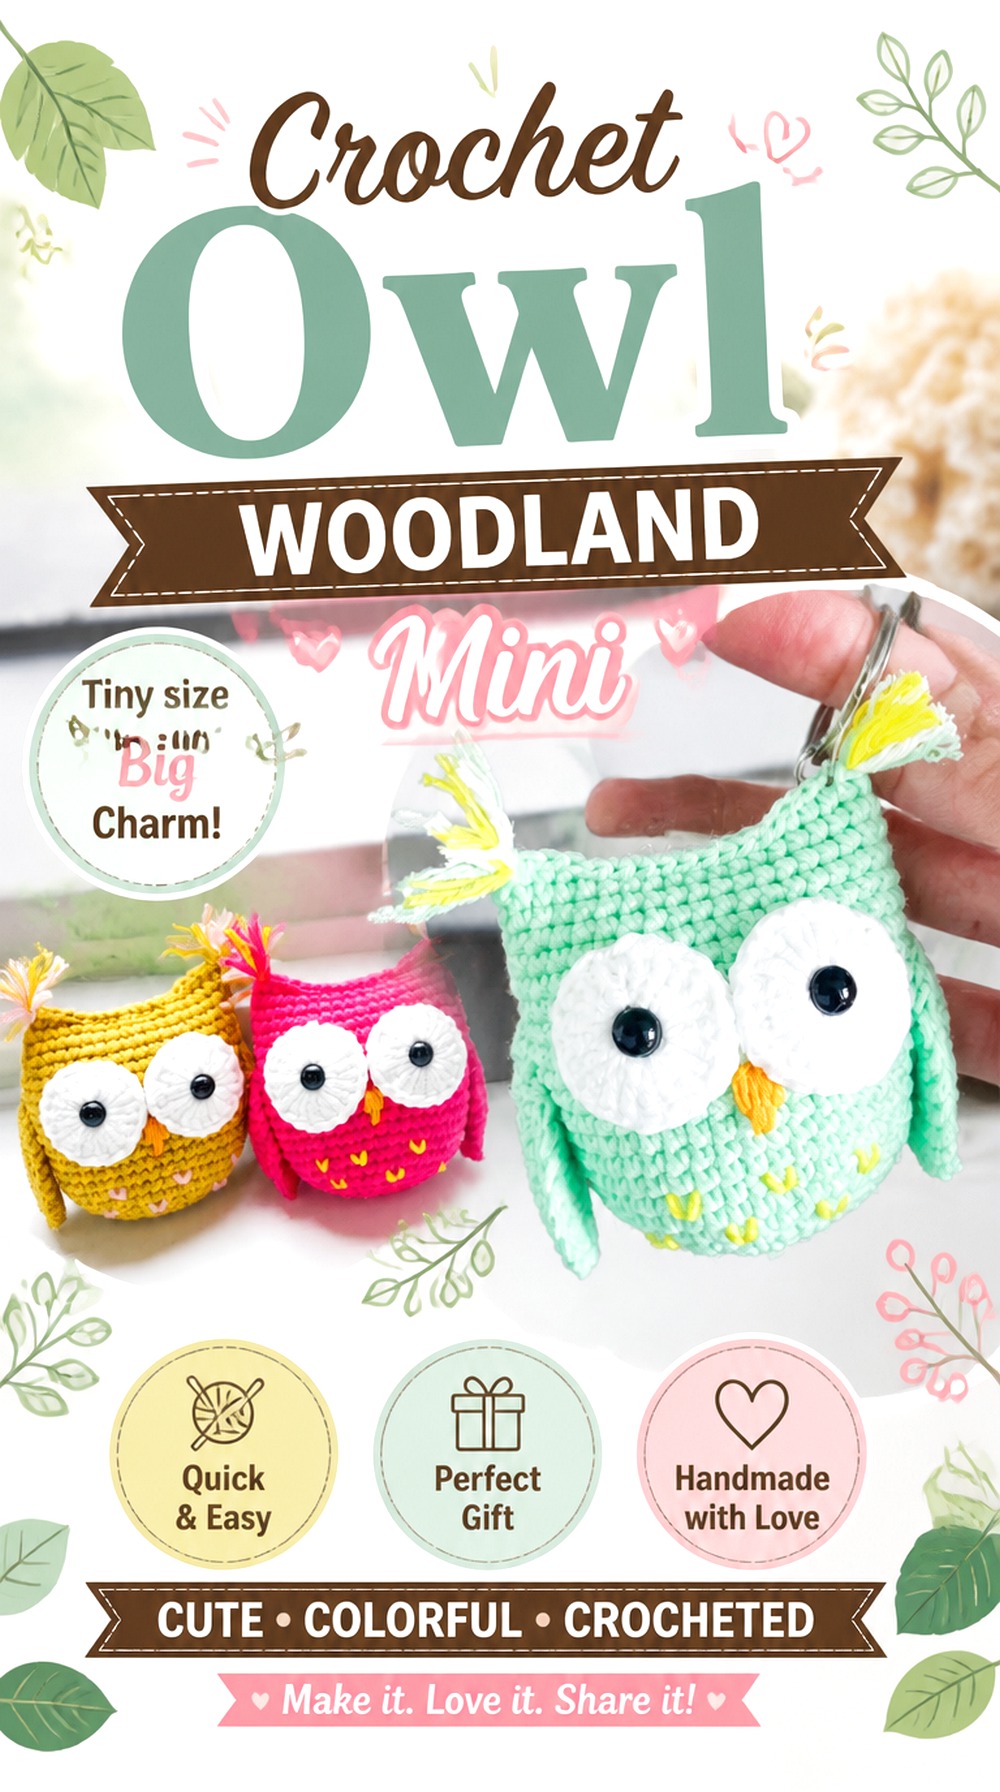
An owl adds woodland personality while keeping the fall connection subtle enough to remain useful beyond Halloween or Thanksgiving. NHÀ LEN’s tutorial is for an amigurumi owl keychain, which gives the design a naturally compact format compared with larger owl plush tutorials.
For tray use, the most important question is how the finished owl sits when it is not hanging. Check the completed form in the tutorial and decide whether you prefer it as a standing/leaning figure or as a suspended accent from an appropriate part of the display. If you change or omit hardware, make sure the finished presentation remains neat.
Let the Face Stay Unobstructed
Small owl designs depend heavily on the eye and face area for recognition. Keep taller flowers, leaves, and handles from crossing in front of that section. A visually quiet background can help the tiny facial details read more clearly at normal room distance.
Decide Between Sitting and Hanging Before Finishing
Because the source project is presented as a keychain, tray styling offers more than one possibility. A hanging placement introduces movement and uses vertical space, while a stationary placement keeps the arrangement calmer. Confirm how the original finishing is handled before changing the presentation so you are not improvising around structural details you have not seen.
Original Tutorial and Creator Credit
Creator: NHÀ LEN
Crochet Thanksgiving Turkey Figure
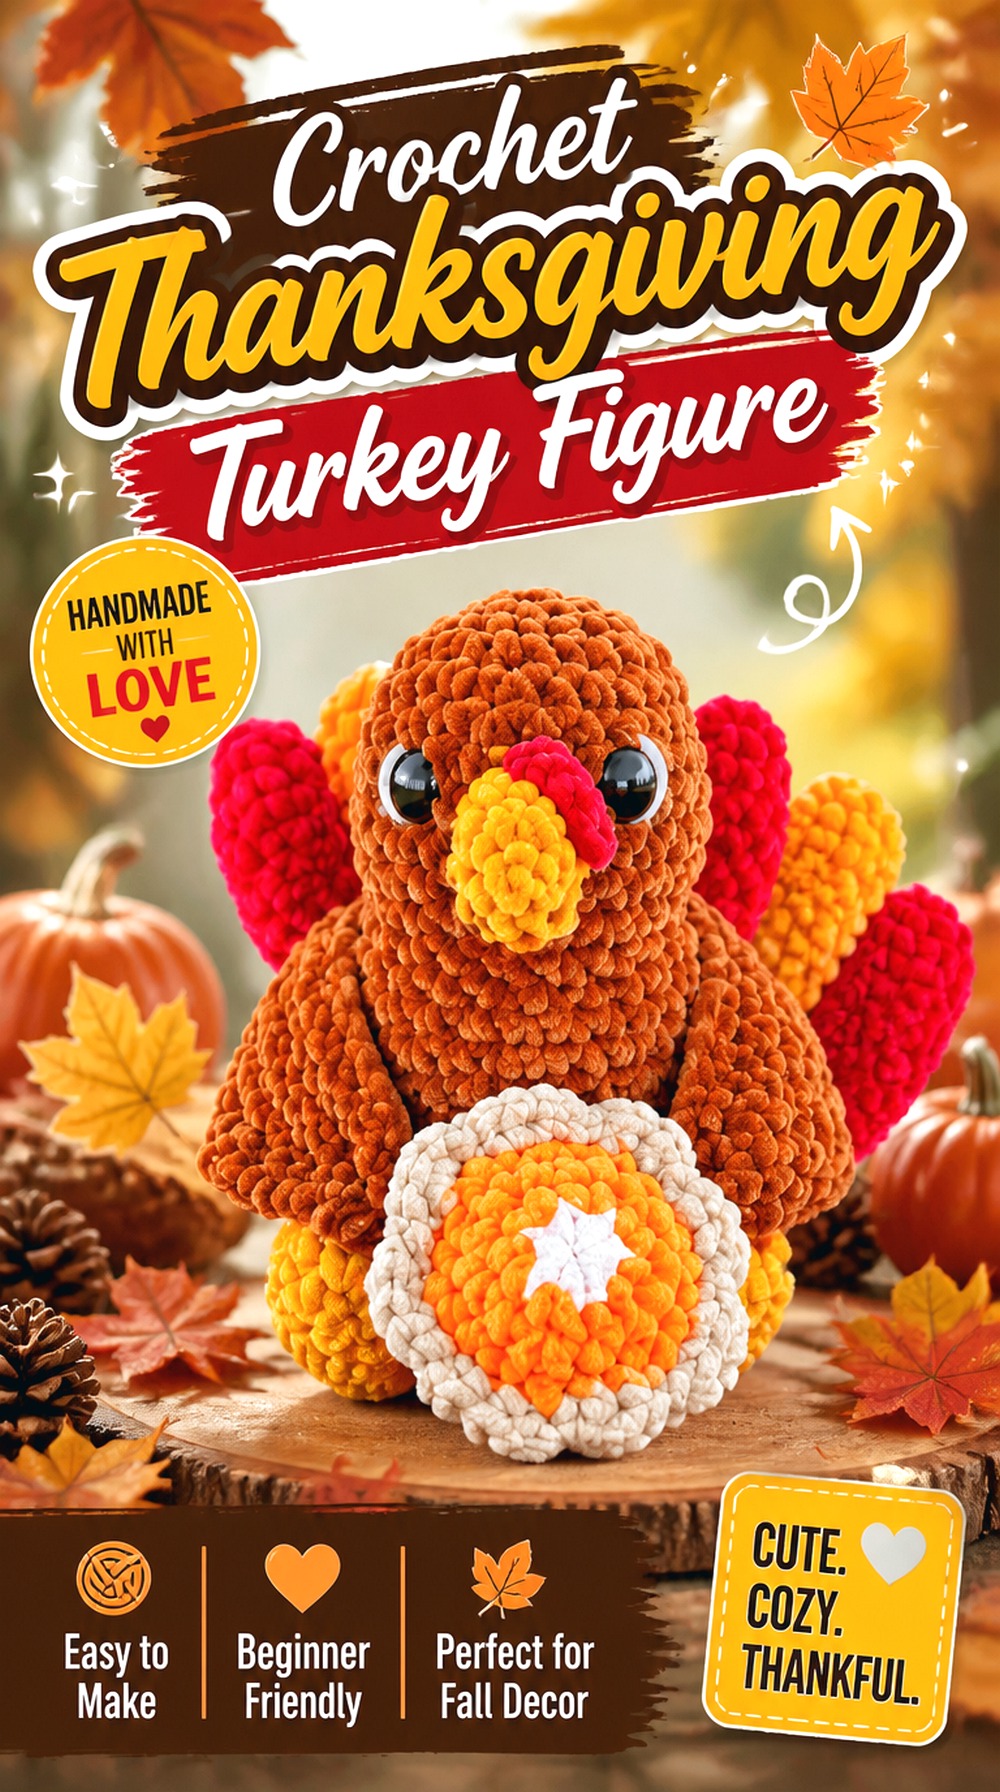
A turkey gives you a clear way to update an existing autumn tray for November. Allez Crochet’s tutorial centers on a Thanksgiving turkey amigurumi, making this a more specific seasonal marker than the pumpkins, mushrooms, or leaves that can remain out throughout fall.
The tail creates a wider visual footprint than the body alone suggests, so plan around the complete silhouette rather than estimating space from the central figure. Positioning it toward the back can let the tail remain visible above low front pieces. Pair it with harvest foods rather than several other character amigurumi if you want the tray to stay visually organized.
Measure for the Tail, Not Just the Body
Wide appendages are easy to overlook when judging whether an amigurumi will fit. Check the finished turkey from the front and side and allow enough space that the tail does not bend against the tray post or disappear behind another decoration. The complete silhouette is what makes the project recognizable.
Use It as a Seasonal Swap Instead of Permanent Fall Decor
The turkey has a much narrower seasonal window than an acorn or apple. That is useful rather than limiting if you treat it as a swap-in piece. Reserve an existing focal position for the turkey in November and move the earlier occupant into storage instead of continually adding more objects to the tray.
Original Tutorial and Creator Credit
Creator: Allez Crochet
Crochet Corn Cob Harvest Accent
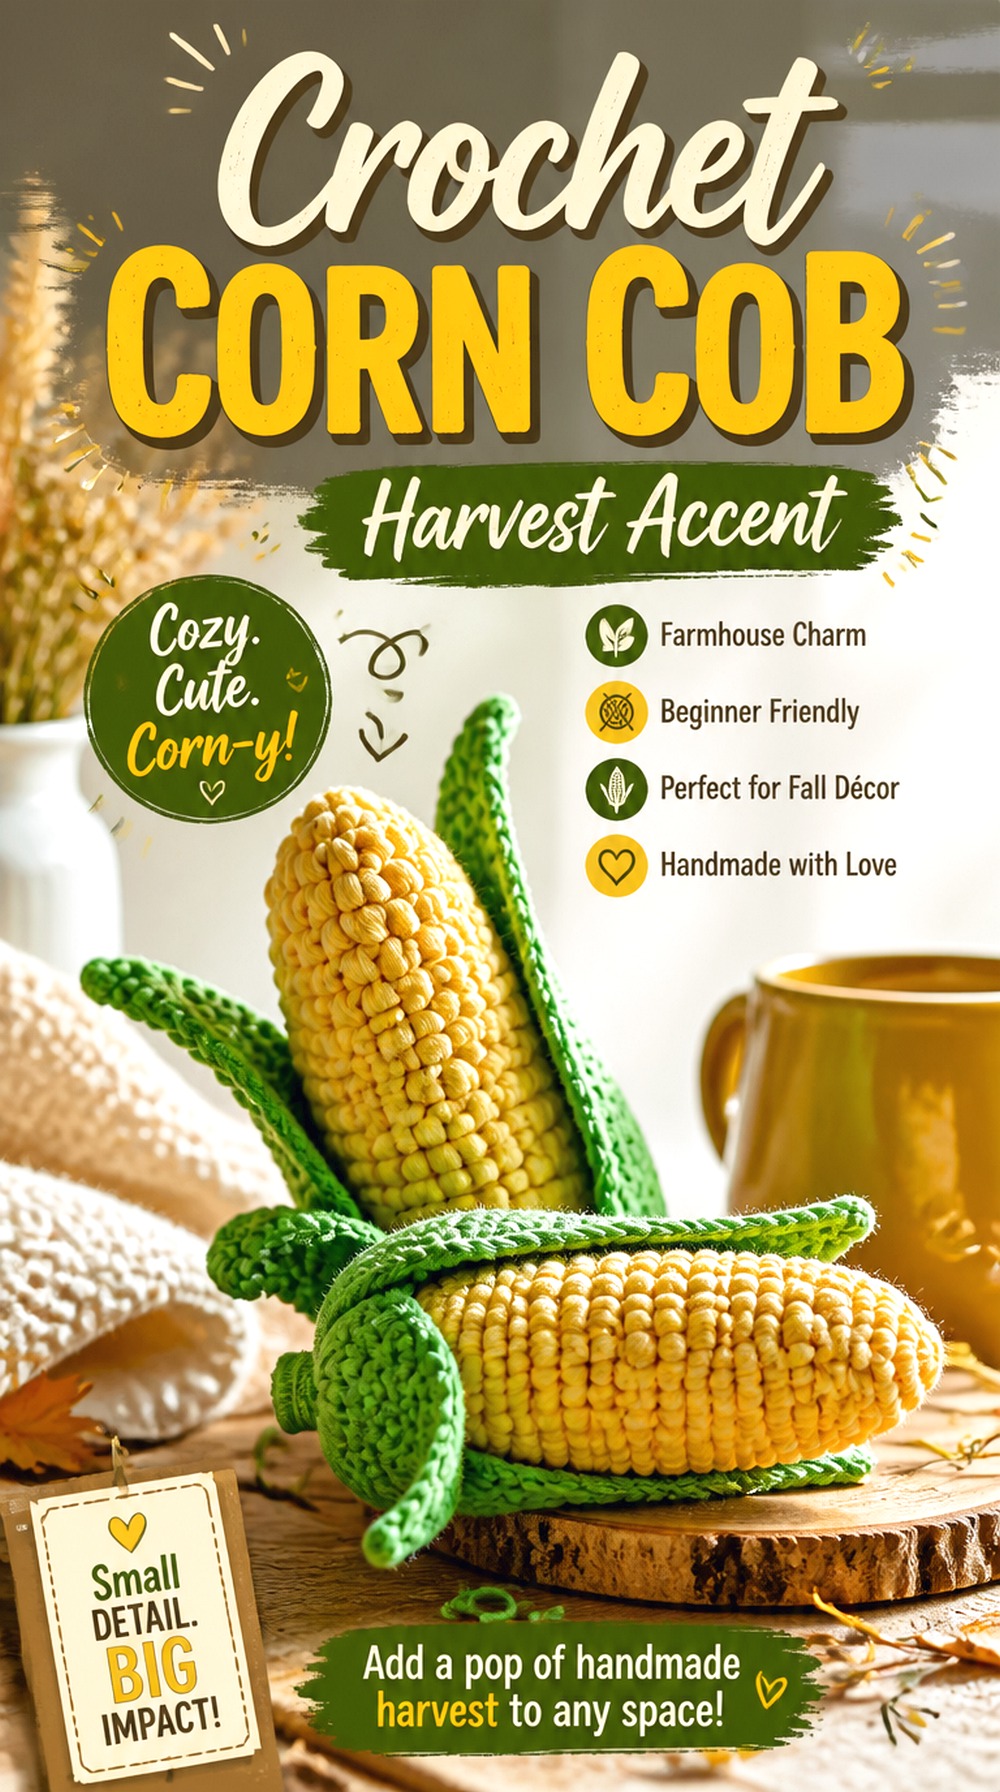
Corn contributes a long, tapered shape that immediately differentiates it from all the spherical produce typically used in fall crochet. Off the Beaten Hook’s tutorial is specifically for a realistic amigurumi corn design, including the recognizable vegetable form rather than a generic yellow plush.
Lay it diagonally across a wider shelf, prop it against the tray support, or combine it with the scarecrow for a concentrated harvest section. Green husk tones also bring a useful cool note into a palette dominated by orange and brown. Before choosing its location, compare the complete length with the usable tray diameter rather than judging only the width.
Diagonal Placement Can Save Usable Shelf Space
A long crochet object does not have to sit parallel to the front edge. Angling the corn can keep both ends within a round tray while making the display feel less rigid. Test that orientation with your finished piece before surrounding it with smaller objects so the composition develops around its real footprint.
Keep the Husk Visible
The green outer portion helps distinguish corn from other yellow food-shaped projects. Avoid burying it behind the apple or basket. If the tray already contains olive or green leaves, repeating that family of tones can visually connect the harvest piece to the rest of the arrangement.
Original Tutorial and Creator Credit
Creator: Off the Beaten Hook
Crochet Mini Basket for Fall Fillers
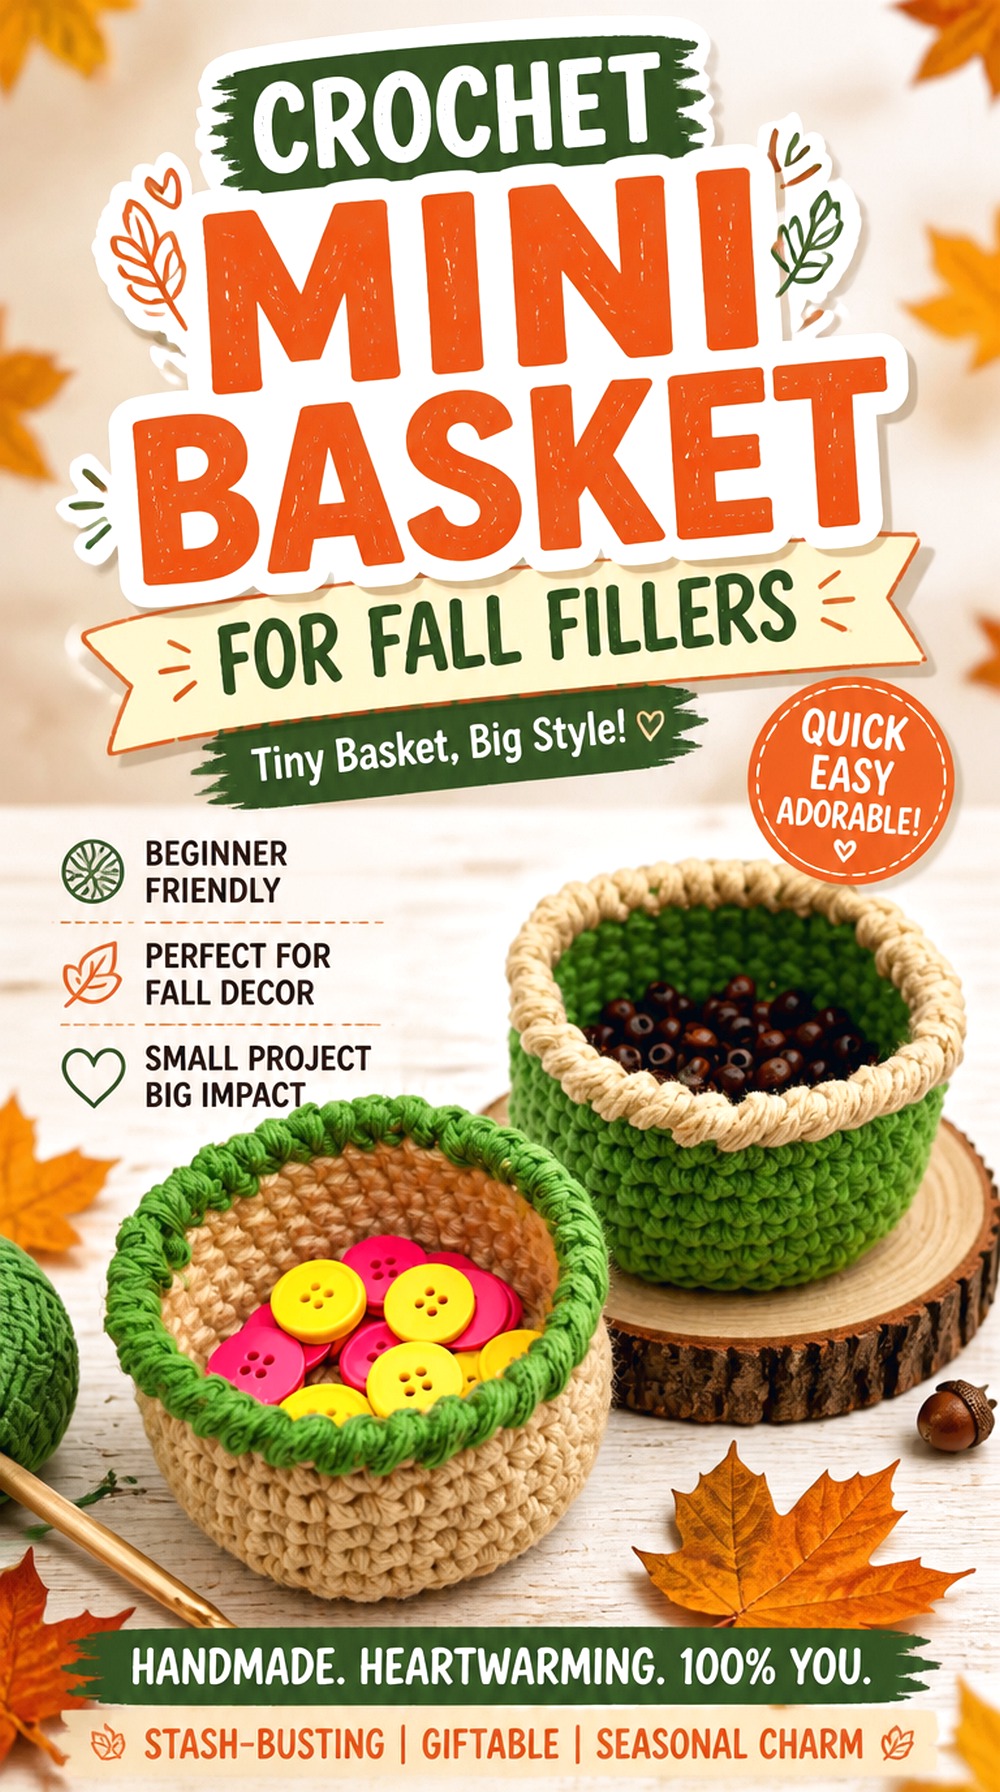
A miniature basket adds function as well as decoration. Hopeful Turns demonstrates a mini crochet basket, and although the source is presented in an Easter context, the basic container shape is not tied to that season. Changing the contents and palette can turn it into a fall display prop without pretending the original tutorial itself is autumn themed.
Use the basket to collect tiny loose-looking elements, support a small flower, or create a contained harvest vignette. It is particularly useful when several miniature pieces would otherwise appear scattered. Check the basket’s opening and finished scale against whatever you hope to place inside rather than assuming every small amigurumi will fit.
Treat the Container as a Neutral Building Block
A simple basket can move between seasons more easily than a turkey or candy corn. For fall, surrounding it with harvest colors or appropriate miniatures supplies the seasonal context. Later, the same basic project can be restyled, making it a useful choice if you prefer decor that does not require a separate storage bin for every holiday.
Make Sure the Basket Does Not Hide Its Contents
Deep containers can swallow tiny fillers. If the decorative objects sit below the rim, use the basket differently or choose contents with more height. The point of the container is to organize the miniature scene, not make the crochet accents disappear from normal viewing distance.
Original Tutorial and Creator Credit
Creator: Hopeful Turns
Crochet Candy Corn October Accent
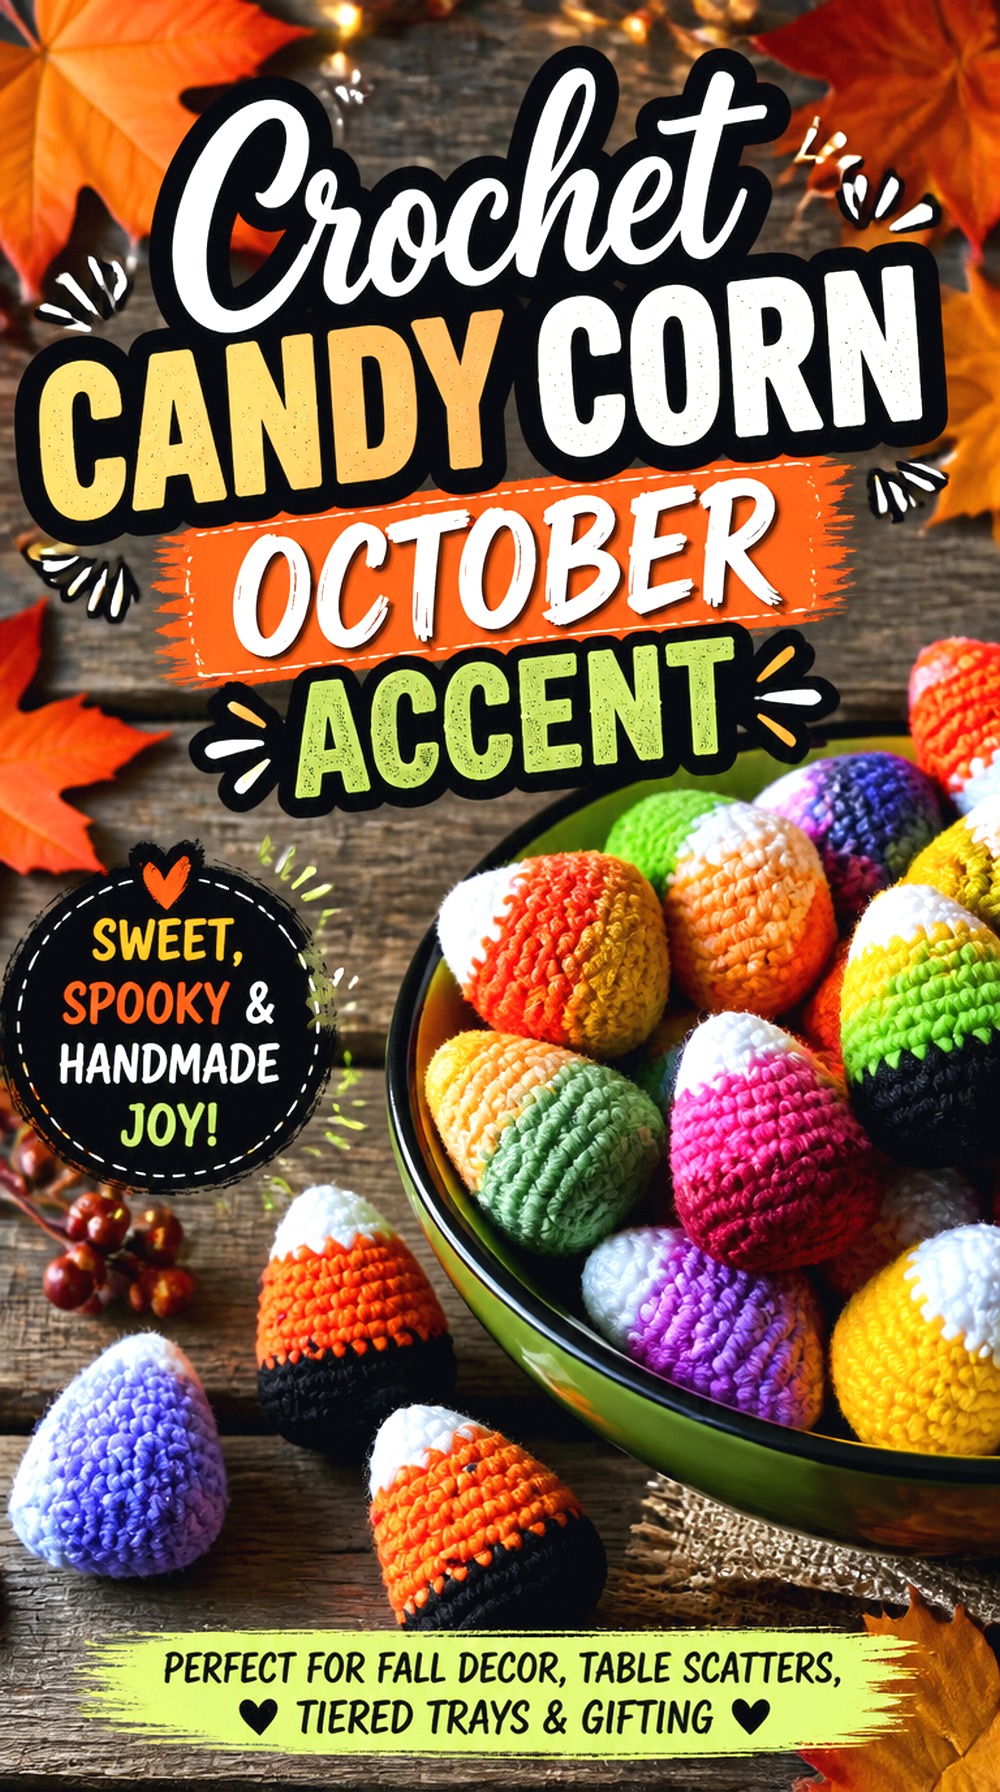
Candy corn is the clearest Halloween-leaning project in this collection. Crochet, Garden, Repeat has a dedicated candy corn amigurumi tutorial, giving you a compact striped shape that can temporarily push a neutral autumn tray toward October without changing every other project.
Its strongest feature is the recognizable three-part color arrangement, so surrounding it with too many competing colors can weaken the effect. Use one or a few near pumpkins, a mug, or woodland mushrooms, then remove them when you want the tray to transition toward Thanksgiving. That seasonal modularity is more useful than trying to make every item work for the entire fall calendar.
Protect the Three-Color Silhouette
Candy corn relies on broad color blocks rather than elaborate construction details. Keep it in a spot where the full pointed profile is visible. Placing another stuffed object directly in front can make the remaining stripes look like unrelated bands of color.
Use It as the October Switch
If your core tray is built around neutral pumpkins, acorns, apples, and leaves, candy corn can be one of only two or three pieces you swap in for Halloween. This avoids building a separate arrangement while still giving October a clearly different personality.
Original Tutorial and Creator Credit
Creator: Crochet, Garden, Repeat
Crochet Pine Cone Woodland Accent
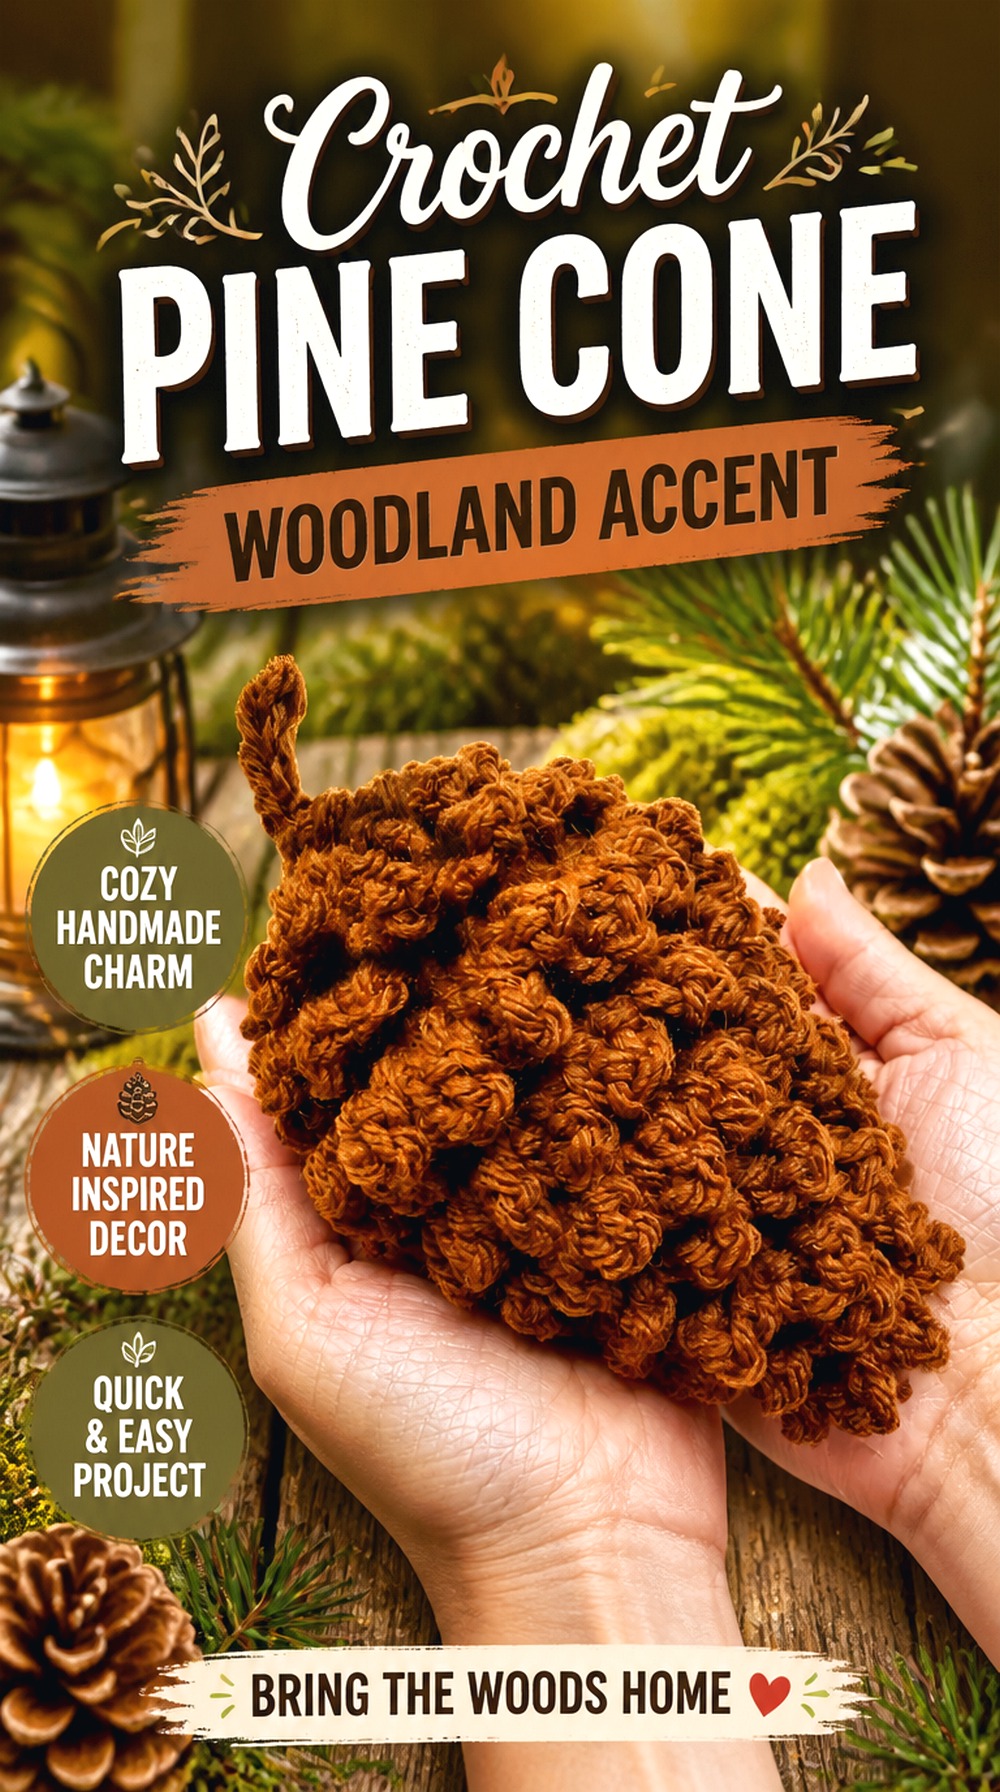
A pine cone brings texture without introducing another face, food item, or pumpkin. Bag-O-Day Crochet’s tutorial focuses on a crochet pine cone and shows a dimensional form suited to rustic or woodland seasonal decorating.
Its narrower profile works beside mushrooms, acorns, and squirrels, and brown yarn can provide a resting point between brighter fall colors. The source also presents a hanging option, which opens another display possibility if your tray has an appropriate place for a suspended accent. Whichever presentation you choose, keep enough side light around the textured surface for the layered form to remain visible.
Texture Needs Light More Than Extra Color
A pine cone can look surprisingly flat when placed in a dark corner of a shelf. Position it where natural or room light can create small shadows across the crochet texture. This allows a restrained brown or taupe palette to stay visually interesting without additional embellishment.
Standing and Hanging Create Different Visual Weight
A standing pine cone acts as a compact filler, while a hanging version uses the otherwise empty space near the tray frame. Decide which role the display needs before finishing. If you use any hanging element, keep it away from places where it will be repeatedly bumped or caught.
Original Tutorial and Creator Credit
Creator: Bag-O-Day Crochet
Crochet Hedgehog Fall Shelf Figure
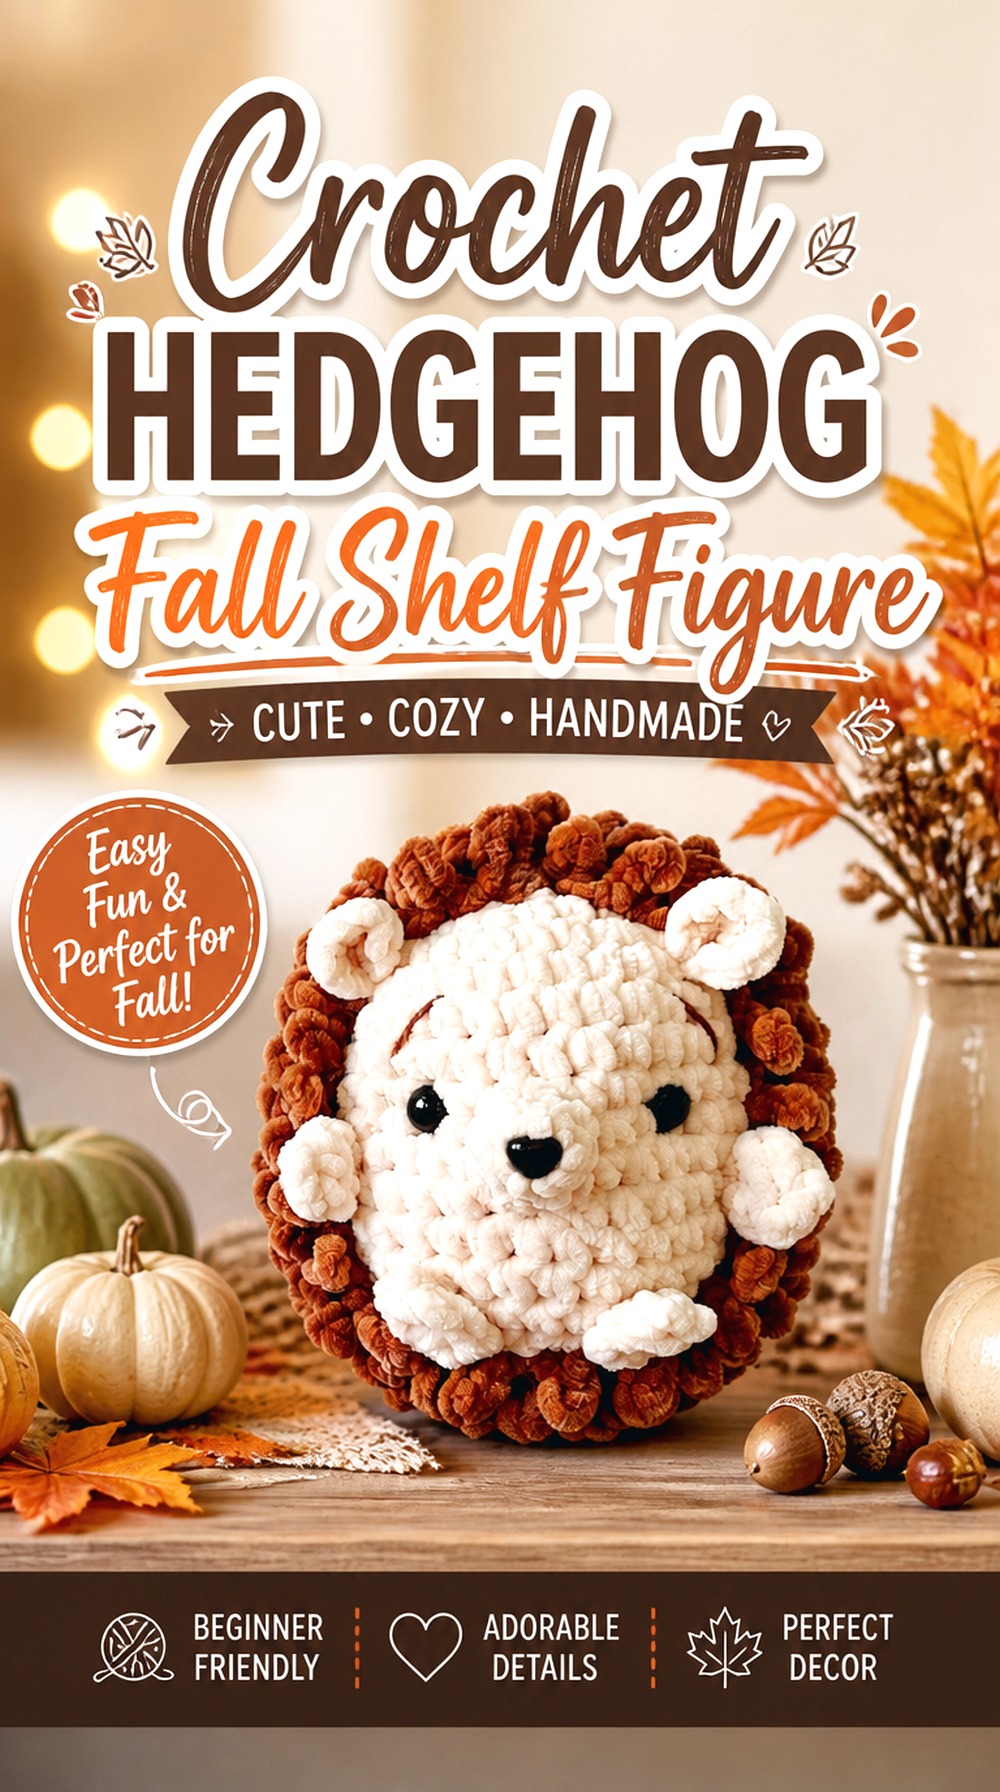
A hedgehog gives the woodland section a low, grounded character shape. Double Dutch Crochet’s hedgehog tutorial produces a recognizable amigurumi animal, and the contrast between the face and textured-looking body gives the piece more visual complexity than a simple fruit or leaf.
Because the silhouette extends horizontally, it can work well on a broader top shelf or a lower tier with sufficient depth. Pair it with a mushroom or pine cone for a woodland mini-scene rather than placing it beside several other animal faces. This lets one character remain the focus while the surrounding objects reinforce the environment.
Give the Face a Clear Sightline
With a low animal, taller objects in front can hide the feature that tells the viewer what the project is. Keep the face toward an open edge and push background accents behind the body instead. This is particularly important when the tray is usually viewed from across a room rather than close up.
Pair Texture With Simpler Neighbors
The hedgehog already has a visually busy body compared with a smooth apple or simple mushroom cap. Surrounding it with more highly textured pieces can make the group feel crowded. A flat leaf or simple acorn provides enough seasonal context without competing with the animal.
Original Tutorial and Creator Credit
Creator: Double Dutch Crochet
Crochet Squirrel Woodland Accent
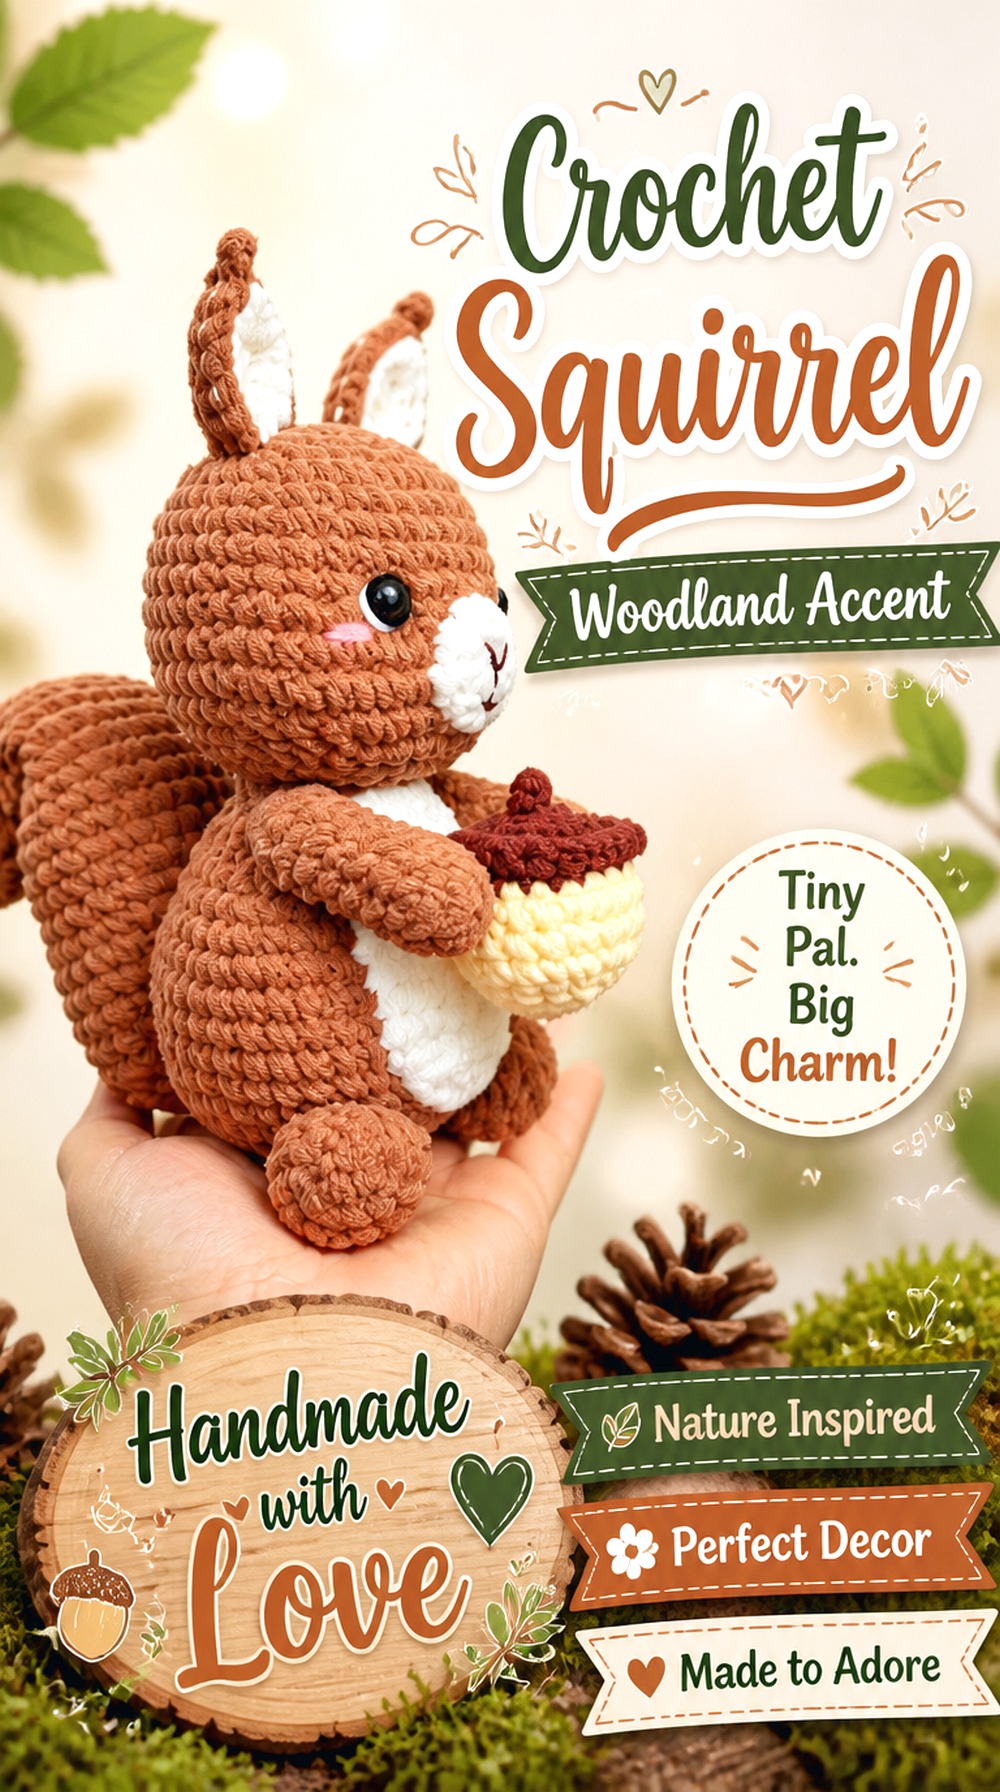
A squirrel introduces a more upright woodland silhouette than the hedgehog and creates an obvious connection with acorns. Tata Crochet Patterns’ tutorial specifically demonstrates a crochet squirrel amigurumi, giving you a character that can support a woodland rather than strictly farmhouse interpretation of fall.
The tail contributes significantly to the visual size, so allow room for the complete outline when testing placement. A squirrel can work as the primary character on one tier while mushrooms, acorns, leaves, and pine cones become smaller environmental details. That hierarchy keeps the shelf from becoming a lineup of unrelated animals.
Account for the Tail When Measuring the Shelf
The body may appear compact while the tail expands the project’s overall width or height. Use the completed tutorial view to judge the actual silhouette before assigning it a position. A corner or back edge can sometimes give a projecting tail more room than the center of a crowded shelf.
An Acorn Can Create a Clear Mini-Scene
Putting the squirrel near the mini acorn gives both projects more context without requiring signs or written labels. Keep the acorn slightly forward or offset rather than directly underneath the character so each handmade piece remains individually visible.
Original Tutorial and Creator Credit
Creator: Tata Crochet Patterns
Crochet Stacked Pumpkin Focal Piece

Instead of spreading several separate pumpkins across the tray, a stacked design concentrates the pumpkin theme vertically. MJ’s Off The Hook Designs presents a pumpkin stack tutorial with multiple size options, which makes the source particularly useful when you need to think about scale rather than treating one finished dimension as universal.
A stack works best as a focal object rather than a filler. Place it where the vertical silhouette is not cut off by the shelf above and leave nearby accessories comparatively low. For a small tiered display, check the creator’s available sizing information and the actual opening on your stand before deciding which version belongs inside the tray.
Vertical Repetition Saves Horizontal Space
Three separate pumpkins can consume an entire shelf, while a stacked composition puts the repetition upward. That can be a smart trade when the top tier has plenty of headroom but limited diameter. The stack also creates a stronger focal shape than several small pumpkins scattered without hierarchy.
Keep Nearby Fillers Deliberately Low
A tall focal piece needs a visual step-down. Use maple leaves, acorns, a pine cone, or a flat pumpkin accent around its base instead of surrounding it with more tall characters. This allows the eye to move from the stack into the smaller details rather than encountering a wall of equal-height objects.
Original Tutorial and Creator Credit
Creator: MJ’s Off The Hook Designs
Crochet Flat Pumpkin Coaster Accent
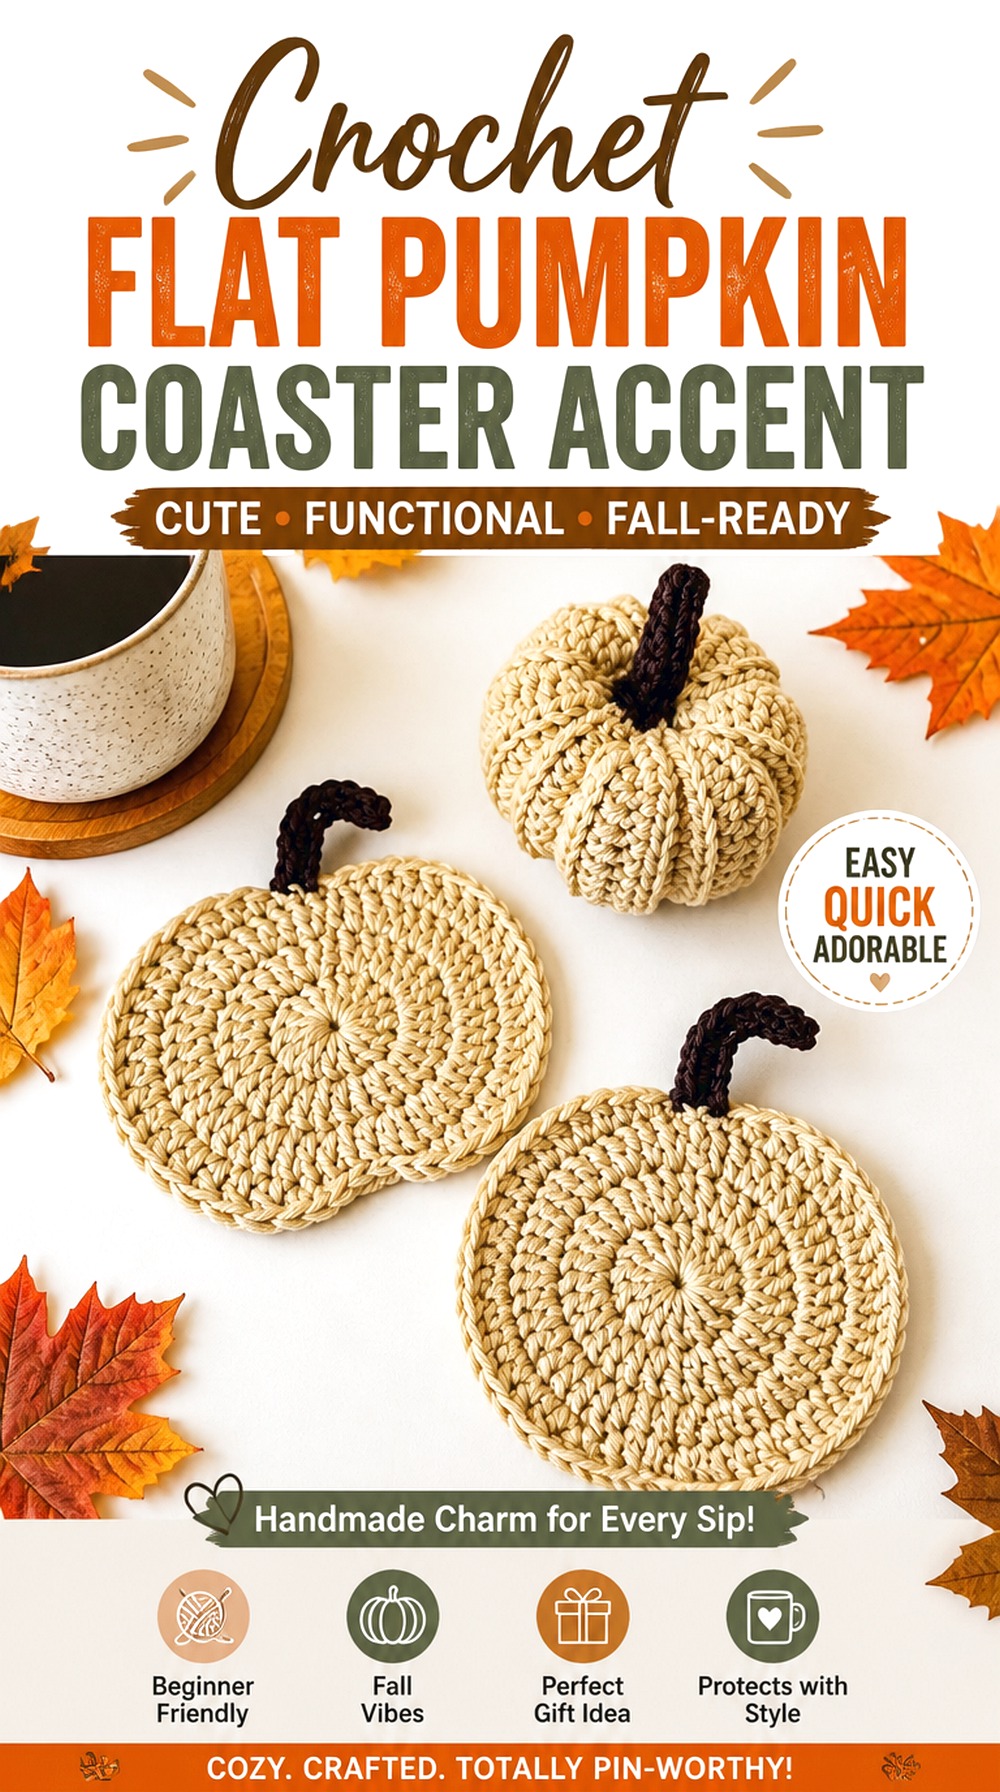
Not every pumpkin needs to be stuffed. Claudetta Crochet’s pumpkin coaster tutorial produces a flat seasonal shape, giving this idea a distinctly different job from the mini ribbed pumpkin and vertical pumpkin stack.
On a tiered tray, the coaster can be used visually as a flat leaning accent, small backdrop, or surface detail rather than only under a cup. Its low depth is particularly useful on a crowded shelf. Because flat crochet can curl depending on fiber and tension, inspect the finished piece before deciding whether it will lie flat or display more successfully propped against something.
Use the Flat Shape as a Backdrop
Lean the pumpkin behind a tiny mug, acorn, or mushroom so its top and sides remain visible. This creates apparent layering without using another three-dimensional object and is an effective way to fill an empty patch at the rear of a tier.
Do Not Assume a Decorative Coaster Is Heat Protection
For this article, the project is being considered as decor. If you later want to use any crochet coaster with hot items, verify that the chosen yarn and finished construction are appropriate for that intended use rather than making heat-resistance assumptions from the project’s appearance alone.
Original Tutorial and Creator Credit
Creator: Claudetta Crochet
Crochet Pumpkin Hanging Tray Charm
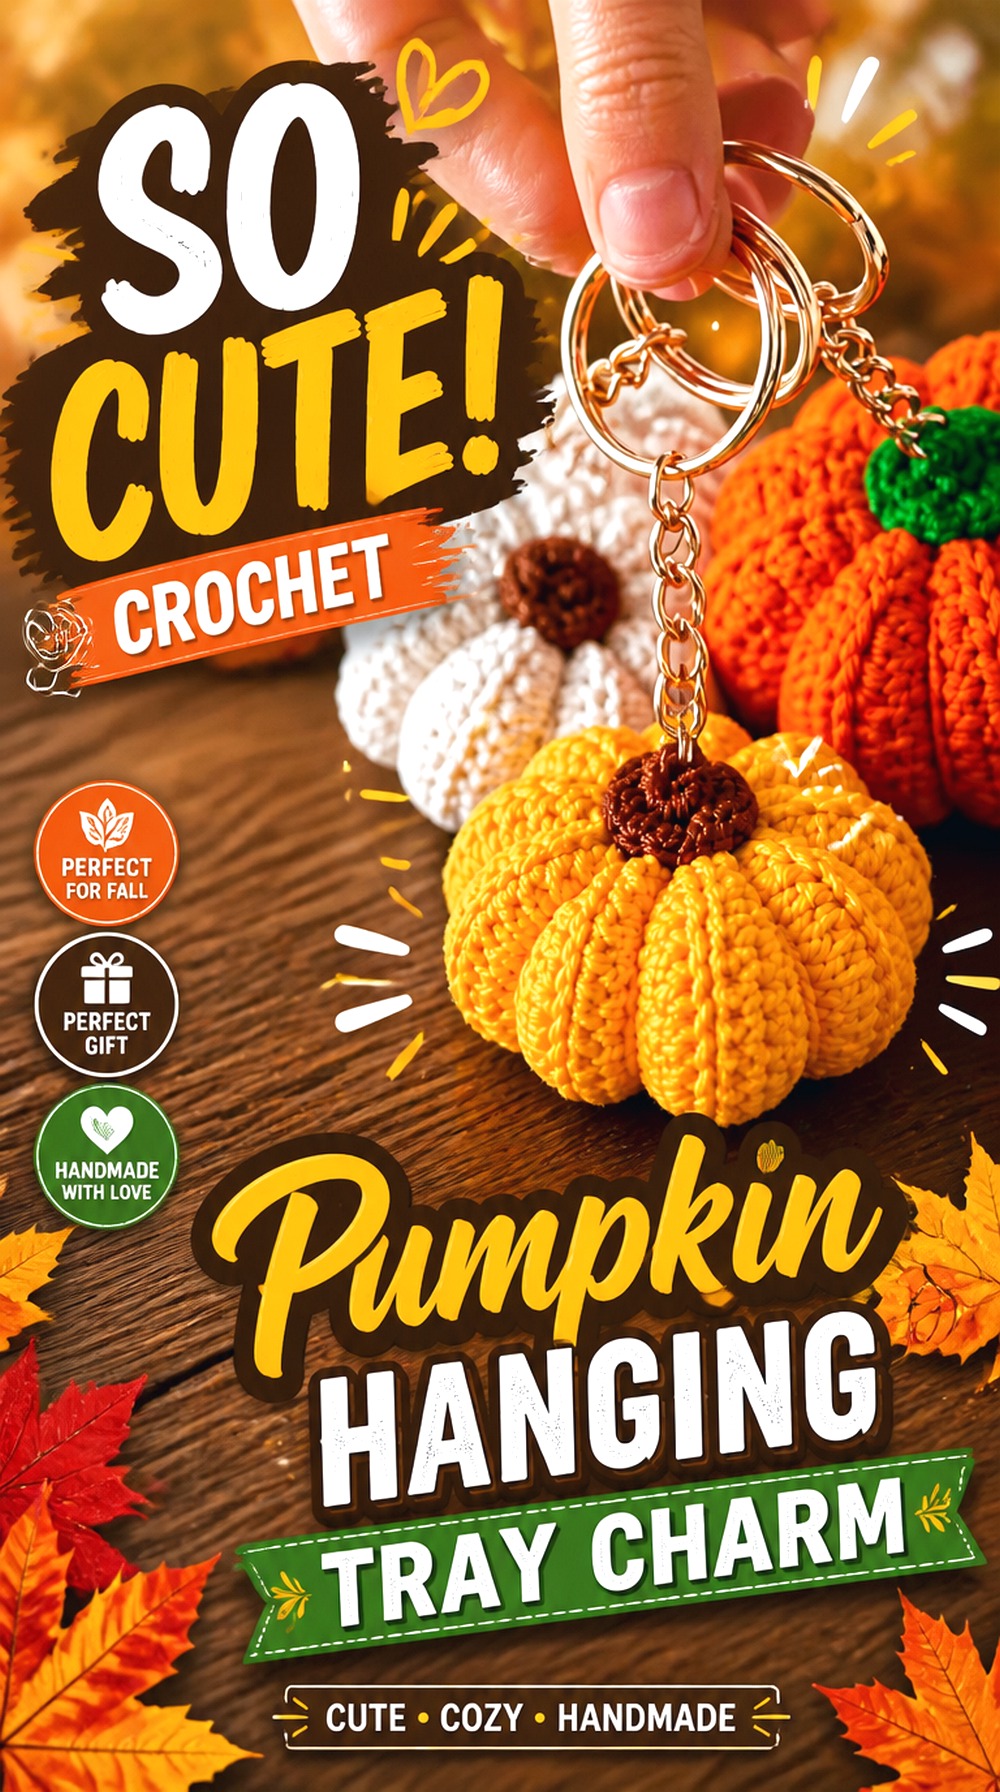
A pumpkin keychain can solve a completely different decorating problem from a tabletop pumpkin: it gives you the option to use the tray’s vertical framework instead of occupying another patch of shelf. Crochet Craftsman’s tutorial is specifically for a crochet pumpkin keychain and includes the hanging-hardware concept as part of the project.
Used as seasonal decor, a small hanging pumpkin can sit near a handle or another appropriate attachment point while the tiers remain available for standing pieces. Keep the charm short enough that it does not repeatedly strike the decorations below, and avoid placing dangling elements where children or pets could easily pull on them.
Hanging Decor Frees the Shelf Surface
When both tiers already have a focal piece and several fillers, adding another standing pumpkin can create clutter. A suspended accent uses space that would otherwise remain empty. It also introduces a different visual level, which can make a compact arrangement feel more layered without increasing the number of objects sitting on the shelves.
Check the Attachment Point Before Adding Hardware
A tray handle or frame is not automatically suitable for every hanging piece. Make sure your chosen point is stable and that the charm does not interfere with carrying, rotating, or cleaning the stand. If the tray is frequently moved, a loose dangling accent may be less practical than a stationary filler.
Original Tutorial and Creator Credit
Creator: Crochet Craftsman
Crochet Chrysanthemum Fall Flower Accent
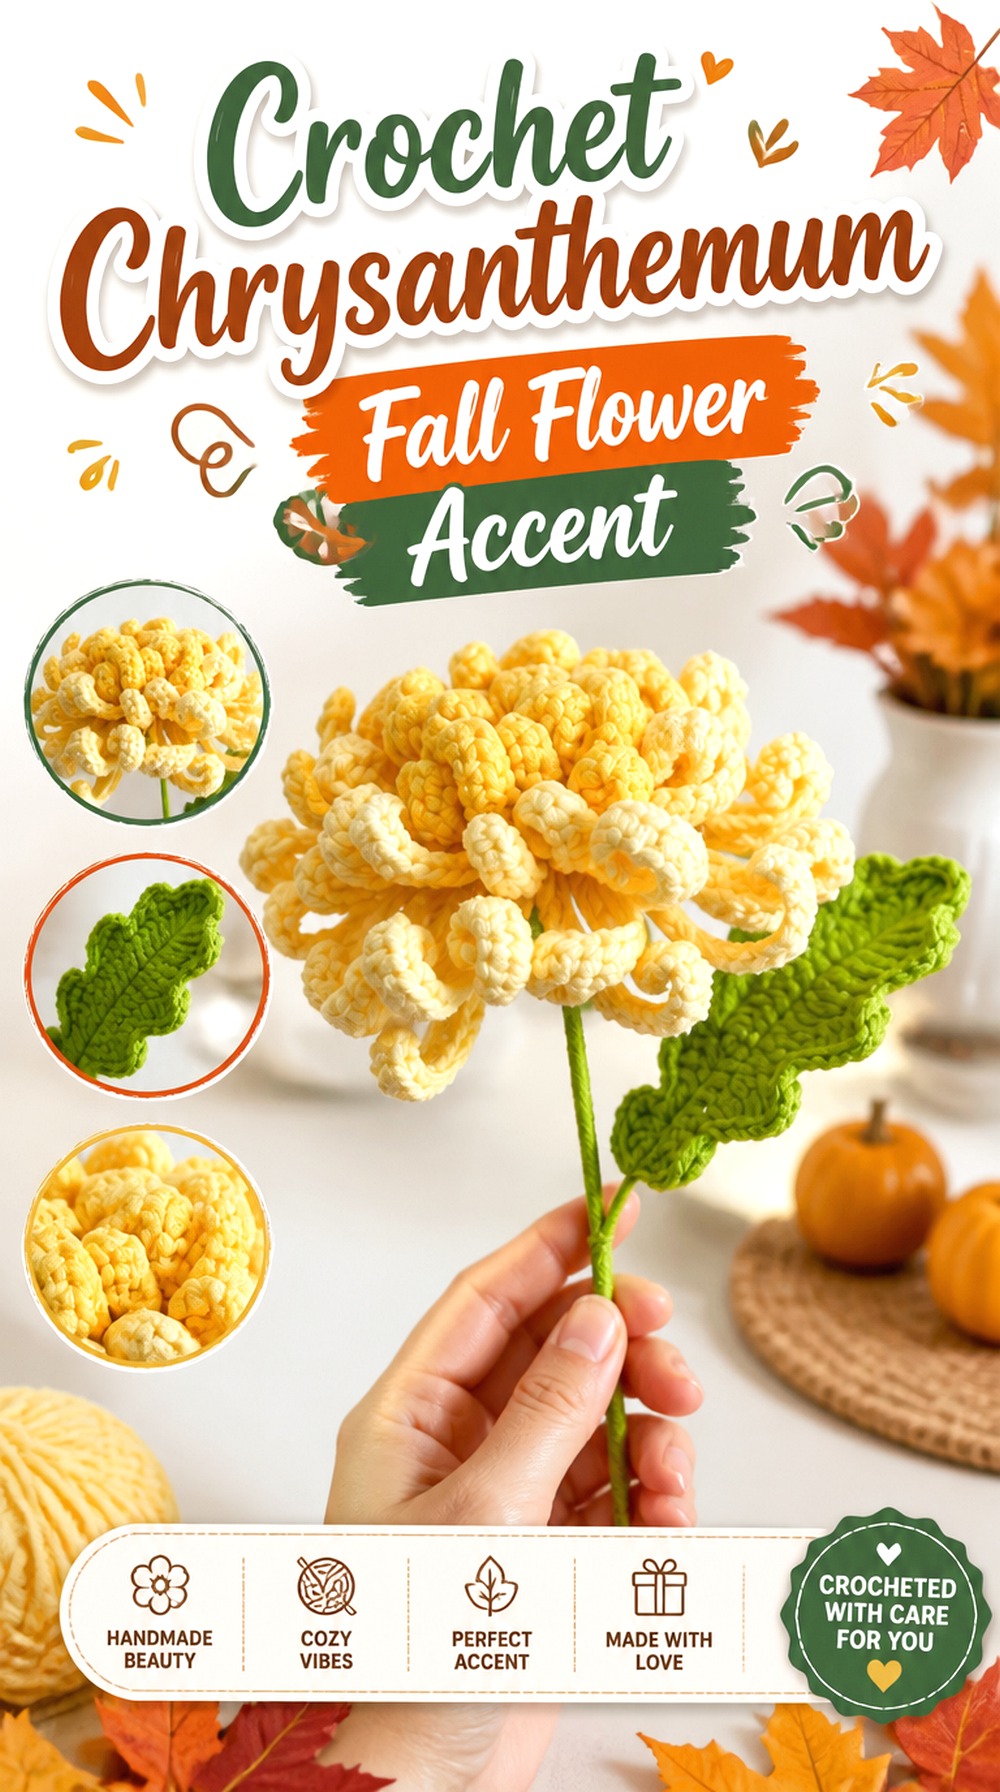
A chrysanthemum gives the tray an autumn floral note that looks very different from the broad sunflower. Happi Crochet’s tutorial demonstrates a crochet chrysanthemum flower, creating a layered bloom with enough detail to serve as a deliberate accent rather than generic greenery.
The flower works well near a mini basket or behind a low harvest object where the bloom can remain visible. Because floral projects can extend much farther vertically than their flower head suggests, decide how you intend to support and position it before assuming it will fit beneath an upper tier. A top-tier arrangement gives you more freedom if the finished stem is tall.
Choose the Placement Before Committing to Height
A stemmed flower on the top tier can rise freely, while the same piece beneath another shelf may be compressed or hidden. Measure the available clearance and decide whether the flower will stand upright, lean at an angle, or become part of a small supported grouping.
Let One Detailed Bloom Replace Several Tiny Fillers
The layered flower head already contains considerable visual detail. Instead of surrounding it with many tiny objects, give the chrysanthemum space beside a simple pumpkin, basket, or leaf. This keeps the flower visible and gives the eye a calmer place to land within a busy handmade display.
Which Crochet Fall Tiered Tray Pieces Work Best Together?
Instead of choosing 22 projects for one tray, select a few with different jobs. For a harvest arrangement, try the scarecrow as the tall element, with corn, apple, mini pumpkin, sunflower, and a flat maple leaf around it. For a woodland tray, the squirrel or hedgehog can lead, followed by mushrooms, acorns, pine cones, and leaves.
A cozy kitchen-style fall tray can use the mini mug, pumpkin pie, apple, and basket, while the holiday transition pieces are best treated as swaps: candy corn for October and the turkey or pie for November. If your tray is especially small, prioritize the mini acorn, mushroom, mug, leaf, hanging pumpkin, and one focal piece rather than reducing every project simply to make all of them fit.
Conclusion
The most effective crochet fall tiered tray is a mix of silhouettes, not a collection of equally sized stuffed objects. Choose one focal piece such as the gnome, scarecrow, turkey, squirrel, or pumpkin stack; add one or two medium harvest or woodland forms; then finish the gaps with flatter leaves, flowers, acorns, mushrooms, or a hanging charm.
For a display that lasts longer, keep pumpkins, apples, acorns, woodland pieces, and florals as the core, then swap candy corn in for October and the turkey or pumpkin pie in for Thanksgiving. Before starting any project, compare its finished form with your tray’s actual clearance and use the original creator tutorials for exact construction details.
Frequently Asked Questions
How small should crochet decor be for a tiered tray?
There is no universal tiered-tray size, so a single recommended crochet measurement would be misleading. Measure the usable flat area and vertical clearance of each tier, including the center post and rim. Then compare those measurements with any finished dimensions supplied by the tutorial creator. When dimensions are not clearly provided, consider making only one piece first before planning a repeated set.
Which crochet fall pieces should go on the top tier?
The top tier usually provides the most unrestricted vertical space, making it a practical location for taller focal pieces such as a gnome, scarecrow, stacked pumpkin, or flower. Lower-profile mushrooms, acorns, pie slices, leaves, and small produce can then fill the areas below. Your particular tray may differ, so measure rather than assuming the upper level is always larger.
How do I keep a crochet tiered tray from looking overcrowded?
Use fewer pieces with clearly different heights and footprints. One focal object, two or three supporting pieces, and a flat or narrow filler often look more intentional than filling every visible inch. Leave enough negative space to see the outline of each object. If a mushroom cap, mug handle, animal face, or leaf shape disappears behind its neighbor, remove or reposition something.
Can I change the yarn in these tutorials to make the projects smaller?
A different yarn and hook combination can change finished scale, but the result is not always a predictable proportional reduction. It may also change firmness, stitch definition, drape, and the size relationship between separate components. If a project must fit a specific opening, use the creator’s material information as your starting point and make a sample before assuming a substitution will produce the size you need.
How can I make one crochet tray work from early fall through Thanksgiving?
Build the core around less date-specific motifs such as apples, pumpkins, acorns, mushrooms, pine cones, leaves, flowers, and woodland animals. Add candy corn when you want a more October-focused look, then remove it and introduce the turkey or pumpkin pie for November. Keeping only a few holiday-specific pieces makes the seasonal change easier and reduces storage.
What should I do if a flat crochet leaf or coaster curls on the tray?
First consider whether the curl is actually a problem—a gently dimensional maple leaf can look natural. If you want a flatter background accent, check the yarn’s care information and use a blocking approach appropriate for that fiber and project. Avoid applying heat or another finishing method simply because it works for a different yarn type.
Are small crochet tiered-tray decorations suitable around children or pets?
Treat small stuffed pieces, hanging cords, keychain hardware, wired floral components, detachable eyes, and other embellishments as decorative objects unless their construction and materials are specifically appropriate for the intended user. Keep small or dangling pieces out of reach where ingestion, pulling, or entanglement is possible. A decorative tiered tray is not automatically a child- or pet-safe play display.