Crochet pumpkins can be much more varied than a row of orange stuffed ornaments. This collection includes classic ribbed pumpkins, dimensional granny-square designs, pillows, table pieces, a hat, storage, a bag, appliqués, garlands, and Halloween characters. That range matters because construction affects everything from yarn choice and stuffing to how easily a finished project can be stored or washed.
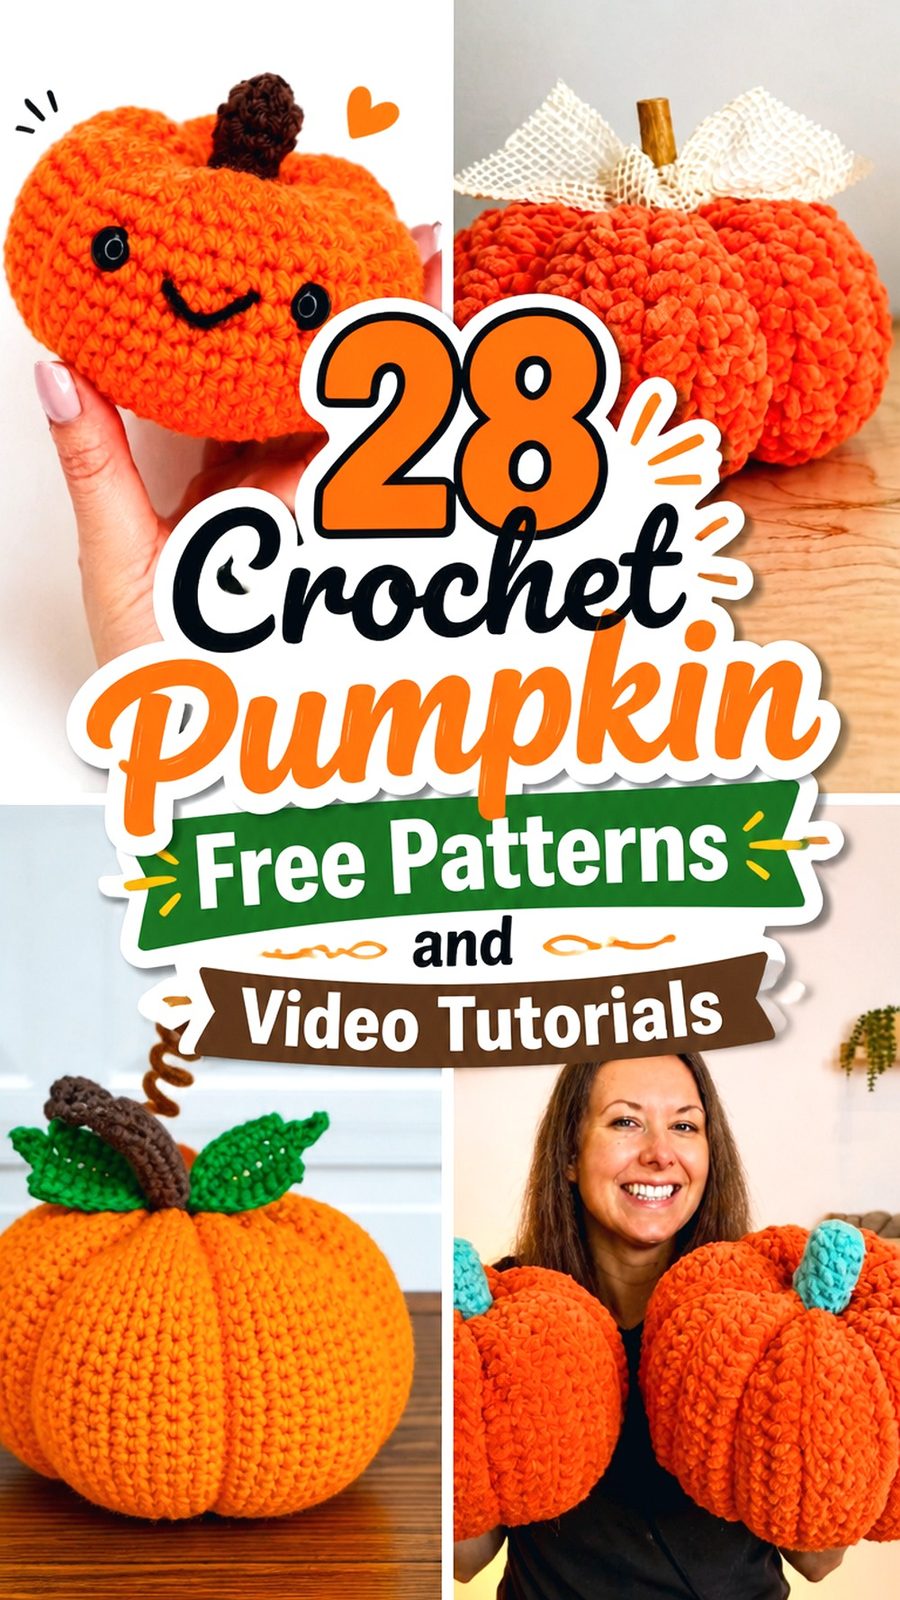
The projects below pair each idea with a public YouTube tutorial from a different crochet channel. Many creators also provide a free written version on their websites or through the video description; in some cases, an optional printable or ad-free PDF costs extra. Rather than repeating creator instructions here, the notes focus on choosing between the designs, adapting them thoughtfully, and spotting practical details before you start.
Quick List
- Crochet Classic Ribbed Mantel Pumpkin
- Crochet Side-to-Side Pumpkin Trio
- Crochet Colorwork Pumpkin Pillow Cover
- Crochet Pumpkin Coaster Holder
- Crochet Pumpkin Granny Square
- Crochet Pumpkin Placemat
- Crochet Pumpkin Beanie with Leaves and Vines
- Crochet Jack-o’-Lantern Pillow
- Crochet Mini Smiling Amigurumi Pumpkin
- Crochet Mini Pumpkin Gift or Keychain
- Crochet Lidded Pumpkin Storage Basket
- Crochet Granny-Square Pumpkin Centerpiece
- Crochet Striped Country Pumpkin
- Crochet Pumpkin Spice Mug Cozy
- Crochet Pumpkin Potholder
- Crochet Pumpkin Wreath
- Crochet Chunky Jack-o’-Lantern Amigurumi
- Crochet Classic Squishy Pumpkin
- Crochet Pumpkin Patch Granny-Square Afghan
- Crochet Chunky Pumpkin Throw Pillow
- Crochet Paulie Pumpkin Character
- Crochet Pumpkin Coaster Set
- Crochet Pumpkin-Shaped Shoulder Bag
- Crochet Full-Size Autumn Pumpkin
- Crochet Halloween Pumpkin Character
- Crochet Pumpkin Garland
- Crochet Pumpkin Appliqué
- Crochet Knit-Look Pumpkin Pillow
Choose a Pumpkin Pattern by Construction, Not Just Color
The biggest difference among crochet pumpkin patterns is how the object gets its shape. Some start as flat ribbed fabric that is joined, stuffed, and cinched. Others are worked as amigurumi, built from granny squares, or incorporated into functional projects such as a placemat, pillow, bag, or basket. That construction affects both the look and the finishing work.
For a simple seasonal display, a stuffed rectangle-style pumpkin keeps the planning straightforward. If you enjoy motif work, granny-square designs give you more opportunities to combine pumpkins with blankets or cushions. Functional projects require another layer of thought: a placemat should stay flat, a basket should hold its shape, and a wearable needs to fit before decorative leaves or vines are added. Decide where the finished item will live first, then choose the construction.
Yarn Choice Changes Shape, Texture, and Function
A pumpkin made from plush or super-bulky yarn behaves differently from one made with smooth cotton or standard worsted yarn. Thick, soft yarn emphasizes volume and works especially well for cushions and oversized decor. Smooth yarn makes stitch definition easier to see, which can be useful when the pumpkin depends on ribs, clusters, colorwork, or small facial details.
Functional pieces need additional consideration. A storage basket benefits from fabric that does not collapse too easily, while a coaster or placemat needs to lie reasonably flat. For wearables, compare the creator’s intended yarn and finished measurements rather than changing yarn weight casually. Substitution can alter width, stretch, drape, and scale even when the stitch pattern stays unchanged. When finished size matters, use the creator’s gauge or measurement information as the deciding reference rather than the yarn color or appearance alone.
Plan Finishing, Storage, and Safety Before You Start
Stuffing is not just a final step on a crochet pumpkin. Too little can leave the sections indistinct, while too much can make cinching difficult and stretch open the fabric. Add filling gradually and judge the silhouette before permanently securing the shaping strands.
Seasonal storage also favors some constructions over others. Removable pillow covers and flat appliqués take less storage space than large stuffed pumpkins, while baskets can remain useful beyond autumn if you choose a neutral color palette.
For pieces intended around small children or pets, consider loose eyes, beads, glued decorations, long cords, stems, and other detachable elements before gifting. Kitchen projects deserve separate attention: never assume yarn is appropriate for hot cookware simply because a project is called a potholder. Follow the creator’s material guidance and the yarn manufacturer’s intended-use information.
Crochet Classic Ribbed Mantel Pumpkin
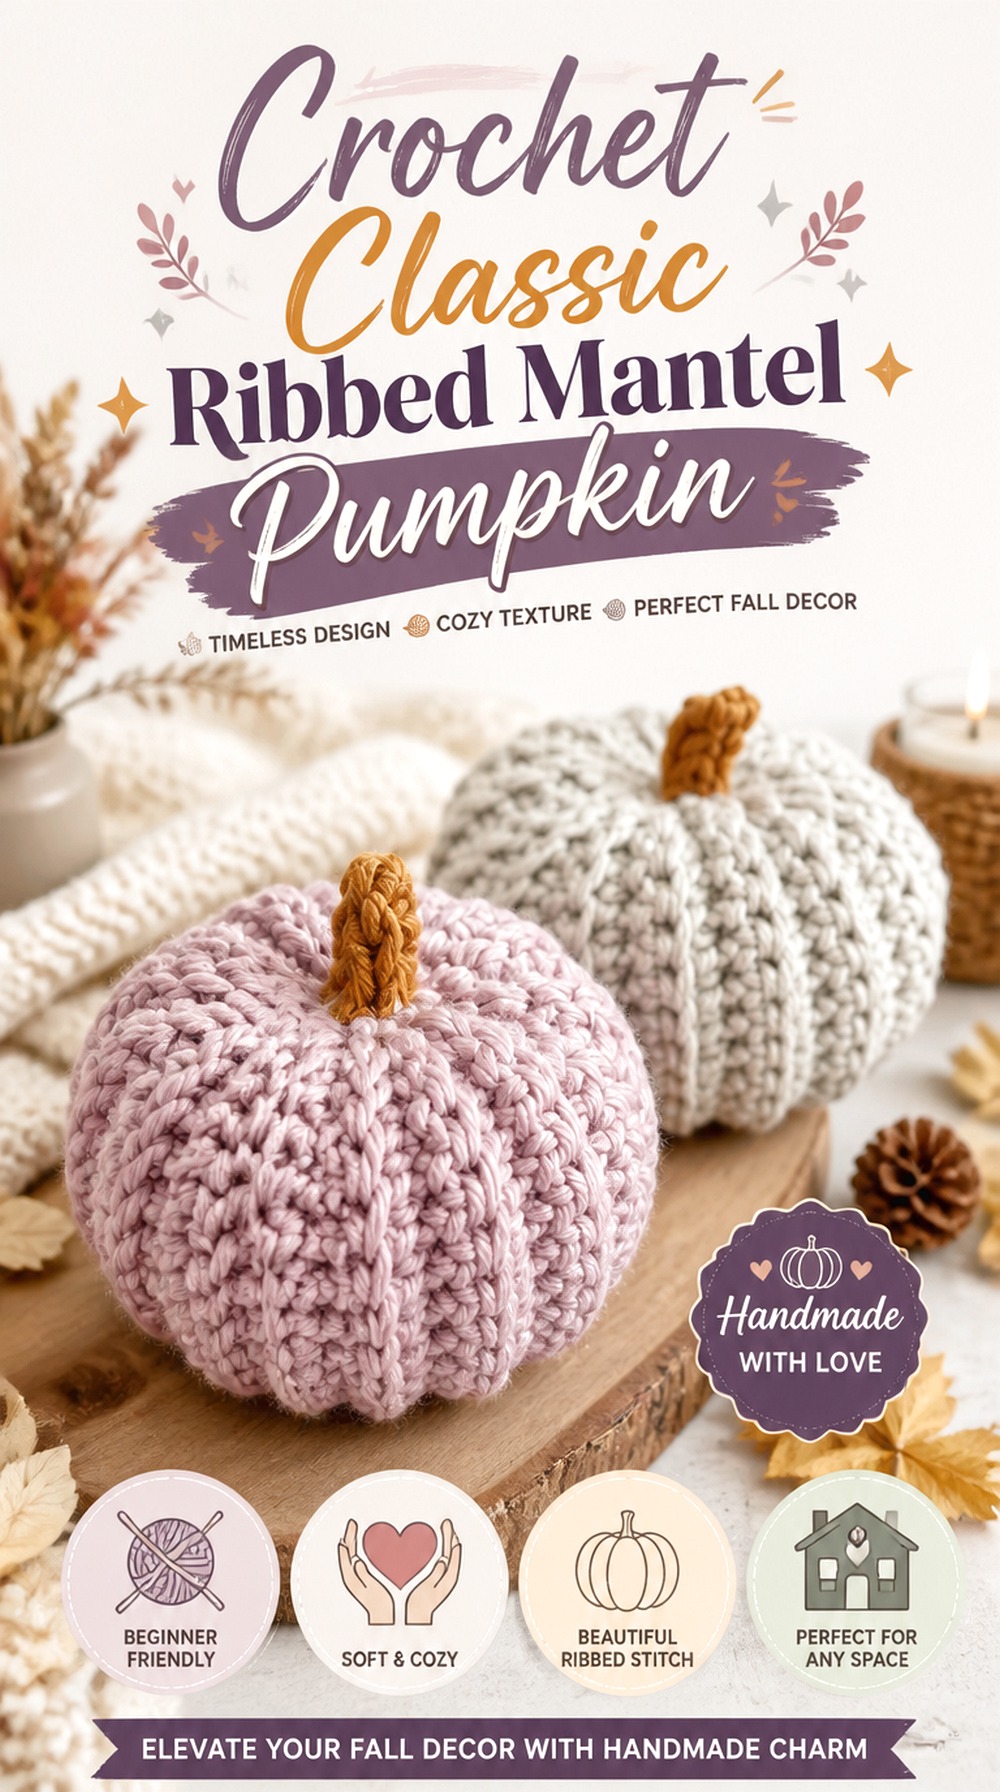
This traditional stuffed pumpkin is a useful starting point when you want recognizable fall decor without moving into amigurumi-style shaping. Bella Coco’s tutorial shows the familiar approach of creating crochet fabric, forming it into the pumpkin body, and adding the finishing details that turn a simple shape into a segmented decoration. The visible ribbing gives the pumpkin depth without relying on multiple colors.
It works especially well as part of a mantel, shelf, or table arrangement because its neutral construction can be repeated in several yarn colors without changing the underlying concept.
Ribbing Determines How Strongly the Pumpkin Reads
With this kind of project, the stitch texture does much of the visual work. A yarn with clear definition will emphasize the ridges, while a very fuzzy yarn can soften them. Decide whether you want crisp architectural ribs or a softer, more blended pumpkin before substituting fiber.
Check the Finished Proportions Before Scaling the Rectangle
Making a flat piece larger in every direction does not automatically preserve the same finished pumpkin shape. If you adapt the project, compare the height and circumference of your formed tube before stuffing. A taller, narrower starting shape will create a noticeably different silhouette from a broad, squat one.
Crochet Side to Side Pumpkin Trio
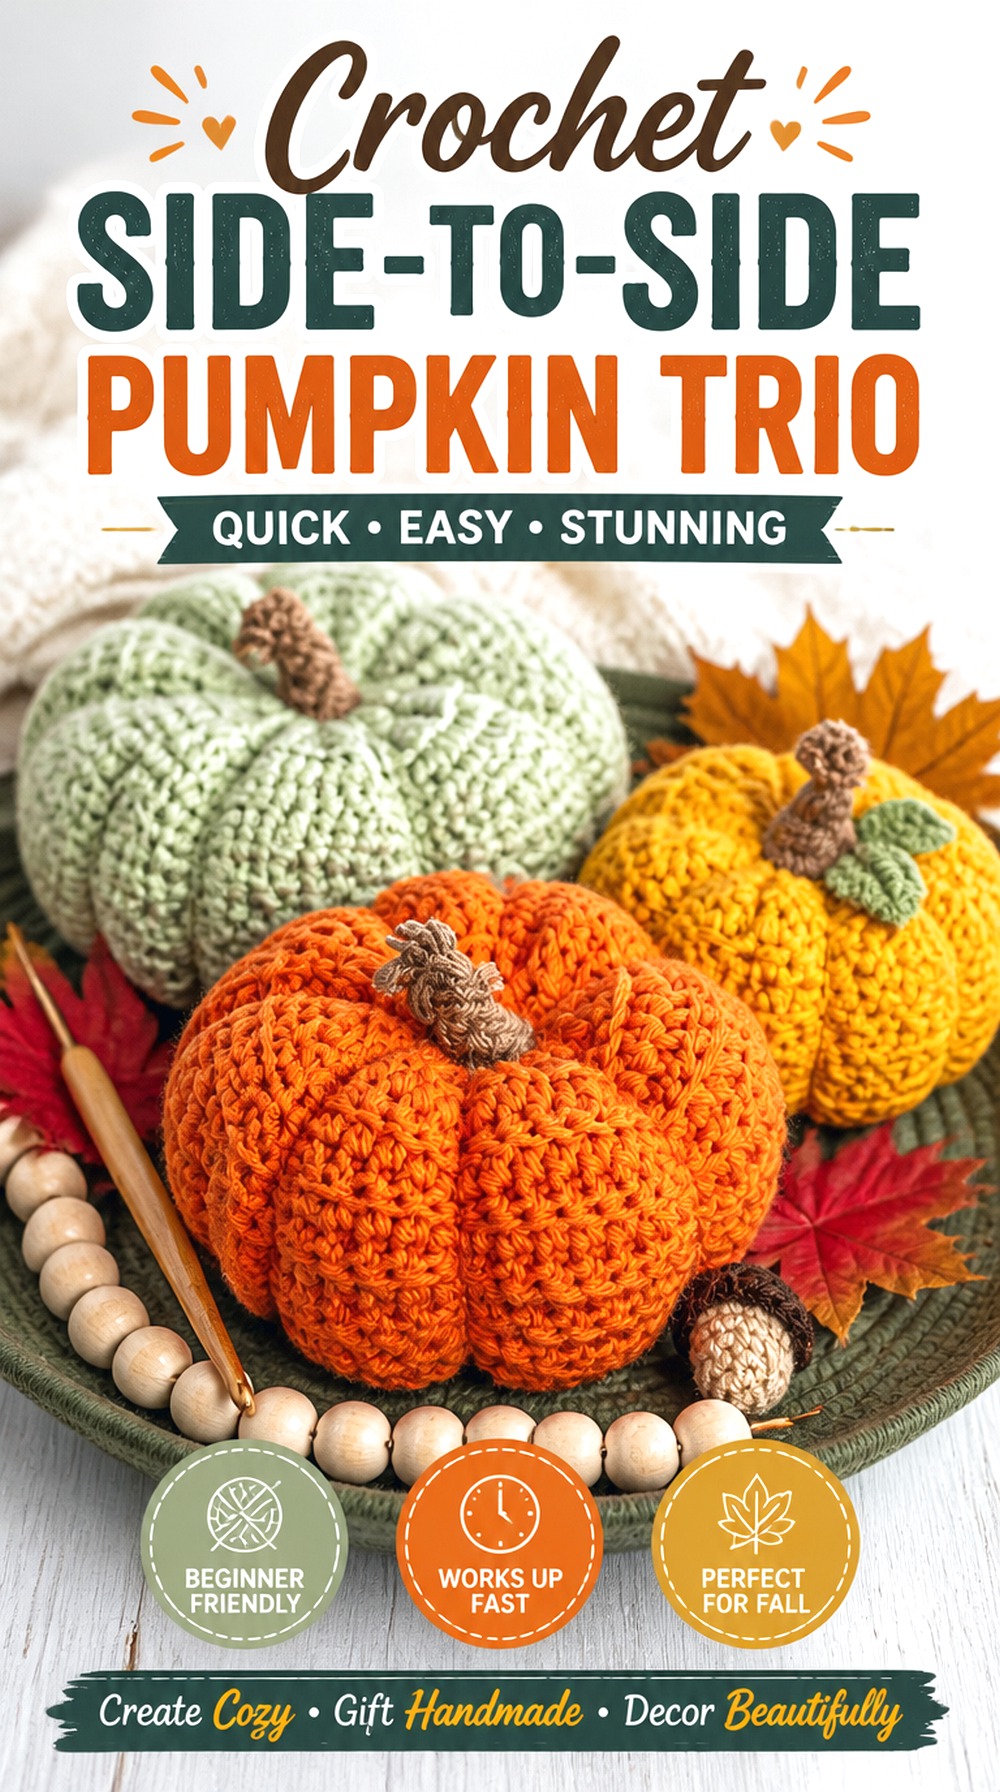
Winding Road Crochet’s design is particularly useful when you want several pumpkins that look related without displaying three identical objects. The free pattern includes multiple sizes, which makes it easier to build a small graduated patch rather than improvising proportions independently.
The side-to-side construction also gives the surface an obvious directional texture. That makes these pumpkins a good contrast beside smoother amigurumi pieces. For a centerpiece, vary size first and color second; the difference in silhouette creates more visual depth than simply making the same pumpkin in several shades.
Side-to-Side Construction Makes a Coordinated Patch Practical
A multi-size source is helpful when you want pumpkins that share the same visual language. Instead of guessing how much to enlarge one version, follow the creator’s size choices and then compare the finished group before deciding whether you need another scale.
Keep All Three Pumpkins Consistent at the Finishing Stage
A coordinated set can look unexpectedly uneven if each pumpkin is stuffed or cinched differently. Compare firmness, segment depth, and stem placement as a group before permanently securing everything. Matching the finishing style matters almost as much as matching the yarn.
Original Tutorial and Creator Credit
Creator: Winding Road Crochet
Crochet Colorwork Pumpkin Pillow Cover
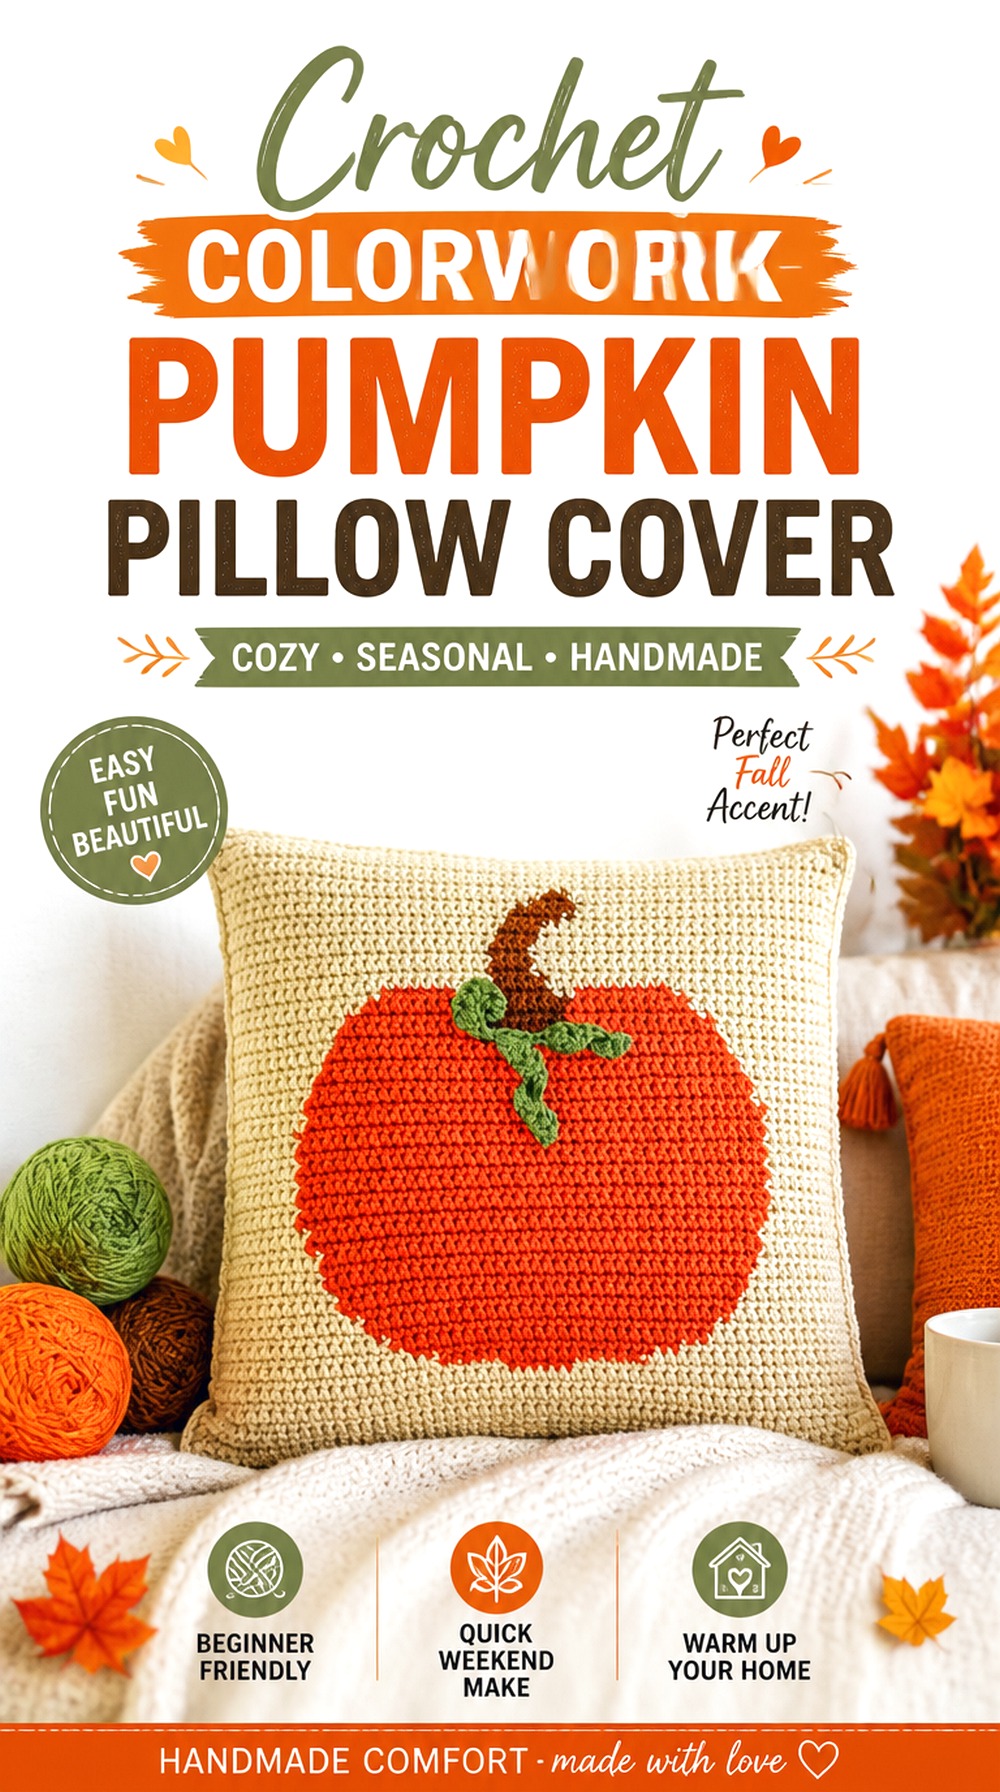
Rather than shaping an entire cushion like a pumpkin, Jo to the World Creations places the pumpkin image on the front of a conventional pillow cover. The free pattern is designed as a removable cover, making this a practical choice for anyone who wants seasonal decor without storing another bulky pillow insert after fall.
The graphic pumpkin front also provides a distinctly different look from textured three-dimensional pumpkins. Choose this project when you prefer a recognizable pumpkin motif but want the finished piece to behave like ordinary sofa decor.
A Removable Cover Is Easier to Store Than a Stuffed Seasonal Pillow
If storage space is limited, being able to reuse an existing insert is valuable. Before starting, confirm that the intended insert and the pattern’s finished cover dimensions are compatible. Overfilling can distort the colorwork, while an undersized insert may leave the front looking loose.
Colorwork Tension Matters Across the Pumpkin Front
The pumpkin image depends on clean color transitions rather than external appliqués. Watch the fabric width as you change colors. Tight carried yarn or inconsistent tension can pull the panel inward, even when the stitch count itself is correct.
Check Your Insert Before Committing to Panel Size
The creator’s free pattern is designed around a specific cushion format. If you already own an insert, measure it first instead of assuming that every square pillow follows the same dimensions. Adaptation is easier before the front panel is complete.
Original Tutorial and Creator Credit
Creator: Jo to the World Creations
Crochet Pumpkin Coaster Holder
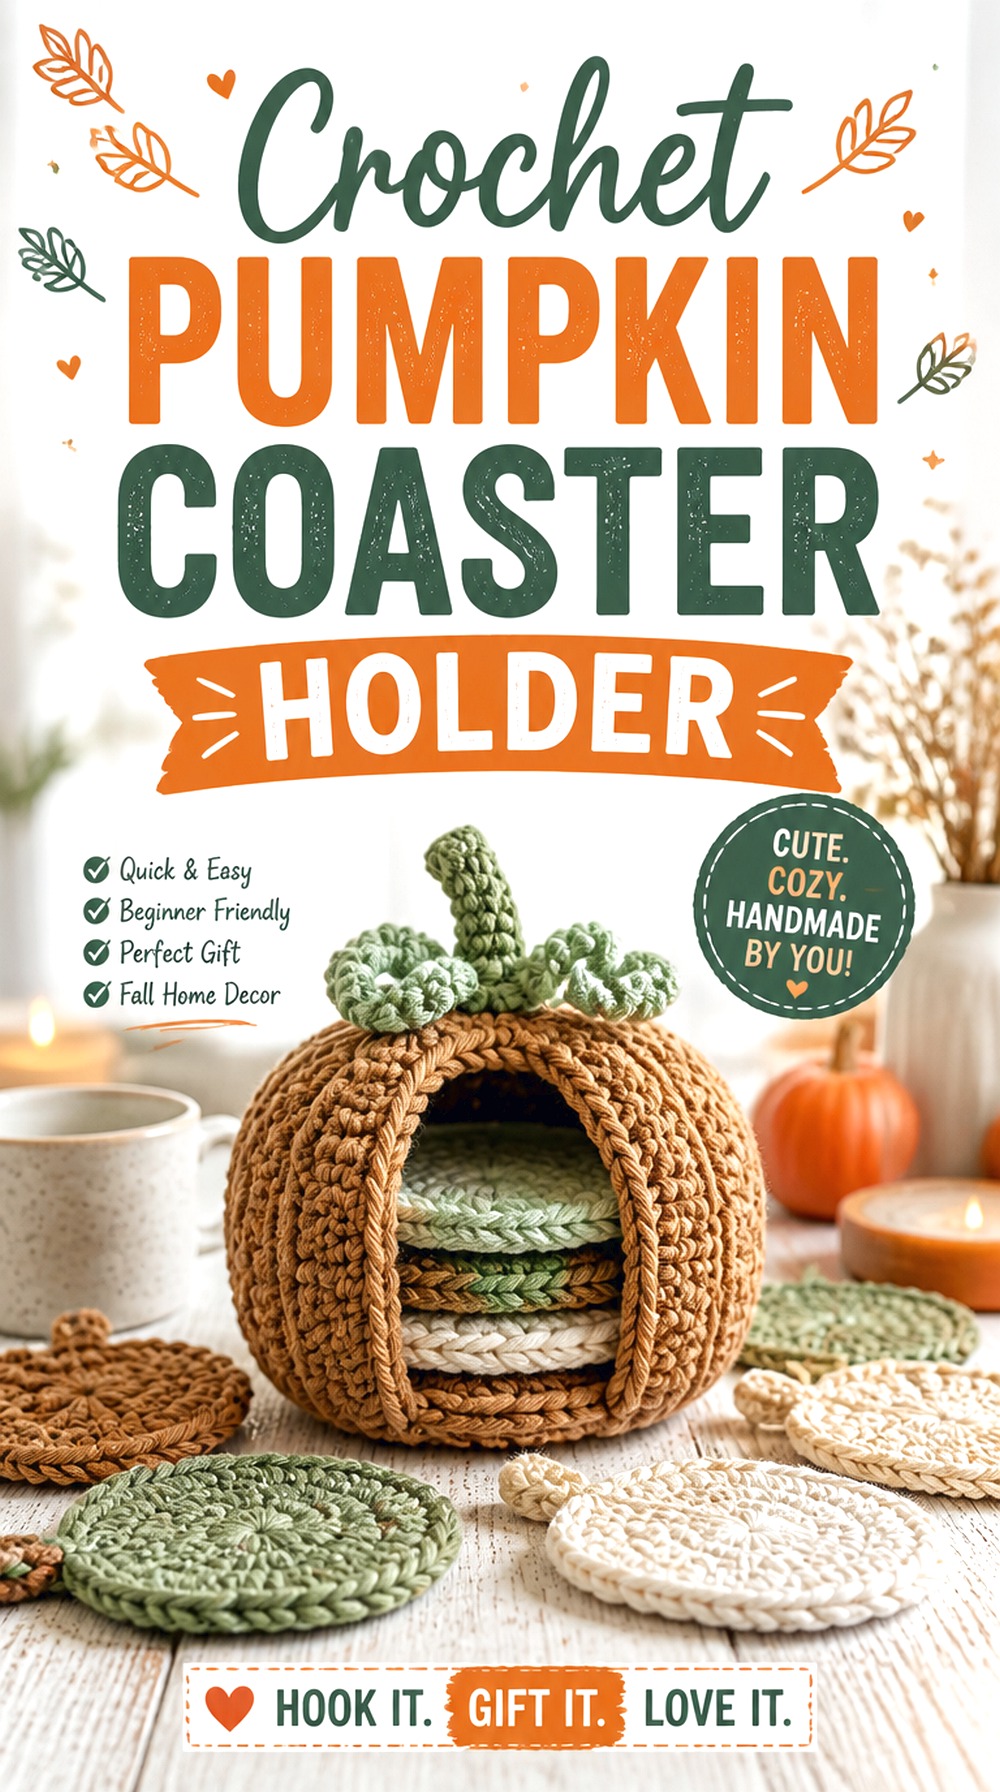
Briana K turns the pumpkin itself into storage: the curly greenery at the top leads to removable leaf-shaped coasters nested inside the pumpkin. That makes this one of the most functional projects in the collection rather than simply another stuffed decoration. The creator provides a free web version alongside the tutorial.
It makes particular sense on a coffee table or fall drinks station, where the pumpkin can remain part of the display even when the coasters are not being used.
The Leaf Coasters Change This from Decor to Table Storage
Because the removable leaves are part of the concept, treat their usability as important as the pumpkin’s appearance. They should be able to come out and return without snagging badly on the opening or becoming overly curled from storage.
Keep the Center Opening Functional
It is tempting to cinch a pumpkin as tightly as possible for dramatic shaping, but this project needs enough usable central space for the coaster system. Follow the creator’s construction rather than borrowing finishing methods from an ordinary closed stuffed pumpkin.
Test the Coasters Flat Before Nesting Them
Before putting the leaves into the pumpkin, set them individually on a flat surface. If they cup or twist noticeably, correct the fabric first. Once stored inside the pumpkin, it becomes harder to judge whether a problem came from the crochet itself or from being packed into the holder.
Original Tutorial and Creator Credit
Creator: Briana K
Crochet Pumpkin Granny Square
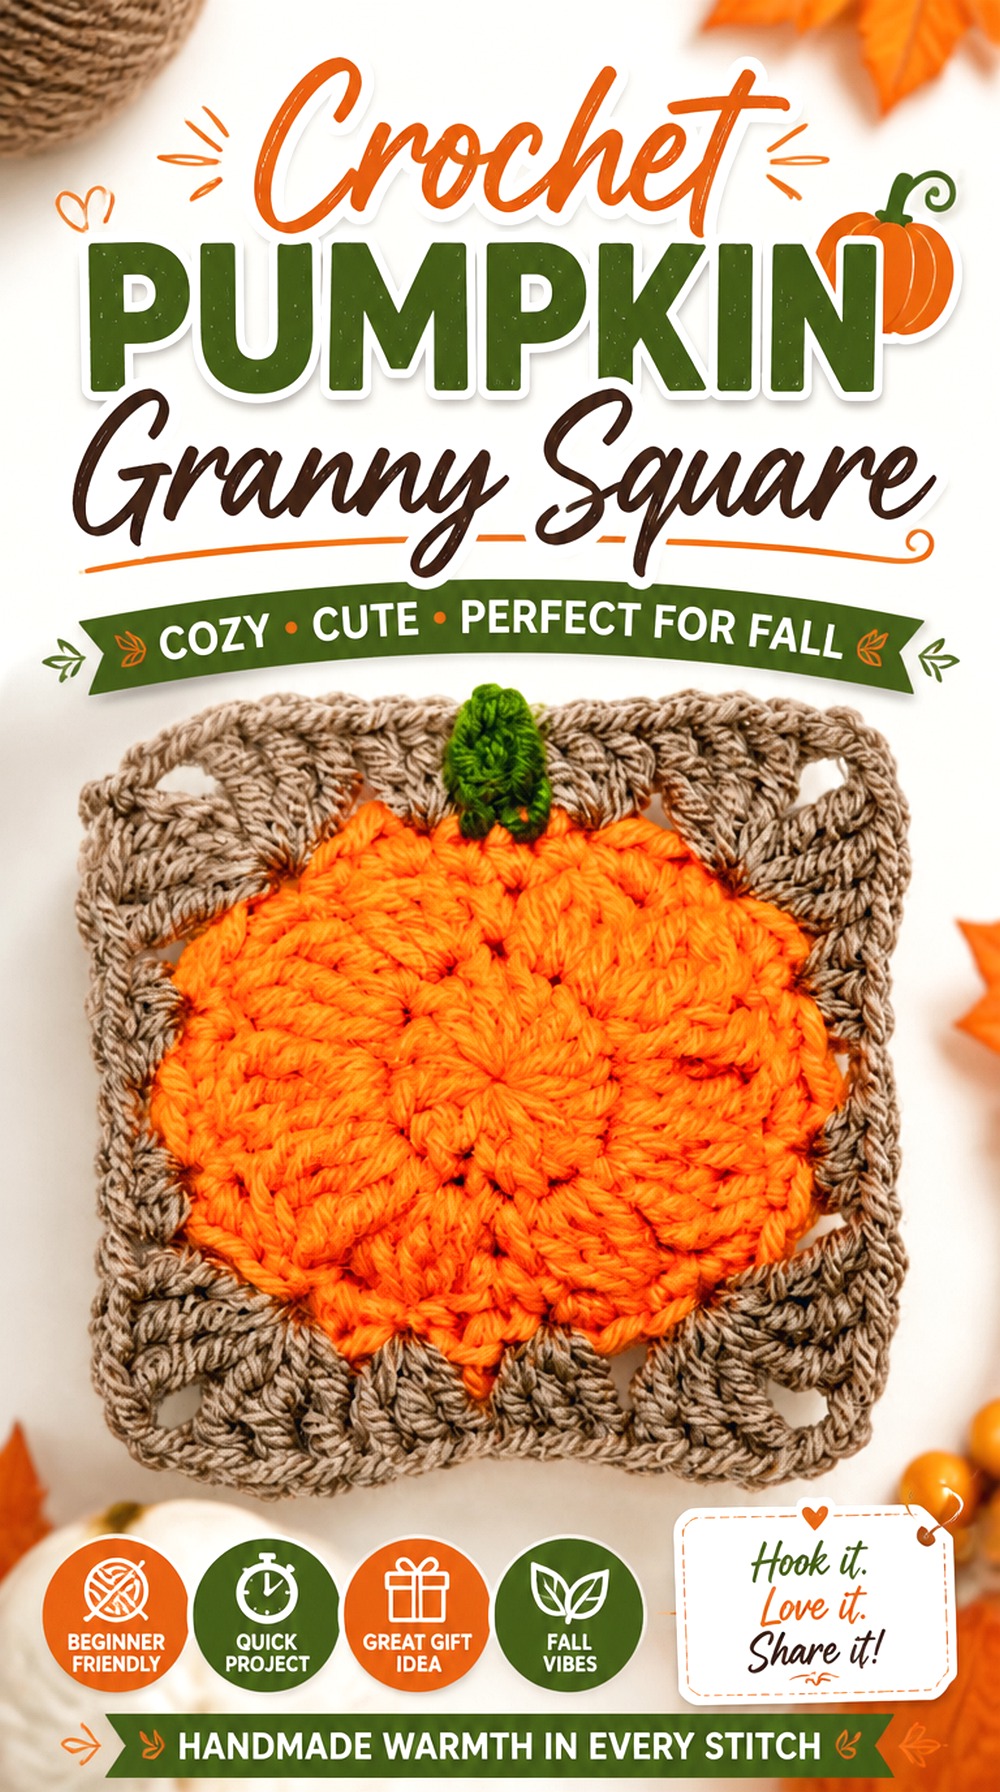
A flat pumpkin motif opens up far more project options than a single stuffed ornament. Secret Yarnery’s tutorial turns the pumpkin into a granny square that can remain a standalone seasonal motif or become part of a larger blanket, cushion, runner, or wall piece. A free pattern accompanies the tutorial.
This is the better choice when you enjoy repeated modular crochet. Instead of storing a collection of separate pumpkins, you can build the autumn theme directly into a textile.
Block the Square Before Building a Larger Project
One successful motif does not guarantee that a full set will join evenly. Make and finish a sample square, then measure it after the same blocking treatment you plan to use on the rest. Consistent blocked dimensions are more useful than judging the squares straight from the hook.
Keep the Pumpkin Center Visually Upright
Pumpkin motifs have an obvious top and bottom because of the stem. If you turn the squares while arranging a blanket or pillow, check orientation before joining. A quick layout photograph can prevent an accidentally rotated pumpkin from being discovered after several joins are finished.
Original Tutorial and Creator Credit
Creator: Secret Yarnery
Crochet Pumpkin Placemat

Tuba Crochet’s pumpkin placemat takes the seasonal motif into table decor without adding stuffing or bulk. Its large, flat pumpkin silhouette makes it more visible than a coaster while still keeping the project practical for place settings, serving areas, or decorative tablescapes. The tutorial’s description points viewers to a free written pattern.
This is a useful option when you want fall crochet that can be stacked and stored flat rather than packed away like plush decor.
Flatness Matters More Than Plushness on a Placemat
A placemat that curls around the edge or develops a raised center can be awkward under dishes. Pay attention to increases, tension, and final blocking. If you substitute yarn, make a smaller test section first to see whether the fabric wants to cup.
Decide Whether the Pumpkin Shape Needs Table Clearance
Decorative leaves, stems, or projections can extend beyond the main body. Consider the amount of table space available between neighboring settings before producing a full set. What looks attractive alone may feel crowded when several placemats are placed side by side.
Use Fiber Choice to Match Cleaning Needs
Table linens encounter spills more often than mantel decor. Check the yarn label for care instructions before committing to a full set. A beautiful fiber that requires inconvenient care may be less practical for everyday dining than one you can clean comfortably.
Original Tutorial and Creator Credit
Creator: Tuba Crochet
Crochet Pumpkin Beanie with Leaves and Vines

This Blue Star Crochet design moves the pumpkin theme from home decor to a wearable. The hat uses pumpkin-inspired texture plus leafy and vine details, and the free written pattern provides a broad size range rather than limiting the concept to one age group.
A wearable needs a different decision process from a stuffed pumpkin. Color and embellishment come after circumference, length, stretch, and comfort. Use the creator’s sizing information rather than enlarging or reducing a finished hat by eye.
Hat Fit Comes Before Decorative Vines
Make sure the main hat fits as intended before permanently positioning the top details. A beautiful stem will not compensate for a brim that is too tight or a crown that is too shallow.
Keep Leaves and Curls Away from the Face
Decorative vines give the hat much of its character, but their placement affects comfort. Before fastening them permanently, try the hat on or position it on an appropriately sized form and check where the curls naturally fall.
Compare Stretch at the Brim
Two yarns labeled the same weight can behave differently. If substituting fiber, compare how readily the brim stretches and recovers. A yarn that stays stretched may change the fit even when your initial measurements match the pattern.
Original Tutorial and Creator Credit
Creator: Blue Star Crochet | Veronika Cromwell
Crochet Jack o’ Lantern Pillow
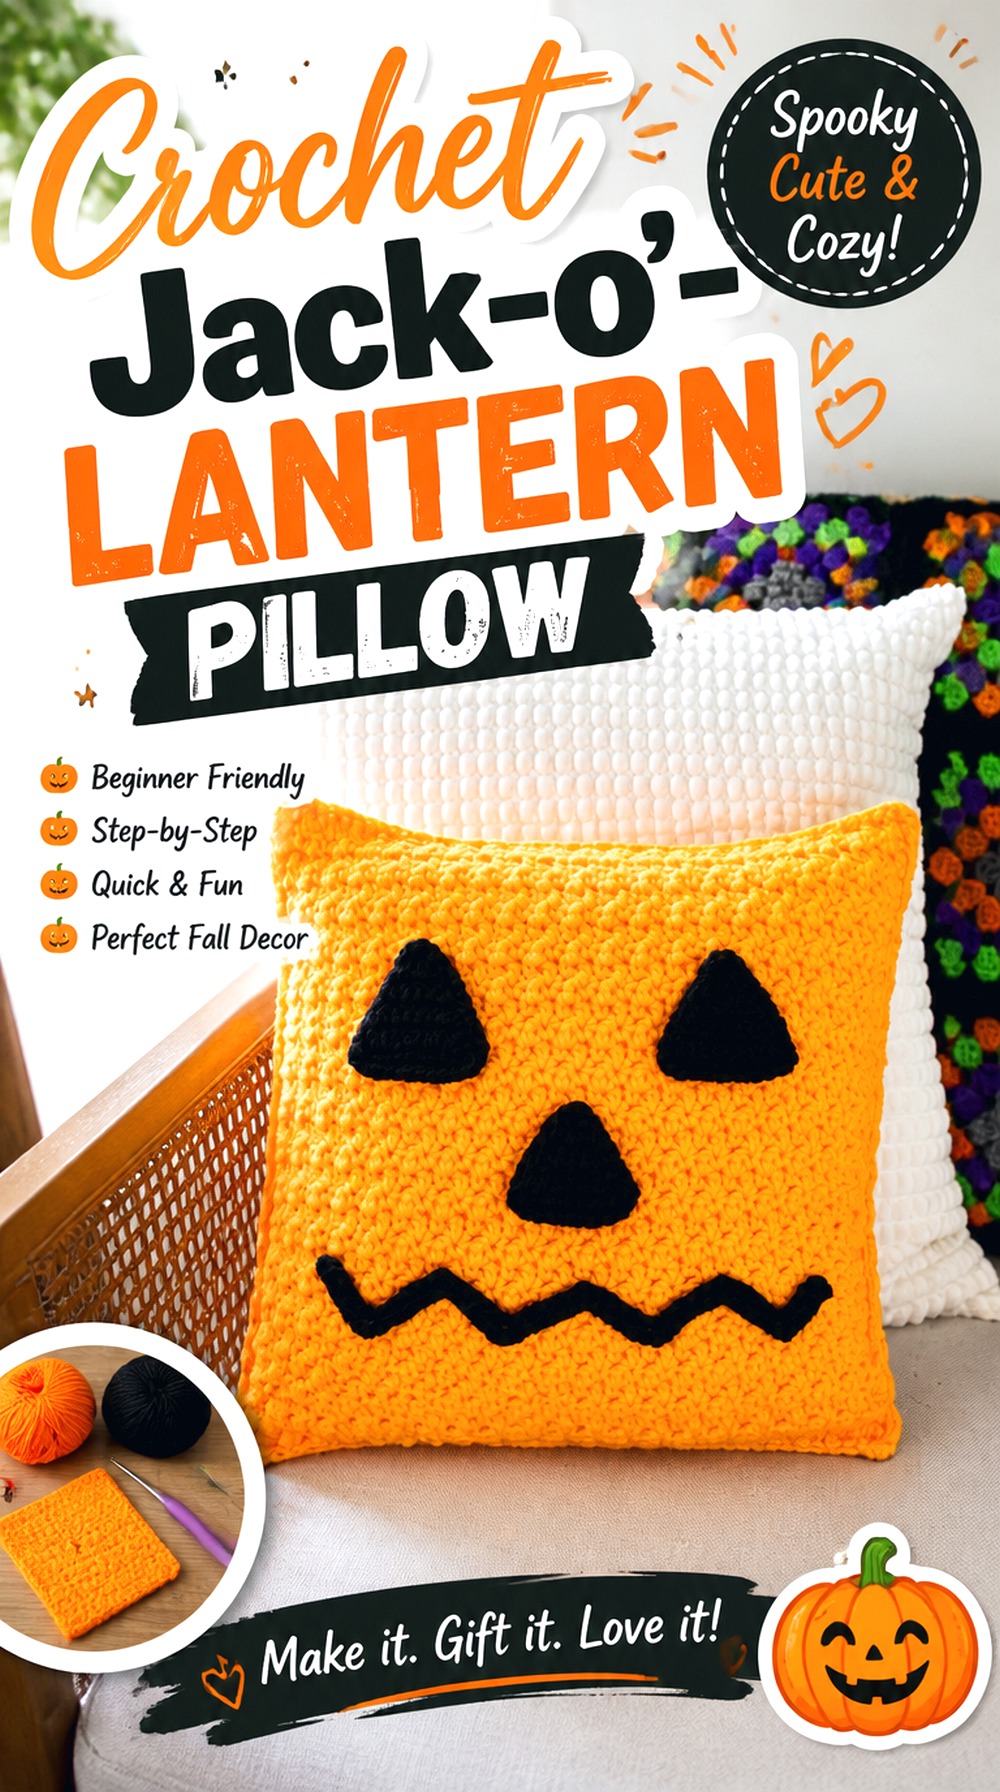
Maria’s Blue Crayon creates a clearly Halloween-focused cushion rather than an all-season harvest pumpkin. The square pillow uses separate pumpkin-face pieces on the front, so the expression becomes the dominant feature rather than relying on surface colorwork. The accompanying blog supplies the free written pattern.
This approach is useful if you want a graphic Halloween accent that reads clearly from across a room. Because the design is built around a conventional pillow form, it also sits differently from the round dimensional pumpkin cushions later in this list.
The Face Appliqué Creates a Strong Halloween Look
Before sewing the facial pieces permanently, pin or loosely position all of them together. Small changes in spacing can alter the expression noticeably. Judge the complete face from normal viewing distance instead of deciding each feature separately.
A Pillow Insert Changes the Finishing Priorities
Flat panels can look square on the table but distort once an insert is added. Check corners and edges as the pillow is assembled so that the front design stays centered rather than shifting toward one side.
Original Tutorial and Creator Credit
Creator: Maria’s Blue Crayon
Crochet Mini Smiling Amigurumi Pumpkin

DIY Fluffies offers a small amigurumi pumpkin with an embroidered expression, giving it more personality than a neutral stuffed ornament. The creator demonstrates both cotton and plush-yarn possibilities, with the yarn change producing a substantial difference in scale and softness.
This flexibility makes the design useful for readers deciding between a compact decoration and a softer plush version without needing an entirely different pumpkin concept.
Cotton and Plush Yarn Produce Very Different Scale
Do not assume a yarn swap is merely cosmetic. Thicker plush yarn changes the finished object’s overall size, stitch visibility, and firmness. Pair the hook with the yarn and evaluate whether the resulting scale still suits your intended use.
Embroidered Features Simplify Small-Piece Safety
The source demonstrates embroidered facial details. If the pumpkin is intended as a gift, think carefully before replacing embroidery with beads, buttons, or other detachable embellishments. The intended recipient should influence the finishing choice.
Original Tutorial and Creator Credit
Creator: DIY Fluffies
Crochet Mini Pumpkin Gift or Keychain
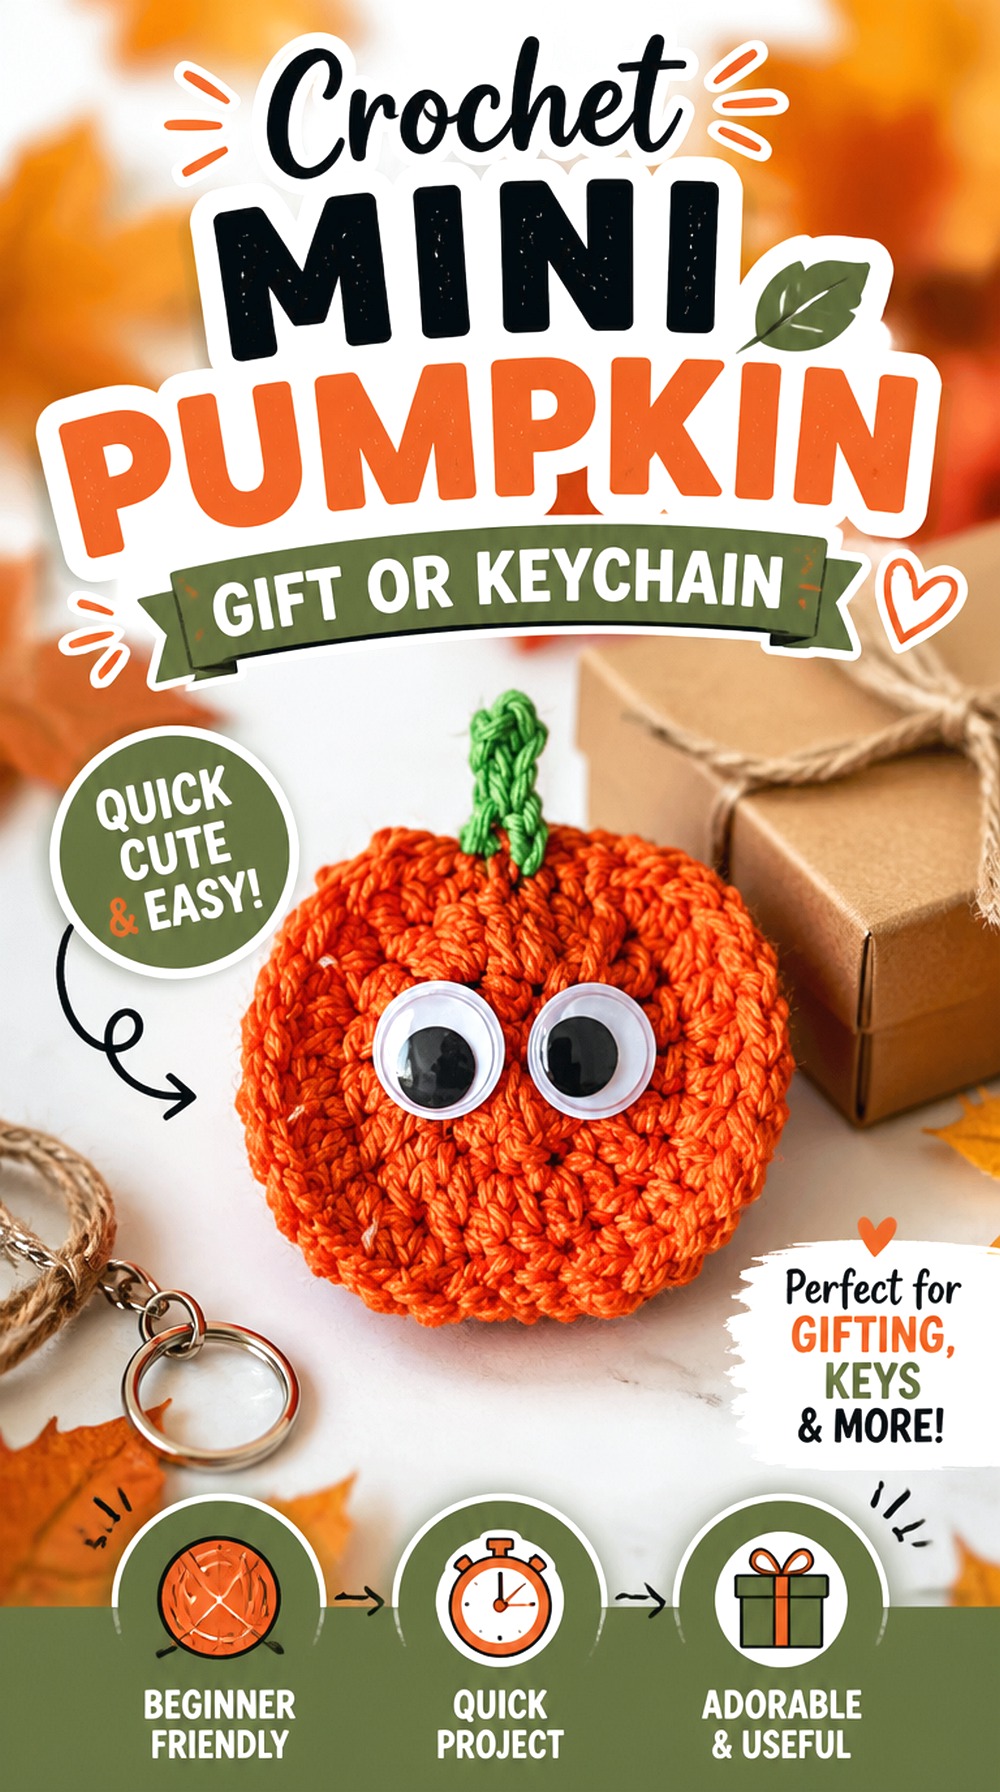
Start Crochet’s small pumpkin is well suited to gift add-ons, small seasonal displays, or conversion into a keychain when the finished scale and attachment are appropriate. The free web pattern uses a straightforward ribbed rectangle concept, making the visual emphasis the shaping and curly green finishing details rather than complicated construction.
Because the finished object is compact, it is also a practical way to test an unfamiliar yarn color or texture before committing to a larger pumpkin.
Small Scale Makes This Useful for Tags and Keyrings
A small pumpkin can move from tabletop decor to an accessory, but check the finished size first. Hardware adds weight and changes how the pumpkin hangs, so make the crochet body before buying or attaching a specific key ring.
Attach Hardware Only After the Pumpkin Holds Its Shape
Complete the stuffing, closing, and shaping before deciding where an attachment point belongs. If a ring is added too early, the weight may pull the pumpkin sideways or distort the top.
Original Tutorial and Creator Credit
Creator: Start Crochet
Crochet Lidded Pumpkin Storage Basket
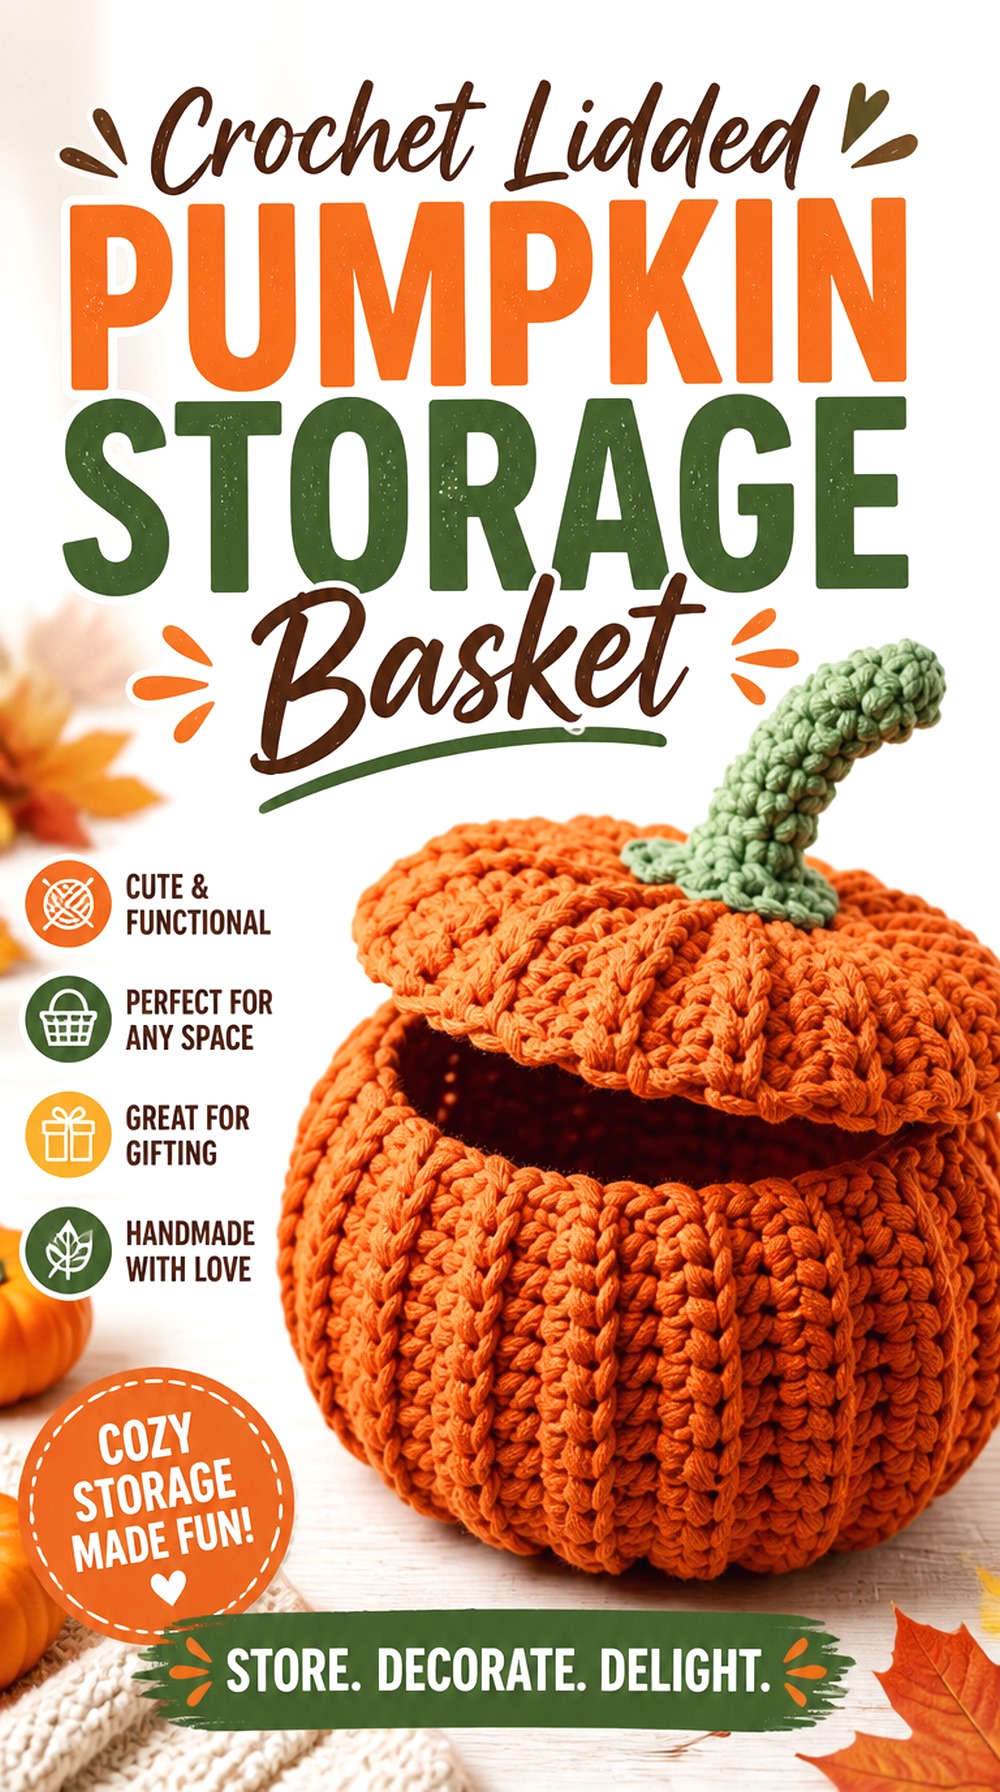
PlotkaDesign’s pumpkin is built as an actual basket with a separate lid, creating a much more structured project than a stuffed decoration. The tutorial uses cotton cord and shows a finished container intended for small-item storage as well as seasonal display.
This is a good choice when you want the pumpkin shape to remain useful. It can sit on an entry table, shelf, or craft surface without being purely ornamental.
Cord Choice Controls Whether the Basket Stands Upright
A storage basket needs more body than a soft plush pumpkin. If you substitute the recommended cord with a softer yarn, expect the sidewalls to behave differently. Make a fabric sample and judge its stiffness before committing to the full basket.
The Lid Has to Clear the Rim Cleanly
Both pieces can look correct independently and still fit poorly together. Check the lid against the basket during construction rather than waiting until all finishing is complete. A small tension difference can become noticeable around a fitted opening.
Keep Storage Expectations Light
A crochet basket’s shape does not automatically mean it is designed for heavy loads. Use it for the kind of small, lightweight storage demonstrated by the project unless the creator specifically supports another use. Reinforcement requirements change quickly as contents get heavier.
Original Tutorial and Creator Credit
Creator: plotkadesign
Crochet Granny Square Pumpkin Centerpiece
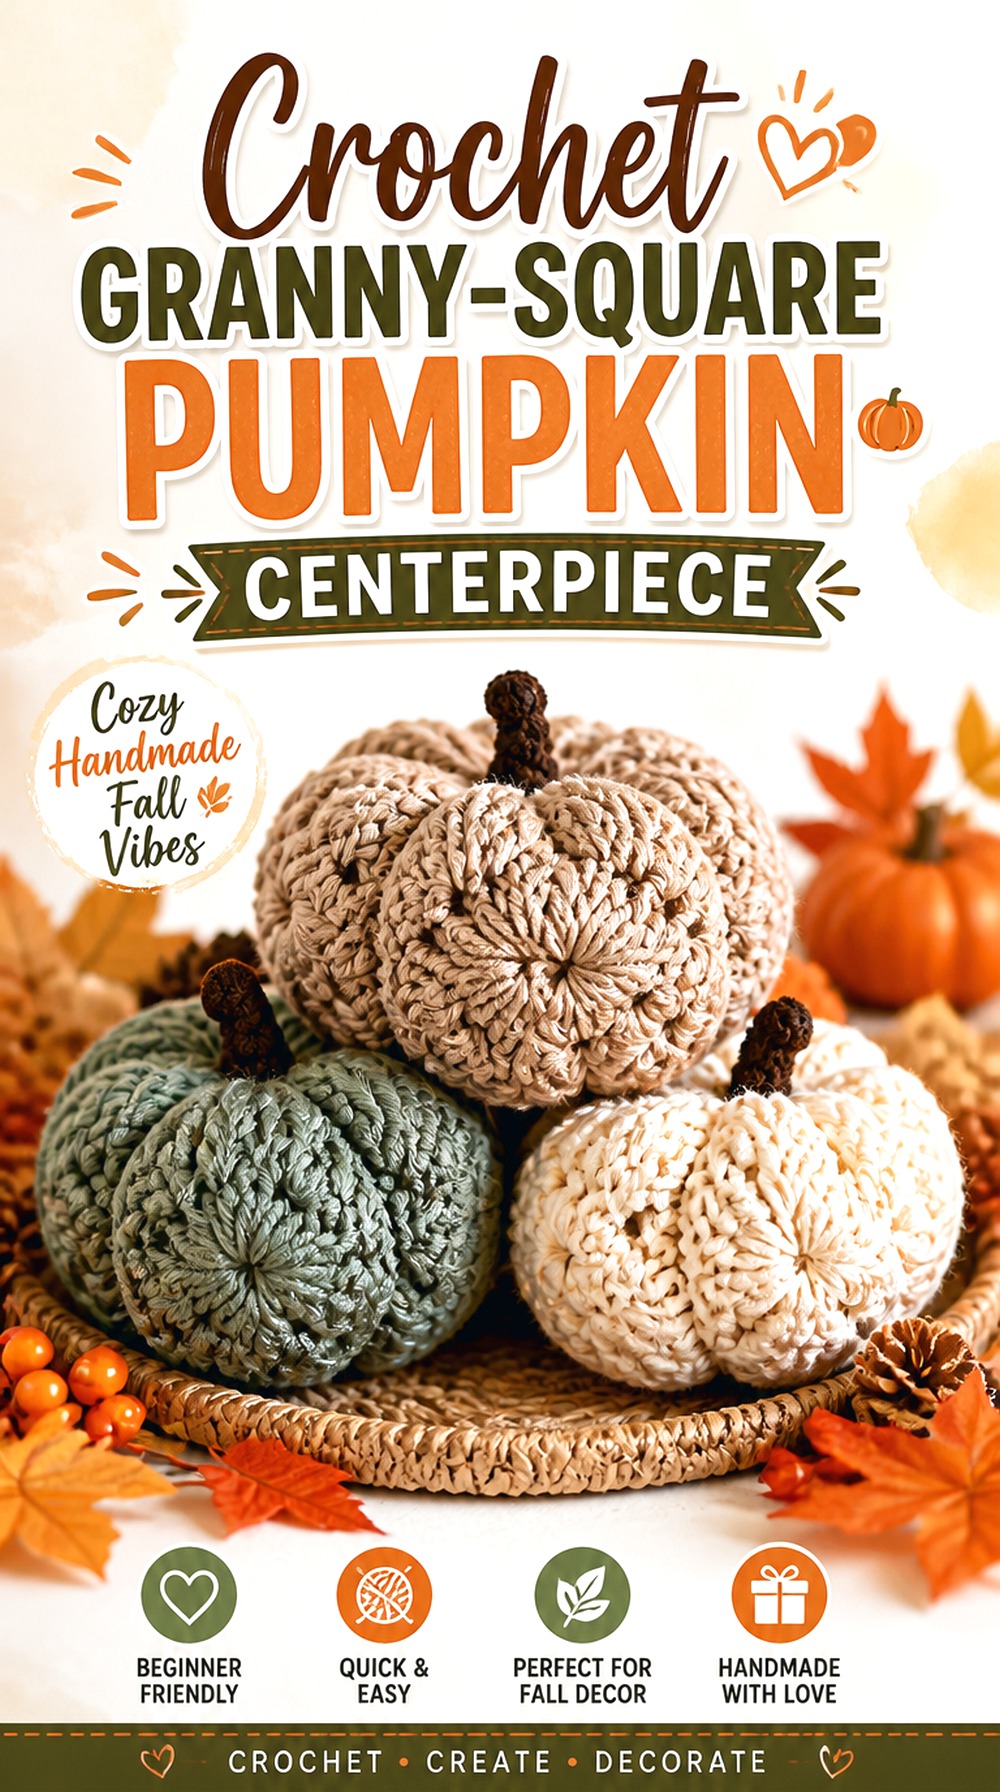
Jewels and Jones takes granny squares out of their usual flat blanket context and turns them into a three-dimensional pumpkin. The free Maple Pumpkin pattern is therefore quite different from the flat pumpkin granny square earlier in this article.
The seams and motif geometry become visible design features, making this an appealing centerpiece for someone who likes modular construction but still wants a stuffed finished object.
Square Size Has to Match Before Assembly
Because separate motifs form one three-dimensional body, inconsistent square dimensions will affect the pumpkin’s final balance. Finish and, where appropriate, block all components consistently before beginning assembly.
Granny-Square Seams Become Part of the Pumpkin’s Texture
The joins remain visually important after stuffing. Choose a joining tension that is secure without creating puckered ridges. Lay the connected motifs flat periodically so you can spot a seam that is becoming tighter than its neighbors.
Original Tutorial and Creator Credit
Creator: Jewels and Jones
Crochet Striped Country Pumpkin
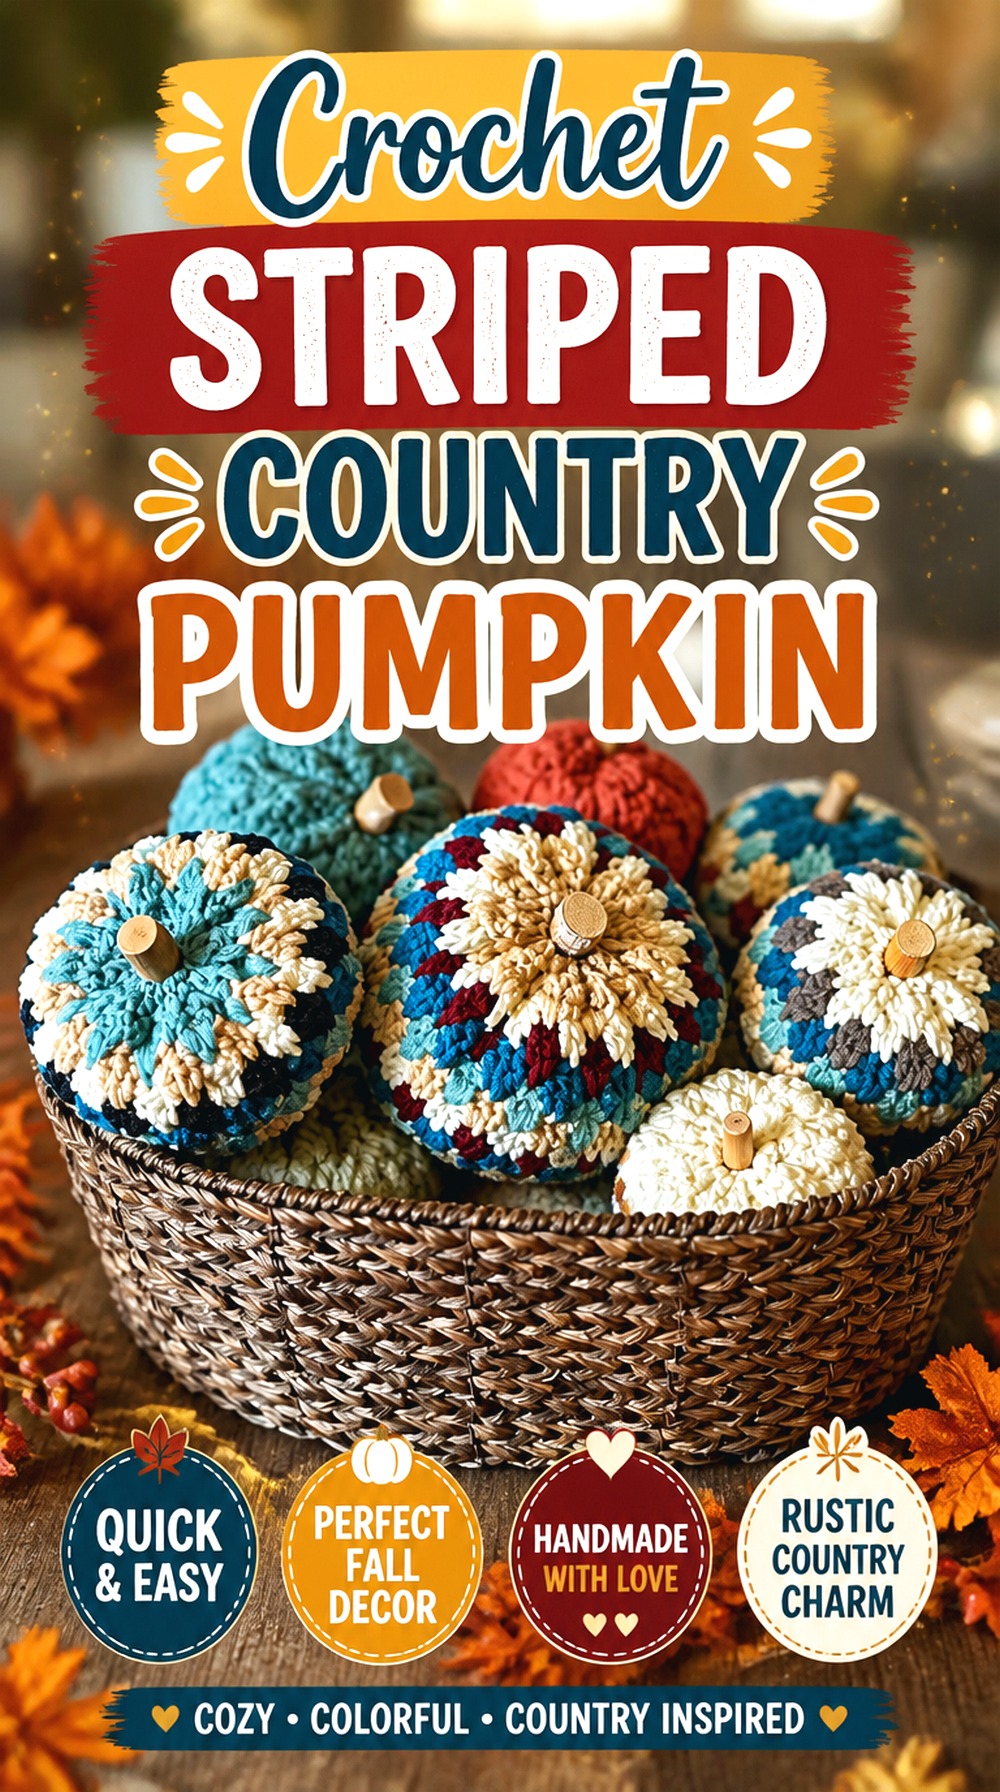
The Country Charm design from Pretty Darn Adorable Crochet Tutorials uses stripes and clustered texture to create a pumpkin with more surface detail than a basic ribbed rectangle. The creator provides a free written version and demonstrates a striped mini version in the video.
This design earns its place in a mixed pumpkin patch because the color pattern is integrated into the texture rather than being added as a bow or external decoration.
Stripe Placement Can Make the Pumpkin Look Taller or Wider
Before improvising a new stripe sequence, consider where the color changes will land after the body is shaped. Narrow repeated bands create a different visual rhythm from one large contrasting section, even when the underlying pumpkin dimensions stay the same.
Cluster Texture Needs Clear Color Changes
When both stitch texture and stripes are prominent, untidy transitions become easier to notice. Keep yarn changes consistent and view the fabric from the eventual outside before joining the body.
Original Tutorial and Creator Credit
Creator: Pretty Darn Adorable Crochet Tutorials
Crochet Pumpkin Spice Mug Cozy
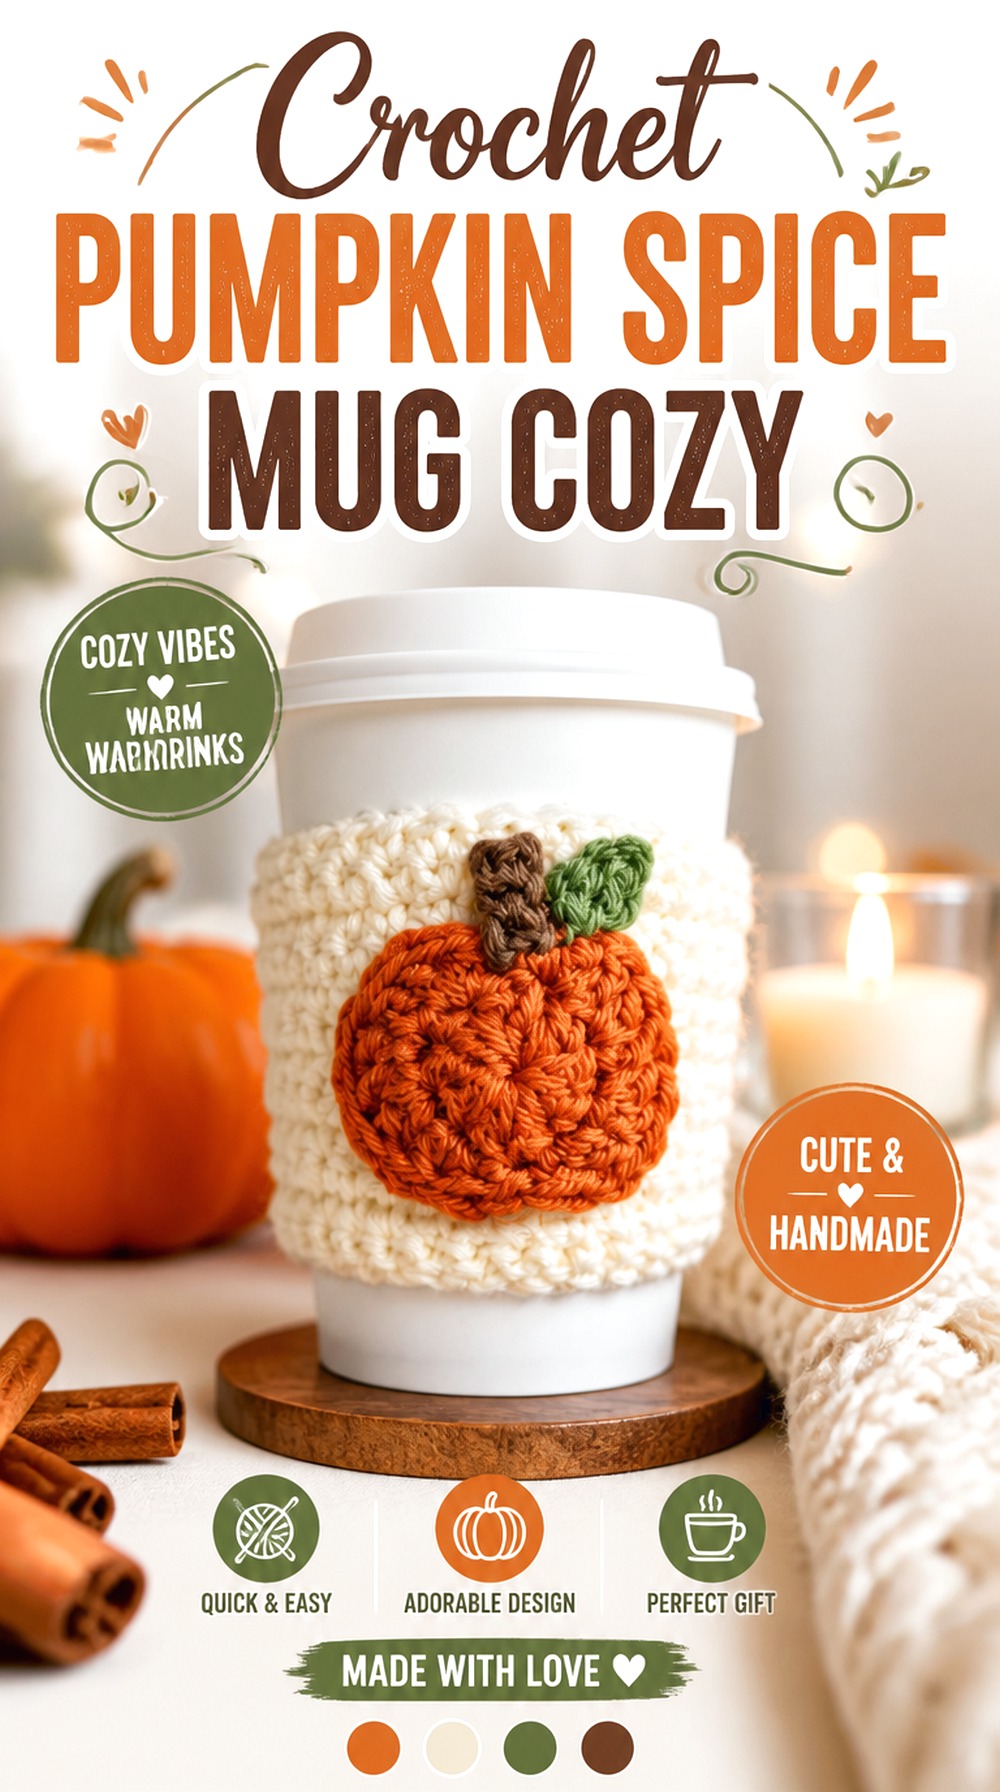
Heather Corinne Crochets uses a flat pumpkin appliqué on a rectangular mug cozy, so the pumpkin is an accent rather than the structure of the object. The creator supplies a free written pattern and a full video tutorial covering both the motif and cozy.
This is useful for anyone who wants a smaller fall project that still has a practical role. It also demonstrates how pumpkin motifs can be carried into non-pumpkin-shaped objects.
Fit the Cozy to the Mug, Not the Pumpkin Motif
The sleeve needs to fit the intended vessel before decoration becomes important. If you adapt the size for another mug, test the base piece around it first. Then position the pumpkin so it still appears centered when the cozy is in use.
Place the Appliqué Where the Hand Will Not Catch It
A raised motif can affect grip. Before sewing the pumpkin permanently, wrap the unfinished cozy around the intended mug and check how you naturally hold it. A small placement adjustment can improve comfort without changing the design.
Original Tutorial and Creator Credit
Creator: Heather Corinne Crochets
Crochet Pumpkin Potholder
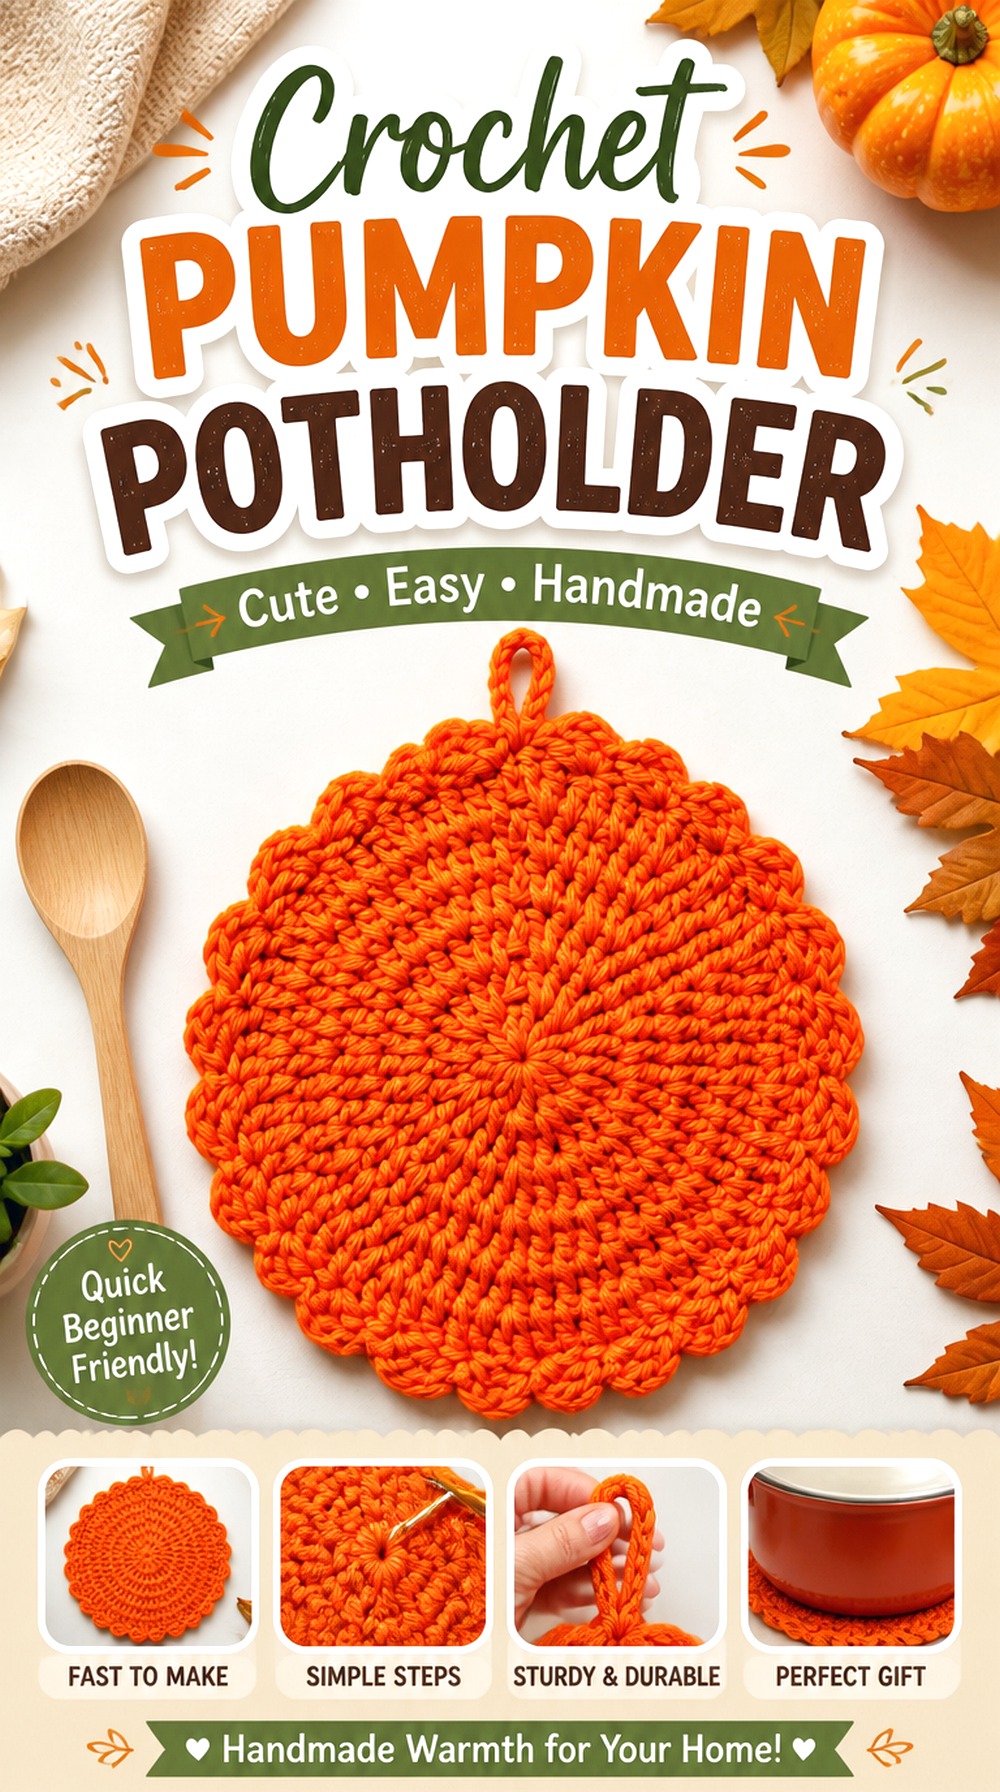
Raji’s Craft Hobby turns a broad pumpkin silhouette into a flat kitchen piece. The creator provides the written/photo tutorial alongside the video, so readers can move between visual instruction and the free web pattern.
This design is most useful when you want fall crochet that has a practical destination rather than another shelf ornament. It can also work as decorative kitchen or table textile if that better matches your chosen materials.
Kitchen Use Requires More Material Caution Than Decor
Do not assume any yarn is suitable for contact with hot cookware. Follow the source’s material guidance, check the yarn manufacturer’s information, and use the piece only within the limitations of the materials you actually choose.
Keep the Pumpkin Shape Flat Enough for Stable Contact
Decorative shaping that works beautifully on a placemat can become inconvenient on an item placed under cookware. Check the completed fabric for thick ridges, curling edges, or attached pieces that interfere with flat contact.
Add a Hanging Loop Only if It Will Not Interfere
A loop can make storage easier, but its location matters. Position it where it will not bunch underneath the item during use or pull the pumpkin noticeably out of shape when hanging.
Original Tutorial and Creator Credit
Creator: Raji’s Craft Hobby
Crochet Pumpkin Wreath
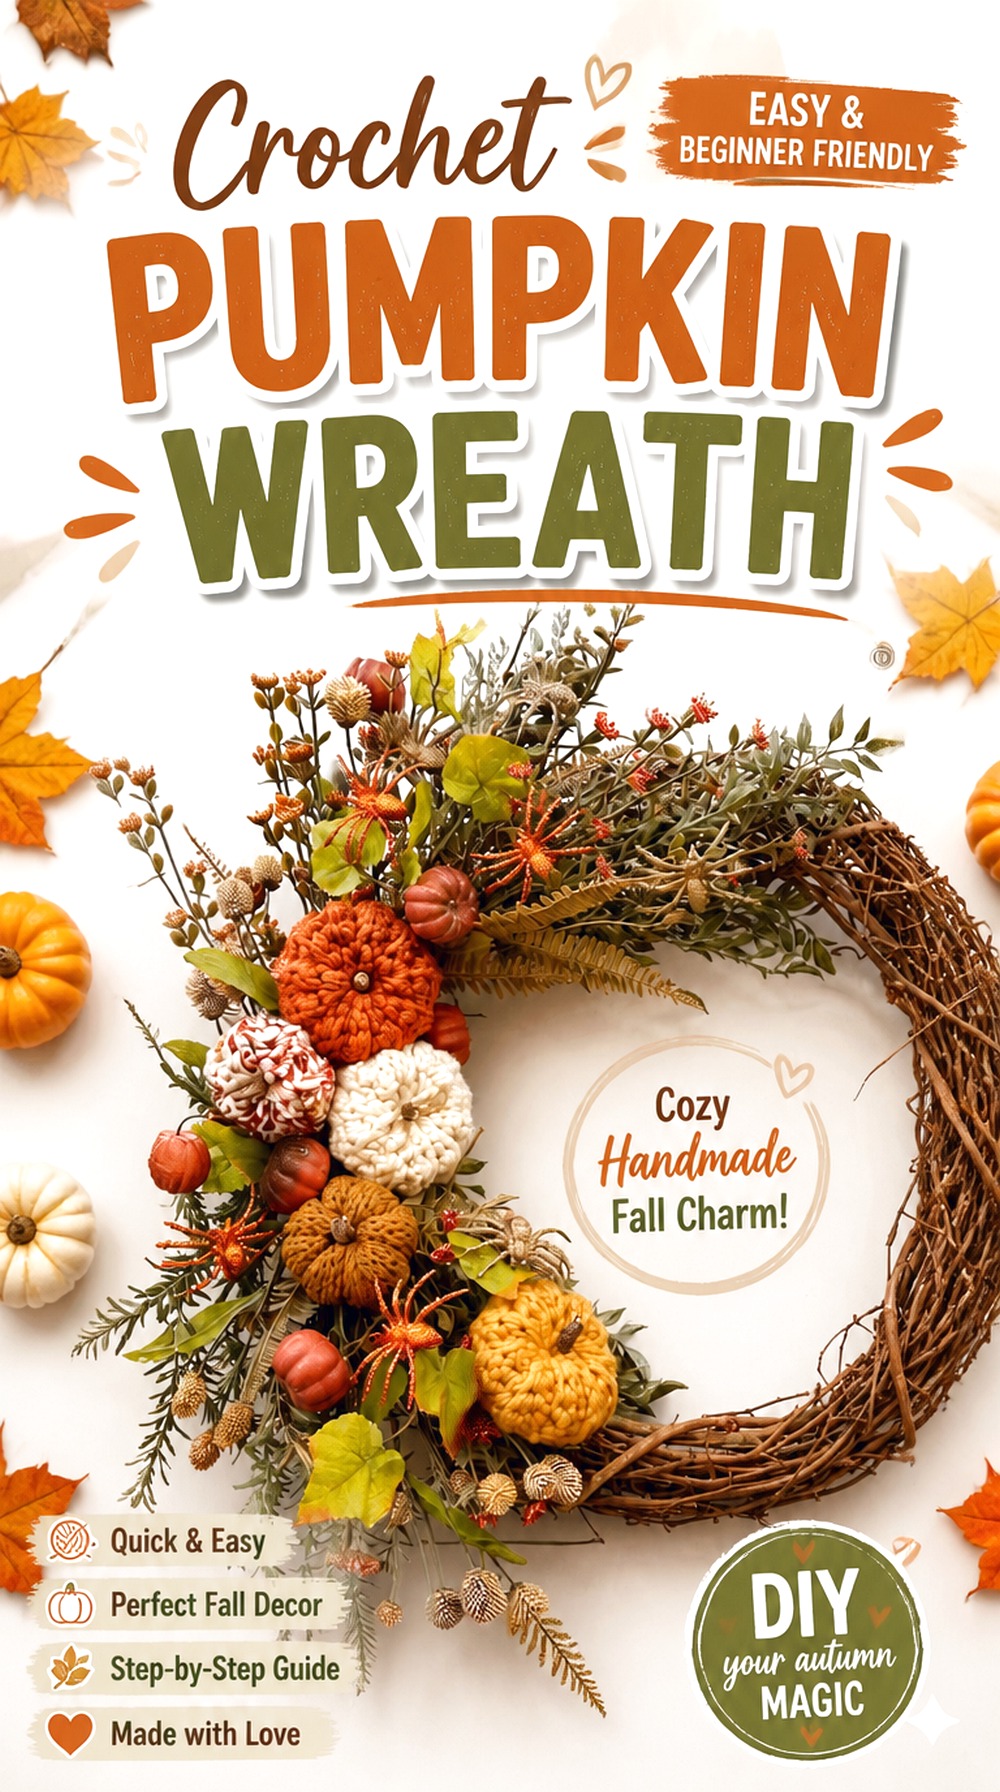
Simply Made by Erin Crochet uses crocheted pumpkins as components in a larger wreath rather than expecting one pumpkin to carry the whole display. Greenery and optional seasonal embellishments fill out the composition, while the creator’s free pumpkin options allow the crochet portion to stay central to the project.
This approach is ideal when you want a statement decoration for a door or wall and enjoy arranging finished elements as much as making them.
Wreath Balance Depends on Pumpkin Scale
Lay the wreath base flat and test several pumpkin arrangements before attaching anything. One oversized pumpkin can visually pull the entire design to one side, while too many equally sized pumpkins can make the composition feel crowded.
Removable Seasonal Accents Extend Display Time
The creator demonstrates seasonal embellishment options. If you want the wreath to work from early fall through Halloween and Thanksgiving, consider making the most theme-specific accents removable while keeping the pumpkins and greenery as the permanent foundation.
Secure Attachments for Door Movement
A wreath on an interior wall experiences little movement; an frequently used door does not. Choose attachment methods according to where the wreath will actually hang, and check that decorative pieces cannot easily shake loose.
Original Tutorial and Creator Credit
Creator: Simply Made by Erin Crochet
Crochet Chunky Jack o’ Lantern Amigurumi
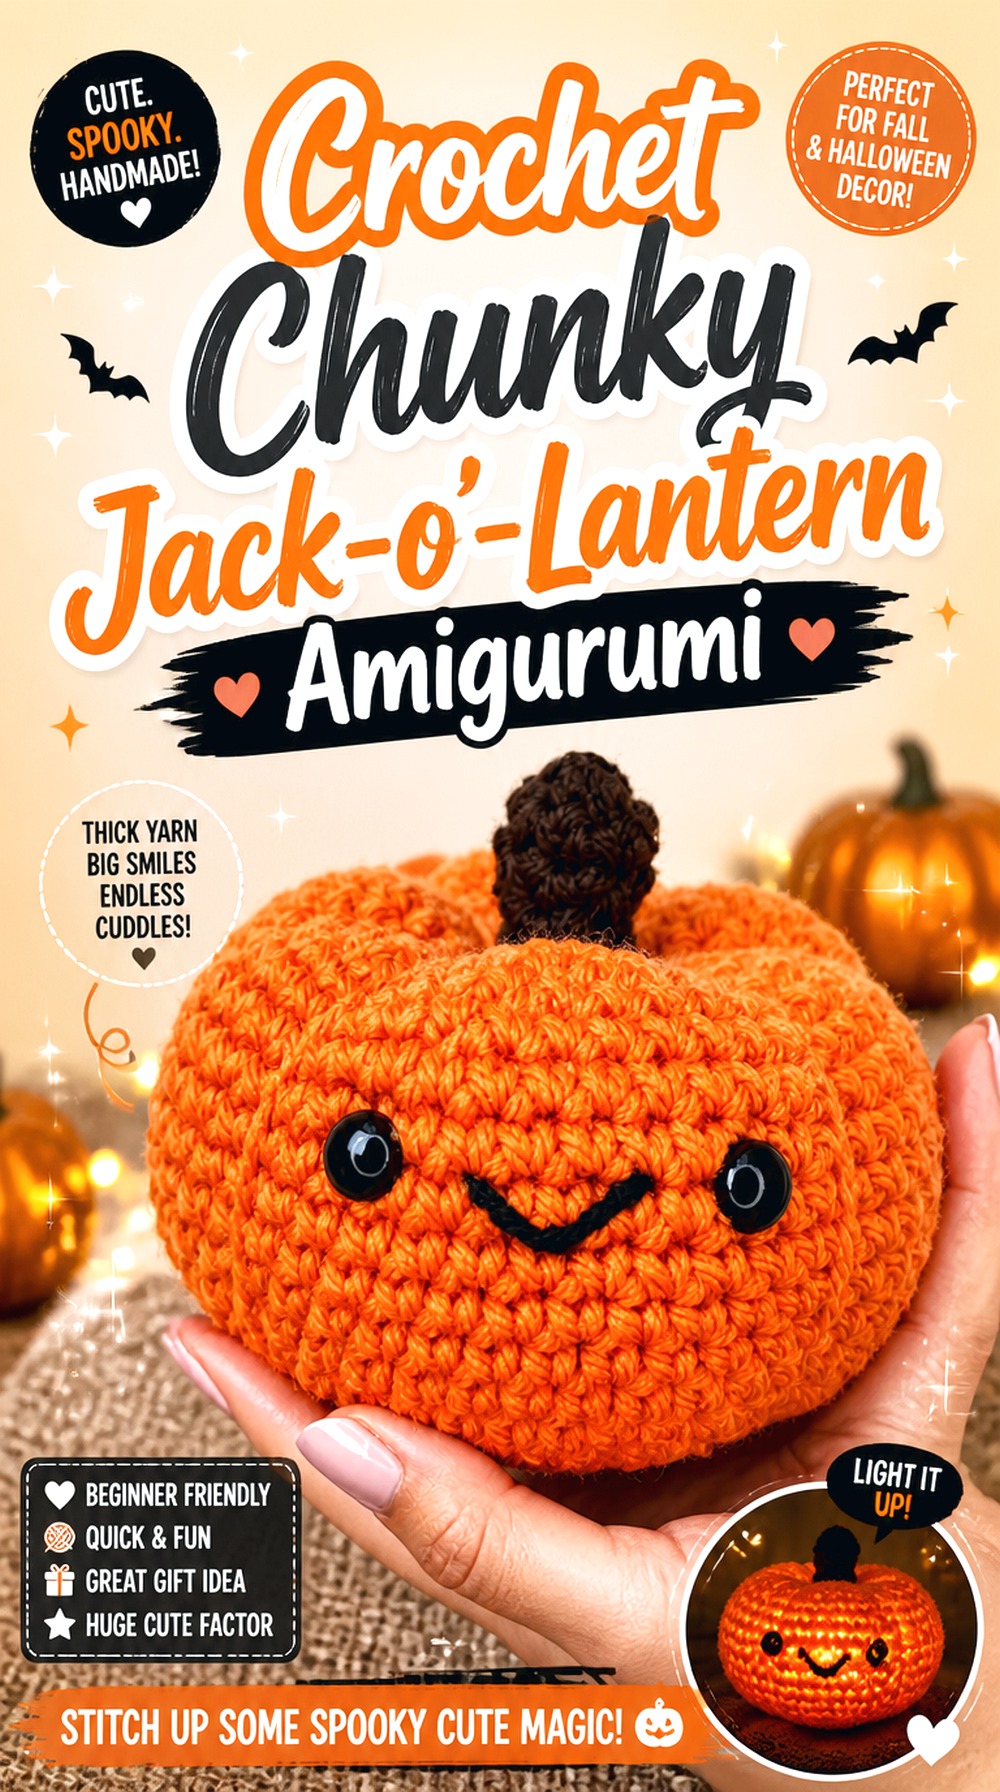
Hooked by Robin’s amigurumi pumpkin adds a bold facial expression, separating it immediately from farmhouse-style pumpkins meant to blend into neutral fall decor. The project is a better match for Halloween shelves, candy-table displays, or character-themed decorating. The creator links a free written pattern with the tutorial.
The rounded amigurumi construction also means the shape is built through crochet rather than created primarily by sewing a flat rectangle into a tube.
A Face Changes the Project from Neutral Fall to Halloween
Choose the expression before deciding on the rest of your display. A clear jack-o’-lantern face becomes the visual focal point, so it pairs more naturally with Halloween decor than with understated harvest styling.
Chunkier Fabric Can Hide Shaping Details
With substantial yarn, surface texture can become soft and plush. Make sure the facial elements and pumpkin segmentation remain visually distinct instead of trying to add more stuffing to increase definition.
Original Tutorial and Creator Credit
Creator: Hooked by Robin
Crochet Classic Squishy Pumpkin

Fiber Flux’s classic pumpkin is useful as a simple, recognizable base for a mixed autumn display. It lacks the overt character face of several Halloween projects and avoids the functional requirements of baskets, coasters, and wearables. The video description points readers to the full free written pattern on the creator’s blog.
Use it when your priority is a soft pumpkin silhouette that can sit comfortably alongside other textures without competing with them.
This Is the Neutral Baseline for a Mixed Pumpkin Display
If you are combining several patterns from this list, a visually simple pumpkin gives the eye somewhere to rest between granny-square seams, stripes, faces, and decorative leaves. Neutral does not have to mean beige; the simplicity comes from the construction.
Stuffing Level Controls the Final Silhouette
Stop periodically while filling and compare the body from the top and side. A firm pumpkin may look more rounded, while lighter stuffing can allow deeper shaping. Do not continue adding filling automatically once the surface is already under tension.
Original Tutorial and Creator Credit
Creator: Fiber Flux
Crochet Pumpkin Patch Granny Square Afghan

Yarnspirations and Repeat Crafter Me turn the pumpkin motif into a full blanket, making this one of the largest projects in the collection. The individual pumpkin squares repeat across the textile, and Yarnspirations provides the associated free pattern.
Choose this route when you want fall crochet to remain useful through the season rather than functioning only as decor. The project also rewards advance planning because consistency across many motifs matters much more than it does for a single square.
Repeated Squares Need Consistent Blocked Dimensions
Measure several finished motifs rather than relying on the first one. Small tension shifts are easy to ignore individually but become obvious when a grid of squares is joined.
Color Changes Can Dominate the Workload
A motif blanket contains much more repeated color management than a solid stuffed pumpkin. Before buying a full palette, make one complete test square and decide whether you enjoy the process enough to repeat it many times.
Plan the Join Before Making a Full Stack of Motifs
The joining method affects the amount of visible space between pumpkins and the overall flexibility of the blanket. Decide on it early so you can leave appropriate yarn tails and finish squares consistently as you go.
Original Tutorial and Creator Credit
Creator: Yarnspirations
Crochet Chunky Pumpkin Throw Pillow

Yarn Stash with Marching North enlarges the familiar stuffed-pumpkin idea into a genuinely cushion-like object. The creator’s free written pattern includes two chunky pillow sizes and uses plush blanket-style yarn, giving the finished pumpkin substantially more volume than a typical mantel decoration.
This is the better direction when you want a pumpkin that can anchor a chair, bench, or floor arrangement instead of disappearing among smaller fall accessories.
Plush Yarn Makes This More Pillow Than Table Ornament
Large chenille-style yarn produces volume quickly, but it also obscures individual stitches. Count and mark carefully rather than relying only on visual stitch identification, especially when working the stem or closing areas.
Check the Final Diameter Against Your Seating Area
A pumpkin cushion can consume more usable seat depth than a standard square pillow. Compare the source’s finished dimensions with the chair, bench, or basket where you plan to display it before selecting a size.
Reinforce the Center Cinch Without Overcompressing
The indentation helps establish the pumpkin silhouette, but pulling excessively can distort a heavily stuffed cushion. Shape gradually and stop when the top and bottom read clearly without making the center feel unnaturally hard.
Original Tutorial and Creator Credit
Creator: Yarn Stash with Marching North
Crochet Paulie Pumpkin Character

The Loopy Lamb’s Paulie Pumpkin is a character-style amigurumi rather than a neutral piece of produce. The free written pattern and video include facial features and a compact stuffed form, giving the finished pumpkin a personality that works well in Halloween displays or as a small seasonal character.
Choose this over a plain pumpkin when expression and character matter more than matching realistic fall decor.
Character Features Need Symmetry More Than Perfect Roundness
Before securing facial components, look at the pumpkin straight on. A slightly irregular body can still look charming, but noticeably uneven eye placement changes the expression immediately. Use temporary markers before making permanent attachments.
Small Parts Change How You Should Gift It
The original design uses character details that deserve extra thought if the finished item is intended for a young child or pet environment. Evaluate every attached feature for the actual recipient rather than assuming an amigurumi project is automatically suitable as a toy.
Original Tutorial and Creator Credit
Creator: The Loopy Lamb
Crochet Pumpkin Coaster Set
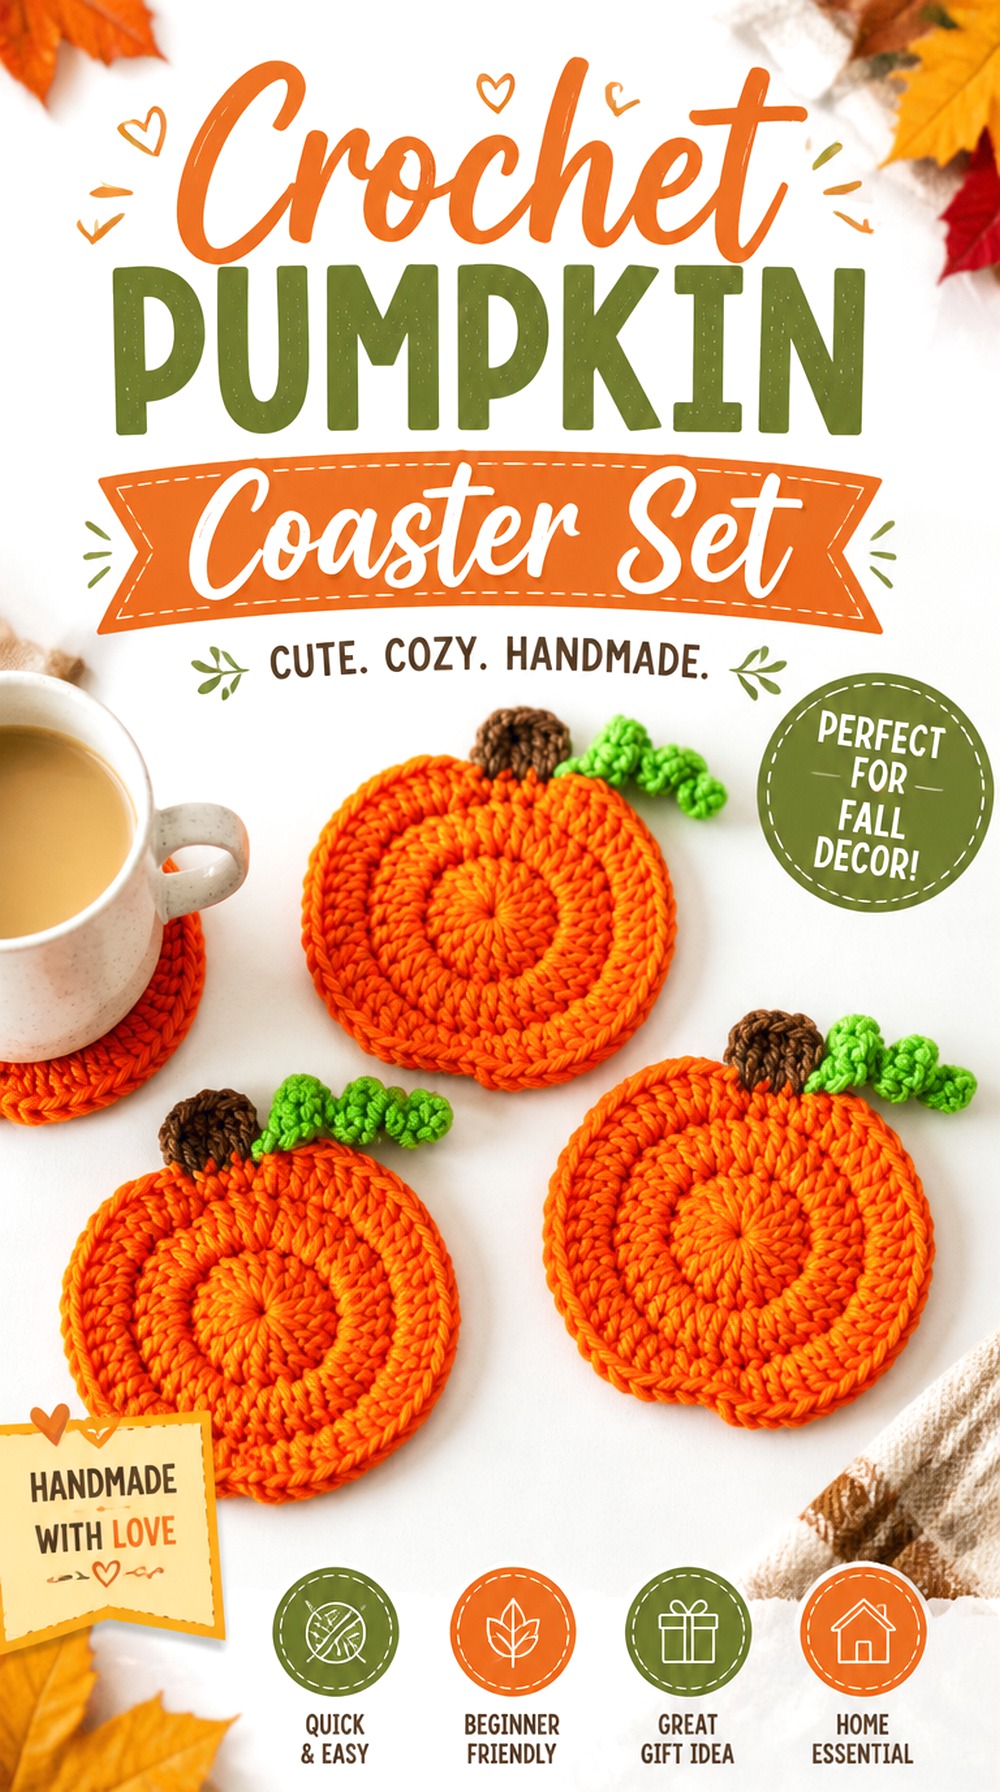
RepeatCrafterMe’s flat pumpkins are designed as coasters, but the creator also notes that the same motif can be adapted into garland or appliqué use. A free pattern post accompanies the complete video tutorial.
That flexibility makes this an especially practical scrap-yarn project. Make a matching table set, or test one motif first and decide whether you prefer it on a bag, blanket, or seasonal hanging.
Coasters Need a Flat Edge and Repeatable Size
For a set, consistency matters more than making one perfect pumpkin. Compare the first two pieces on top of each other. If their outlines differ noticeably, correct tension or blocking before producing the rest.
Make the Vine Detail Work for Your Table
Curled greenery gives the motif personality but also extends beyond the main coaster. Position it so glasses or mugs do not repeatedly catch on the detail, especially if the coasters will be used daily.
Original Tutorial and Creator Credit
Creator: RepeatCrafterMe
Crochet Pumpkin Shaped Shoulder Bag
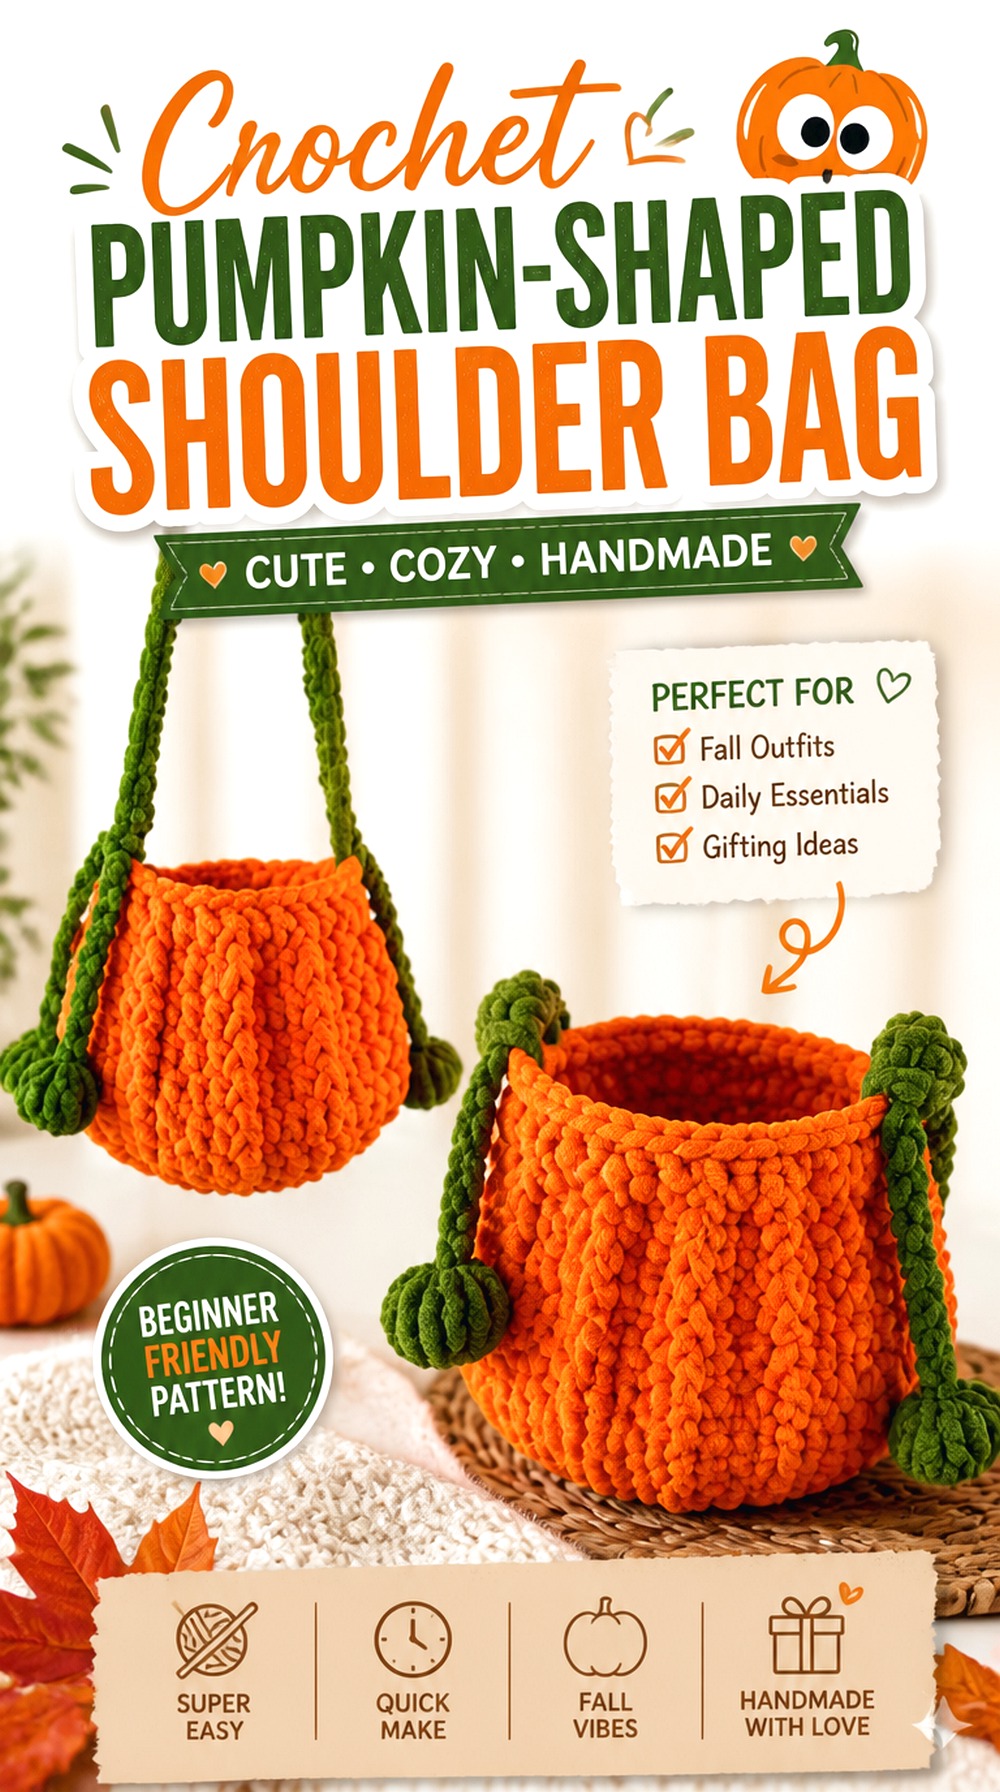
Handwork diy turns the pumpkin silhouette into a wearable bag, immediately changing the construction priorities. The opening has to remain usable, the body has to carry its own weight, and the strap becomes just as important as the decorative pumpkin shaping. The public video provides a complete step-by-step project tutorial.
This is one of the strongest choices in the collection when you want a finished item to leave the house rather than remain part of an autumn display.
Bag Function Changes the Meaning of Pumpkin Shaping
Deep decorative ridges can look attractive on a stuffed ornament but may reduce usable interior space in a bag. Follow the source construction first, then evaluate any extra shaping only after you understand how the opening and body behave.
Check the Opening Before Choosing What to Carry
A wide pumpkin body does not guarantee an equally wide opening. Look at the actual top access and consider the objects you intend to place inside. This is more informative than estimating capacity from the outer silhouette.
Strap Length and Stretch Deserve Their Own Test
Load the finished bag lightly and observe the strap before making personal length adjustments. Crochet straps can lengthen under weight, so the unloaded measurement alone does not always predict where the bag will sit when worn.
Original Tutorial and Creator Credit
Creator: Handwork diy
Crochet Full Size Autumn Pumpkin
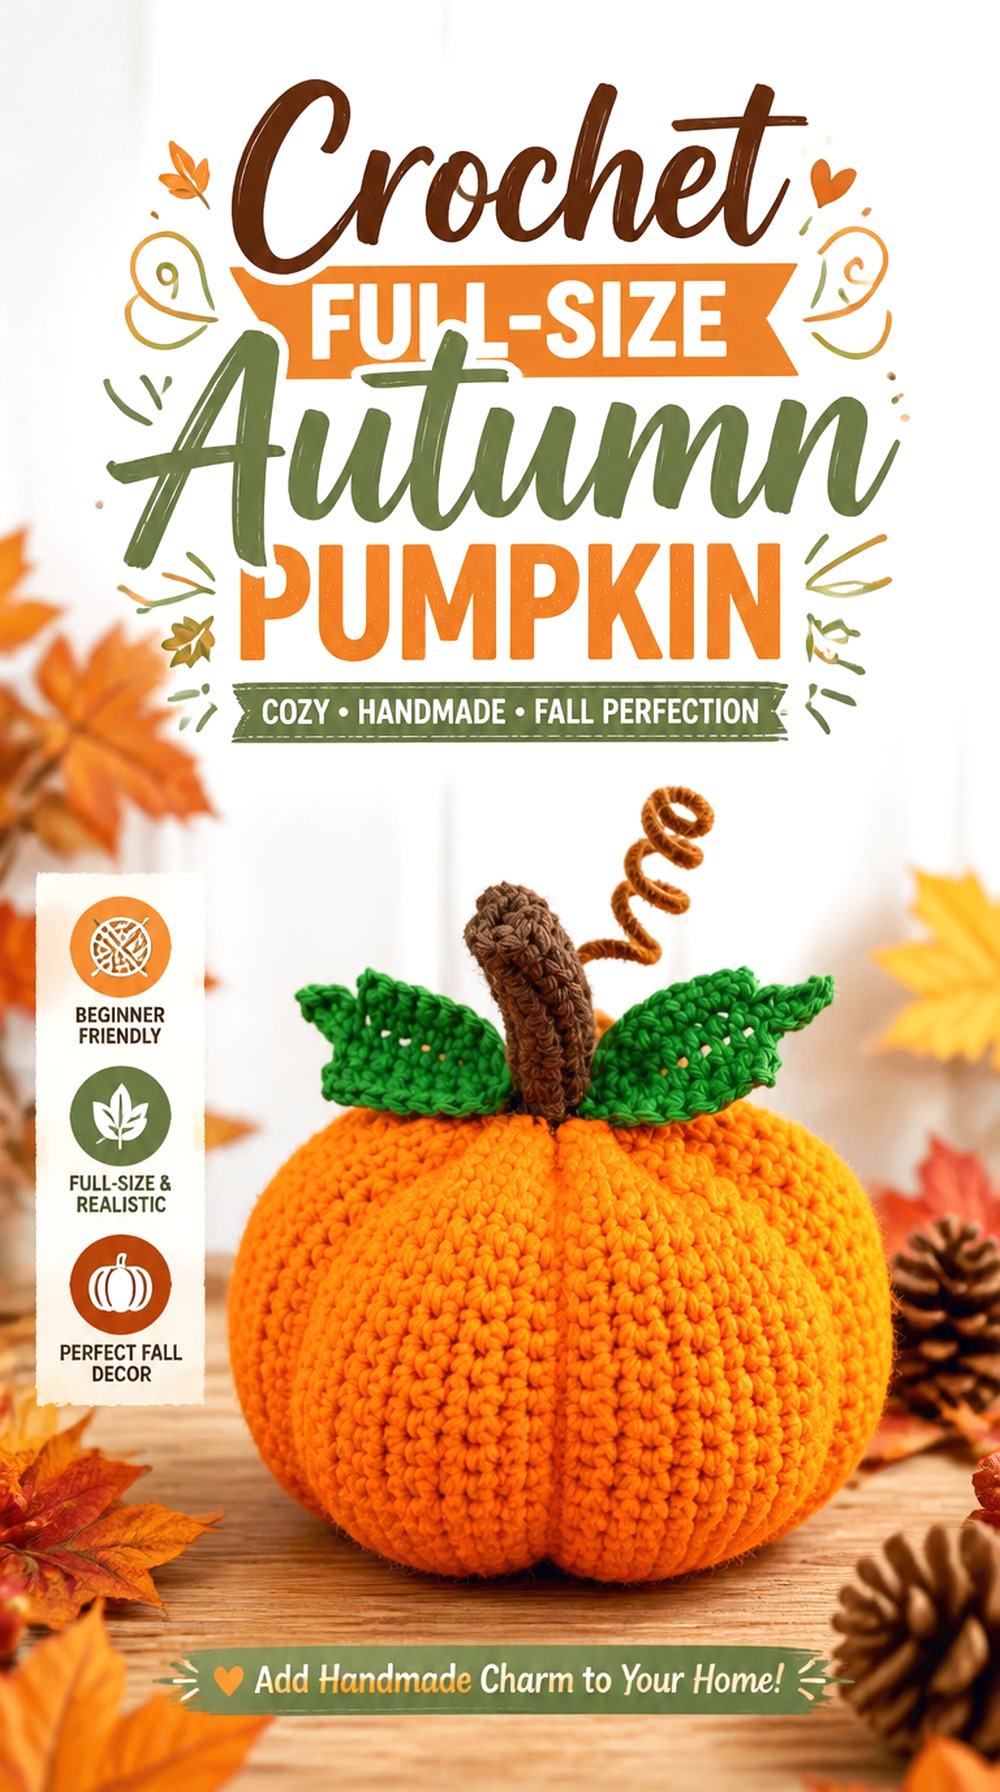
Naztazia’s pumpkin produces a substantial stand-alone decoration with a clearly segmented body, stem, and optional leafy detailing. The creator provides a written PDF pattern in addition to the public video, and the source example is large enough to function as a visible room accent rather than a tiny shelf filler.
This is a good project to choose when one larger pumpkin would be more useful than an entire collection of small ones.
A Larger Pumpkin Needs Even Stuffing Distribution
As the volume increases, lumps and hollow spots become easier to notice. Add filling in stages and rotate the pumpkin frequently. Check the outer wall before closing the final opening instead of trying to correct uneven stuffing afterward.
Decorative Leaves Should Not Hide the Segmenting
Leaves and curly details can enhance the top, but the pumpkin’s main visual structure comes from its body sections. Arrange top embellishments after the shaping is complete so they complement rather than cover the strongest grooves.
Original Tutorial and Creator Credit
Creator: naztazia
Crochet Halloween Pumpkin Character

LittleOwlsHut Crochet Patterns offers a more sculpted Halloween pumpkin with pronounced texture and facial features. The free pattern uses post-stitch texture in the body, giving the pumpkin built-in visual segments rather than relying entirely on external strands wrapped around a smooth surface.
That construction makes it a useful alternative to the simpler smiling amigurumi designs in this collection. Choose it when you want the body texture itself to be part of the character.
Post-Stitch Ridges Give the Body Built-In Structure
Because the texture is crocheted directly into the fabric, tension consistency becomes particularly visible. A much tighter section can interrupt the repeated ribs. Pause periodically and compare each textured segment with its neighbors.
Facial Pieces Need Careful Placement
The face includes separate dimensional elements, so temporary positioning is worthwhile. View the pumpkin from the intended display angle before securing them. If gifting, also consider whether detachable or rigid components suit the recipient and environment.
Original Tutorial and Creator Credit
Creator: LittleOwlsHut Crochet Patterns
Crochet Pumpkin Garland

Crochet with Clare’s garland changes the scale and display method entirely. Instead of treating each pumpkin as a centerpiece, small pumpkin motifs repeat along a hanging cord to create a linear decoration for a mantel, shelf, window, or wall. The video description also points to a free written pattern.
This is a practical choice when surface space is limited or when you want one project to visually stretch across a larger area.
Garland Pumpkins Must Be Light Enough to Hang Neatly
Yarn that makes a wonderful chunky tabletop pumpkin may be unnecessarily heavy on a garland. Before making the full set, attach one completed motif to the intended cord and check whether it pulls the strand downward more than you want.
Space the Motifs Before Fixing Them to the Cord
Lay the finished pumpkins along the full cord first. Equal numerical spacing is not always the most visually balanced choice if end loops, knots, or motifs have slightly different widths.
Original Tutorial and Creator Credit
Creator: Crochet with Clare
Crochet Pumpkin Appliqué
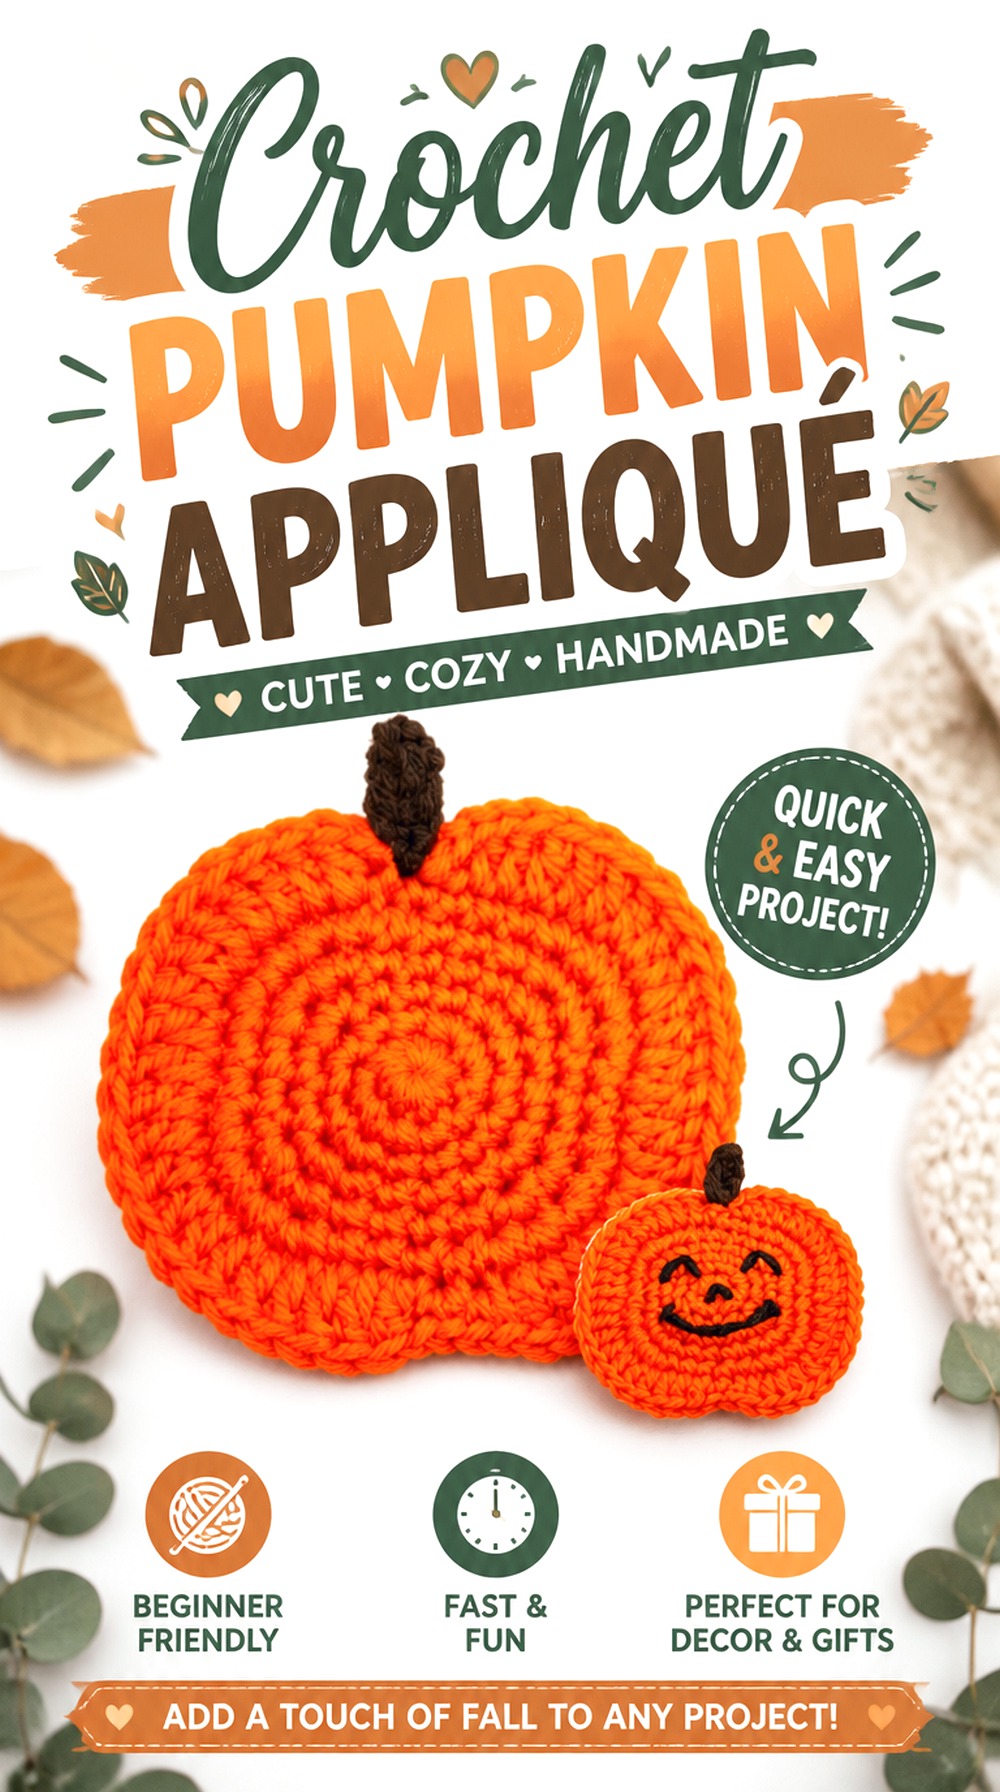
Jess Crafting’s flat pumpkin appliqué is the most adaptable small motif in the collection. It can remain a simple pumpkin or gain an embroidered jack-o’-lantern face, and the free written pattern and video keep the project independent from a larger finished item.
Use it when you already have a hat, bag, blanket, garland, cardigan, or other background project that needs a seasonal accent rather than another separate decoration.
Flat Appliqué Is the Most Flexible Motif Format
Before making several, decide where the motif will be attached. A pumpkin sized for a blanket corner may overpower a small hat or pouch. Make one sample and place it physically on the target item before committing to a batch.
Decide on the Background Before Adding the Face
A black embroidered jack-o’-lantern face may look strong against bright orange but disappear on a dark finished object. Test the appliqué against its intended background and decide whether the plain pumpkin or Halloween version creates better contrast.
Original Tutorial and Creator Credit
Creator: Jess Crafting
Crochet Knit Look Pumpkin Pillow

MJ’s Off The Hook Designs uses alternating textured rows to create a ribbed, knit-look pumpkin that functions as a substantial decorative pillow. Unlike the plush blanket-yarn pillow earlier, this design emphasizes defined ribbing and a more furnishing-like finish. The creator offers a free blog version for the demonstrated size alongside the video, while additional pattern options are available separately.
Choose this project when you want a large pumpkin but prefer structured stitch texture over a very fuzzy plush surface.
Knit-Look Ribbing Makes This Pillow Feel More Furnishing-Like
The alternating texture is the main visual feature, so smooth enough yarn to reveal the ridges is valuable. If you substitute a heavily fuzzy fiber, make a sample first and check whether the stitch pattern remains visible from normal viewing distance.
Size Choice Changes Where the Pillow Works
A pumpkin intended for a wide bench or floor basket can overwhelm a small accent chair. Use the creator’s dimensions as a planning tool and compare them with the actual display area rather than choosing the largest version automatically.
A Crochet Stem Gives a Softer Finish Than a Hard Topper
A crocheted stem keeps the entire cushion soft, which can be preferable if the piece will sit where people lean against it. Hard twigs or decorative sticks may look rustic but change how comfortably the pumpkin functions as a pillow.
How the 28 Crochet Pumpkin Projects Compare
| If You Want… | Look First At… | Main Planning Issue |
|---|---|---|
| Small stuffed fall decor | 1, 2, 13, 18, 24 | Shape, ribbing, stuffing, and stem treatment |
| Halloween characters | 9, 17, 21, 25 | Facial placement and suitability of attached details |
| Flat motifs | 5, 22, 27 | Finished dimensions, blocking, orientation, and intended background |
| Table or kitchen projects | 4, 6, 14, 15, 22 | Flatness, cleaning, fit, and material suitability |
| Functional storage or carrying | 11, 23 | Structure, opening, strap or lid fit, and intended contents |
| Wearable fall crochet | 7 | Actual fit, stretch, and placement of decorative elements |
| Larger home textiles | 3, 8, 19, 20, 28 | Finished measurements, storage, inserts, weight, and scale |
| Hanging seasonal decor | 16, 26 | Attachment strength, overall balance, and motif weight |
| Unusual dimensional construction | 12 | Consistent motif size and joining tension |
Conclusion
The most useful way to choose among these 28 crochet pumpkin patterns is to decide what you want the finished project to do. For quick seasonal accents, start with a ribbed or classic stuffed pumpkin. Choose granny squares or appliqués when you want to incorporate pumpkins into a larger textile, and look toward the basket, bag, hat, coasters, potholder, or mug cozy when function matters as much as the fall theme.
For a larger statement piece, the afghan, wreath, and pumpkin pillows offer substantially more visual impact. Whichever direction suits your space, check measurements, yarn behavior, finishing requirements, and intended use before making substitutions. Use each original creator’s tutorial for the exact construction details and pattern-specific instructions.
Frequently Asked Questions
Are all 28 crochet pumpkin patterns completely free?
Every project in this roundup has a publicly accessible YouTube tutorial, and many also have a free written pattern hosted by the creator or linked through the video description. Some creators sell an optional ad-free or printable PDF while keeping the web version or tutorial free. Check the individual creator’s current pattern page before assuming that a downloadable PDF is also free.
What is the easiest way to change the size of a crochet pumpkin?
Follow the resizing guidance given for the specific pattern whenever possible. Changing yarn weight and hook size can change the finished scale, but it also changes stitch definition, density, and stuffing visibility. Rectangle-style pumpkins may offer more straightforward proportion adjustments than shaped amigurumi, but there is no single resizing formula that works for every construction.
What yarn helps a stuffed crochet pumpkin hold its shape?
The answer depends on the texture you want. Smooth yarn with relatively firm fabric can produce well-defined segments, while plush yarn creates a softer, rounder result. More important than fiber name alone is creating fabric dense enough that stuffing does not show prominently. Compare the creator’s recommended yarn, hook, and gauge before substituting.
Should crochet pumpkin squares be blocked before joining them?
Blocking is particularly useful when multiple motifs need to match. Finish a sample square, treat it the same way you plan to treat the finished project, and measure it afterward. If several pumpkin granny squares differ noticeably in size, correcting the inconsistency before joining usually gives a cleaner blanket or pillow layout.
Can I turn a pumpkin appliqué or granny square into another project?
Yes, provided you plan around the motif’s actual finished dimensions. A pumpkin appliqué may work on a bag, hat, blanket, or garland, while granny squares can form pillows or larger textiles. Make one complete motif first and measure it rather than planning the final object from an assumed size.
What should I consider when making pumpkin crochet for children or pets?
Look closely at buttons, beads, safety eyes, glued stems, wire, long vines, cords, and other detachable components. A pattern being called amigurumi or a plush does not automatically make every finishing option appropriate for every recipient. Choose details based on the intended use and avoid making unsupported safety assumptions.
Can a crochet pumpkin potholder be used with hot cookware?
Only use a crochet kitchen item within the limitations of its materials and the creator’s intended use. Yarn appearance alone does not establish heat resistance. Check the pattern’s material guidance and the yarn manufacturer’s care and fiber information, especially before using a crocheted piece with hot pans or baking dishes.